
For those that need to, there is a way to create your own labels using Apple Pages. Sooner or later, everyone needs to ship something. Some may need to do it far more often than others. Whatever your reasoning, many are often need of shipping labels, and may find themselves needing to create their own. That, or you may just need them for other purposes. Fortunately, Apple Pages does allow for the creation of labels. Continue reading to find out more.
While Apple Pages is a rather powerful word processor, one downside to the app is that it offers very little in the way of providing label templates. While there are other options available to users—which I will get into—creating your own can potentially save users the headache of finding the right template.
Creating your own labels in Apple Pages can take a little bit of work, but the payoff is likely worth it for some users. Once you have created your own labels, you can reprint and reuse them as often as you would like. This can be a game changer for a small business, or it can be especially helpful if you like to create your own labels.
Finding Label Templates Online
Before you go making your own labels, it may worth knowing that there are plenty of templates available directly from the Microsoft Word website. The company keeps a database of different templates, including labels. Users are able to open Word templates in Pages, however, you may need to tweak these templates slightly to get them exactly where you want them. However, this may be easier than building a label from scratch, so keep that in mind.
Additionally, alongside Microsoft, Avery also has a website that features a large selection of templates for labels, including ones that are non-Avery labels. What’s more, Avery does also have a small selection of templates available through their website that are formatted for Pages. I would recommend checking here before creating them from scratch.
How to Create Labels from Scratch in Pages
If you are building a template for labels from scratch, you’re going to need to know the dimensions of the labels you wish to create. Using a ruler, get the measurements you need for your label. You may also look to the package you are trying to ship to see if there is any information regarding dimensions.
To make your own labels from scratch, follow these steps.
How to create labels from scratch in Pages.
- Create a new Pages document.
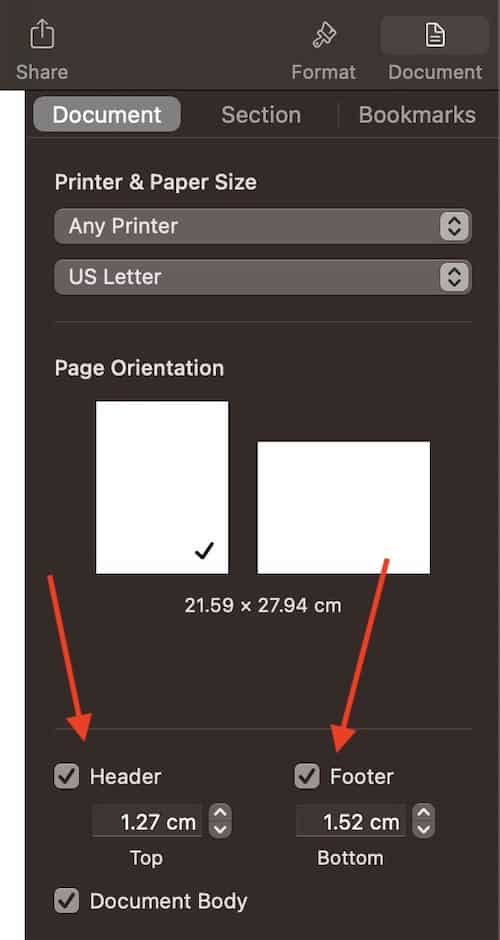
- Once you have a blank document, open the Inspector by clicking the Document icon in the top-right corner of the app. That, or go to View > Inspector > Document Setup.
- You will then need to remove the Header and Footer from your document. From the Document window opened in the last step, go to the header and footer and click the check-mark boxes to deselect them and turn them off.
- You will then need to create a table. Do not use the Table button from the toolbar, as it will create a table with Headers and Footers. Instead, go to Insert > Table > Plain from the Menu bar.
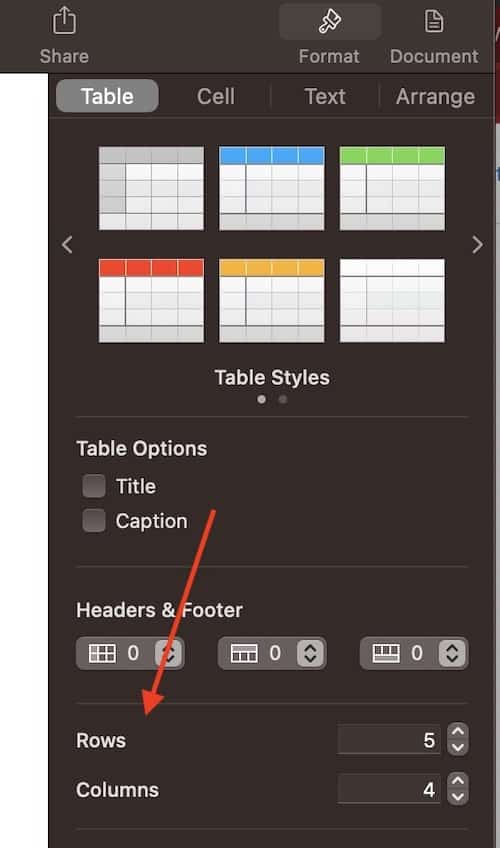
- When you have a table, click on it and change the Inspector from Document to Format. Either click Format in the top-right corner, or go to View > Inspector > Format in the Menu Bar. From the Format Inspector, change the Rows and Columns to reflect how many labels will go on the sheet.
- You will then need the physical measurements of the label you want to make.
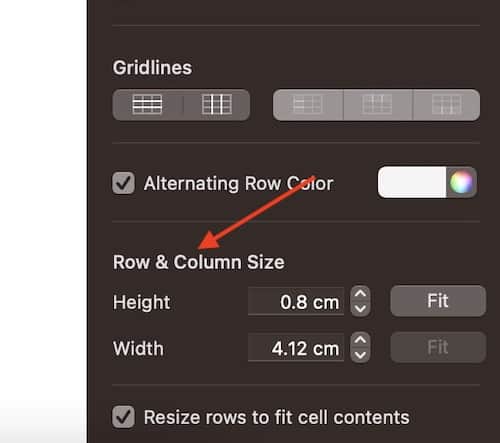
- Within Pages, go to Row & Column Size. You will find this in the same area you added rows and columns, which is the Format section. Change the width and height to whatever dimensions you need.
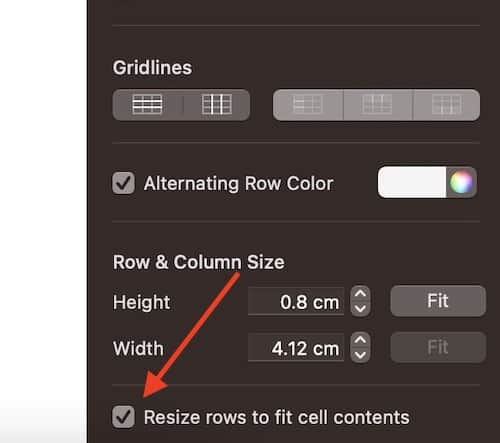
- Ensure that you deselect “Resize rows to fit cell contents”. You do not want your labels changing shape.


Changing Margins and Running a Test Print
From here, you will then need to tweak some settings to get your labels perfect. You will likely need to adjust the margins of your labels to better fit the measurements of what you need. Once again you will need to measure the labels you are looking to create, this time measuring from the edge of the sheet all the way to the edge of the label.
To adjust the margins, go back to your document, and click anywhere that is not your table. In the Document section of the inspector, you should see the document margins. Adjust them how you see fit.
It is at this point that you should be able to begin printing test copies of your labels. Using a standard sheet of paper, print out your newly created labels to see how they stack up to the real thing. You can then adjust everything according to your needs. From here, it is recommended that you save often, and make tiny incremental changes to your document. In this case, a little goes a long way.
Remove Gridlines
Once you are satisfied with your work, you can now remove the gridlines from your table. This will ensure that your newly-created labels all look uniform.
To adjust these settings, you will need to select your table without selecting a single cell. If you click on you see an outline around a cell rather than the table, you have a cell selected. You will know you have selected the table correctly when there is an outline around the table.
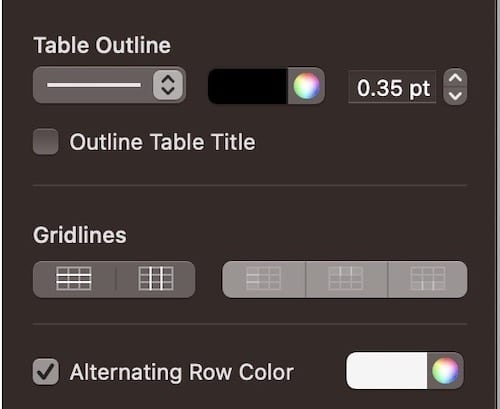
Once you have the table selected, go to the Format Inspector and make changes to the following settings:
- Table Outline: From the pop-up menu, choose None.
- Gridlines: Deactivate these by clicking on them until they turn white. It is likely that you will not need to click all of the boxes.
- Alternative Row Color: Ensure that you uncheck this box.

Conclusion: Create Your Own Labels in Apple Pages
If you are happy with your labels, it would be a good idea to save them as a template so that you can have them for future use. Simply go to File > Save as Template. Name the file whatever you would like. You now have your own custom shipping labels that are available for future use.
When it comes to making labels in Pages, there are several options and templates available to users. However, sometimes creating your own from scratch can often be an easier solution. Whether you need labels to ship a lot of different packages, or are simply looking for a way to create your own, be sure to follow the steps in this guide to ensure the process goes as smoothly as possible.
I have an Avery Label Printer, the type prints roll labels. Avery’s app wouldn’t work after one of the OSX upgrades so I created a template on Pages. That took some experimentation as all of the templates out there, all that I could find, were for sheet labels and they are a hassle for just one label. Eventually Avery caught up and released an new app. Anyway, I had to set the Pages file to print in landscape mode.