Apple’s payment system lets you pay for goods and services online as well as in physical stores. It’s a secure and private method of purchasing, so we’ll show you how to set up Apple Pay.
Set Up Apple Pay on iPhone
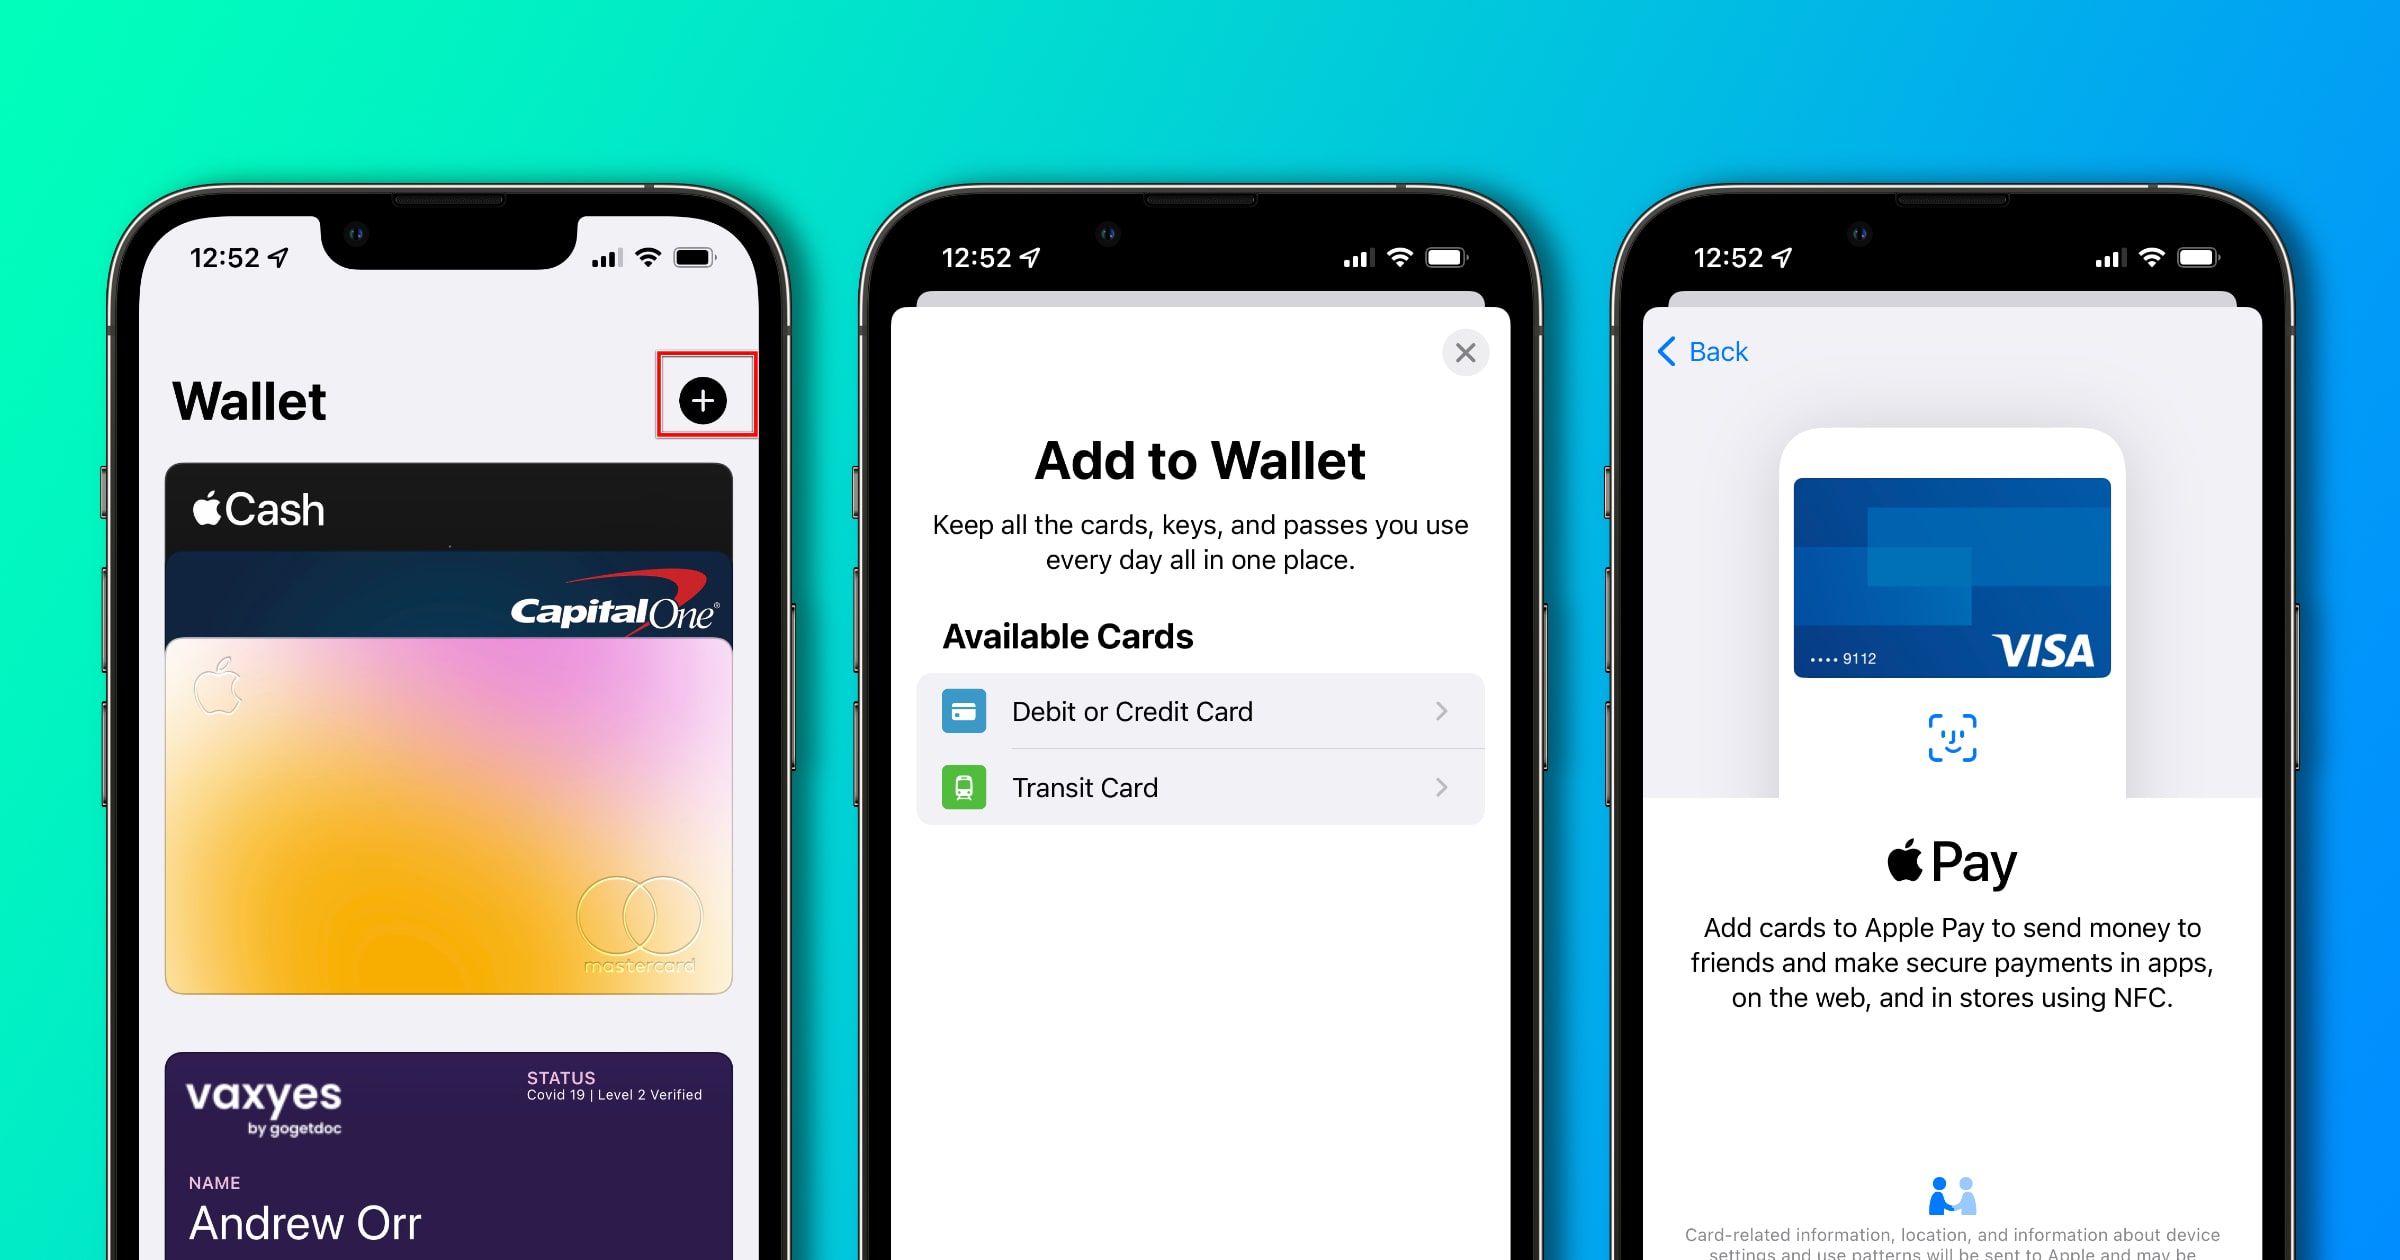
- Open the Wallet app.
- Tap the plus icon in the top right corner.
- Tap Continue. You’ll be asked to position your credit or debit card in front of the camera. Or you can enter the card details manually. You may have to download an app from your bank for the card to be added.
- Then, tap Next. Your bank will verify your information, and if more details are required you’ll be asked to enter more.
- Once the card is verified, tap Next.
You’ll see your card in the Wallet app and you can start using it with certain retailers that support Apple Pay.
Set Up Apple Pay on Other Devices
Setting up Apple Pay is largely the same on other Apple devices. You just have to go to a different area in the system. On the iPad, go to Settings > Wallet & Apple Pay. Tap Add Card, then follow the instructions above.
On an Apple Watch, open the Watch app on your iPhone. Tap Wallet & Apple Pay, then follow the instructions above. Finally, to set up Apple Pay on your Mac, you’ll need a Mac with Touch ID. Go to System Preferences > Wallet & Apple Pay, then follow the instructions above. Furthermore, you might be also interested in how to add your Apple Account Card to Wallet.