
If you create a project in iMovie, it’s time to share it with the world. Whether it’s a simple movie you want to share with your friends, or your grand cinematic masterpiece, I got you covered. There’s a couple of different ways a user can share their iMovie project on a Mac, and there’s a couple of options using iOS as well. Taking a look at these steps, users will be able to share a completed project with their friends, family and the world in no time.
As a refresher, iMovie is Apple’s free video-editing software. Available on the App Store, users can create and edit video projects from their Mac, iPhone or iPad. However, a user should keep in mind that sharing videos can get complicated once they reach a certain length. This can be particularly troublesome with iMovie on your Mac, especially if you are creating rather lengthy projects. The reason for this difficulty is due to the increase of the file size, so keep that in mind.
Share an iMovie Project on Mac
Sharing your iMovie project from a Mac is incredibly easy. Additionally, there’s also a couple of different ways to do it. Following these steps, you can share your project through through social media, mail or as a file. There’s also a way to share screen grabs from your project as well.
Time needed: 3 minutes
How to share an iMovie project on Mac.
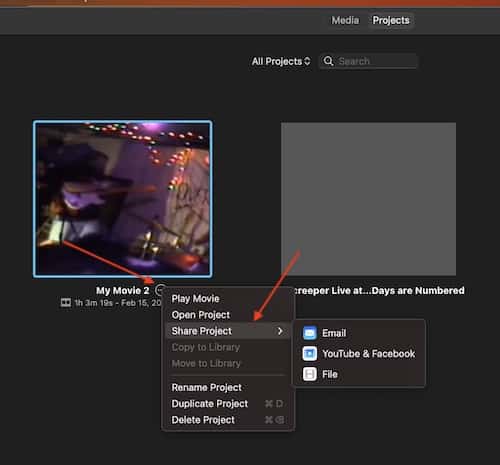
- If you are on the project selection screen, the first way you can share a project is by clicking the three dots next to the name of one of your projects.
- Then, hover over Share Project. A new window will give you a couple of different options: Email, YouTube & Facebook, and File.
Note that the YouTube and Facebook option simply creates a file that is ready for these channels: it will not automatically upload your project to these sites.
- Choose the option that works best for you.
If you chose YouTube & Facebook or File, you will be given some options before saving your file to a selected folder and drive. This includes the resolution of your project as well as giving it a title. Email will open the Mail app and then ask you to enter details. You can then send it as you would any other email.

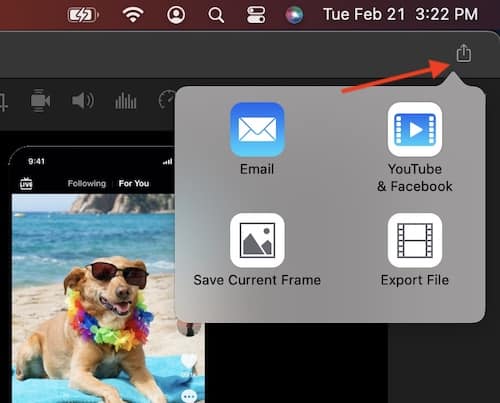
- You can also find the Share options within an individual project. Simply select the Share button in the top-right corner of the project.
You will have the same options as if you did it from the main screen, though you will also have the option of saving the current frame where the playhead is positioned. Note that this will only save a single frame for sharing.
- You can also go to File > Share from the menu bar and select the same options.
This will also give you the option to share a single frame from your project.


Share an iMovie Project on iOS
When it comes to iOS, users get a couple more options. This includes AirDrop, sharing to social media and more.
Simply follow these steps:
- Open up iMovie, and select one of your projects.
- Underneath Edit, click the Share button.
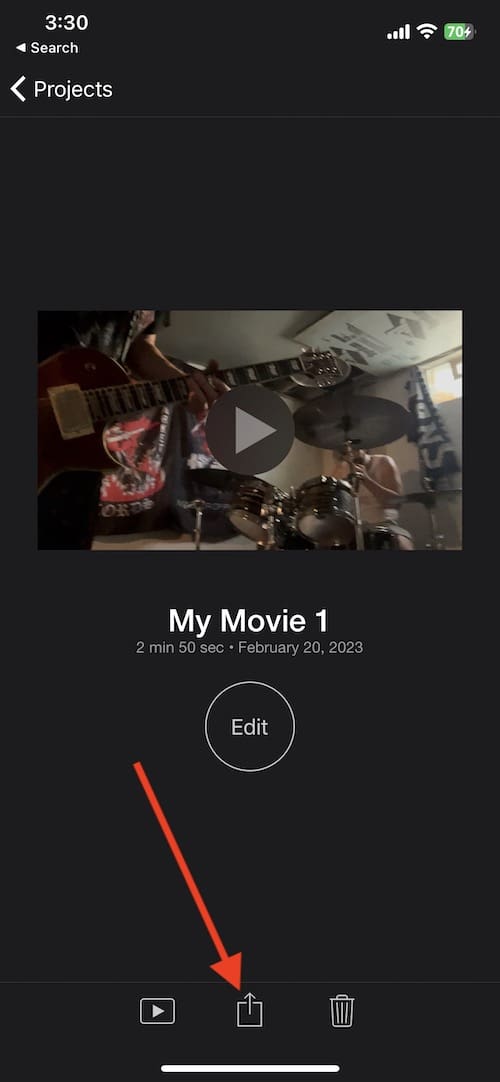
- You will be given a multitude of options, including Saving the video, Saving to Files, sharing to an app and more. Simply select the best choice, and then fill out any appropriate information that it may ask.
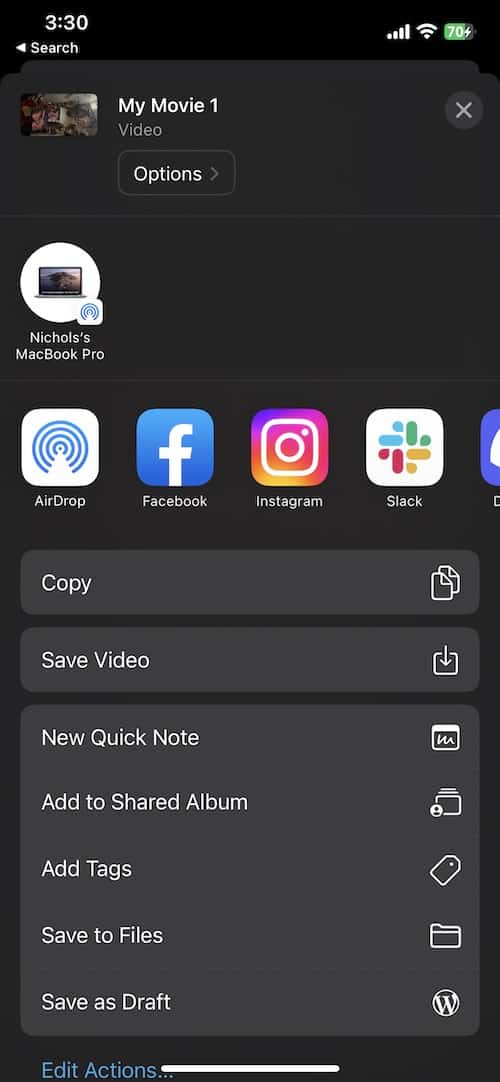
(Note: Next to where you see the MacBook Pro icon, your device will recommend people you can share the project with. I have removed all of them in the example photo out of privacy.) - Depending on your choice, you may have a variety of ways to move forward, however, virtually all of them will ask you for additional info. Simply select the best choices that apply to you. You will then need to select the Share option after entering your information.
- If you are trying to share a video that you just created or edited, you will need to select Done in the top left corner to go back to your projects and follow these steps.


Bring Your Project to the World
Creating projects in iMovie can be a lot of fun. It can be even more fun sharing these projects with your friend or with the world. If you have created something that you are truly proud of, use these options to let the world know. Of course, thanks to iMovie, you can also try creating a slideshow, or using the green-screen effect.
Once you get the hand of using iMovie, there’s practically no limits to the things you can create. In addition to checking out our other guides mentioned above, remember that it never hurts to experiment in the app, as this can be a great way to discover new things about your project on iMovie itself.