

Your Apple Watch can connect to Wi-Fi without needing your iPhone nearby. This allows you to use Siri, iMessage, notifications, and supported apps even when the phone is out of range. By default, the watch uses Bluetooth to stay paired with your iPhone, but it automatically switches to Wi-Fi when Bluetooth is unavailable. Models from Series 6 and later support both 2.4 GHz and 5 GHz networks, while earlier models and the Apple Watch SE typically support only 2.4 GHz. However, the watch cannot connect to captive portals like hotel or campus logins, or enterprise 802.1X networks.
Table of contents
Methods to Connect Apple Watch to Wi-Fi
Apple Watch offers multiple ways to connect to Wi-Fi, giving you flexibility depending on your situation. You can join networks manually through the Settings app, switch quickly using Control Center, or let your watch inherit saved credentials from your iPhone.
If Wi-Fi is unavailable, the watch can connect via Auto Hotspot. You can also manage saved networks, verify compatibility with supported Wi-Fi bands, and configure privacy options. Each method below explains when to use it and provides clear steps to follow.
Don’t miss the best of The Mac Observer
Set us as a preferred source and our Apple reporting ranks higher in your Google Search results and Discover feed — one tap, no account changes.
1. Settings App (Manual Join)
The Settings app is the most comprehensive way to connect your Apple Watch to Wi-Fi. Use this method when joining a new network for the first time, connecting to hidden SSIDs, or fixing issues caused by incorrect passwords. It also provides access to advanced options such as Auto-Join, Private Wi-Fi Address, and detailed network diagnostics.
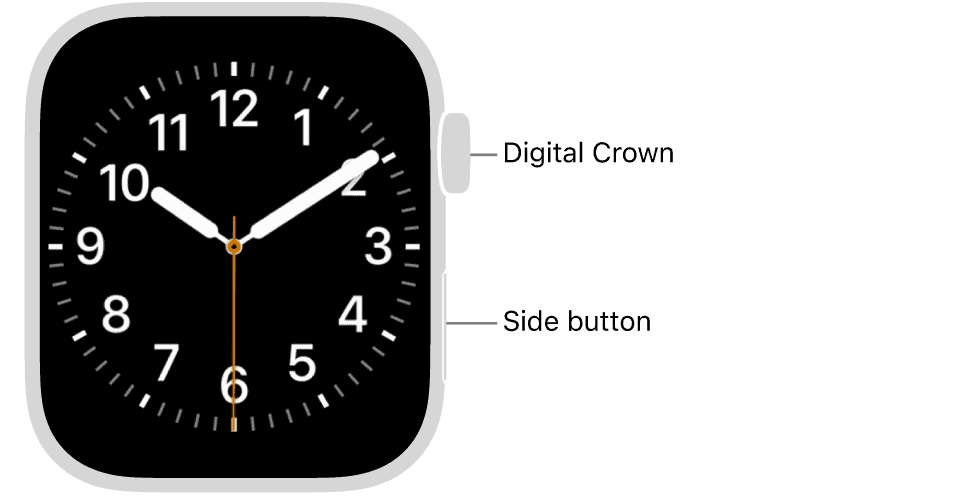
- Press the Digital Crown to open the app grid or list, then tap Settings.
- Scroll down and tap Wi-Fi. Make sure Wi-Fi is switched on.
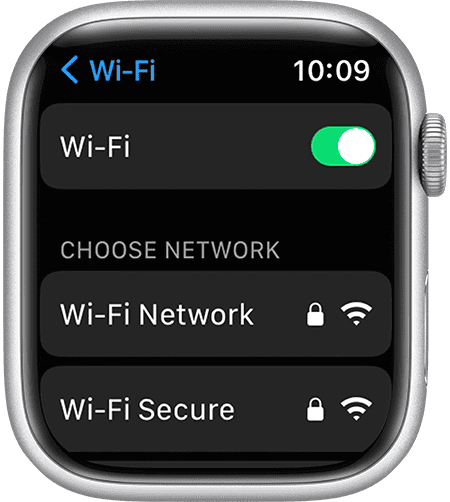
- Wait for the watch to scan and display available networks.
- Select your desired network (SSID). If it is hidden, tap Add Network and enter the SSID manually.
- If prompted, type the password using the on-screen keyboard, Scribble, or dictation, then tap Join.
- Once connected, tap the network name again to adjust options such as Auto-Join, Private Address, or to check IP/DNS details for troubleshooting.
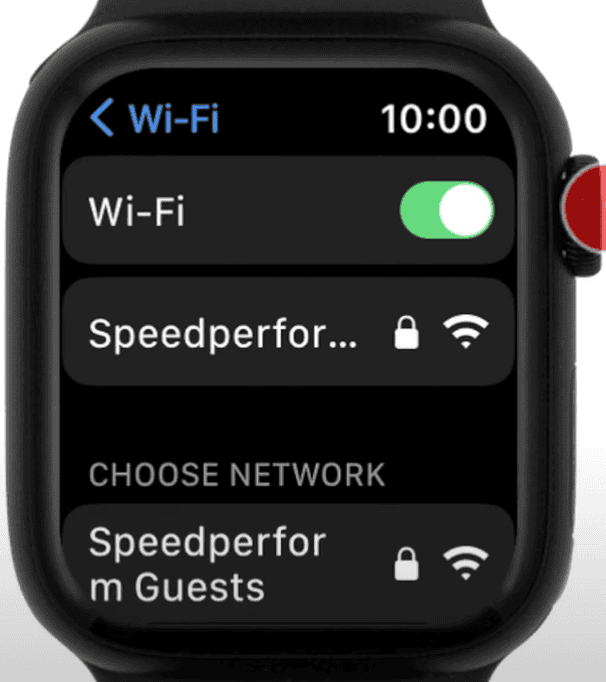
- If the connection fails, tap Forget This Network and try rejoining with the correct password.


2. Control Center (Quick Switch)
Control Center is the fastest way to toggle Wi-Fi on or off and switch between networks. This method is ideal when you are moving between locations and need to change networks quickly without navigating deep into Settings.
- Press the side button to open Control Center (on older watchOS, swipe up from the bottom of the screen).
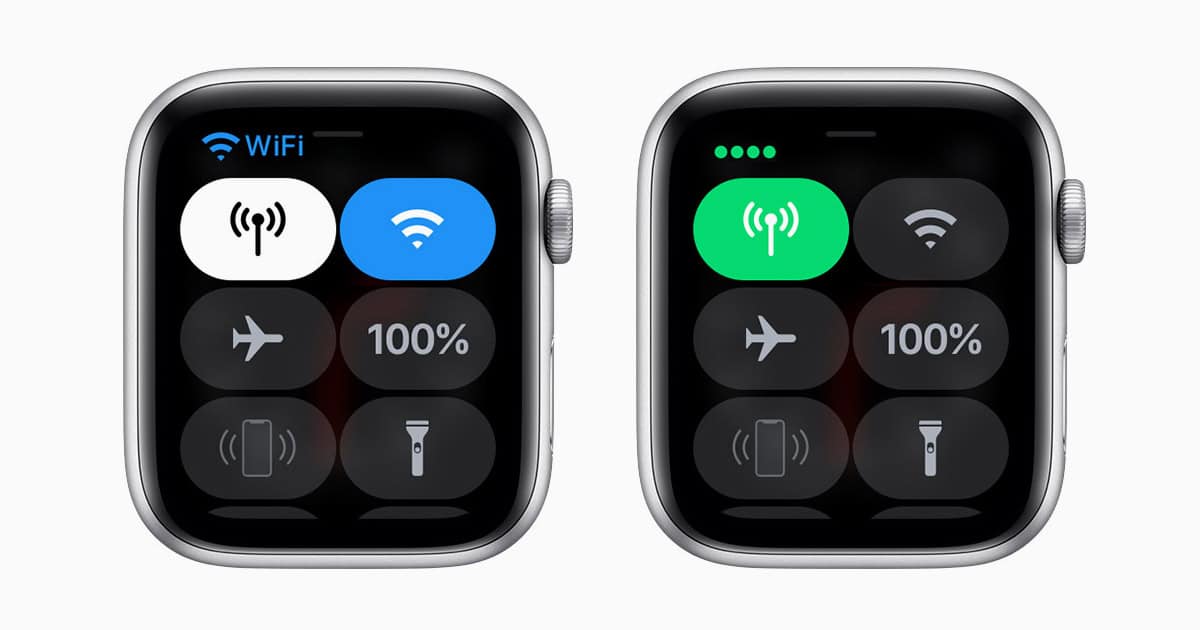
- Check the Wi-Fi icon. If it is dim, tap it to enable Wi-Fi.
- Touch and hold the Wi-Fi icon to bring up the list of available networks.
- Tap the network you want to join. Enter the password if asked.
- Confirm the connection by checking that the Wi-Fi icon in Control Center is highlighted, indicating it is active.

3. Auto-Join via iPhone Credentials
Apple Watch can automatically learn Wi-Fi credentials from your paired iPhone. This method is useful because once your iPhone connects to a Wi-Fi network, your watch will remember it and connect on its own, even if the iPhone is not nearby.
- Ensure your Apple Watch is paired with your iPhone and connected via Bluetooth.
- On the iPhone, join the Wi-Fi network you want to use.
- Keep both devices near each other for about a minute. The watch will silently copy the network credentials from the iPhone.
- Now move away from the iPhone while leaving it behind. The Apple Watch should automatically connect to that same Wi-Fi network if it is compatible.
- Open Control Center on the watch to confirm the Wi-Fi icon is active and test internet-dependent features like Siri or Messages.
If your Apple Watch won’t connect properly, see what to do when Apple Watch is not connecting to iPhone.
4. Auto Hotspot Preferences
When regular Wi-Fi networks are not available, Apple Watch can connect to a Personal Hotspot from your iPhone or another trusted device. Configuring Auto Hotspot ensures you stay connected while traveling or when standard Wi-Fi is unreliable.
- On the watch, open Settings > Wi-Fi.
- Scroll down to Auto Hotspot Settings.
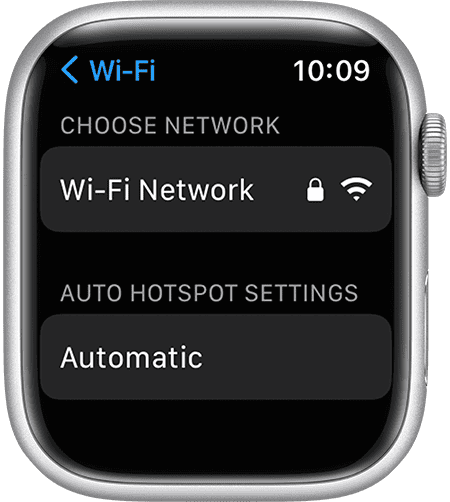
- Choose your preferred option (connect automatically, ask to join, or never join).
- On your iPhone, verify the Personal Hotspot is set up correctly. Go to Settings > Personal Hotspot and check the name and password.
- Disable standard Wi-Fi on the watch to test. The watch should switch to your iPhone’s hotspot if available.

5. Manage and Forget Networks
Sometimes stored Wi-Fi settings cause conflicts, especially if passwords change or networks behave inconsistently. Forgetting and re-adding a network often resolves these issues.
- On the watch, go to Settings > Wi-Fi.
- Tap the name of the network you are connected to.
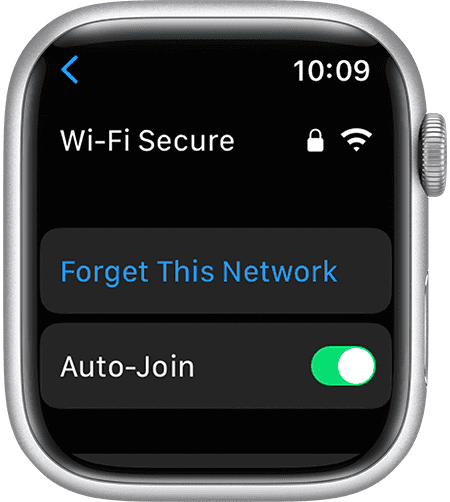
- Tap Forget This Network and confirm.
- Return to the Wi-Fi list and select the network again.
- Re-enter the correct password and confirm connection.

6. Band and Compatibility Checks
Not all Wi-Fi networks are compatible with Apple Watch. Series 6 and newer models can use both 2.4 GHz and 5 GHz bands, while older models and SE are limited to 2.4 GHz. The watch does not support enterprise 802.1X networks or captive portals that require browser-based logins.
- Check your watch model to confirm supported Wi-Fi bands.
- If your router is dual-band, separate SSIDs for 2.4 GHz and 5 GHz (for example, Home-2G and Home-5G) to avoid confusion.
- Avoid connecting directly to hotel or school networks that require a browser login.
- If only a captive portal is available, connect your iPhone and then share that connection with your watch using Personal Hotspot.
- Make sure your router supports 802.11b/g/n and uses WPA2 or WPA3-Personal security instead of enterprise authentication.
Some users face persistent pairing issues; here’s what to try when you can’t connect to Apple Watch.
7. Privacy and Temporary Disconnect
Your Apple Watch can use a private Wi-Fi address to reduce tracking across networks. You can also temporarily disconnect from Wi-Fi when needed, forcing the watch to use cellular data (on supported models) or to refresh its connection.
- Open Control Center on the watch and hold the Wi-Fi icon.
- Tap the connected network to view options.
- Set Private Address to Fixed or Rotating if available. Disable it only if the network requires your real device address.
- To disconnect temporarily, tap the Wi-Fi icon. It will automatically reconnect later unless you forgot the network.
- If your watch has cellular, verify that it switches to mobile data after disconnecting Wi-Fi.
Sometimes a brief delay is normal then learn why connecting Apple Watch may take a moment.
Tips
- Use different SSIDs for 2.4 GHz and 5 GHz networks.
- Prefer WPA2/WPA3-Personal for stable connections.
- Forget and re-add networks if issues repeat.
- Keep watchOS and iOS updated for Wi-Fi improvements.
- Enable Private Address on public networks to reduce tracking.
- For hotels or enterprise Wi-Fi, tether through your iPhone’s Personal Hotspot.
FAQs
Yes. Series 6 and newer support both 2.4 GHz and 5 GHz. Earlier models and Apple Watch SE usually support only 2.4 GHz.
Apple Watch does not support captive portals or enterprise 802.1X networks. Use your iPhone’s Personal Hotspot instead.
No. Once it has the credentials, it connects directly to compatible Wi-Fi networks.
Open Control Center, hold the Wi-Fi icon, and select the desired network.
Check Control Center status icons. Use Siri or Messages to test internet access.
Summary
- Use Settings for full control of Wi-Fi connections.
- Use Control Center for quick toggling and network switching.
- Sync iPhone credentials for seamless auto-joins.
- Configure Auto Hotspot for backup connectivity.
- Forget and re-add networks to resolve conflicts.
- Match network bands with your watch model.
- Enable privacy options and manage temporary disconnects when needed.
Conclusion
Connecting Apple Watch to Wi-Fi improves independence from the iPhone and keeps essential features running. Choose the right method: manual join, Control Center switch, or iPhone credential sync to stay online. With smart network management and privacy settings, your watch remains reliable whether you are at home, at work, or traveling.


Discussion