
Creating a logo on macOS often comes down to one question: will this logo still work outside the editor? A design can look great on screen but fall apart once it is resized, exported, or reused across platforms. BrandCrowd approaches logo creation from a slightly different angle by focusing on variety and visual inspiration first, then letting users refine designs inside a controlled editor.
In this guide, I will walk you through how to create a logo on your Mac using BrandCrowd’s AI tools, with a practical focus on logo quality, filtering, customization, and export formats that actually fit macOS workflows.
Table of contents
- Step 1: Open BrandCrowd on macOS
- Step 2: Enter your brand name and industry
- Step 3: Review the initial logo results
- Step 4: Reduce visual overload with filters
- Step 5: Customize fonts, colors, and layout
- Step 6: Make careful refinements without over-editing
- Step 7: Export logo files that fit macOS workflows
- Pricing and what you actually get
- Can you edit your logo later?
- Final thoughts
Step 1: Open BrandCrowd on macOS
BrandCrowd runs fully in the browser and works reliably on macOS in Safari, Chrome, and other Chromium-based browsers. There is no software to install and no reliance on local rendering, which keeps the experience lightweight and responsive on both Intel and Apple silicon Macs.
Don’t miss the best of The Mac Observer
Set us as a preferred source and our Apple reporting ranks higher in your Google Search results and Discover feed — one tap, no account changes.
Once you open the site, head directly to the logo maker to start a new project.
Step 2: Enter your brand name and industry
Start by typing your business or brand name exactly as you want it to appear in the logo. BrandCrowd also asks for an industry or keyword, which helps guide the AI logo generator toward relevant visual styles and icon themes.
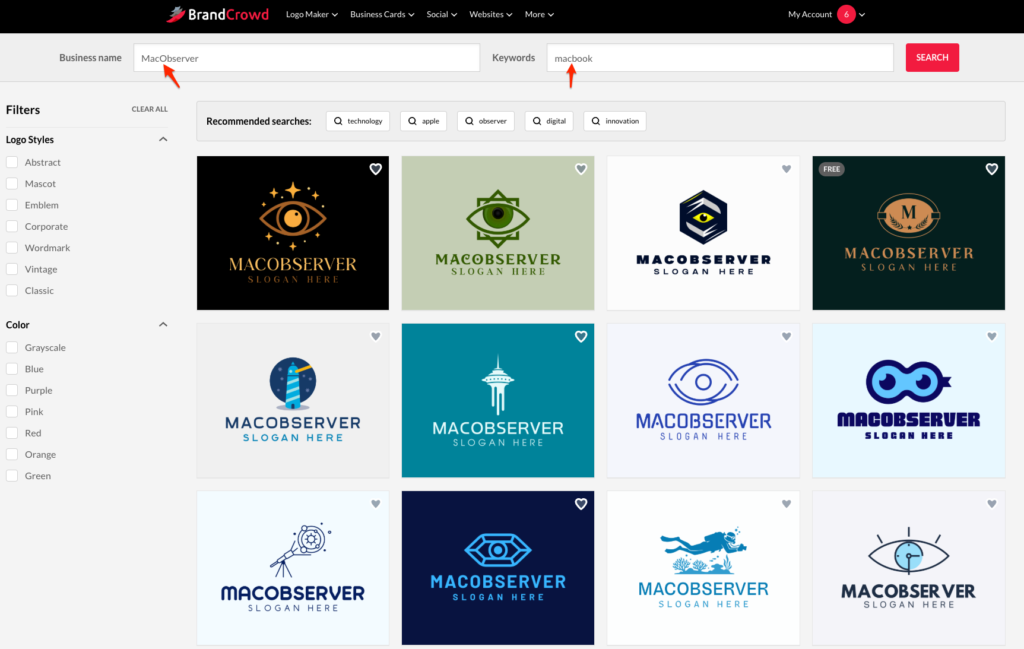
This step matters more than it seems. Choosing a broad industry like “technology” produces very different results than something specific like “mobile app development” or “IT consulting.” The AI uses this input to pull from a library of over 145,000 logo templates.
Step 3: Review the initial logo results
This logo generator offers a plethora of options almost instantly. At first glance, the number of results can feel overwhelming, especially because many designs look visually polished right away.
At this stage, focus on structure rather than details. Look for logos with clear typography, balanced spacing, and icons that do not overpower the name. A strong logo should still feel readable if you imagine it scaled down to a browser tab or social profile image.
Step 4: Reduce visual overload with filters
BrandCrowd includes extensive filtering tools that help narrow results quickly. Filters let you refine logo results by visual style, icon type, and color palette, making it easier to cut through the noise and focus on designs that actually fit your brand.

You can filter by modern, minimalist, corporate, vintage, or abstract styles, as well as by icon-based or text-based logos. Color filters help preview how logos behave on light or dark backgrounds, which is especially useful for macOS users who switch between light and dark system themes.
Step 5: Customize fonts, colors, and layout
Once you select a logo, BrandCrowd opens its editor. Here you can change fonts, adjust colors, swap icons, and modify layout orientation. The editor keeps things relatively safe by snapping elements into place and maintaining alignment, which reduces the chance of accidental misalignment.
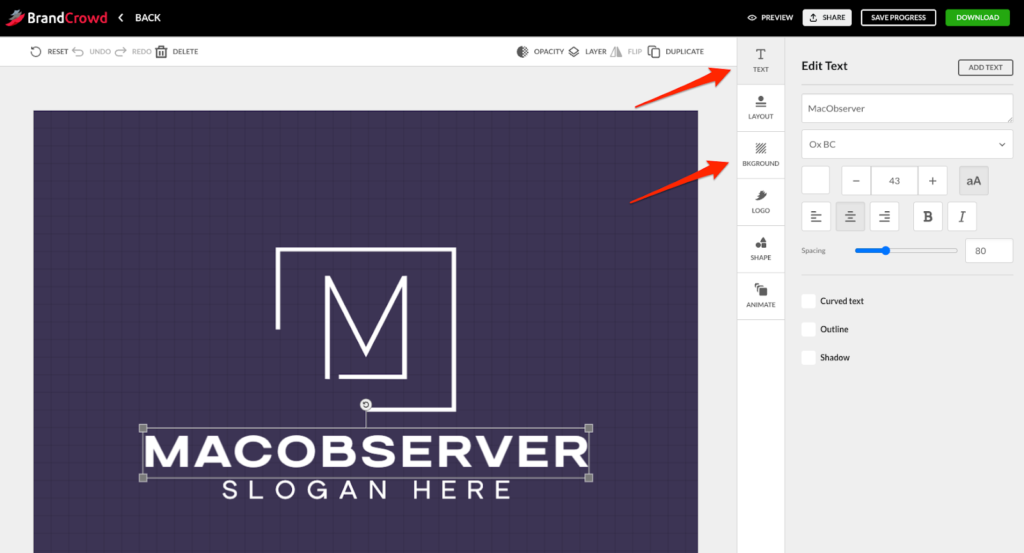
BrandCrowd’s font library is large, and changing fonts can dramatically alter the tone of a logo. When testing options, keep readability in mind. Clean fonts tend to perform better across macOS interfaces, especially in smaller UI contexts.
Step 6: Make careful refinements without over-editing
It is tempting to keep tweaking once you are inside the editor, but small adjustments usually go further than large changes. Try refining spacing, resizing icons slightly, or testing alternative color combinations instead of rebuilding the entire layout.
If a logo starts to feel forced, it is often faster to return to the results page and choose a different starting design. BrandCrowd’s strength is the breadth of its template library, so switching concepts is usually more effective than heavy editing.
Step 7: Export logo files that fit macOS workflows
BrandCrowd offers several export formats depending on the plan you choose. PNG files are ideal for websites and social media. PDF and SVG formats scale cleanly for print and open natively in macOS Preview without quality loss.
Transparent background versions are especially useful when placing logos into Keynote slides, websites, or marketing materials. Even if you do not plan to print immediately, having vector files protects your logo as your brand grows.
Pricing and what you actually get
BrandCrowd lets you design and preview logos for free, but downloading files requires a paid plan. When billed annually, pricing starts at $5 per month, which includes high-resolution logo files and vector formats for web and print.
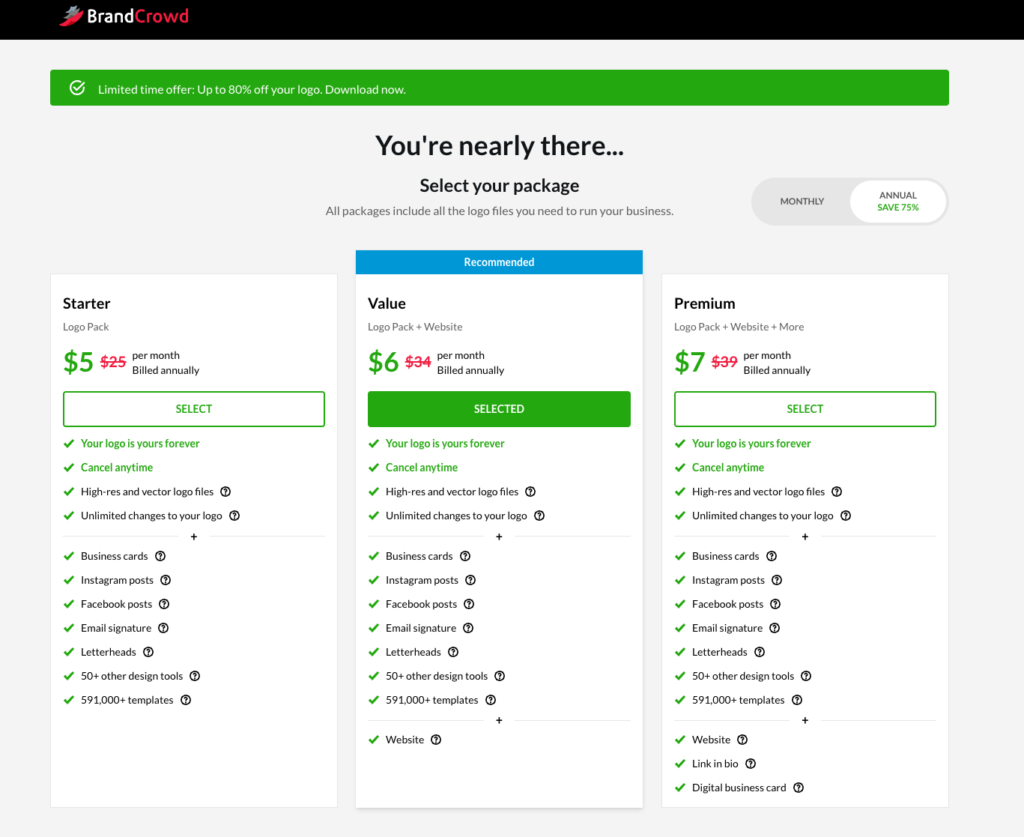
Higher tiers at $6 or $7 per month billed annually unlock additional export options and broader access to BrandCrowd’s design tools, making it easier to create matching brand assets alongside your logo.
Can you edit your logo later?
Yes. Once purchased, logos remain editable within your BrandCrowd account. You can return to the editor to make changes, export new versions, or adjust colors and fonts as your brand evolves.
Final thoughts
BrandCrowd’s AI logo tools work well on macOS because they prioritize variety and visual inspiration while keeping editing approachable. The platform is particularly strong for users who want to compare many polished logo concepts quickly and then refine one without starting from scratch.
For Mac users who value choice, clean browser performance, and export formats that integrate smoothly with macOS apps, BrandCrowd offers a practical way to move from idea to a usable logo with minimal friction.



Discussion