
Most websites or forms that need you to upload photos, videos, PDF files, etc., have a maximum size limit. If the file you are uploading is over this limit, you will encounter issues. In this case, you must reduce the file size or make the file smaller to successfully upload it to that particular website.
If you want to make a file smaller on your iPhone, we’ve put together this guide to help you do it. Read along to learn how to reduce file size of photos, videos, and even PDF on your iPhone.
How To Reduce Photo File Size on iPhone
Most people are looking for ways to reduce the file size of a photo from their iPhone. Sadly, the Photos app doesn’t have a native solution. However, that doesn’t mean you can’t make a photo’s file size smaller on your iPhone. There are multiple ways to reduce a photo’s file size without installing any third-party apps and we’ve listed all of them below.
1. Crop the Photo To Reduce Its File Size
The first and most straightforward method to reduce a photo’s file size is to crop it. This method might not be the best solution for most people, however, it is the easiest. Therefore, if you only need a particular part of a photo, you can crop the rest. Read along to learn how to crop a photo to reduce its file size on your iPhone.
- Open the Photos app on your iPhone.
- Navigate to the photo you want to crop.
- Tap the Edit option at the top right corner.
- Now, select the Crop option located below.
- Crop the image to keep the important elements in the photo.
- Tap the Done button at the top right corner to save the changes.

Remember that this might not always work. If it doesn’t, we suggest moving on the further steps.
2. Use a Shortcut To Reduce Photo File Size
The Shortcuts app is a hidden gem. Most of us ignore it but it is extremely useful if you learn your way around it. You can create a shortcut that can help you reduce a photo’s file size. The downside of creating a shortcut is that it will be time-consuming. Therefore, we’ve linked a premade shortcut below that reduces the size of a photo on your iPhone.
Time needed: 3 minutes
Steps to use a add and use a Shortcut to reduce a photo’s file size on the iPhone.
- Download the Change Image Quality and Share shortcut. (Tap the link and it will redirect you to the Shortcuts app)
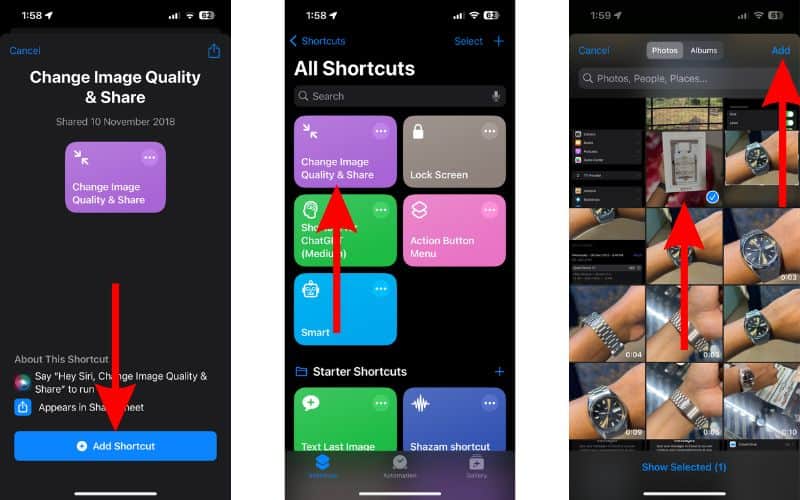
- Tap the Add Shortcut button.
- Now tap the Change Image Quality and Share shortcut.
- Then select the photo you want to reduce in size and tap the Add option at the top right corner.
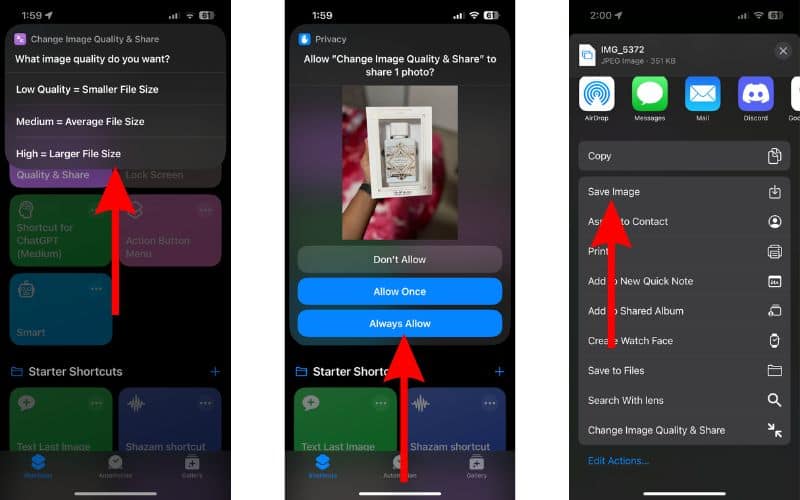
- Next, you’ll get a “What image quality do you want?” pop-up with three options, Low Quality, Medium, and High.
- Tap the Allow Once or Always Allow button to allow the shortcut access to the Photo.
- Next, select the Save Image option in the Share menu.


3. Use Instant Messaging Apps To Reduce the File Size
Do you share media files (photos and videos) via WhatsApp, Telegram, etc.? If you do, you must have noticed that the photos and videos are compressed when shared through such services. It is done to transfer the photo easily while consuming less data and storage.
So why don’t we use this to our benefit? You can share a photo through an instant messaging service and then download it back again from there. Here’s how to use instant messaging apps to reduce the file size of photos and videos on your iPhone.
- Open the Photos app on your iPhone.
- Navigate to the photo you want to reduce in file size.
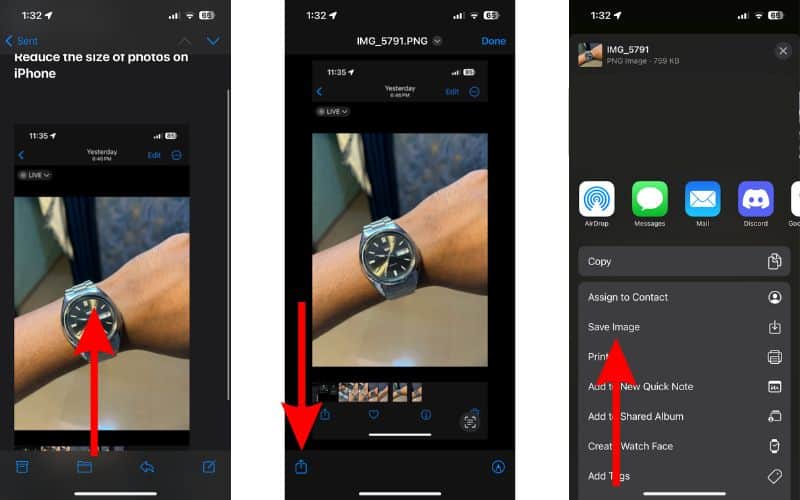
- Tap the Share button at the bottom left corner.
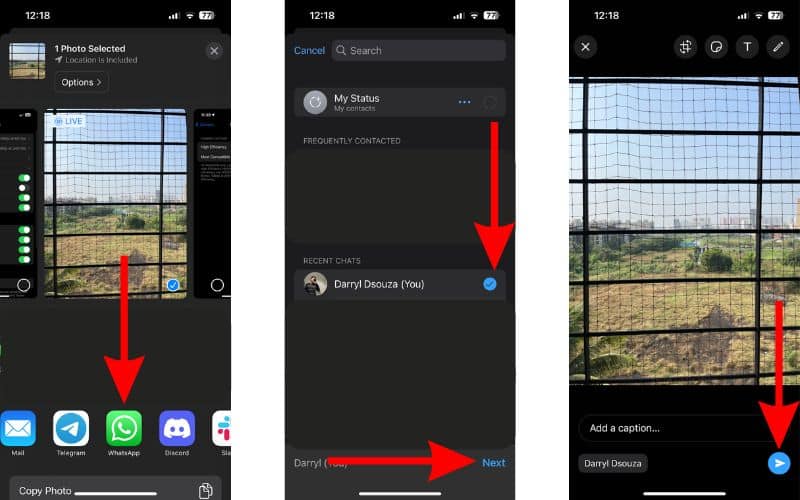
- Select any Instant Messaging app from the Share menu. You can select any as most of these services compress media files before sharing them. We’ve selected WhatsApp for demonstration purposes.
- Select a contact you want to share it with and then tap Next.
- Tap the Send button at the bottom right corner.
- Now open WhatsApp (or any other instant messaging service you’ve used) and head to the conversation where you shared the photo.
- Tap on the photo in the conversation and then select the Share button at the bottom left corner.
- Lastly, tap the Save button to save the photo to the Photos app on your iPhone.


If you open the Photos app and check the file size of the image, you will see a substantial difference between the original and compressed photos.
4. Use The Mail App To Reduce Photos Files Size
The Mail app (default mail app) on your iPhone allows you to reduce photos file size. It is a simple workaround and it works flawlessly. Here’s how to reduce photos file size using the Mail app.
- Open the Photos app on your iPhone.
- Navigate to the photo you want to reduce in file size using Mail.
- Tap the Share button at the bottom left corner.
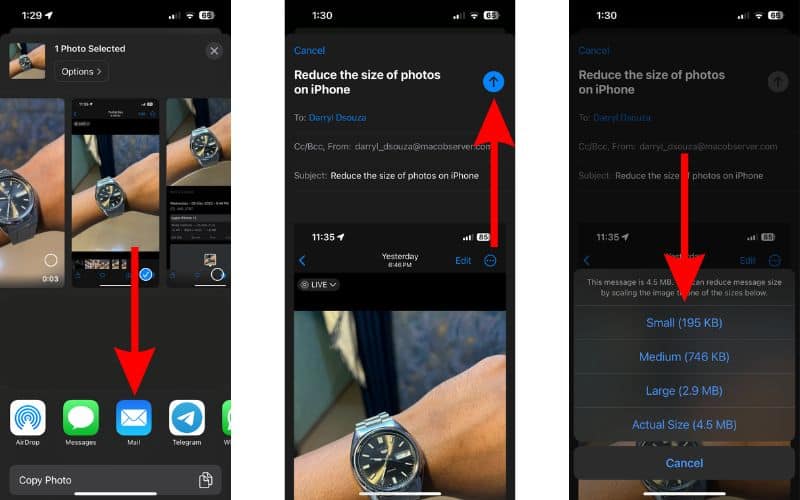
- Select the Mail app from the Share menu.
- Enter your email address (secondary email) in the To: text box and add the subject of the mail in the Subject: text box.
- Then tap the Send button at the top right corner.
- You will get an option to reduce the photo size by scaling the image. The available options will be Actual Size, Large, Medium, and Small. Select one that best suits your needs and the email will be sent.
- Now, head to the Mail app and open the email you just sent.
- Tap the attached photo to open it and then tap the Share button at the bottom left.
- Select the Save Image option from the Share menu. The compressed photo will be saved to the Photos app on your iPhone.


5. Change Photos File Format for Smaller File Size
We have listed several methods to help reduce the file size of photos above. The next important thing you should do is to change the format in which your iPhone captures images. The iPhone offers an efficient format (HEIF/HEVC) which helps reduce the file size when capturing photos and videos on your iPhone.
Switching to the HEIF/HEVC format will ensure that the photos and videos you capture through your iPhone are comparatively smaller in size. It will allow you to store more images and videos and easily share them without worrying about storage or data constraints.
- Open the Settings app on your iPhone.
- Navigate to the Camera option.
- Tap the Formats option on the next screen.
- Now, select the High Efficiency option.

How To Reduce the File Size of Videos on iPhone
You might encounter an error message if you’re trying to upload a video to a form or share it through email. Mostly, this error message will notify about the file size being too large or above the maximum limit. You can easily reduce the file size of a video on your iPhone through the iMovie app.
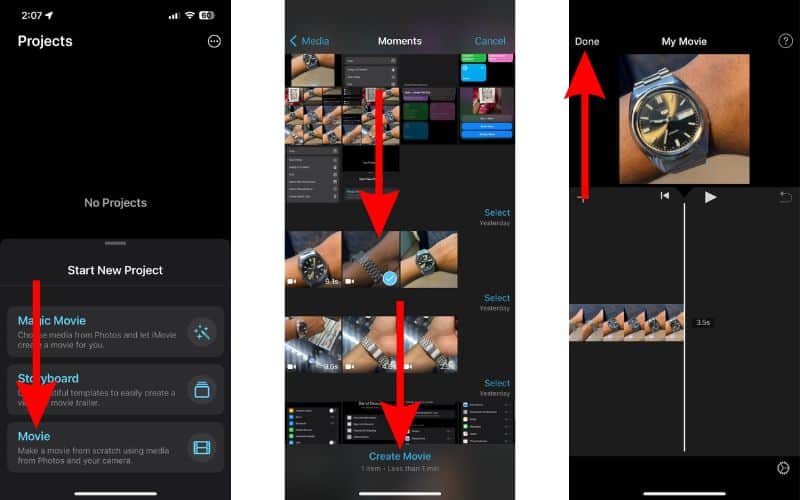
- Open the iMovie app on your iPhone.
- Tap the Movie option located under the Start New Project menu.
- Select the video of which you want to reduce the file size and then tap the Create Movie option at the bottom of the screen.
- Now, tap the Done option at the top left corner.
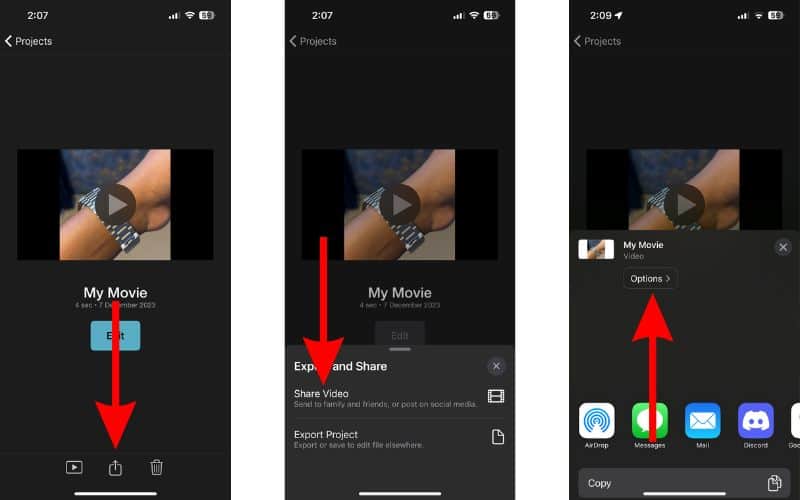
- Tap the Share button at the bottom of the screen.
- Here, select the Share Video option in the Export and Share menu.
- Tap the Options button located under My Movie in the Share menu.
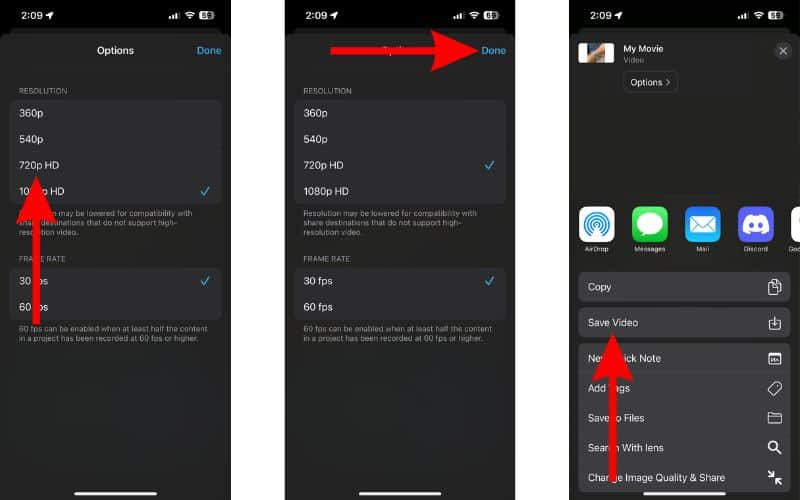
- Select the resolution of the video. Keep in mind, that lower resolution equals to smaller file size. However, the video quality will also decrease as you lower the resolution of the video.
- Once you’ve selected the desired resolution, tap the Done option at the top right corner.
- Finally, tap the Save Video option in the Share menu.


Reduce the File Size of PDF on iPhone
Are you looking for ways to reduce the file size of a PDF document? Usually, PDFs are small in size. However, if you have a PDF that is too large in terms of file size and cannot share it or upload it, you can reduce its file size. We recommend visiting Adobe’s PDF compressor website which will help you reduce the file size of a PDF. You need not install any third-party app and can get the file compressed within a few seconds.
Conclusion
“The bigger, the better,” argument might be true in terms of sizes of photo or video files as smaller (compressed) media files usually lose out on details. However, sometimes, you need smaller file sizes as they do the job equally well. We hope you were able to reduce the file size of a photo, video, or PDF file on your iPhone. Please let us know in the comments if you have any other doubts.


