
I know how annoying it feels when your Mac is not connecting to Wi-Fi. Speaking from experience, you’ll quickly waste hours running system scans. To help you find the root cause faster, I ranked some common troubleshooting steps from most to least effective.
What to Do if Mac Won’t Connect to Wi-Fi but Other Devices Will
Before blaming the internet connectivity issues on your Mac, let’s rule out other possible causes first:
- Check Your Wi-Fi Router: Check for wireless router issues, like physical damages, signal obstructions, or overheating. You might also need to restart it multiple times.
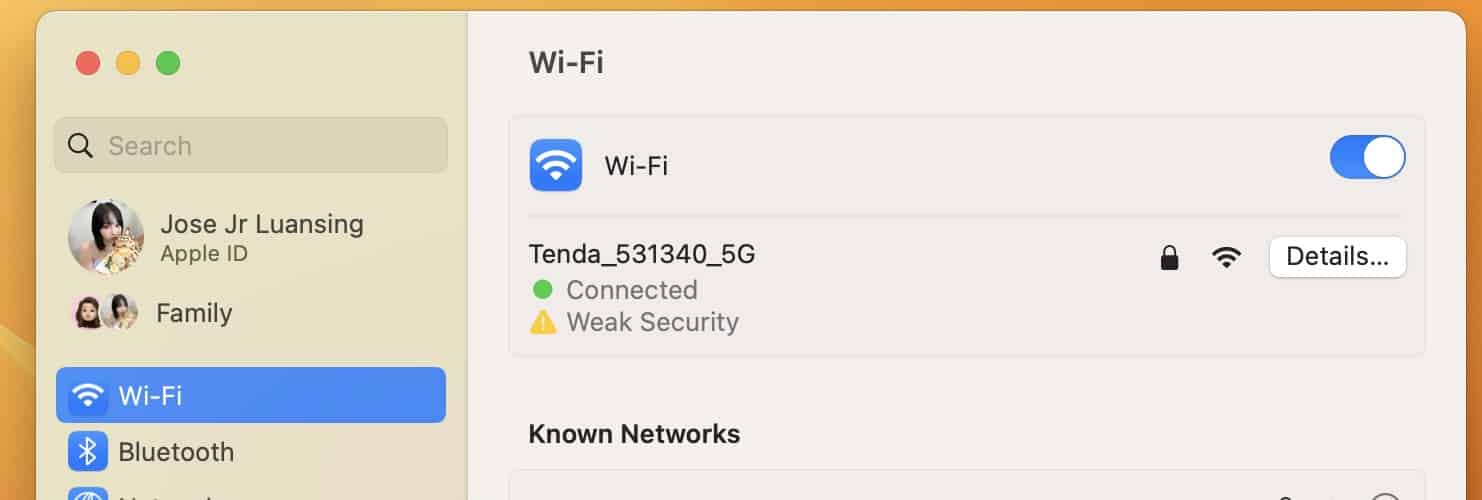
- Unpair and Pair Your Wi-Fi Network: Disconnect and connect your preferred networks. Open the Wi-Fi icon on the menu bar, go to Wi-Fi Settings, click the horizontal ellipsis beside your network, and then select Forget Wi-Fi Network.
- Check Other Network Connections: Check other Wi-Fi networks. Your internet provider might be to blame if your router and Mac are working properly. Also, try using an ethernet internet connection. You’ll find the port behind your Mac or on its power brick.
You can proceed with more complex troubleshooting steps if your Mac is still not connecting to Wi-Fi. Here are several ways to fix Mac Wi-Fi problems.
1. Troubleshoot With Wireless Diagnostics
Time needed: 5 minutes
Here’s how to run Wireless Diagnostics on your Mac:
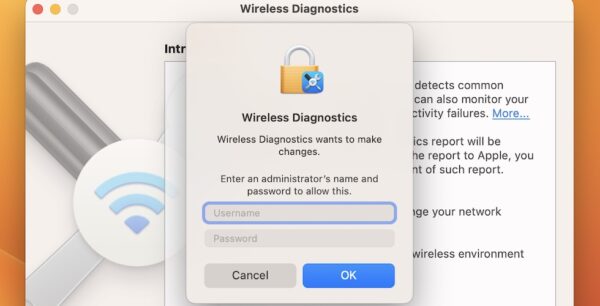
- Hold the Option key, click the Wi-Fi icon in the menu bar, and choose Open Wireless Diagnostics from the drop-down menu.

- Input your administrator profile’s username and password and click Ok > Continue.
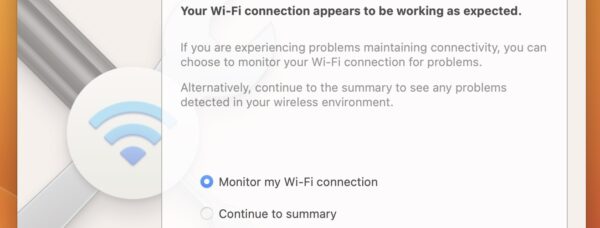
- Wait for Wireless Diagnostics to finish scanning and list potential issues. You can also click the Information icon beside each row for a thorough explanation.

- If no Mac Wi-Fi problems are detected, select Continue to Summary to file a diagnostics report. Enter any details about your router and press Continue.


2. Turn Off VPNs
Check if you accidentally left any VPNs enabled. They could prevent you from accessing sites that prohibit users from rerouting traffic through encrypted connections:
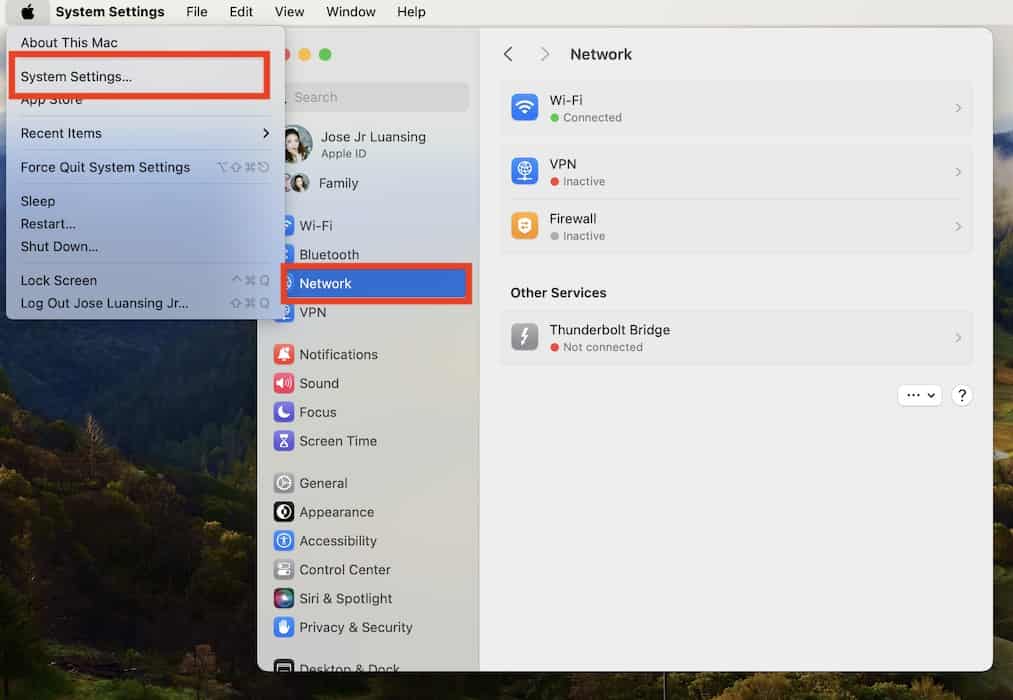
- Click the Apple Menu > System Settings > Network in the side navigation pane.
- Open the VPN section and toggle off any enabled VPN configuration.
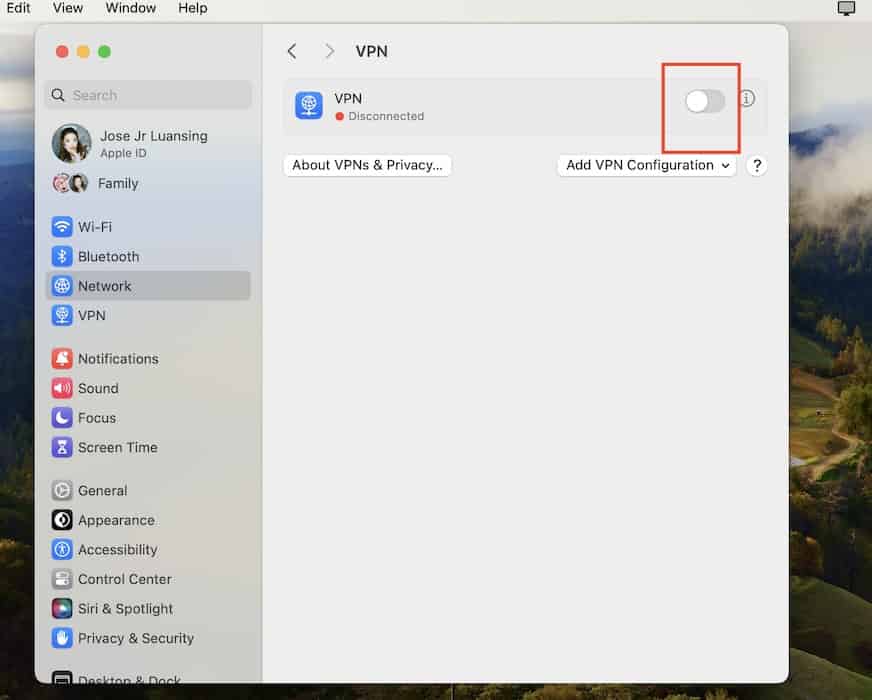
- To erase VPN settings, click the information icon (i) beside their names and hit Remove Configuration.
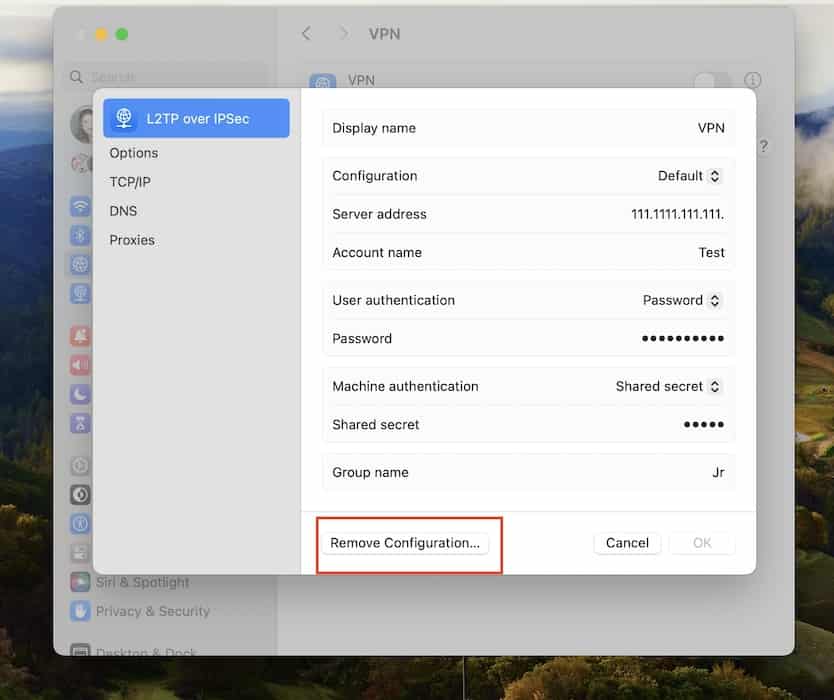
- Also, check your browser extensions for active VPNs.


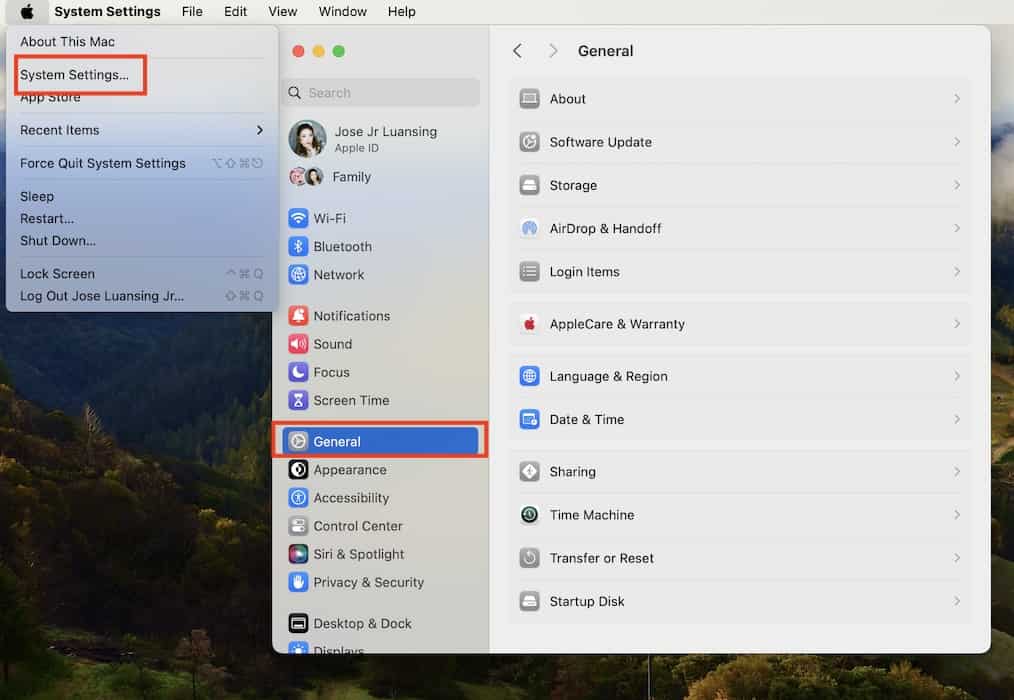
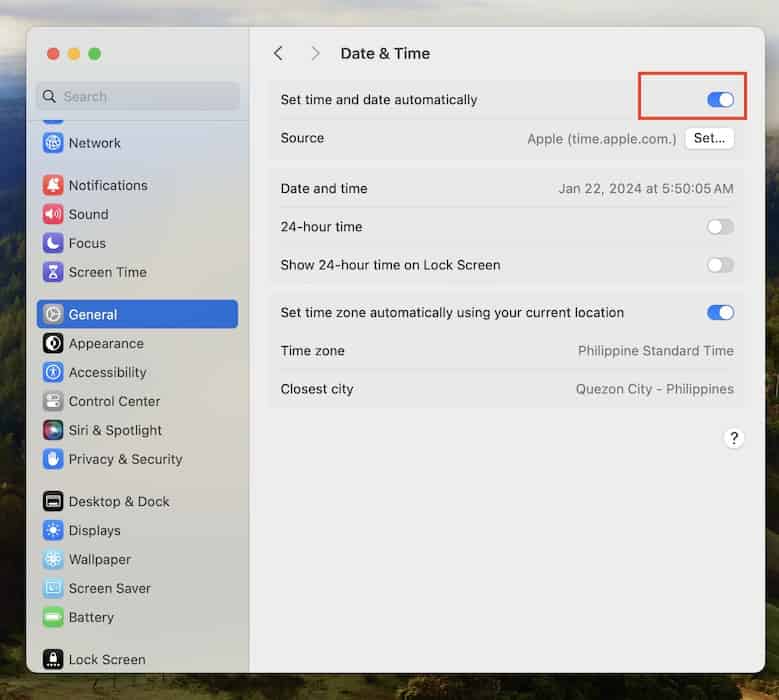
3. Double-Check the Date and Time on Your Device
Adjust the date and time of your device. Many websites use them to authenticate user access—they might think you’re a bot if your device shows inaccurate timestamps:
- Click the Apple Menu > System Settings > General in the side navigation pane.
- Scroll down to Date & Time and toggle on the button for Set time and date automatically. Your Mac will refer to time.apple.com by default, although you can set any source you want.


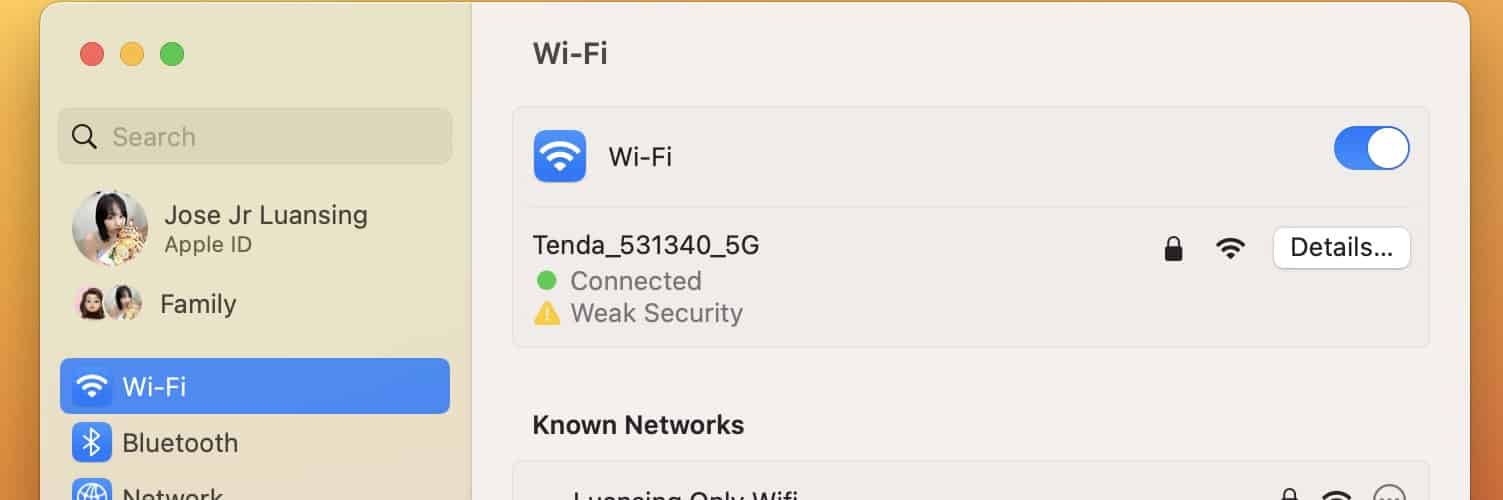
4. Adjust Your ISP’s DNS Settings
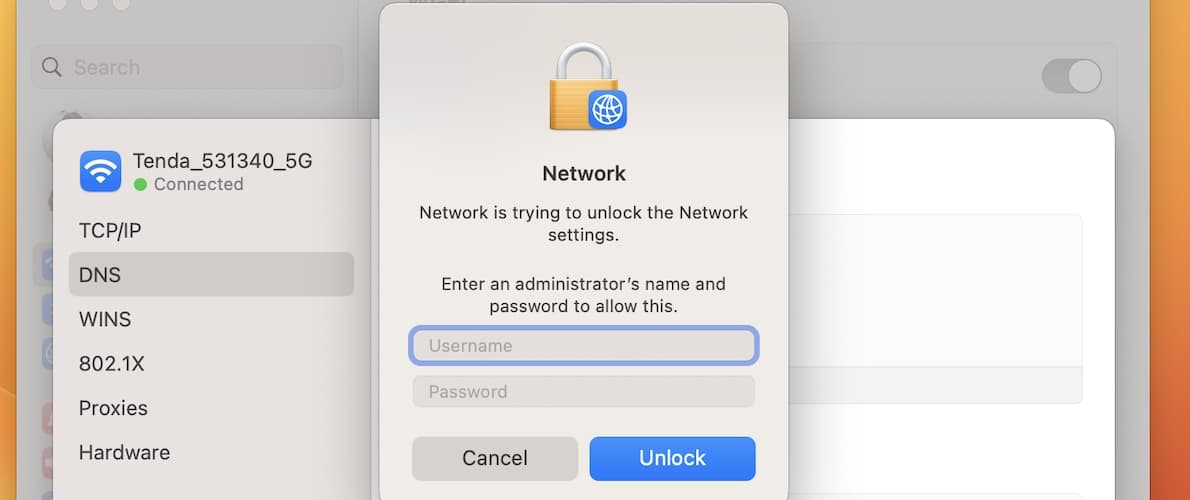
- Click the Wi-Fi symbol in the menu bar, launch Wi-Fi Settings, and select Details beside your Wi-Fi name.
- Open the DNS tab from the sidebar menu and click the plus symbol (+) under the DNS Servers section.
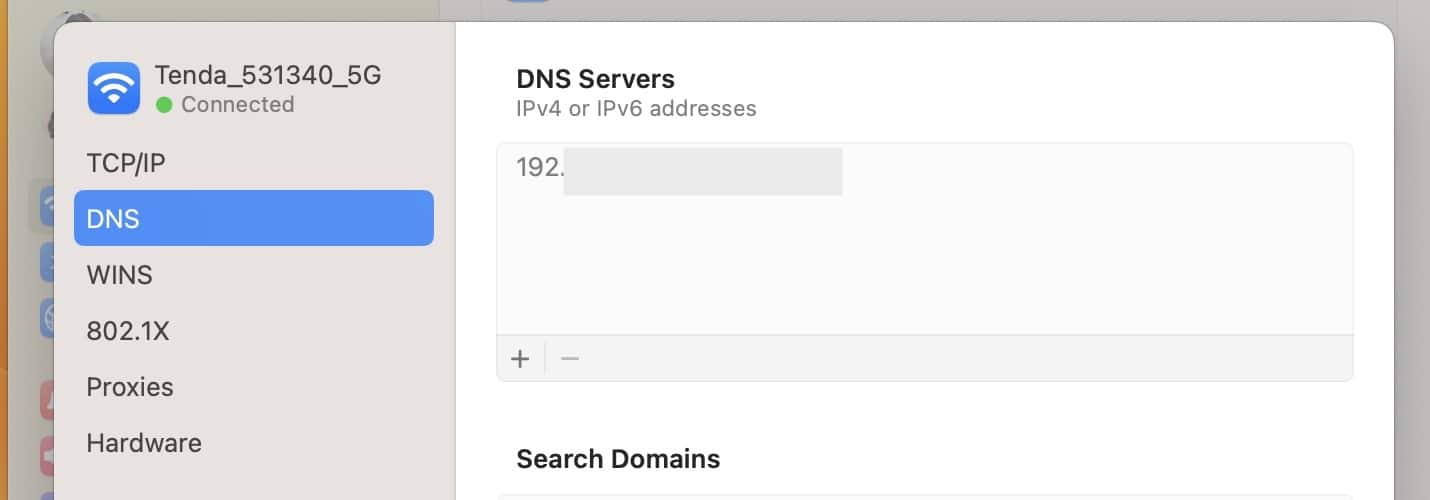
- Copy-paste any public server for troubleshooting, like 8.8.8.8 or 8.8.4.4.
- Click the Ok button, enter your admin password, and start testing your Wi-Fi network.


There are several public DNS servers for you to try, which include:
Google Public DNS
- IPv4: 8.8.8.8 and 8.8.4.4
- IPv6: 2001:4860:4860::8888 and 2001:4860:4860::8844
OpenDNS
- IPv4: 208.67.222.222 and 208.67.220.220
- IPv6: 2620:0:ccc::2 and 2620:0:ccd::2
Cloudflare DNS
- IPv4: 1.1.1.1 and 1.0.0.1
- IPv6: 2606:4700:4700::1111 and 2606:4700:4700::1001
5. Kill and Launch Wi-Fi From Terminal
If, for whatever reason, you can’t access the Wi-Fi menu from the menu bar icons, kill and launch Wi-Fi from Terminal instead. It’s a fairly simple action. Just ensure you input the correct commands; otherwise, you might terminate another system function.
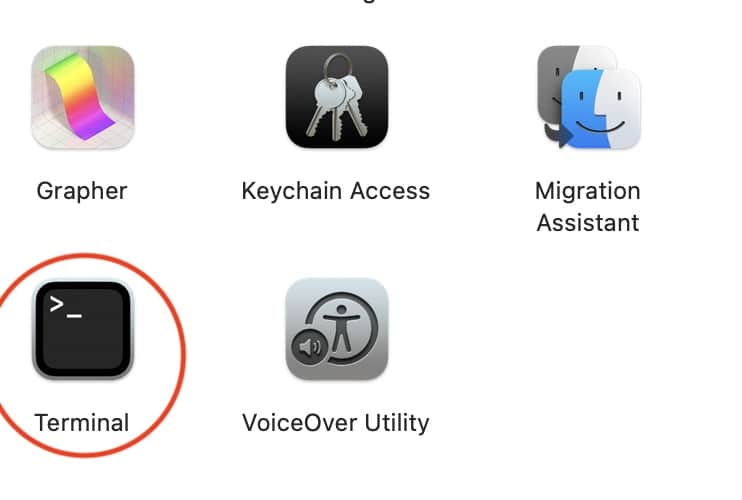
- Launch Finder > Applications > Utilities > Terminal or open Launchpad > Terminal, which you’ll likely find in the Other folder.
- Input
networksetup -setairportpower en0 offto turn off the Wi-Fi. - Let your Mac rest for a while, then input
networksetup -setairportpower en0 onto turn on Wi-Fi.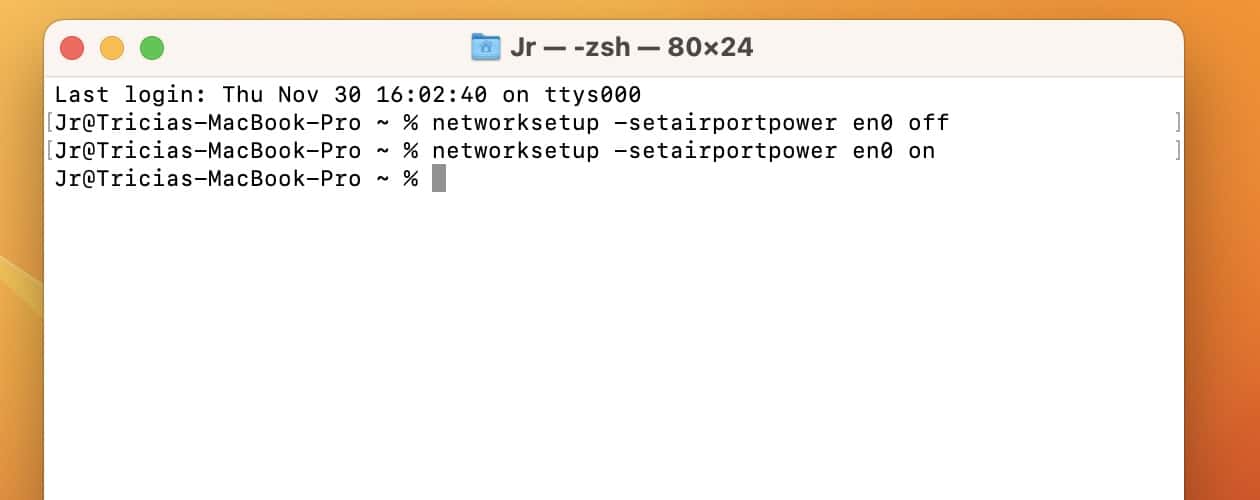


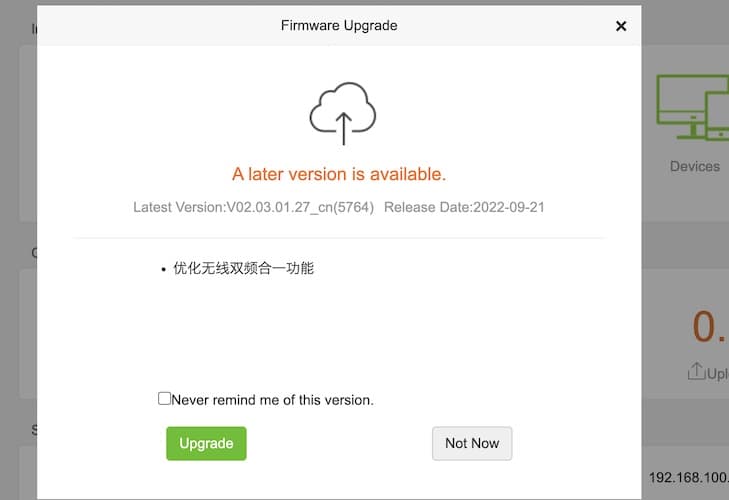
6. Update Your Wi-Fi Router’s Firmware
You should update your Wi-Fi router’s firmware every three to four years. ISPs fix compatibility issues, minimize disconnects, increase connectivity range, improve request response speed, and introduce new features through updates. Using outdated firmware for too long might cause faulty Wi-Fi:
- Click the Apple menu > System Settings > Wi-Fi > Details next to your paired Wi-Fi network.
- Copy your router’s IP address.
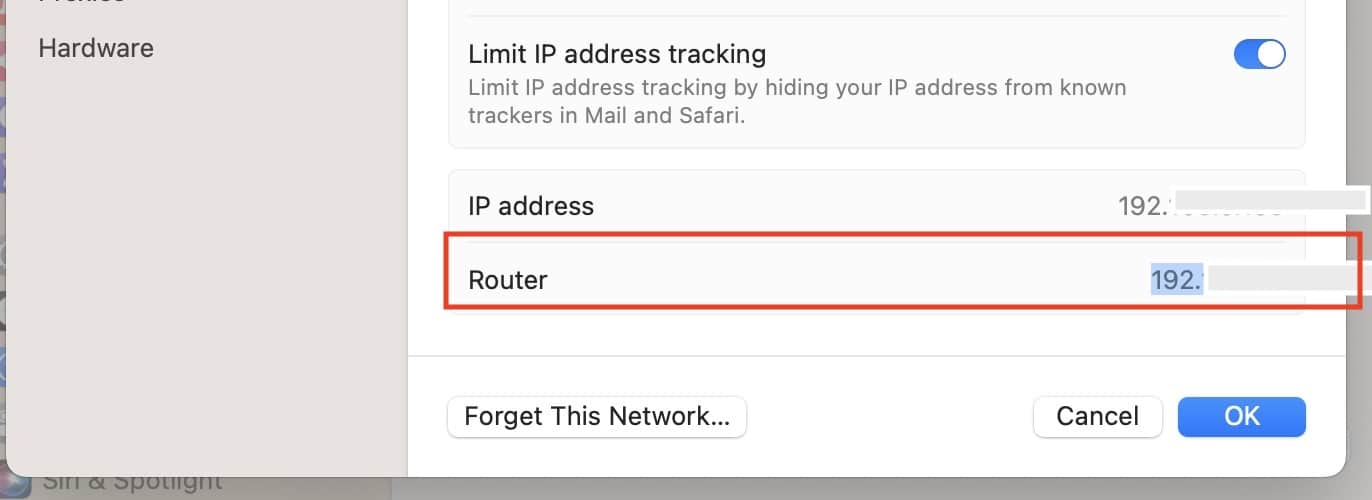
- Input it into your browser’s URL address bar, hit Return, and see if there’s an available firmware update.
- Follow the on-screen instructions, which may vary based on your ISP.


7. Test Different Networks, Devices, and Web Browsers
You can connect your Mac to different networks, test if other gadgets can access the internet, and visit multiple websites on various browsers. See if you’ll notice some improvement after uninstalling browser plug-ins, and force quitting third-party apps.
8. Contact Your ISP
If you still have a faulty Wi-Fi connection despite running the above software and hardware diagnostics tests, call your internet service provider (ISP). It can’t help with Mac Wi-Fi problems, of course. But your ISP’s technicians can troubleshoot your router and pinpoint any connection issues on their end—they might even visit you for in-person maintenance. It’s definitely worth trying before going to the Apple Genius Bar for repairs.
Why Is My Mac Not Connecting to Wi-Fi?
Several reasons could be causing network issues on your Mac such as being connected to the wrong network, service cutoff by your ISP due to missed bill payments, software problems from recent third-party app installations or updates, defects in your router, and overlooked hardware issues that require an Apple technician’s attention.


