
Kali Linux is a popular choice for penetration testing or ethical hacking. It includes a number of tools for testing your network’s vulnerabilities as well as those of your computers and other devices. The Debian-based Linux distribution has long been run on Macs, but has become more difficult in recent years. Let’s dive into how you can install Kali Linux on an M1 Mac, or any other Apple Silicon-based computer.
The Trouble With M1 Macs and Alternate Operating Systems
You might be wondering why you can’t just dual-boot Kali Linux, or replace macOS with it altogether. On Intel-based Macs, this was quite doable. Even on those, though, it began to be a bit troublesome because the T2 Security Chip makes this difficult.
Don’t miss the best of The Mac Observer
Set us as a preferred source and our Apple reporting ranks higher in your Google Search results and Discover feed — one tap, no account changes.
With the transition to Apple Silicon on Mac hardware, the problem is compounded even further. Apple Silicon Macs, from the first M1-based MacBooks to the latest M2 Pro MacBook Pro, not completely differently from PCs.
To make a long story short, booting alternate operating systems on newer Mac hardware is still a work in progress. The team at Asahi Linux has made great strides in bridging the gap, but it’s still got a ways to go.
To run something like Kali Linux, then, we turn to another method: a virtual computer.
Getting Ready to Install Kali Linux On Your M1 Mac
The first thing you need to do to install Kali is gather the required software and installer images. For our virtual PC, we’re going to choose UTM. It’s got the robustness we need, and is available free of charge.
Note that I recommend downloading UTM directly from the website. Yes, you can purchase it for $10 on the Mac App Store, but the only difference here is getting automatic updates for UTM itself.
You’ll also need the Kali Linux installer image. From the distribution’s web page, click Installer Images > Apple Silicon (ARM64. Click your desired option for Installer, whether you want a direct download or a torrent.

It’s important to note that Kali Linux does offer prebuilt virtual machine downloads for VMWare, VirtualBox and Qemu. I don’t recommend these, however, because they are built for Intel-based PCs.
How to Install Kali Linux On Your M1 or M2 Mac
Now for the fun part: setting up your virtual PC and installing Kali Linux. This is fairly straightforward, but you will need to set some unusual options along the way.
Setting Up Your UTM Virtual Machine for Installation
To install Kali Linux on your Apple Silicon Mac, you’ll first set up your UTM virtual machine.
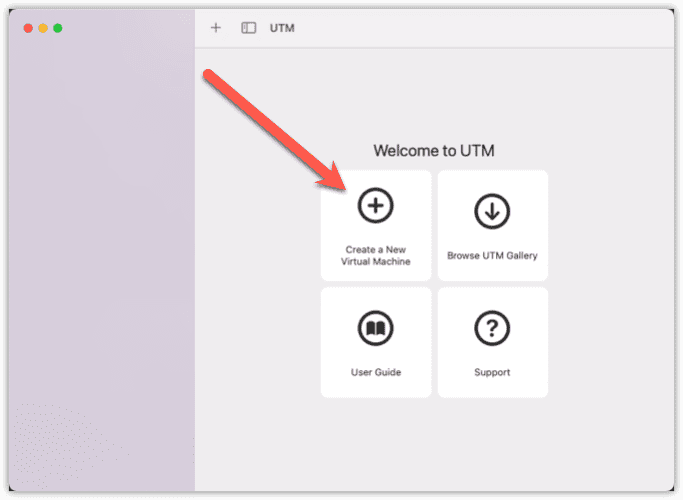
- Launch UTM and click Create a New Virtual Machine > Virtualize.
- Under Operating System, choose Other.

- Next, click Browse and choose the Kali Linux installer image you downloaded. Then, click Continue.
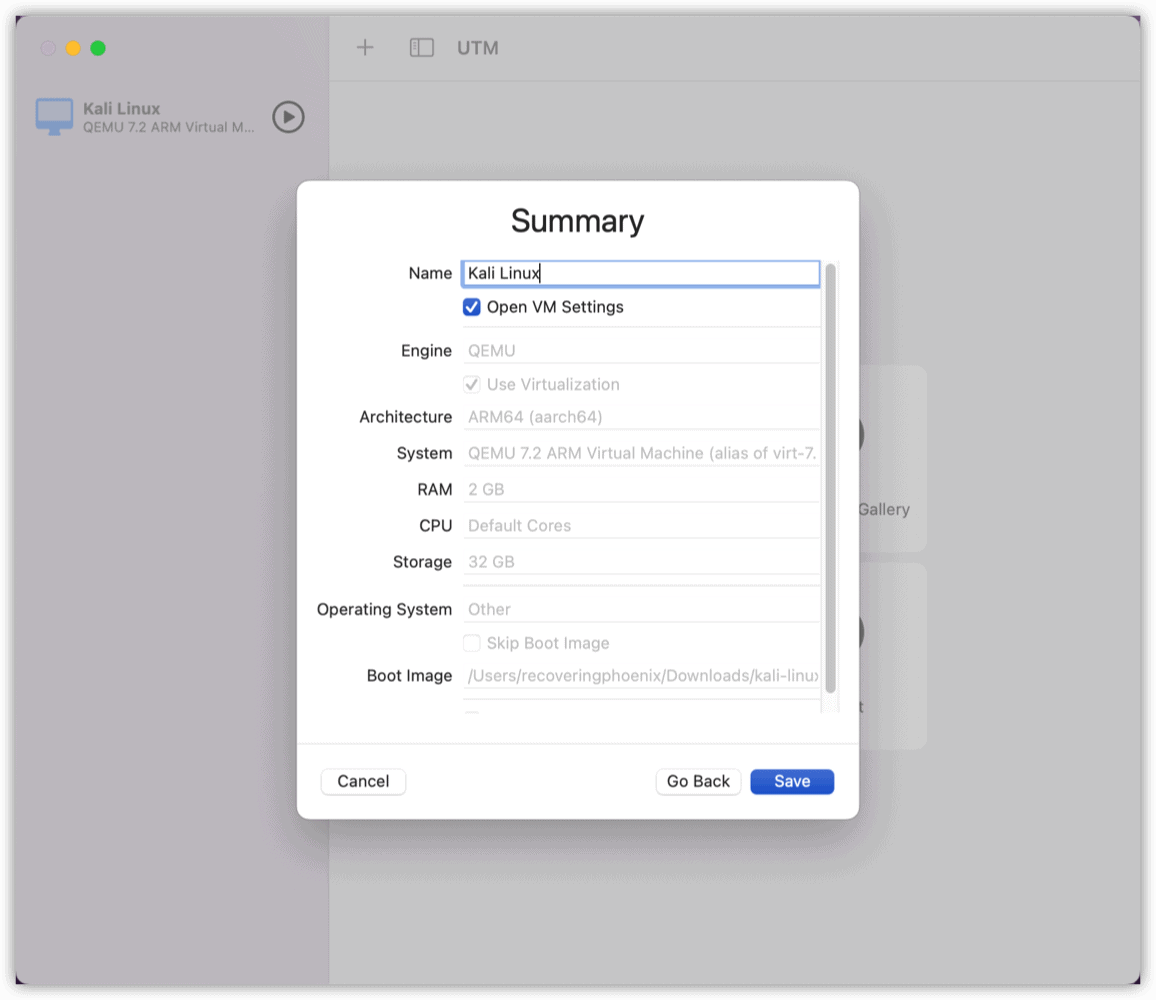
- You can set this how you like, but I’ve found that setting memory to 2048MB and storage at 32GB was more than sufficient.
- You can leave Shared Directory Path empty, unless you need it for some reason.
- When you get to the summary page, give your virtual computer a name and check the box for Open VM Settings. Then, click Save.
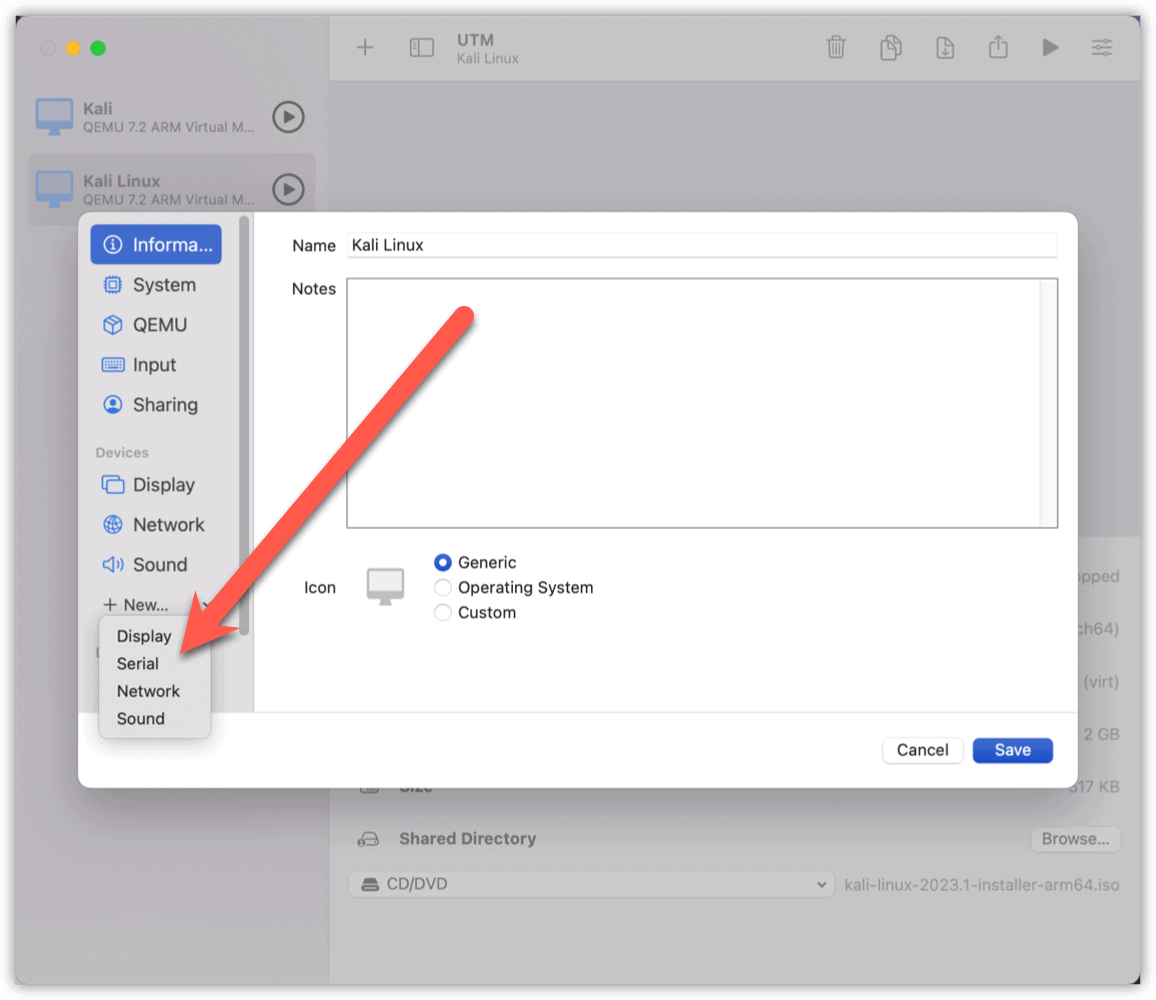
- Next, we need to configure our VM to open a second terminal window during installation. For some reason, the primary one goes dark, tripping people up. In the sidebar under Devices, click New > Serial.


Once that’s all configured, it’s time to move on to installation.
Installing Kali Linux in UTM On Your Mac
You’ll click the large Play button to begin the installation. You’ll see two windows, but most of your work will be in the one labeled Terminal 1. As you’ll soon see, the second window will go blank until all is done.
Time needed: 5 minutes
To install your Kali Linux virtual machine, follow these steps.
- Select Install and the Kali Linux installer will begin collecting information.
- You’ll want to select the appropriate language and keyboard layout for your needs.
- You may have to manually select the right time zone, as the installer doesn’t always properly detect it.
- The installer will ask you to create a user, choose what packages to install, and so forth. The default options will generally work best for most.
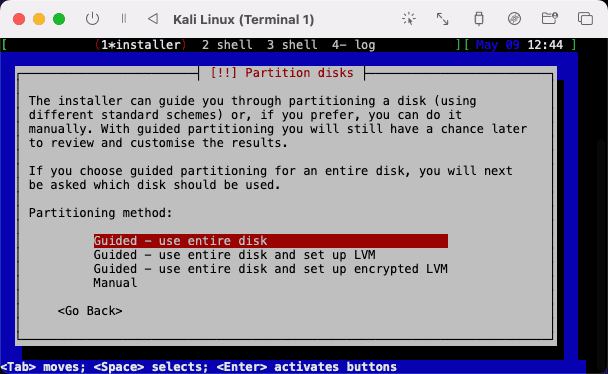
- On the Partition disks page, just choose Guided – use entire disk.
- Select the default options until you reach the page asking if you want to write the partition data to disk. Here, select Yes and press Return.
- When the installation completes and asks to reboot, shut down the virtual machine. There are a couple more settings changes we’ll need to make.
- Back in the UTM menu for your Kali Linux virtual machine, right-click Serial, then click Remove. Next, click Save.
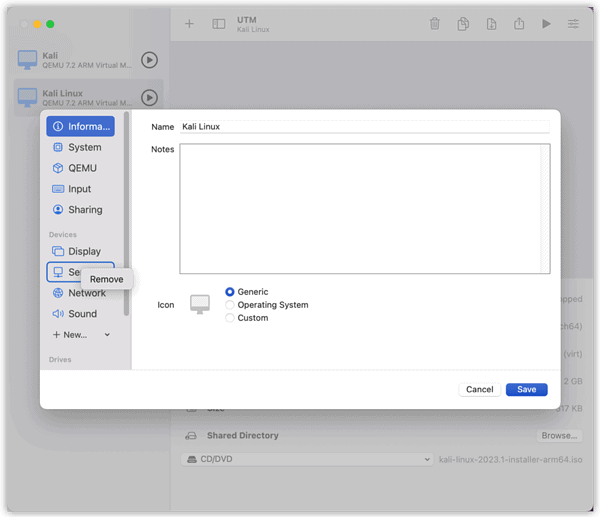
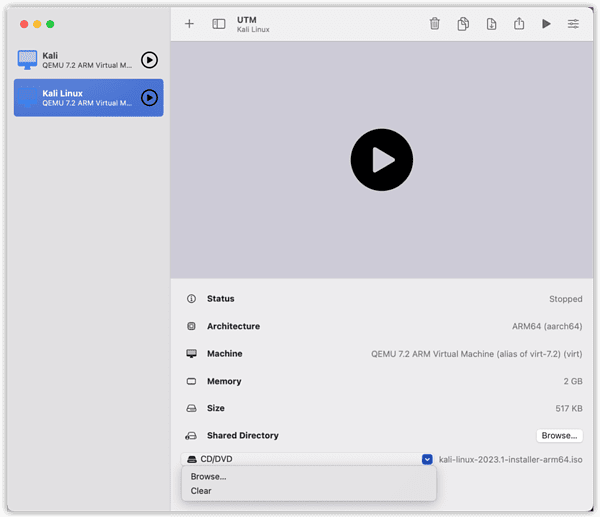
- Scroll down until you see CD/DVD. Click the dropdown menu and click Clear.


Getting Started With Your Security Testing
Now that the installation is complete, you can click the Play button. Kali Linux should boot up and you’ll be ready to begin your vulnerability testing, digital forensics, or whatever purpose you have in mind.

As you work, here are some extra tips to keep in mind regarding working in a UTM virtual machine.
- If your mouse gets stuck in the VM, pressing Control + Option will release it.
- Capture Mouse Cursor Button can be a real game-changer, productivity-wise. When you press it, your mouse cursor automatically moves from your host operating system to where it should be in the VM.


You might be wondering why you can’t just dual-boot Kali Linux, or replace macOS with it altogether. On Intel-based Macs, this was quite doable. Even on those, though, it began to be a bit troublesome because the T2 Security Chip makes this difficult.
While I’m not in need of running Linux at the moment, thank you so much for the mention of UTM. I was hoping somebody would come up with a virtualization/emulation system for Apple Silicon Macs. I hadn’t heard of them before, but you can be sure I just bookmarked their site.