
If you want to move your playlists, albums, or favorite songs from services like Spotify to Apple Music, this guide has you covered.
I will walk you through the latest built-in Apple tool and other easy ways to transfer your music.
Table of contents
How to transfer music to Apple Music?
1. Via Apple’s built-in settings (New)
This is the easiest way if it’s available for you. Apple is rolling this out gradually, so it may not show up for everyone right now.
Using the Apple Music app (iOS and Android)
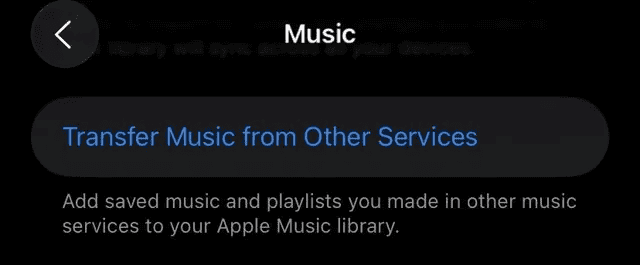
- Open the Settings app on your iPhone or iPad and go to Apps > Music.
- Look for Transfer Music from Other Music Services.
- Alternatively, open the Apple Music app on your iPhone, iPad, or Android device.
- Sign in with your Apple ID if asked.
- Select the service you want to transfer from, like Spotify, and log in.
- Choose the playlists, albums, or liked songs you want to move.
- Review the matches and fix any errors if needed.
- Confirm the transfer. You have up to 30 days to adjust mismatched tracks.

Using the Apple Music website
- Visit the Apple Music website and sign in with your Apple ID.
- Click your profile picture at the top right.

- Select Transfer Music from the menu.
- Connect your Spotify account (or another supported service).
- Pick the playlists, albums, and songs you want to bring over.
- Review the matches and correct any issues.
- Complete the transfer. You can still edit mismatched songs within 30 days.

Only playlists you created yourself can be transferred. Service-generated or auto-curated playlists will not carry over.
 NOTE
NOTE
You might also be interested in learning how to enable Crossfade in Apple Music.
2. Use SongShift (Standalone App)
If the built-in tool is not yet available in your region or you prefer an app, SongShift is a reliable choice.
- Download SongShift from the App Store.
- Add both your Spotify and Apple Music accounts.
- Choose playlists or albums you want to transfer.
- Review matched songs and correct mistakes, if any.
- Confirm and add to your Apple Music library.
3. Via TuneMyMusic (Online tool)
No app needed. Works in a browser on any device.
- Visit the TuneMyMusic website.
- Sign in to Spotify (or another service) and Apple Music.
- Select the playlists or songs to transfer.
- Start the transfer and wait for it to finish.

Tips
- Make sure Sync Library is turned on in Apple Music before transferring. Some users report the transfer option only appears after enabling it.
- Always review unmatched songs quickly. You have up to 30 days in the Apple tool to resolve mismatches.
- Back up large playlists or libraries in smaller batches to avoid overload or mistakes.
- Label your new Apple Music playlists clearly so you can verify each transfer.
- If a song does not match, try searching manually for a version with the same name, artist, and duration.
Frequently Asked Questions
The built-in Apple tool and SongShift (basic use) are free. TuneMyMusic also has free access for small playlists.
No. Only playlists you created yourself will transfer. Playlists created by the service, like Spotify curated lists, will not.
No. Transfers are one way. Your library on Spotify stays intact.
Apple Music may not have exact matches, or titles may differ. You get alternative versions or placeholders to review. The Apple tool lets you review for 30 days.
Summary
- Use the built-in Apple Transfer Music feature in settings or on the web if available in your region.
- Try the SongShift app for a guided and trusted transfer.
- Use TuneMyMusic online if you prefer web tools.
Conclusion
Switching from Spotify or any other music service to Apple Music no longer needs to be a chore. With Apple’s built-in transfer tool, you can move your playlists and library smoothly if the feature is available in your country. If not, plenty of solid tools like SongShift andTuneMyMusic are ready to help you hop over in just a few clicks.
Pick the method that fits your needs best, follow the simple steps, and soon your favorite tunes will be right where you want them in Apple Music.


