

We have all been there. You have a perfect photo for a presentation, a profile picture, or a fun sticker, but the background is cluttered or just plain boring. You might think you need expensive software like Photoshop to fix it, but you actually do not!
Your Mac comes with a powerful hidden gem called Preview. While mobile users are still exploring what Preview offers on iOS 26, the desktop version remains a mature powerhouse. It is not just for viewing PDFs or helping you print selected pages; it is a surprisingly capable image editor. Whether you are running the latest macOS or rocking an older version, Preview can help you isolate your subject and banish that background in seconds.
Ready to make your images pop? Let’s dive in.
Don’t miss the best of The Mac Observer
Set us as a preferred source and our Apple reporting ranks higher in your Google Search results and Discover feed — one tap, no account changes.
Table of contents
What you’ll need to Get Started
Before we start editing, ensure you have the following ready. The good news is that you likely have everything you need already installed on your computer.
- A Mac Computer: Any MacBook, iMac, or Mac mini will work.
- The Image File: Have your photo saved on your Desktop or in a folder where you can easily find it. High-contrast images (where the subject stands out clearly from the background) work best.
- Preview App: This comes pre-installed on every Mac.
Here’s How to Remove the Background
There are a few ways to tackle this, depending on which version of macOS you are using and how complex your image is. We will start with the easiest method available on modern Macs.
1. Method 1: The One-Click Magic (macOS Ventura and newer)
If you have updated your Mac recently (macOS Ventura, Sonoma, or Sequoia), Apple has included a feature that uses machine learning to detect your subject automatically. It is incredibly fast.
- Open your image: Double-click your image file to open it in Preview.
- Select the Tool: Go to the top menu bar and click Tools.
- Click Remove Background: Select Remove Background from the dropdown menu. Alternatively, you can use the keyboard shortcut Command + Shift + K.
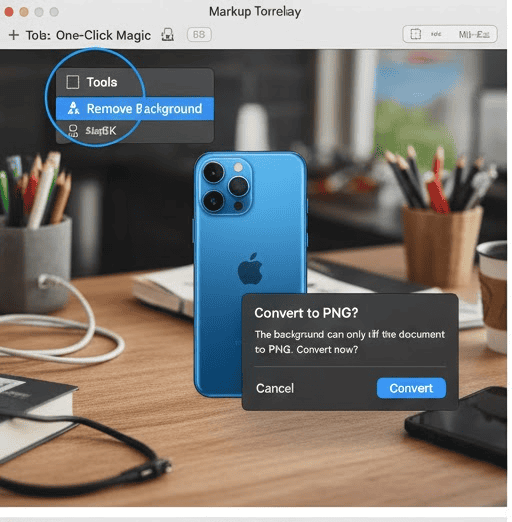
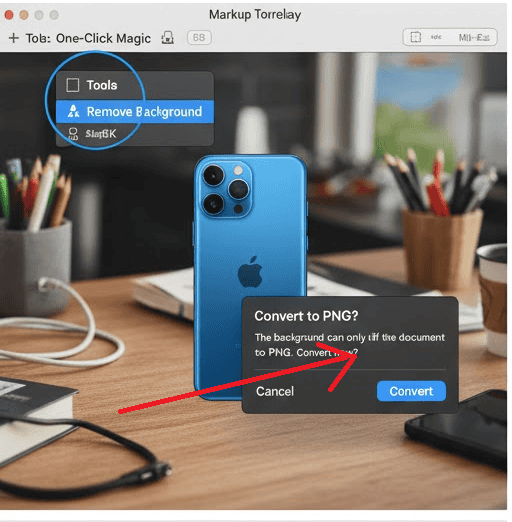
- Convert to PNG: If your image is a JPG or HEIC, Preview might ask to convert it to a PNG. Click Convert. Transparency only works with PNG files, so this step is crucial. (If you have a whole folder of these to process, you might want to batch convert your images to PNG format before you start).
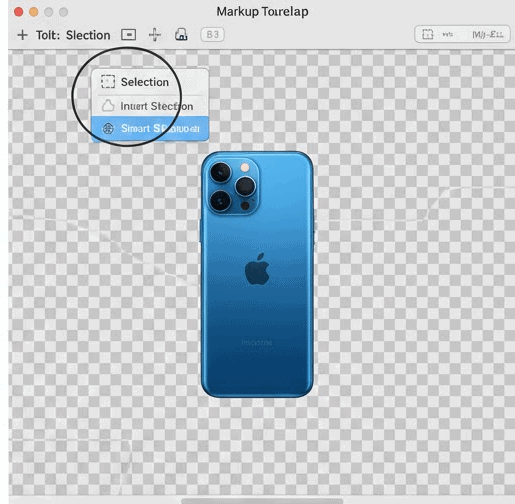
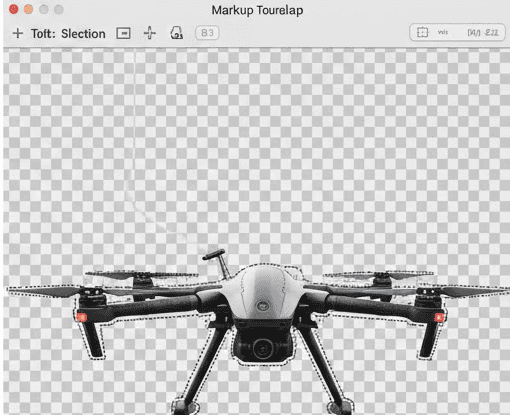
- Admire the result: The background should disappear instantly, leaving your subject surrounded by a transparent area.


2. Method 2: The Instant Alpha Tool (Older macOS or detailed work)
If you are on an older version of macOS (like Monterey or Big Sur) or if the automatic tool missed a spot, the Instant Alpha tool is your best friend. This works like a magic wand that selects colors.
- Open the Markup Toolbar: Open your image in Preview. Click the Markup Toolbar icon (it looks like a pen tip in a circle) near the top right of the window.
- Select Instant Alpha: Click the icon that looks like a magic wand (usually the second icon from the left in the toolbar).
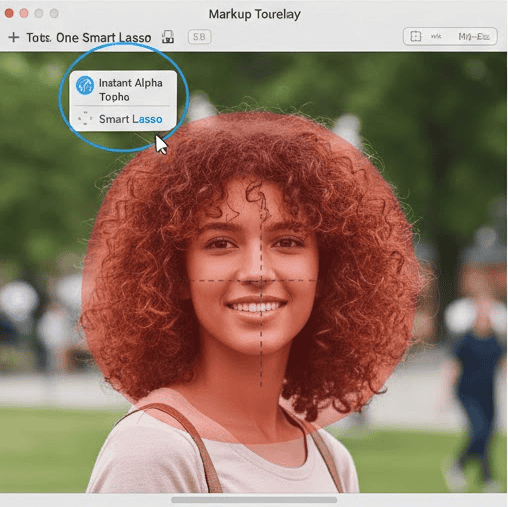
- Click and Drag: Click on the background area you want to remove and strictly hold the click. Slowly drag your mouse pointer away from the click point.
- Watch the Red Overlay: You will see a red overlay spread across the background. This indicates what will be deleted.
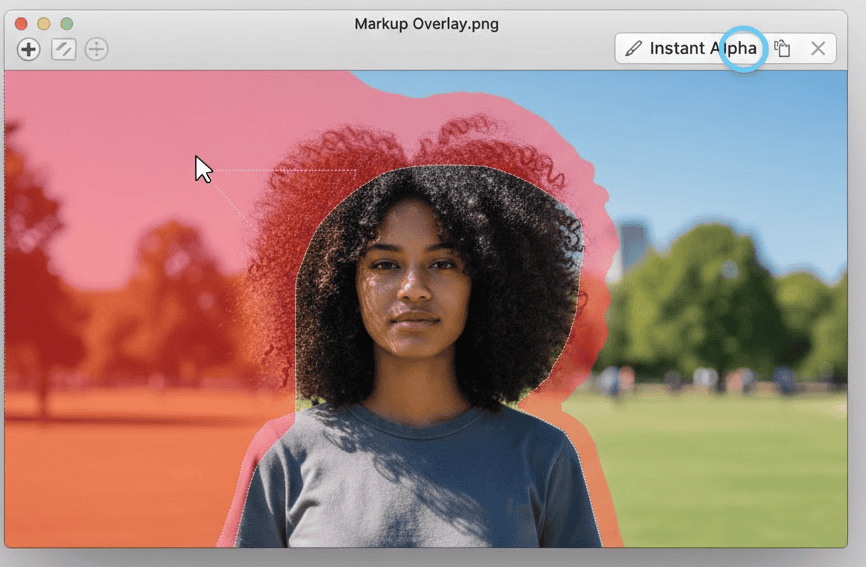
- Drag further to select more similar colors.
- Drag back if it starts selecting your subject.
- Delete: Once the background is highlighted in red, release the mouse button. You will see “marching ants” (a dotted line) around the selection. Press the Delete key on your keyboard.
- Repeat if necessary: You may need to repeat this process for different sections of the background.


3. Method 3: The Smart Lasso (For complex edges)
Sometimes the background is too messy for Instant Alpha. The Smart Lasso lets you trace the object you want to keep.
- Open Selection Tools: In the Markup Toolbar, click the Selection Tools menu (usually the first icon, a dotted rectangle). Choose Smart Lasso.
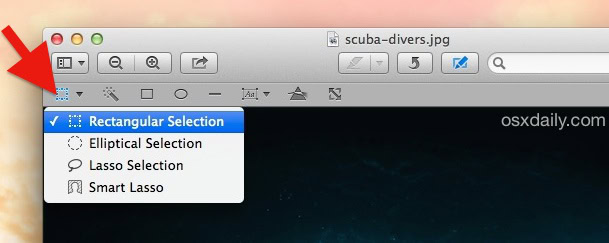
- Trace your subject: Click and drag to draw a heavy outline around the edge of your subject. You do not need to be perfect; just ensure the thick line covers the border between the subject and the background.
- Connect the loop: Finish your tracing by connecting back to the starting point.
- Invert Selection: By default, you have selected the subject. To delete the background, go to the top menu bar, click Edit, and select Invert Selection.
- Delete: Press the Delete key to remove everything except your traced subject.


Additional Tips
- Check for Transparency: If the background turns white instead of checkerboard (transparent) after you press delete, you are likely still working with a JPG file. Go to File > Export, select PNG as the format, and ensure the Alpha checkbox is ticked.
- Zoom In for Details: For tricky areas like hair or fur, use the Command + Plus (+) shortcut to zoom in. This gives you much better control with the Instant Alpha or Lasso tools.
- Duplicate First: It is always a safe bet to duplicate your image before editing. In Finder, right-click the image and select Duplicate so you keep the original safe.
- Finder Quick Action: For an even faster method on newer Macs, simply right-click the image file in a Finder window, scroll down to Quick Actions, and select Remove Background. You do not even need to open the app! If this option is missing or fails to launch, you might need to troubleshoot why Preview is not working in Finder.
Final Thoughts
Removing image backgrounds used to be a tedious chore reserved for graphic designers. Now, Preview makes it accessible to everyone right on the desktop. Whether you use the modern AI-powered tool or the trusty Instant Alpha wand, you can create professional-looking cutouts in seconds.
So go ahead and clean up those product photos or make that funny meme of your cat. You have the tools right at your fingertips.
FAQs
This usually happens if the subject is not clearly defined or if the image format is unsupported. Try converting the image to a standard PNG or JPG first, or ensure the subject has good contrast against the background.
Yes! As long as you have not closed the file, you can press Command + Z to undo your last action. You can press it multiple times to go back several steps.
When you switch from a compressed format like JPG to a PNG (which supports transparency), the file size often increases because PNG is a lossless format that preserves higher quality.


This is a fantastic feature overlooked well done Thank you