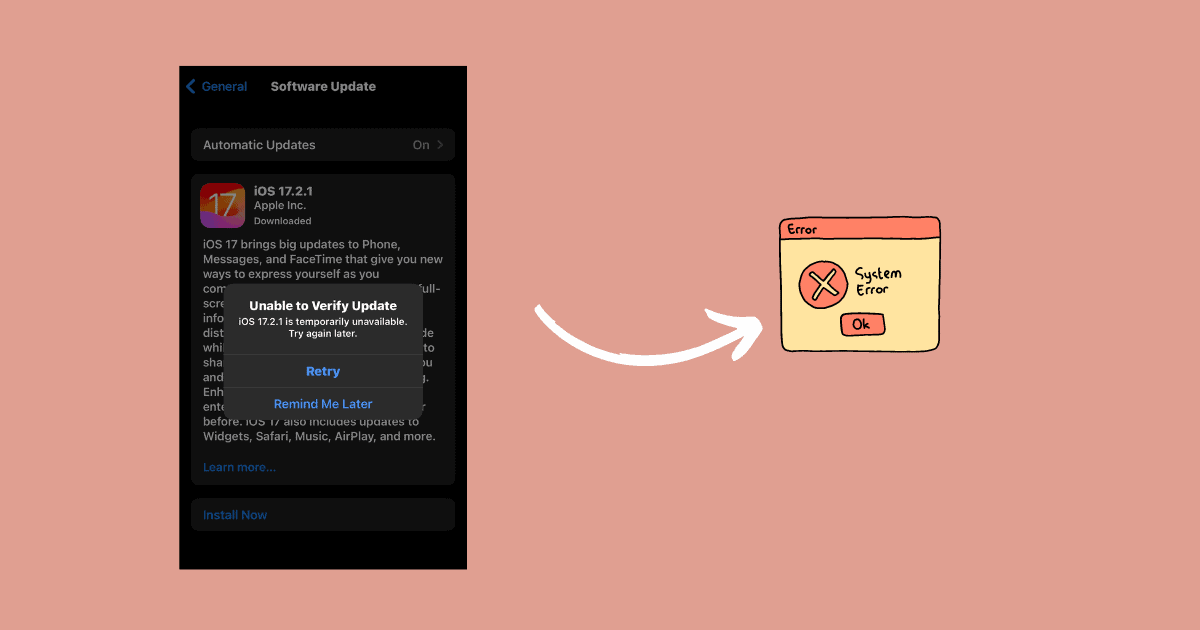
Are you repeatedly seeing the “Unable To Verify Update” error while trying to upgrade to iOS 17/17.7? This issue could be caused by network problems or insufficient storage space on your iPhone. I encountered the same error during my last iOS update and found it challenging to resolve.
Fortunately, there are several methods you can try to fix this issue. Let’s explore them below.
What To Do If I Get The Error “Unable To Verify Update” When Updating to iOS 17/17.7
1. Check Your Internet Connection
Time needed: 5 minutes
iOS updates require a strong and stable connection throughout. It’s best to avoid using cellular data, as it may not be reliable for downloading large updates. Here’s what you can do:
- Turn off and on Wi-Fi on your iPhone.
- Restart your router and connect to the network.
- Open an internet browser and check if the internet is working.
- You can also do a speed check to ensure it’s running smoothly.
2. Delete Any VPN Software
VPN software can sometimes interfere with your internet connection, preventing you from connecting to Apple’s servers for updates. Disable it while troubleshooting.
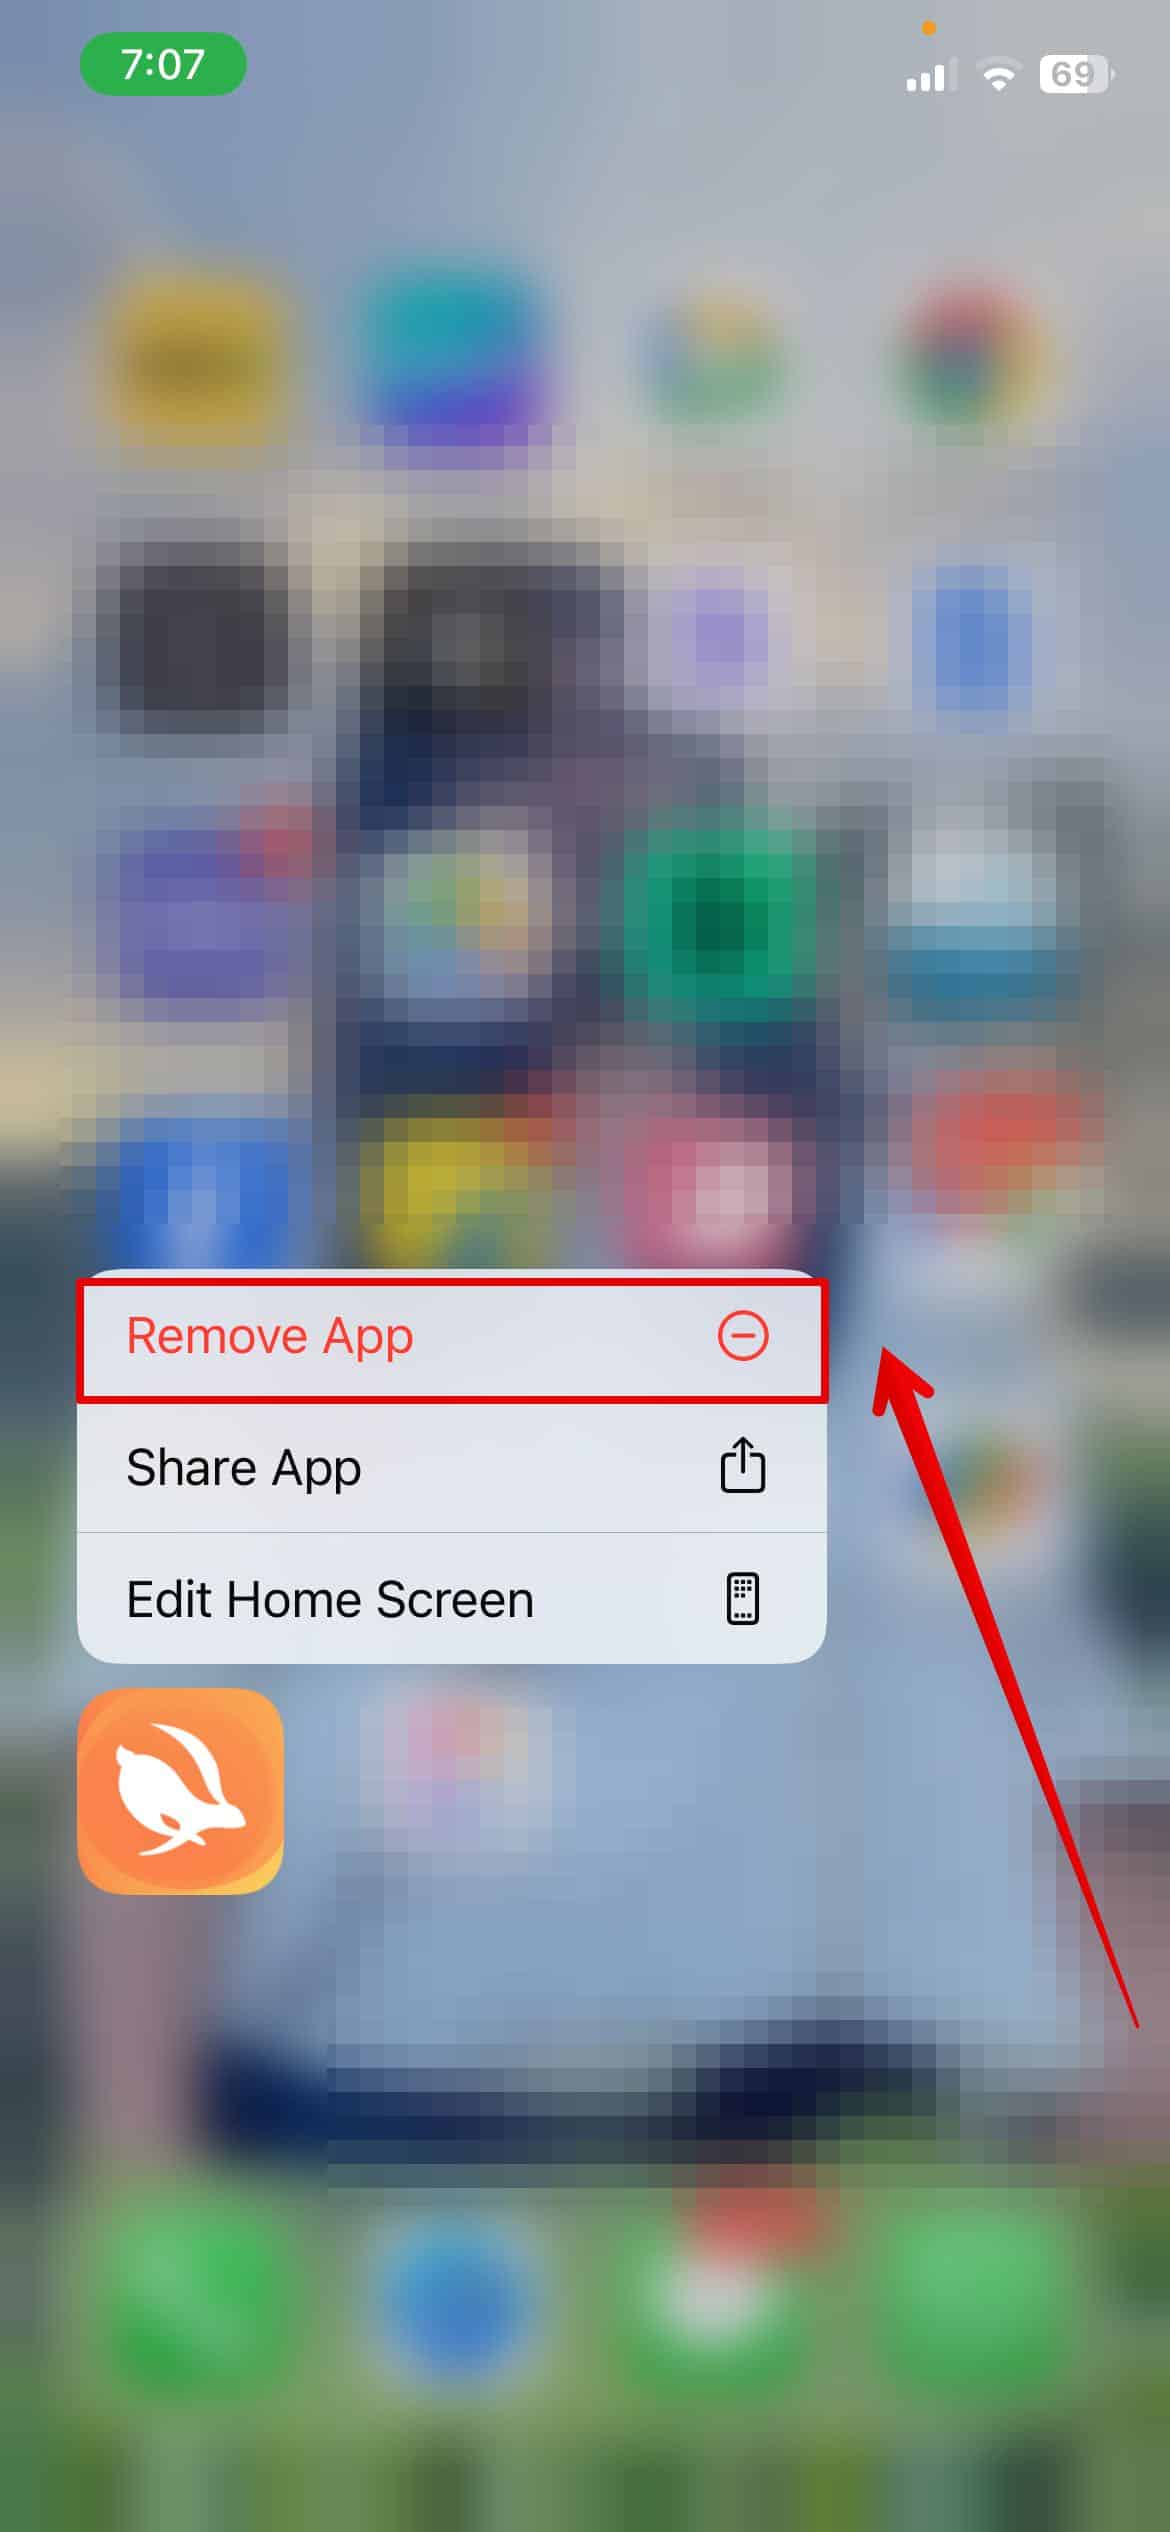
- Press and hold the VPN app on your Home Screen.
- Now, select Remove App.
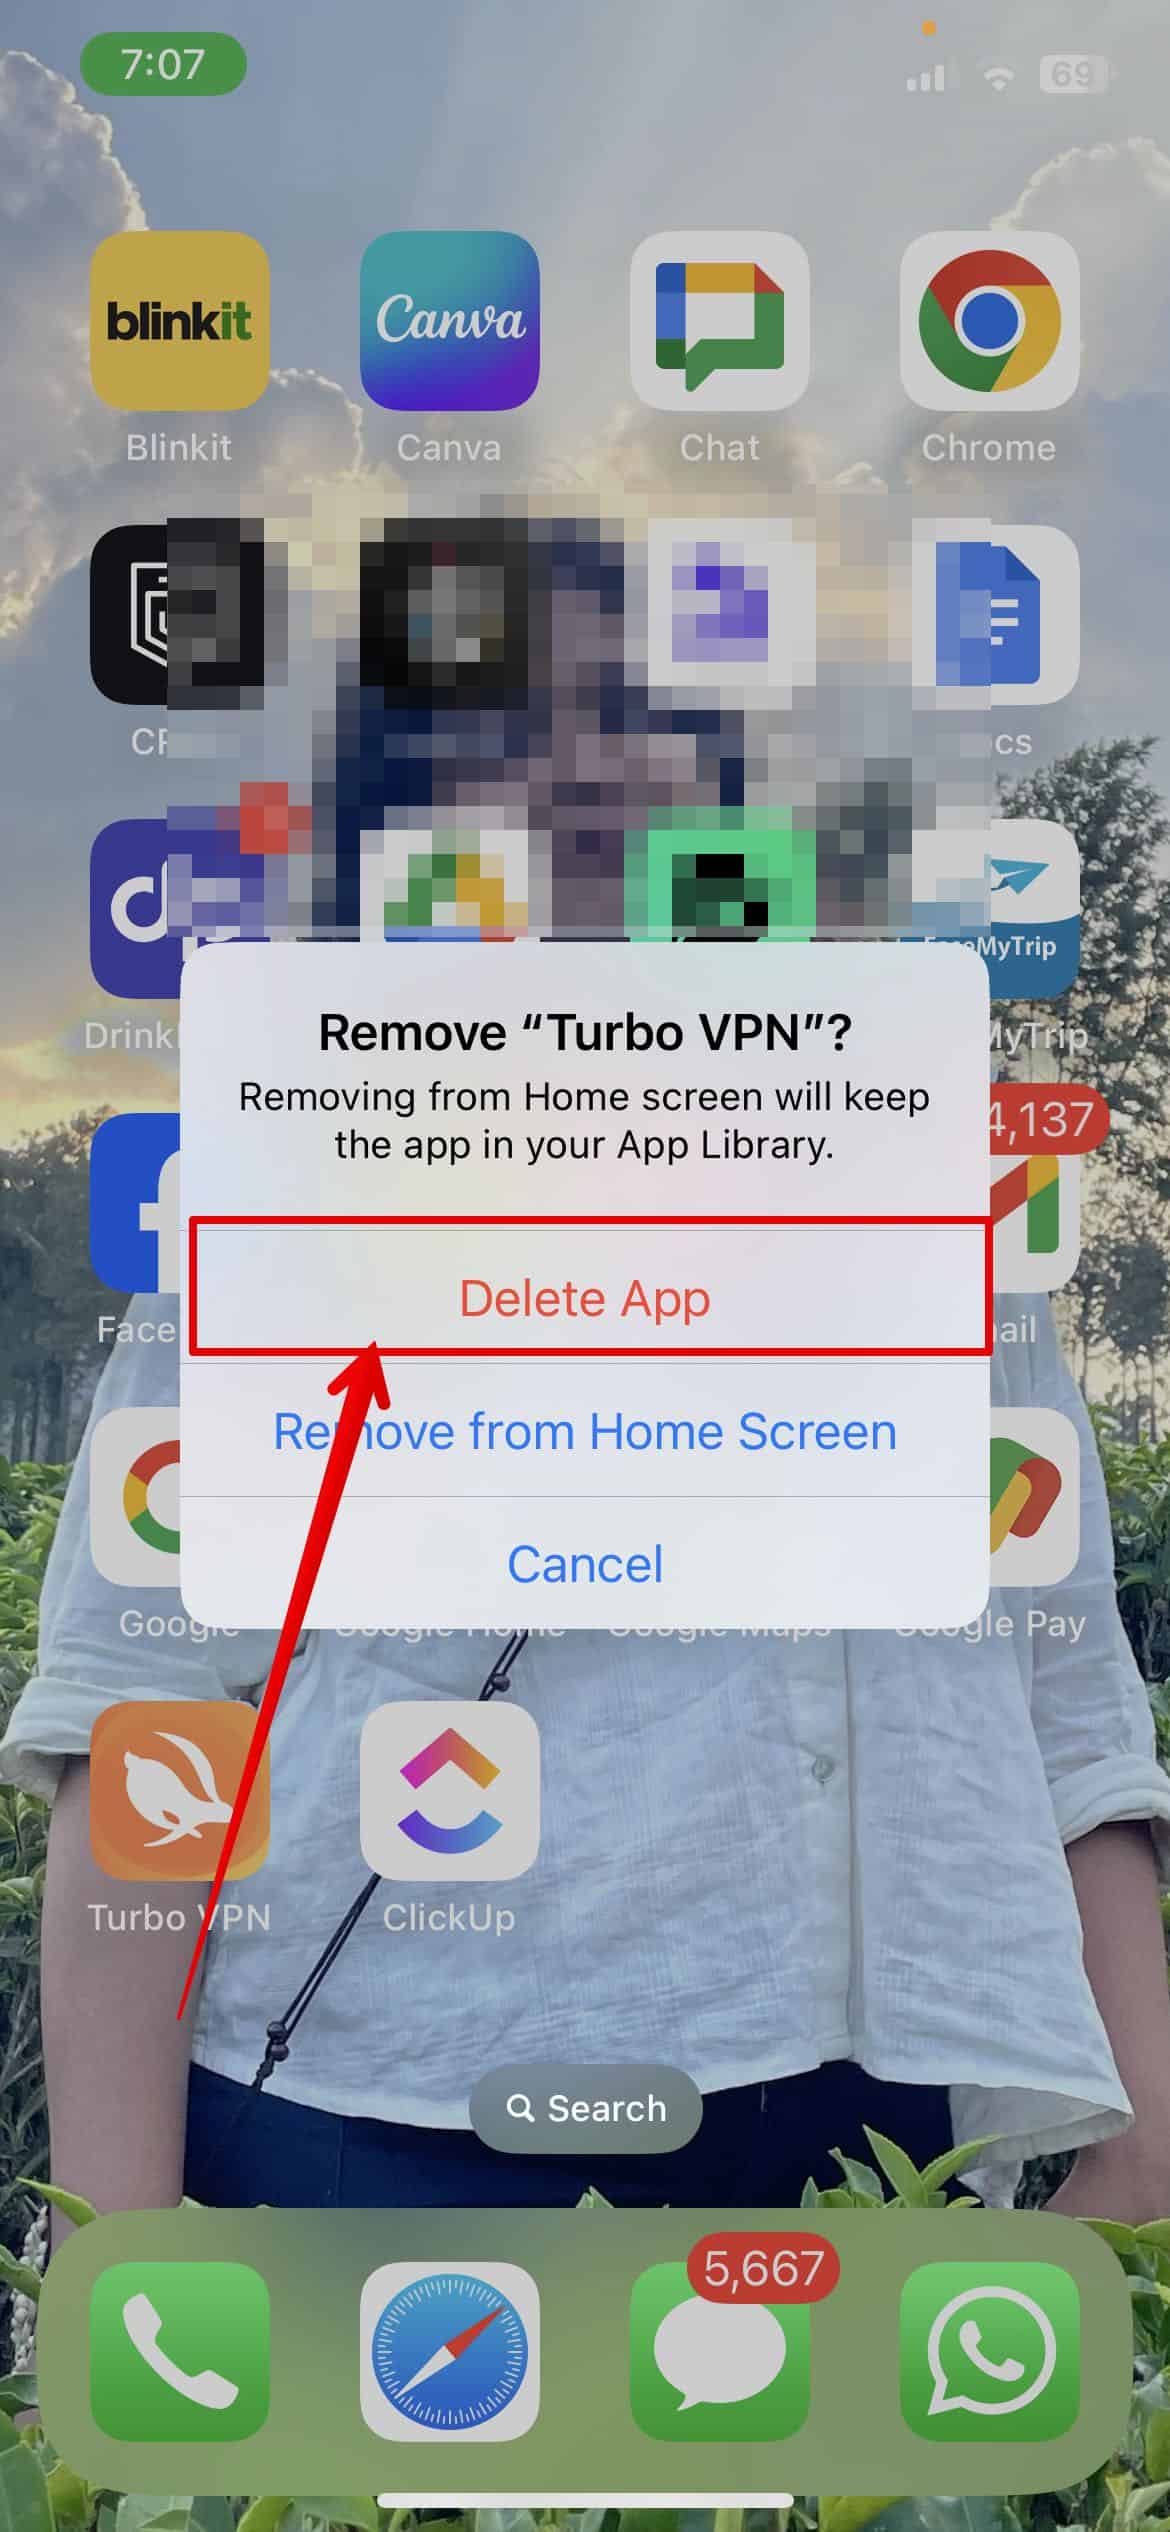
- Tap on Delete App to confirm.
Once the update is complete, you can reinstall the app.
3. Free Up Storage
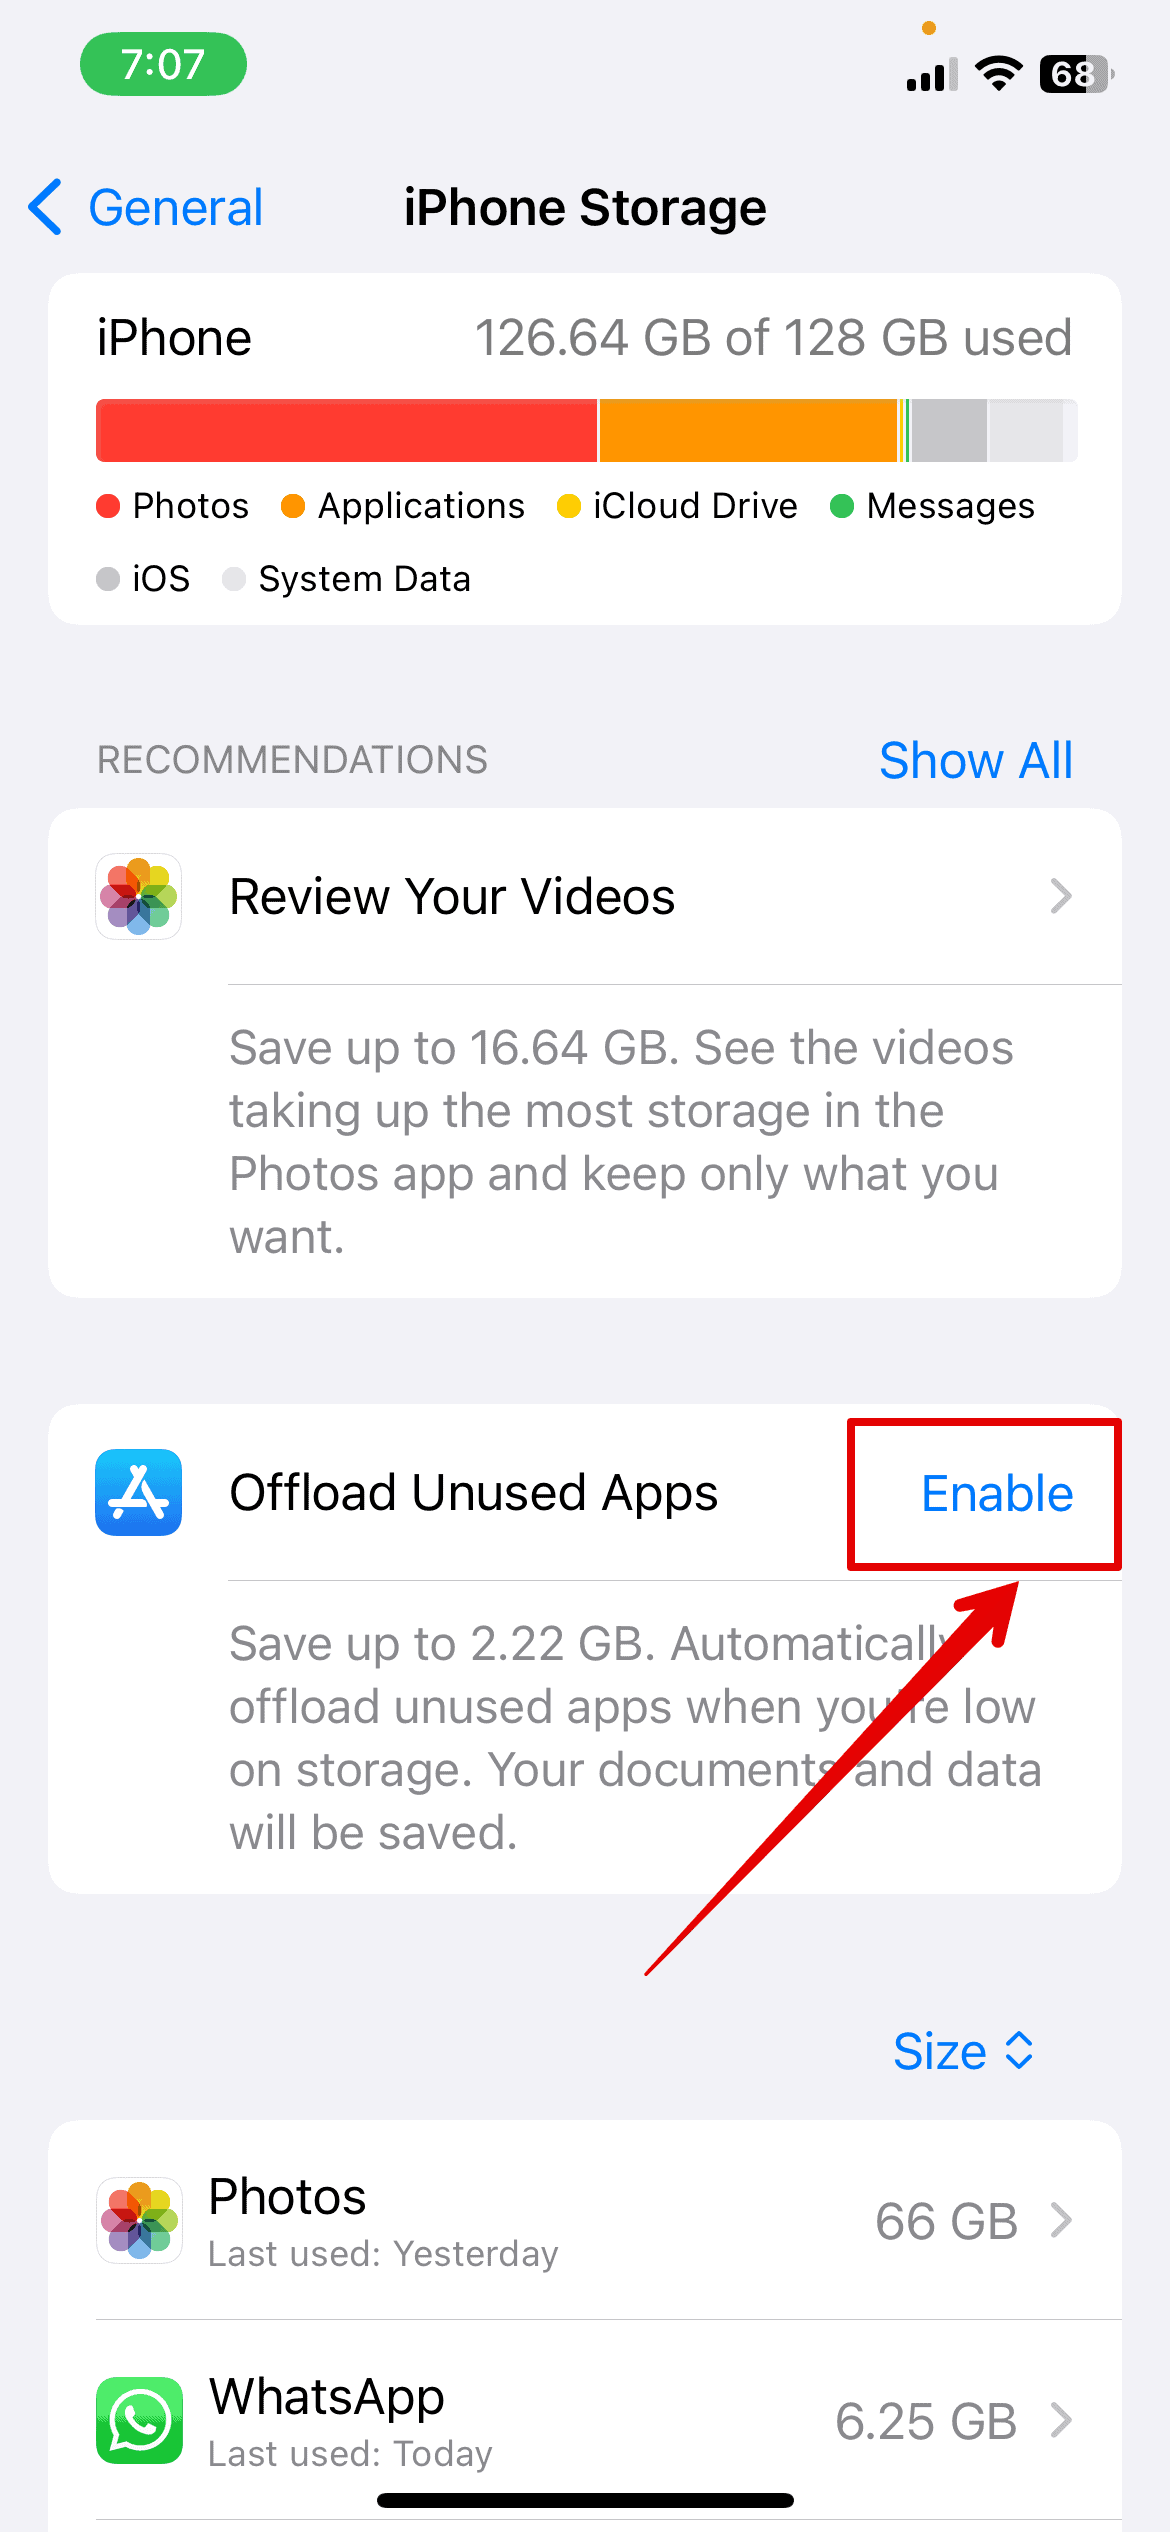
One of the major reasons you are getting an error while updating the iOS is because of insufficient storage space. Try out these steps to check and ensure you have enough storage:
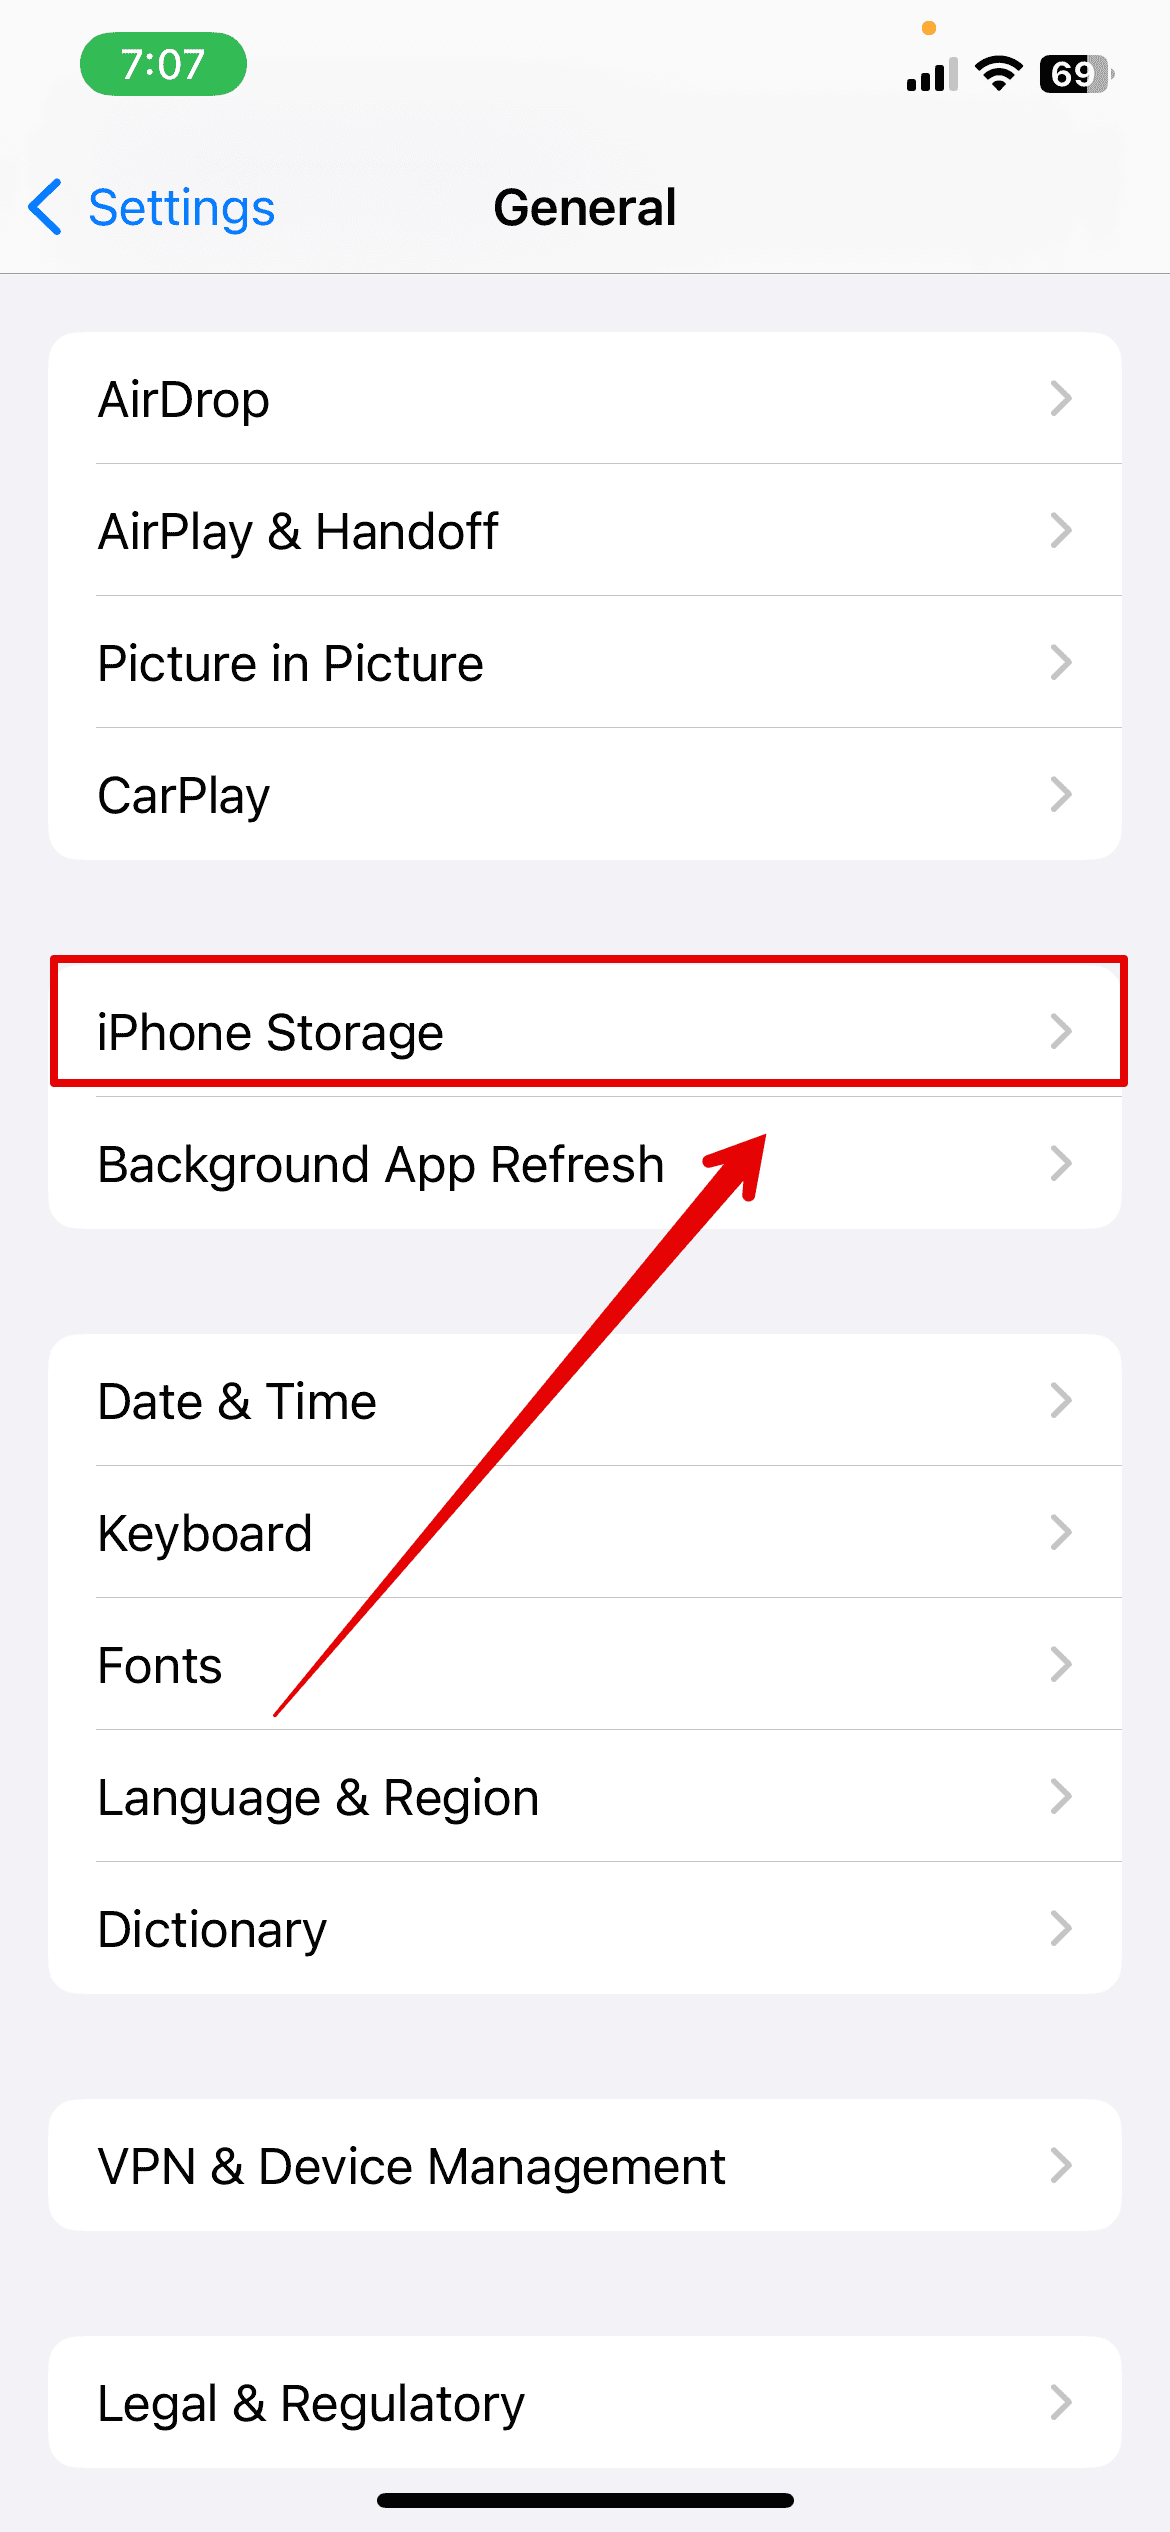
- Open the Settings app and go to General.
- Tap on iPhone Storage.
- Check the current available storage on your device.
- To free some space, delete large videos and images from your iPhone.
- Or, tap on Enable beside Offload Unused Apps to automatically remove apps you don’t use frequently. This will not delete your app data.
- Also, empty the Recently Deleted album in the Photos app.
4. Force Restart Device
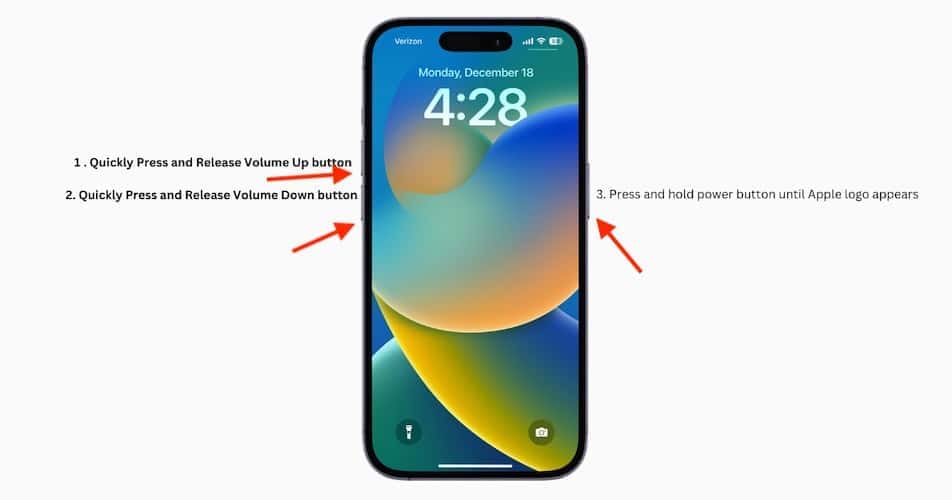
If your iPhone has any temporary software bugs or errors, you can eliminate them by force-restarting your device.
- Press and quickly release the Volume Up button.
- Press and quickly release the Volume Down button.
- Then, press and hold the side button on your iPhone.
- Release the button once you see the Apple logo appear on the screen.
5. Update Your Device Through the Computer
You can try updating your device by connecting it to your computer if none of the above methods are working for you.
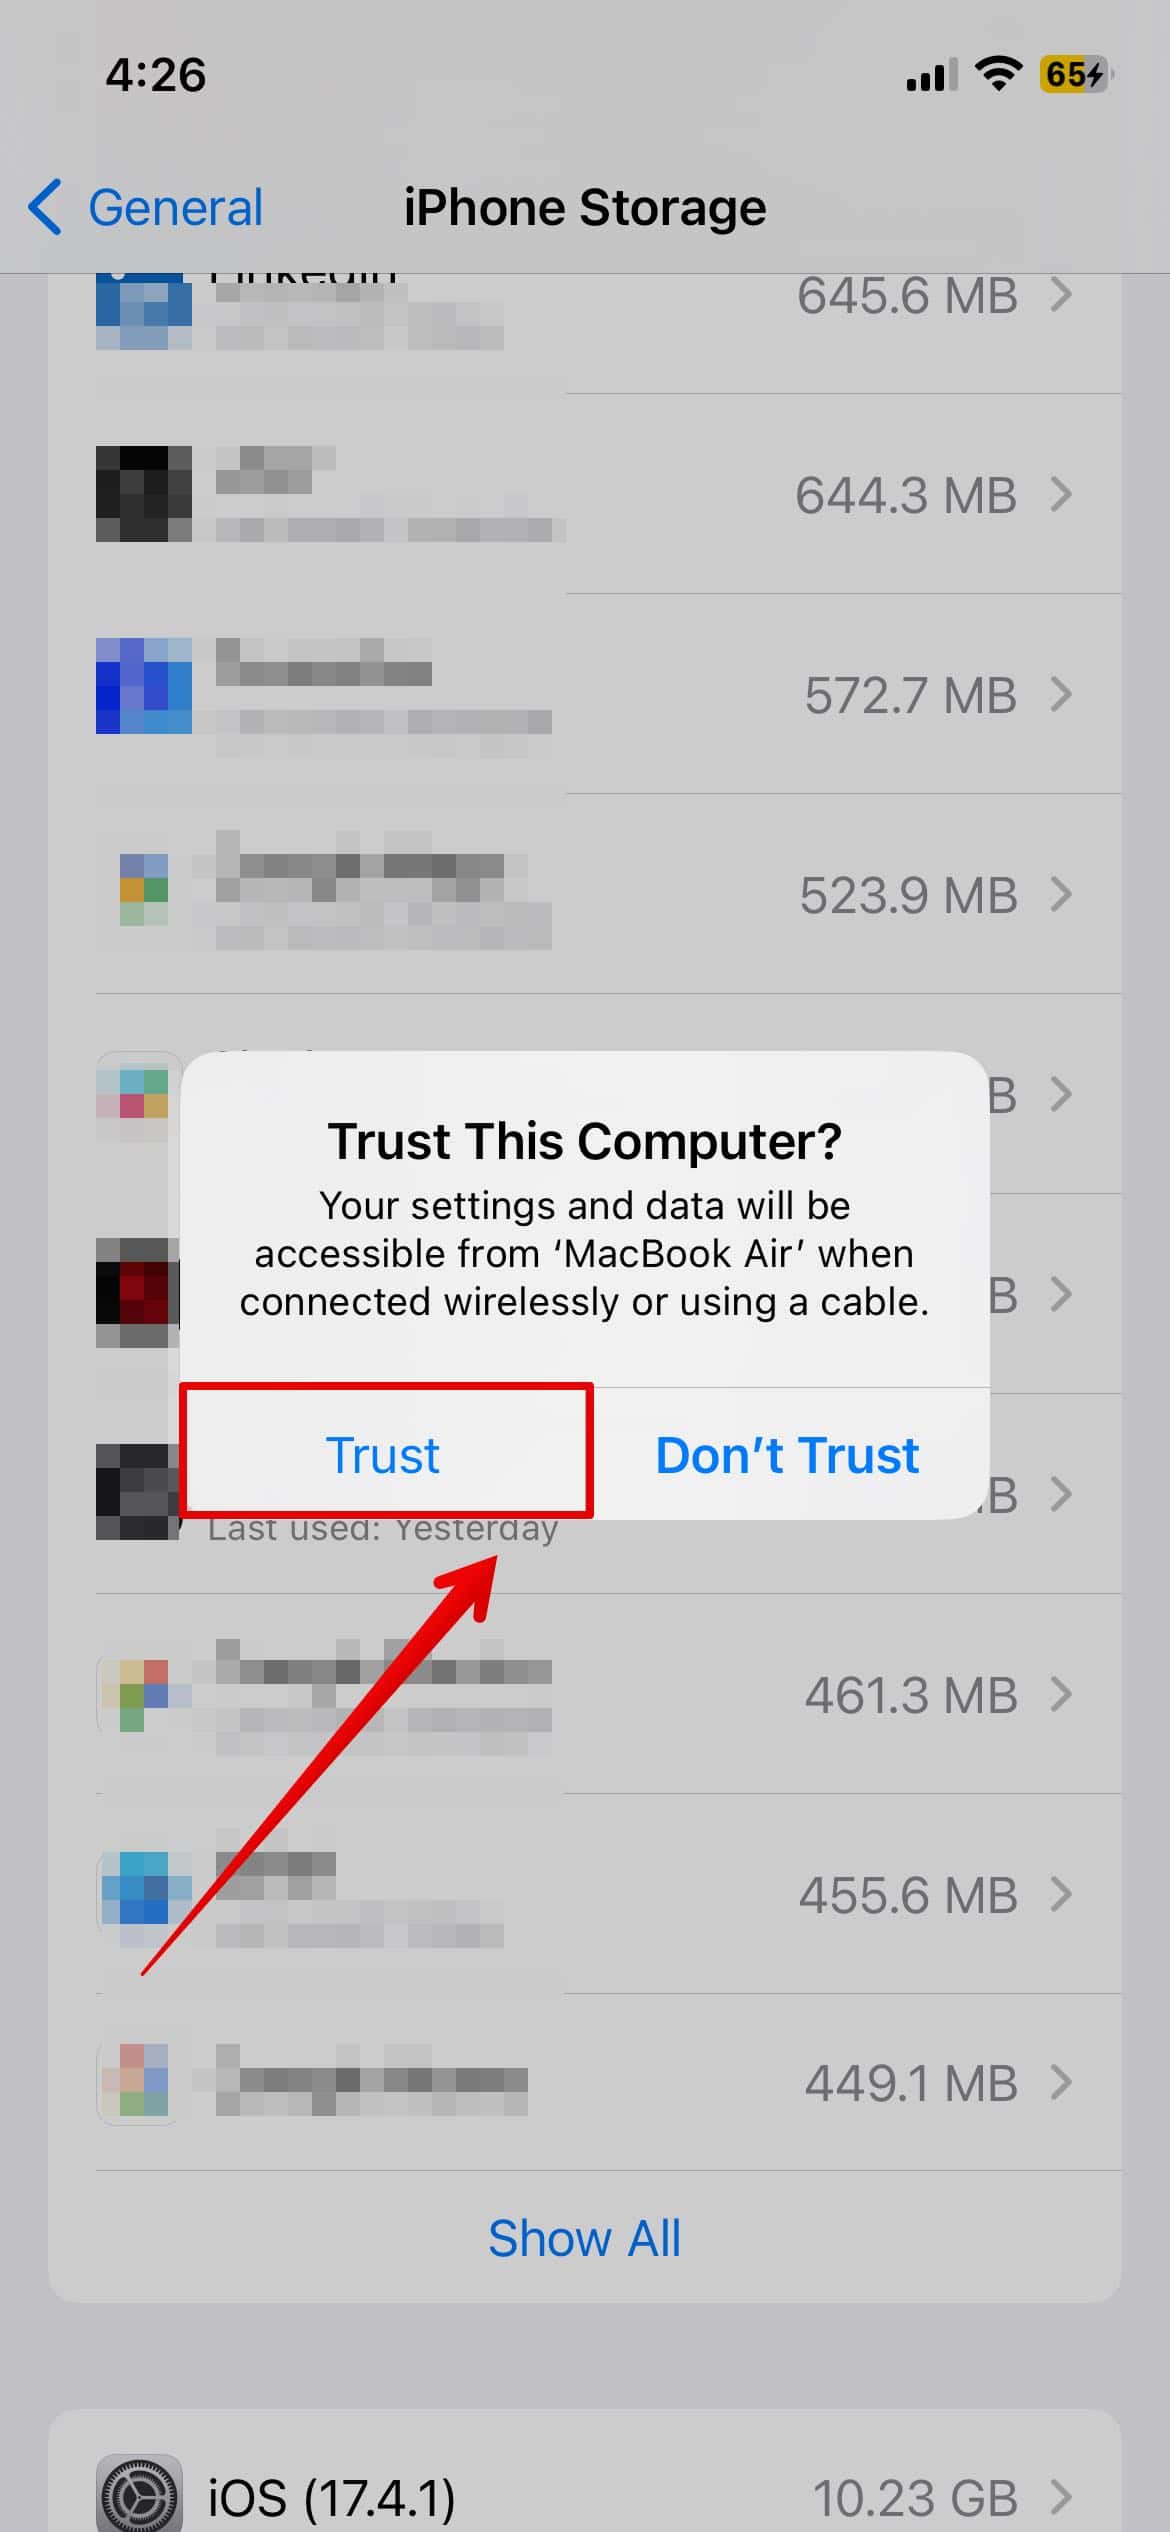
- Connect your iPhone to your computer using a cable.
- Tap on Trust on your iPhone to allow your Macbook to connect with your computer.
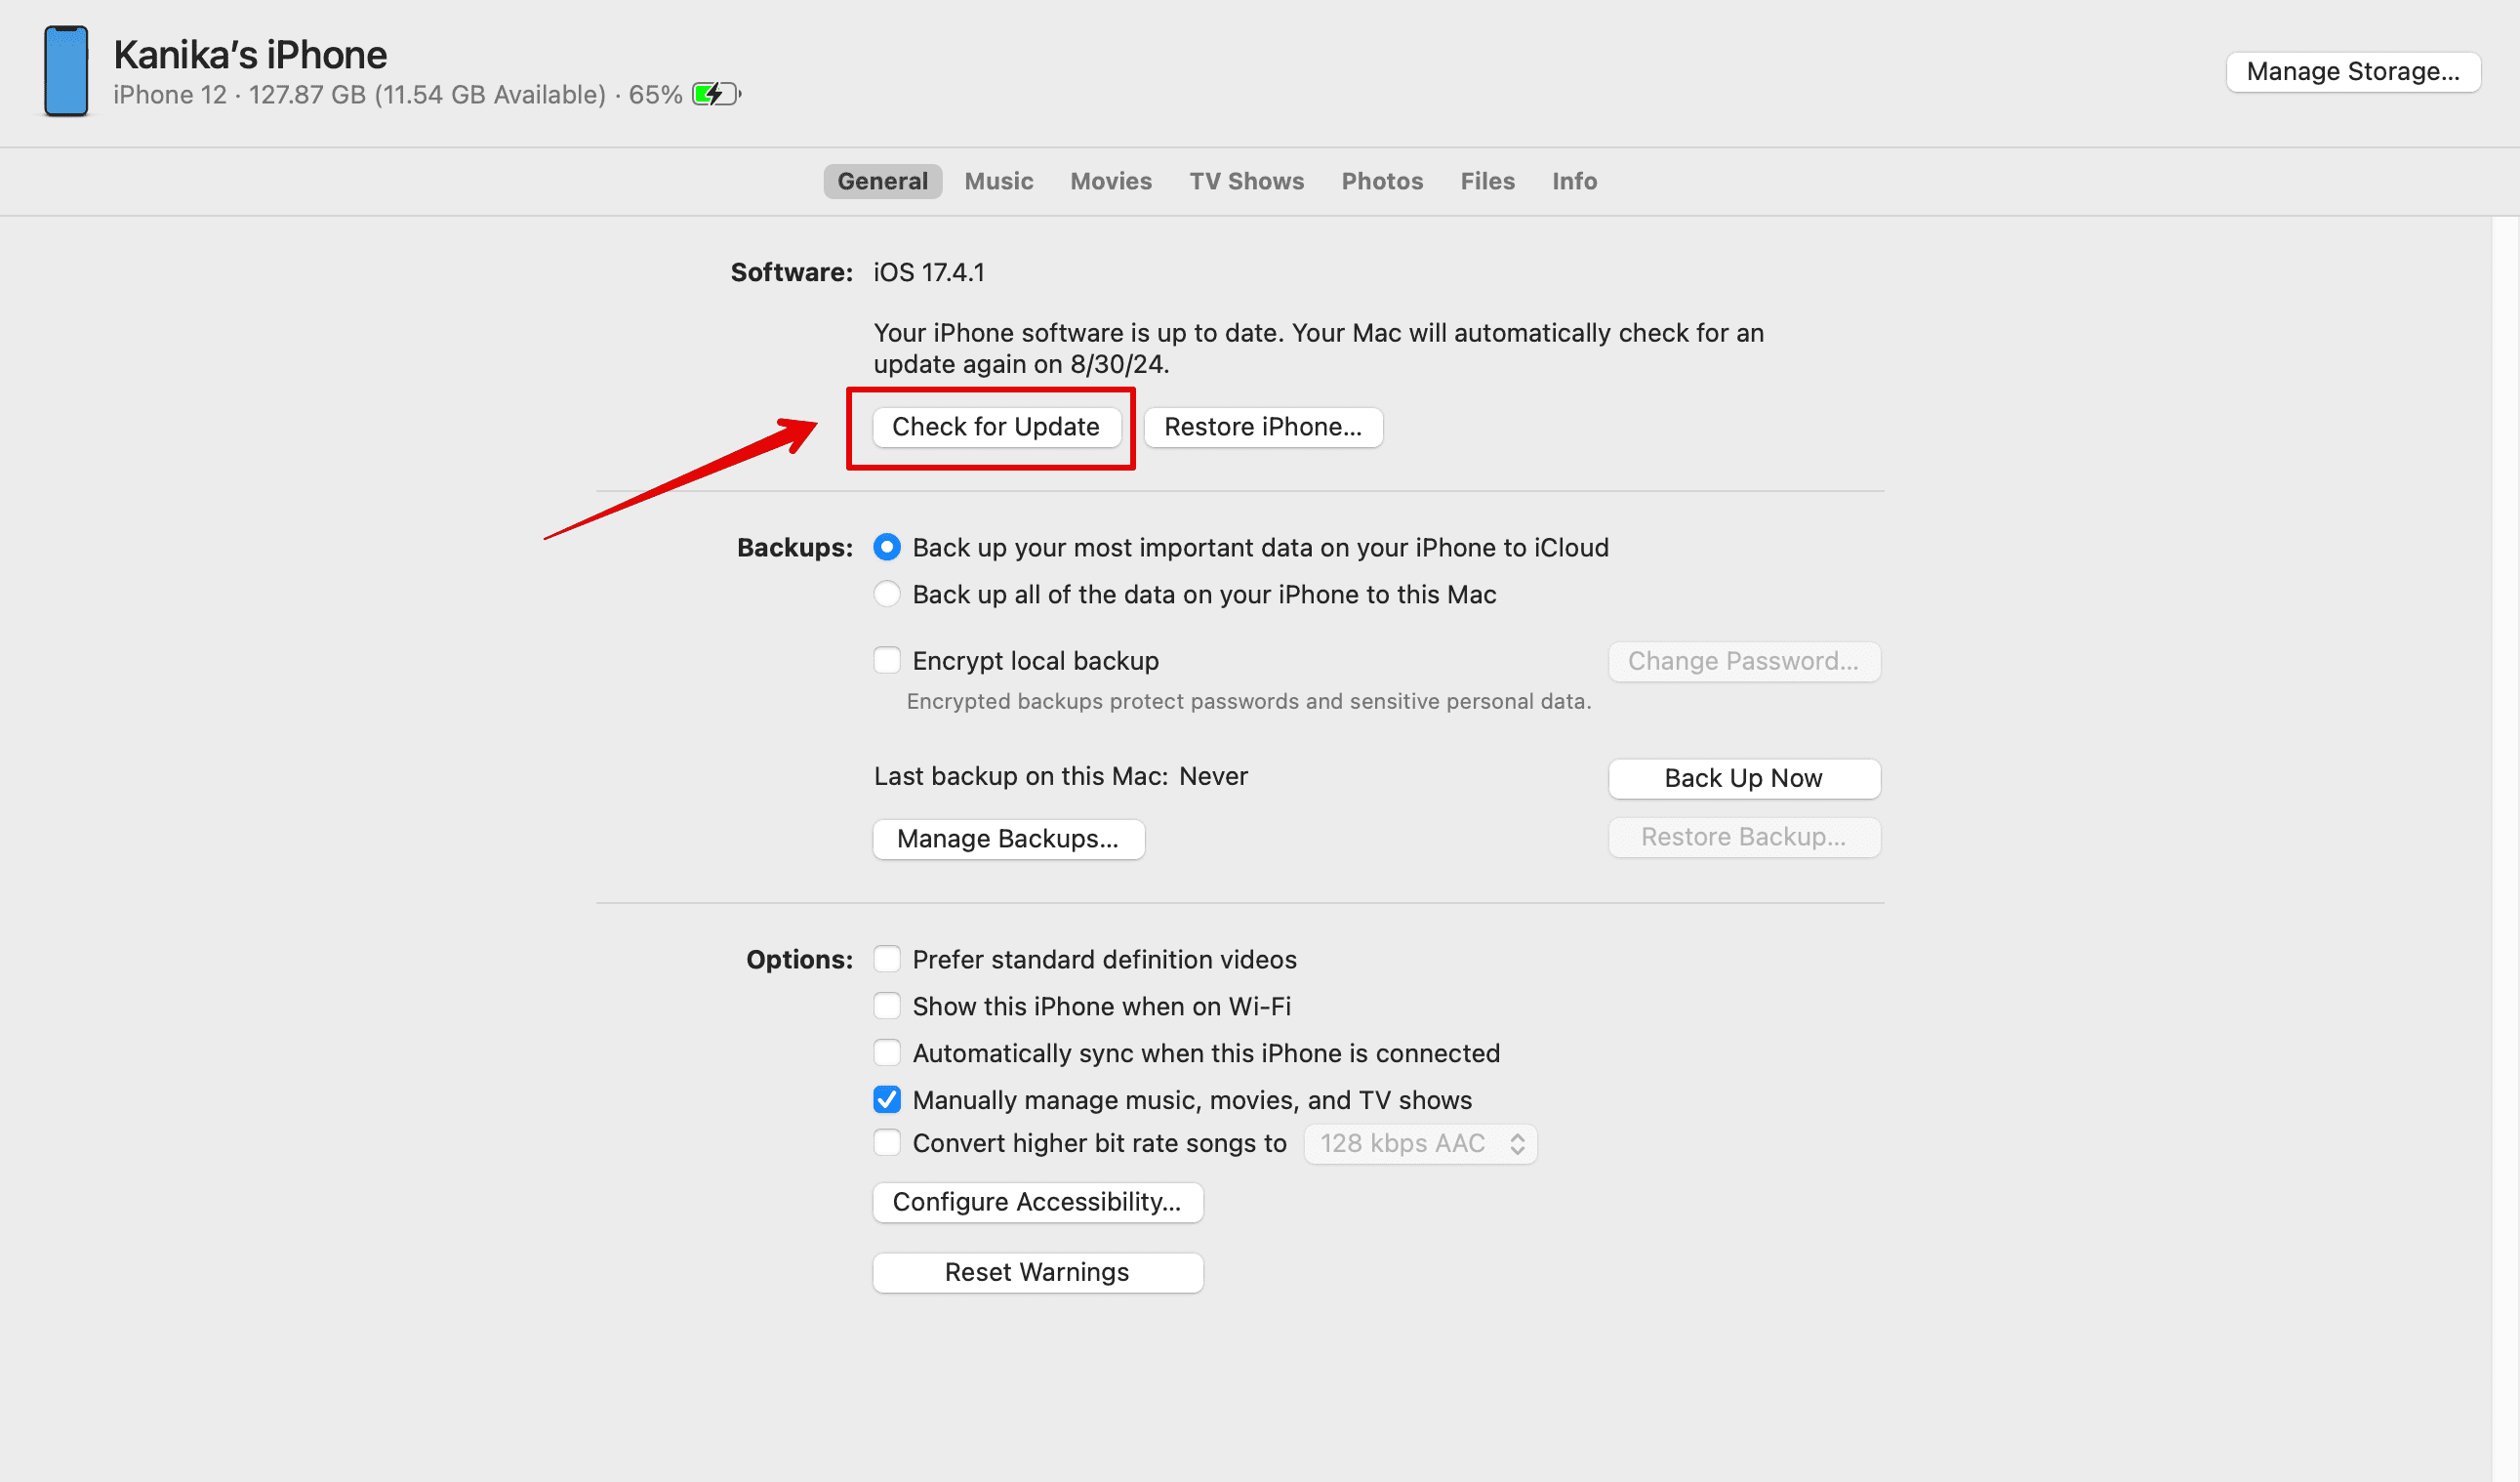
- Now, open Finder on your Mac and look for your device under Locations.
- Tap on Check for Update.
- Wait for a few seconds while the system checks for any available updates.
- Select Download and Update to continue.
- Follow the on-screen instructions to complete the update process.
6. Remove Beta Software Program
If you are part of the Apple Beta Software Program, it could conflict with the official release update. It’s best to unenroll your account while troubleshooting.
- Open the Beta Software Program official website.
- Sign in with your Apple ID.
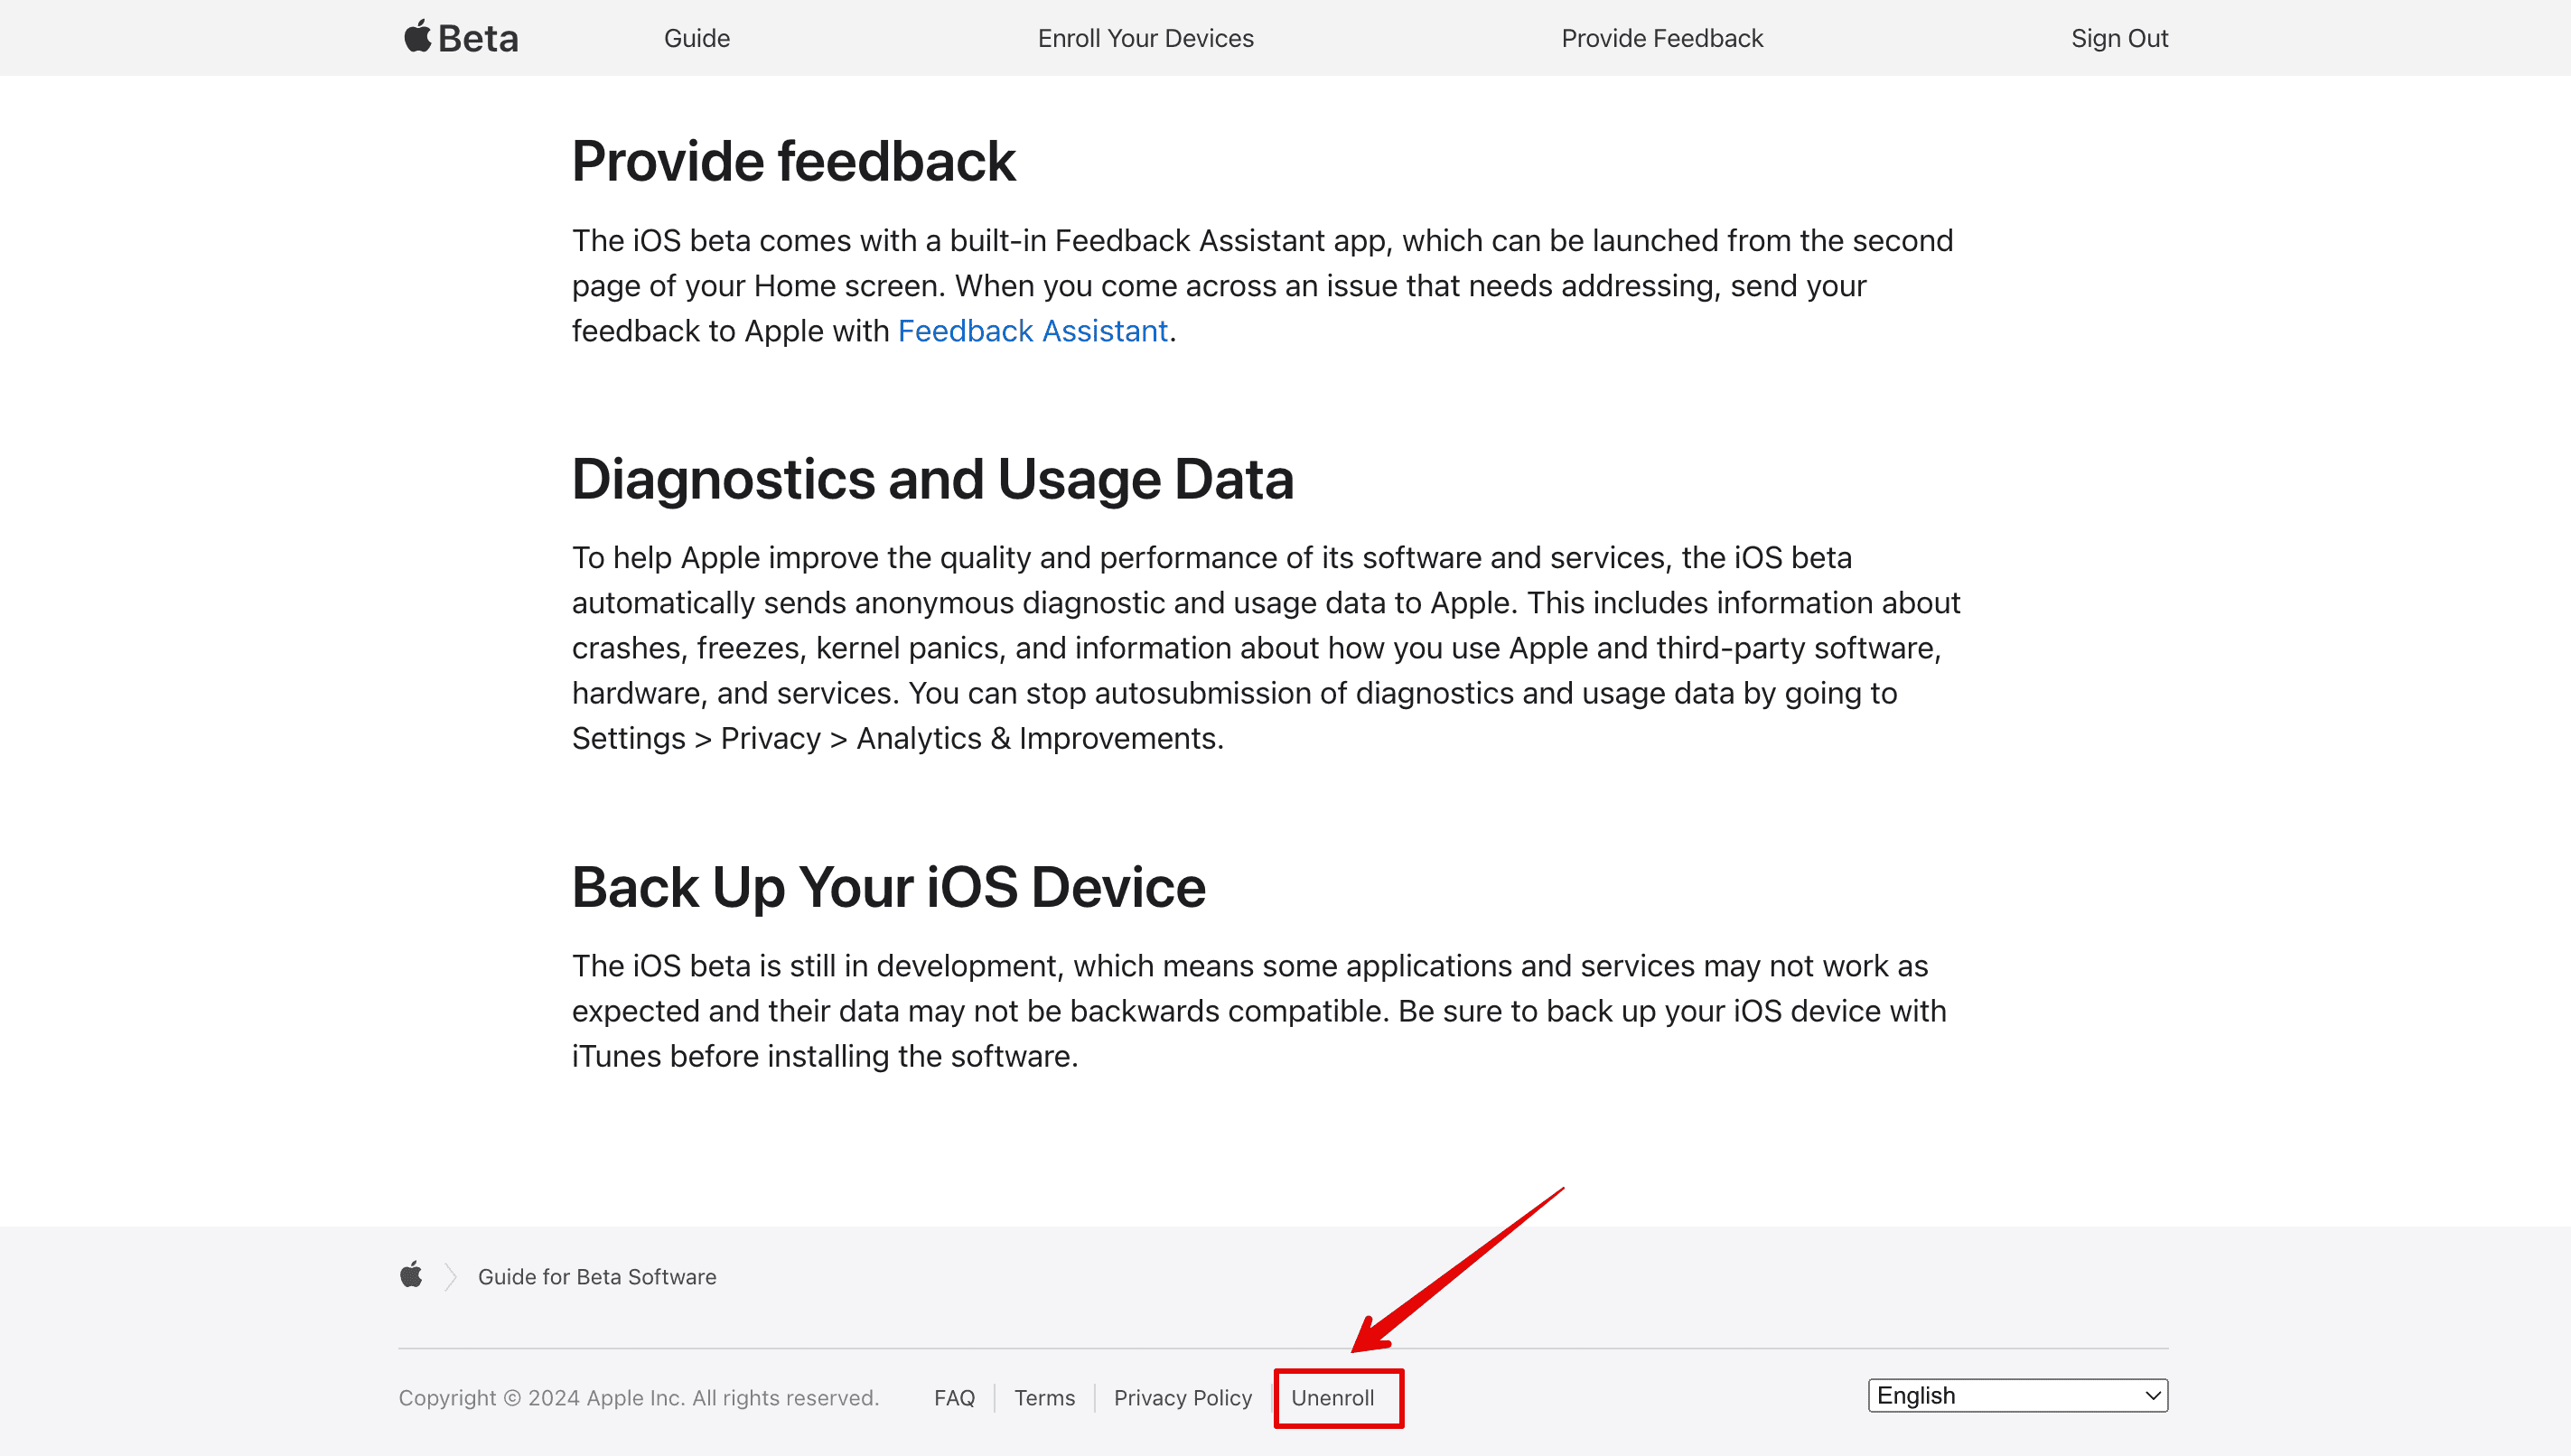
- Now, scroll down to the bottom of the screen and tap on Unenroll.
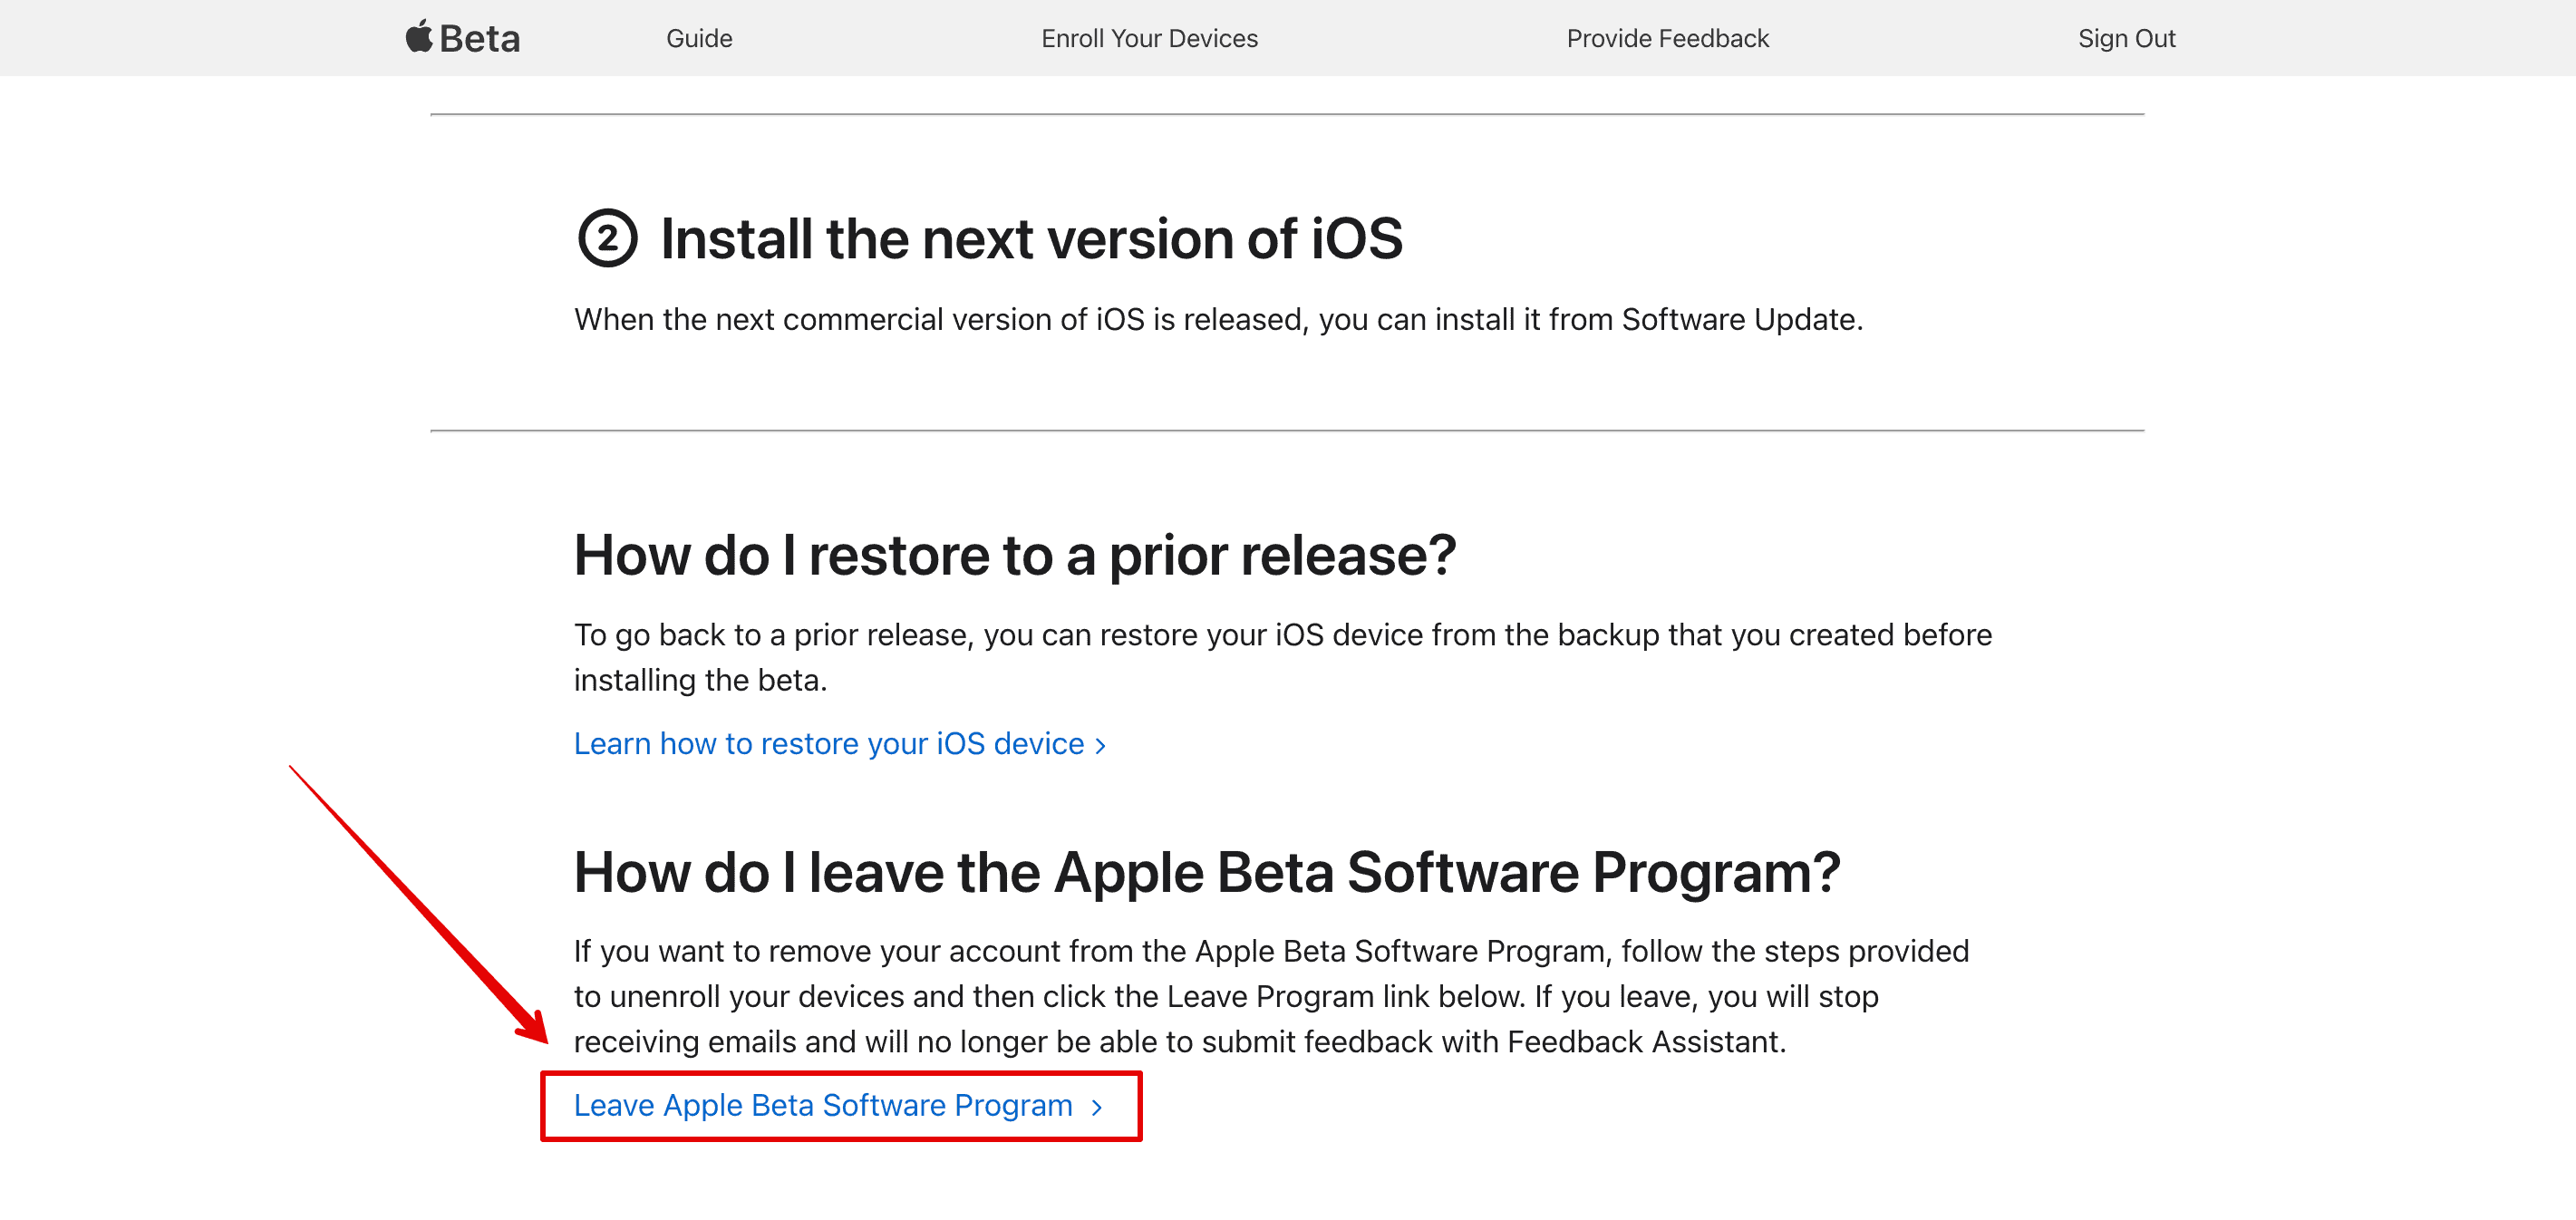
- Click on Leave Apple Beta Software Program.
- Then, select Leave Apple Beta Software Program on the screen to confirm.
- Restart your iPhone to refresh and try updating your device again.
If nothing seems to be working, contact Apple Support via their official website. Explain all the necessary steps you have already taken and they might be able to help you further with additional troubleshooting methods.
