
Many users have reported being stuck in a loop while installing the latest macOS Sonoma version on their MacBooks. Even after following the installation process by the book, the system still says that macOS Update 14.7 can’t be installed. If you are facing this issue, try the fixes mentioned below.
What To Do If You Can’t Install macOS Sonoma 14.7?
This error could be due to a lack of storage space, compatibility issues, or even software bugs preventing you from downloading the update through the standard process.
However, you can try to install the update in other ways:
1. Use Safe Mode
You can enter Safe Mode to install the macOS Sonoma 14.7 update.
Safe Mode loads only essential system software, bypassing possible issues that cause the installation problem. Furthermore, it can also prevent third-party software from interfering with the installation process.
Let’s check out the steps below.
1.1 For Apple Silicon Mac
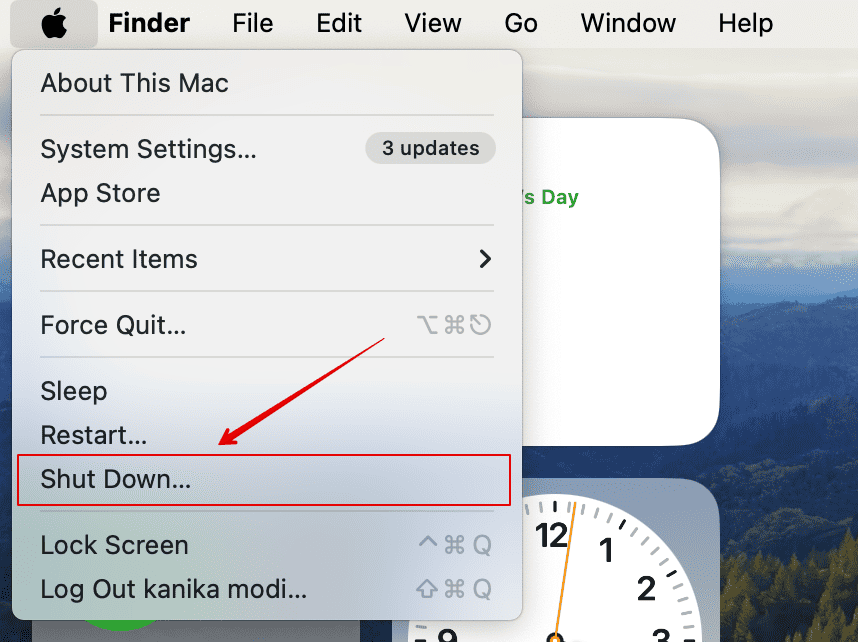
- Go to the Apple Menu on the top-left corner of the screen.
- Click on Shut Down.
- Once the system is completely shut off, press and hold the power button.
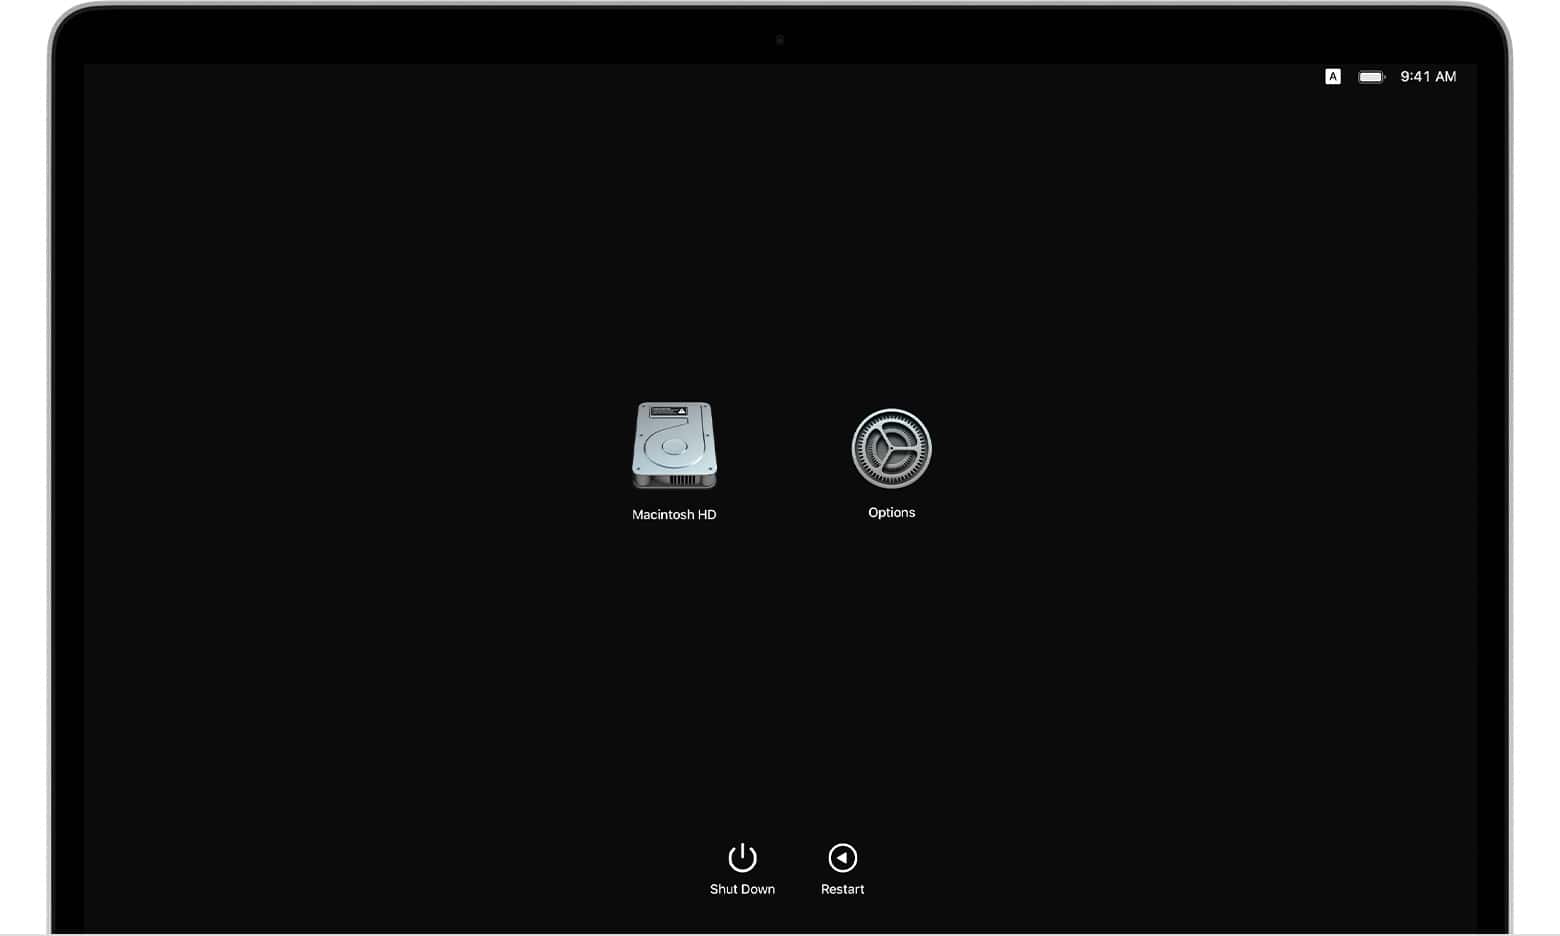
- Release the button when you see “Loading startup options” appear.
- Select a Volume.
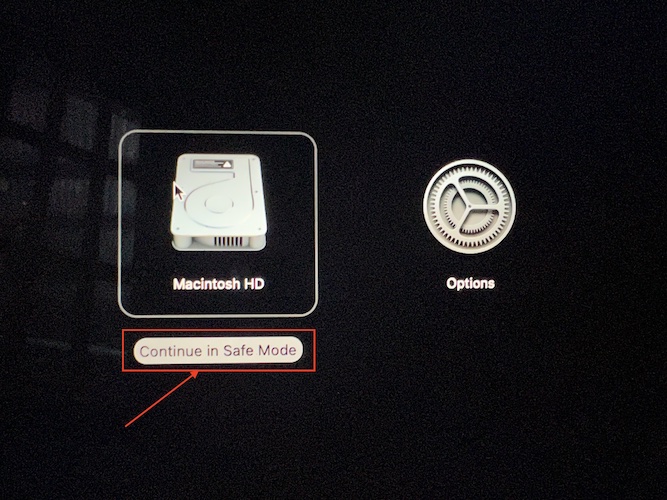
- Now, press and hold the shift key.
- Click on Continue in Safe Mode below the Volume name.


Your Mac will now restart. Enter your login credentials to enter into your MacBook. While logging in, you will see Safe Mode written at the top.
1.2 For Intel-based Mac
- Go to the Apple Menu on the top-left corner of the screen.
- Click on Restart.
- When the system shuts down, press and hold the Shift Key.
- Release the button when you see the Login Window.
- Log in to your Mac.
You have now entered the Safe Mode. From here, you can update the system the usual way and check if the issue persists.
2. Check System Requirements
If you cannot update your Mac through Safe Mode, it could be because your system is incompatible with the macOS Sonoma 14.7 version. Hence, checking the system requirements before trying other methods mentioned in this guide is necessary.
Here is an extensive list of all the MacBooks that support macOS Sonoma.
- iMac (2019 and later)
- Mac Pro (2019 and later)
- iMac Pro (2017)
- Mac Studio (2022 and later)
- MacBook Air (2018 and later)
- Mac Mini (2018 and later)
- MacBook Pro (2018 and later)
3. Free Up Storage Space
We all know that macOS Sonoma updates are huge. Many of us often tend to ignore the fact that your Mac may not have ample space to download this version.
Hence, you can check the current status of your storage and free up some space.
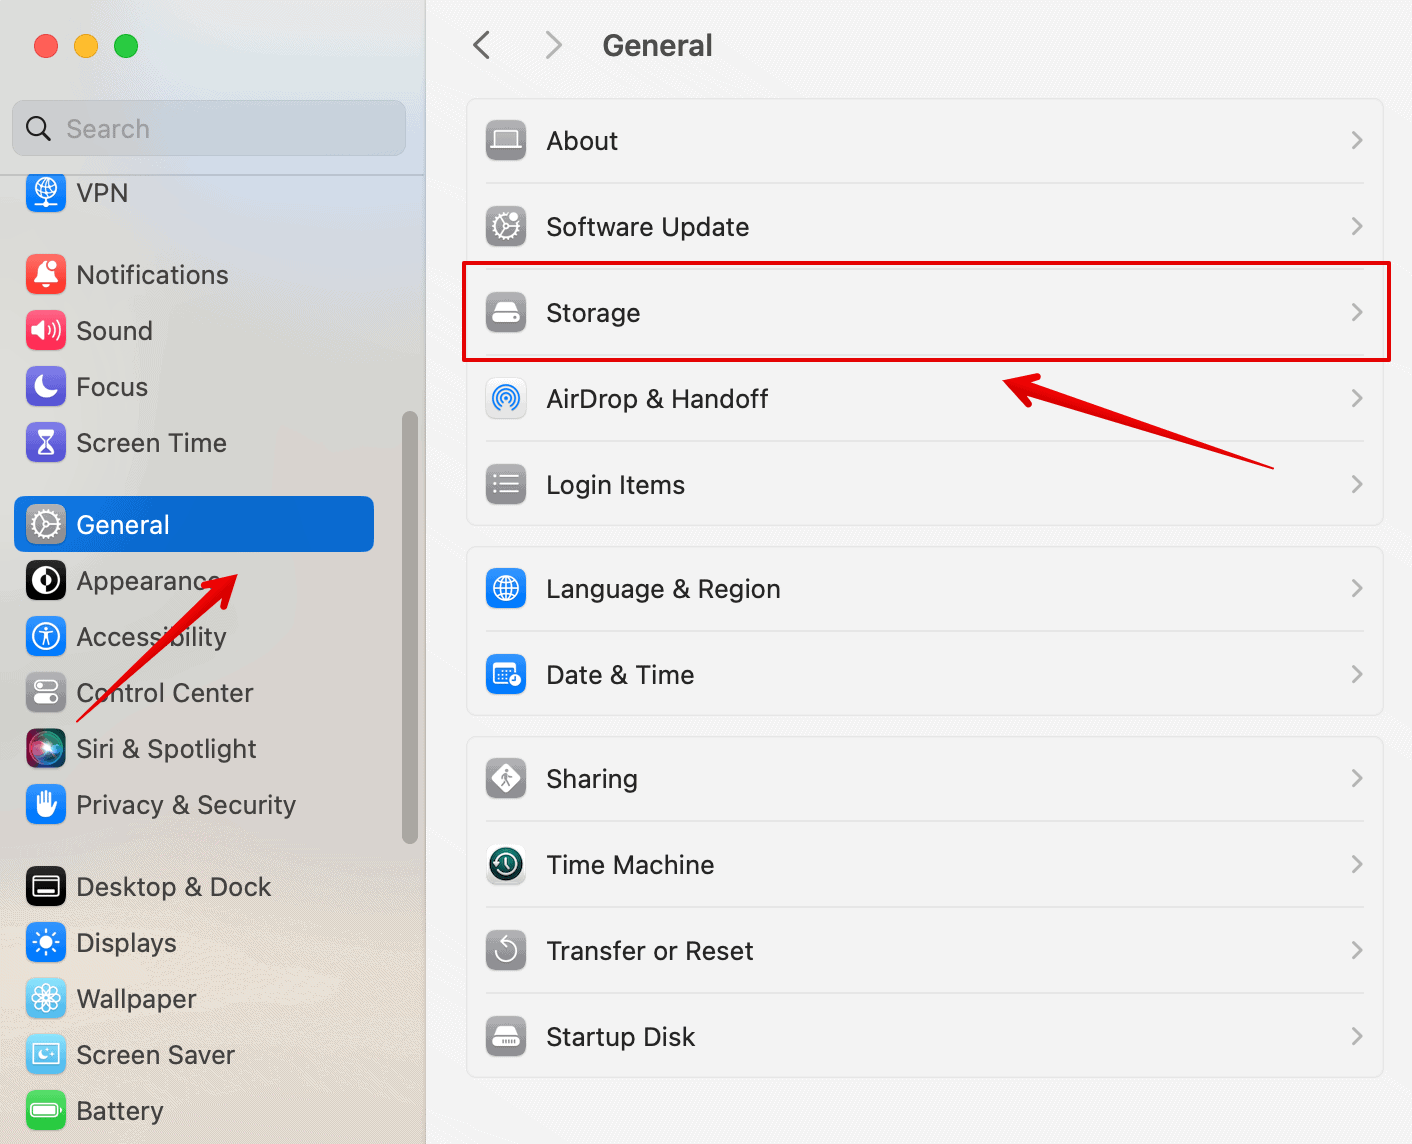
- Go to the Apple menu and open System Settings.
- Then, click on General on the left sidebar.
- Select Storage.
- Check out all the apps and folders that take up the most space.
- Click on the i icon for detailed info.
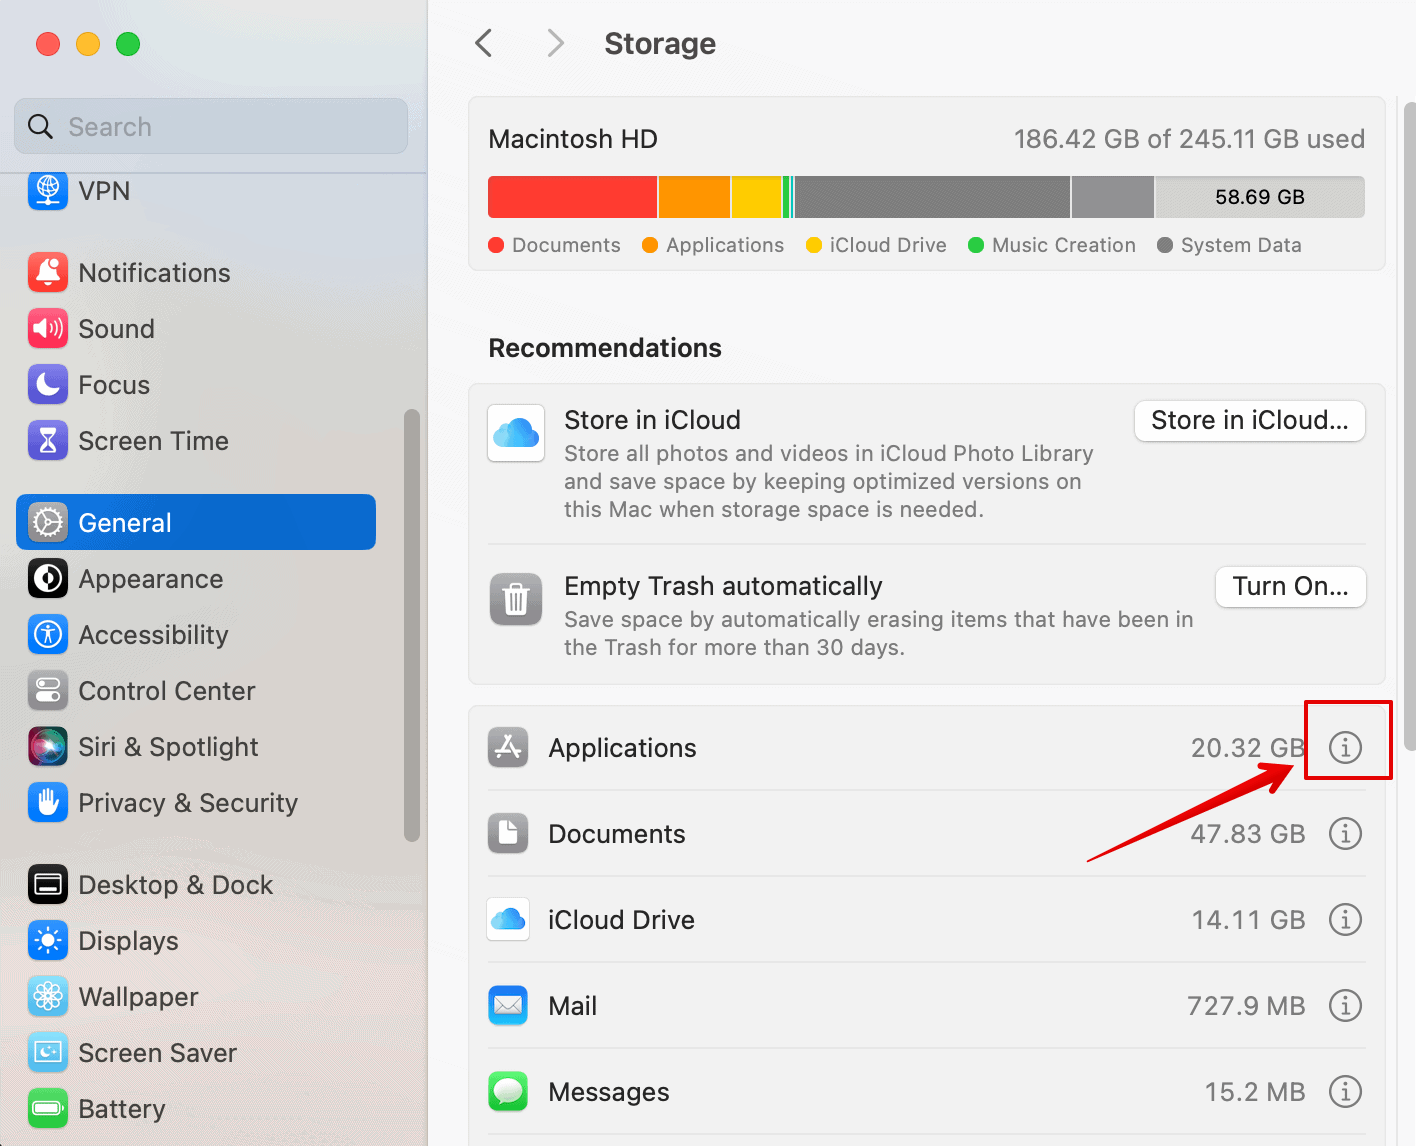
- Select the files you want to delete and click on Delete below.

Keep repeating this till you have enough storage space and update to macOS Sonoma 14.7. If you’re looking for faster options for saving storage space, you can use trustworthy cleaning apps. In my experience, the Intego Washing Machine app met my requirements because it has a specific macOS and iOS cleaning mechanism that will help you thoroughly clean your Mac and optimize its storage space significantly.
➡️ Try Intego Washing Machine here
4. Download it Manually From the App Store
Since the above installation methods are not working, you can download the updated files directly from the App Store.
Sometimes, downloading the macOS update manually from the App Store can bypass issues encountered with the Software Update method. This ensures a fresh download of the update files, which may resolve any corrupted or incomplete downloads causing the installation problem.
Here is how you can do it.
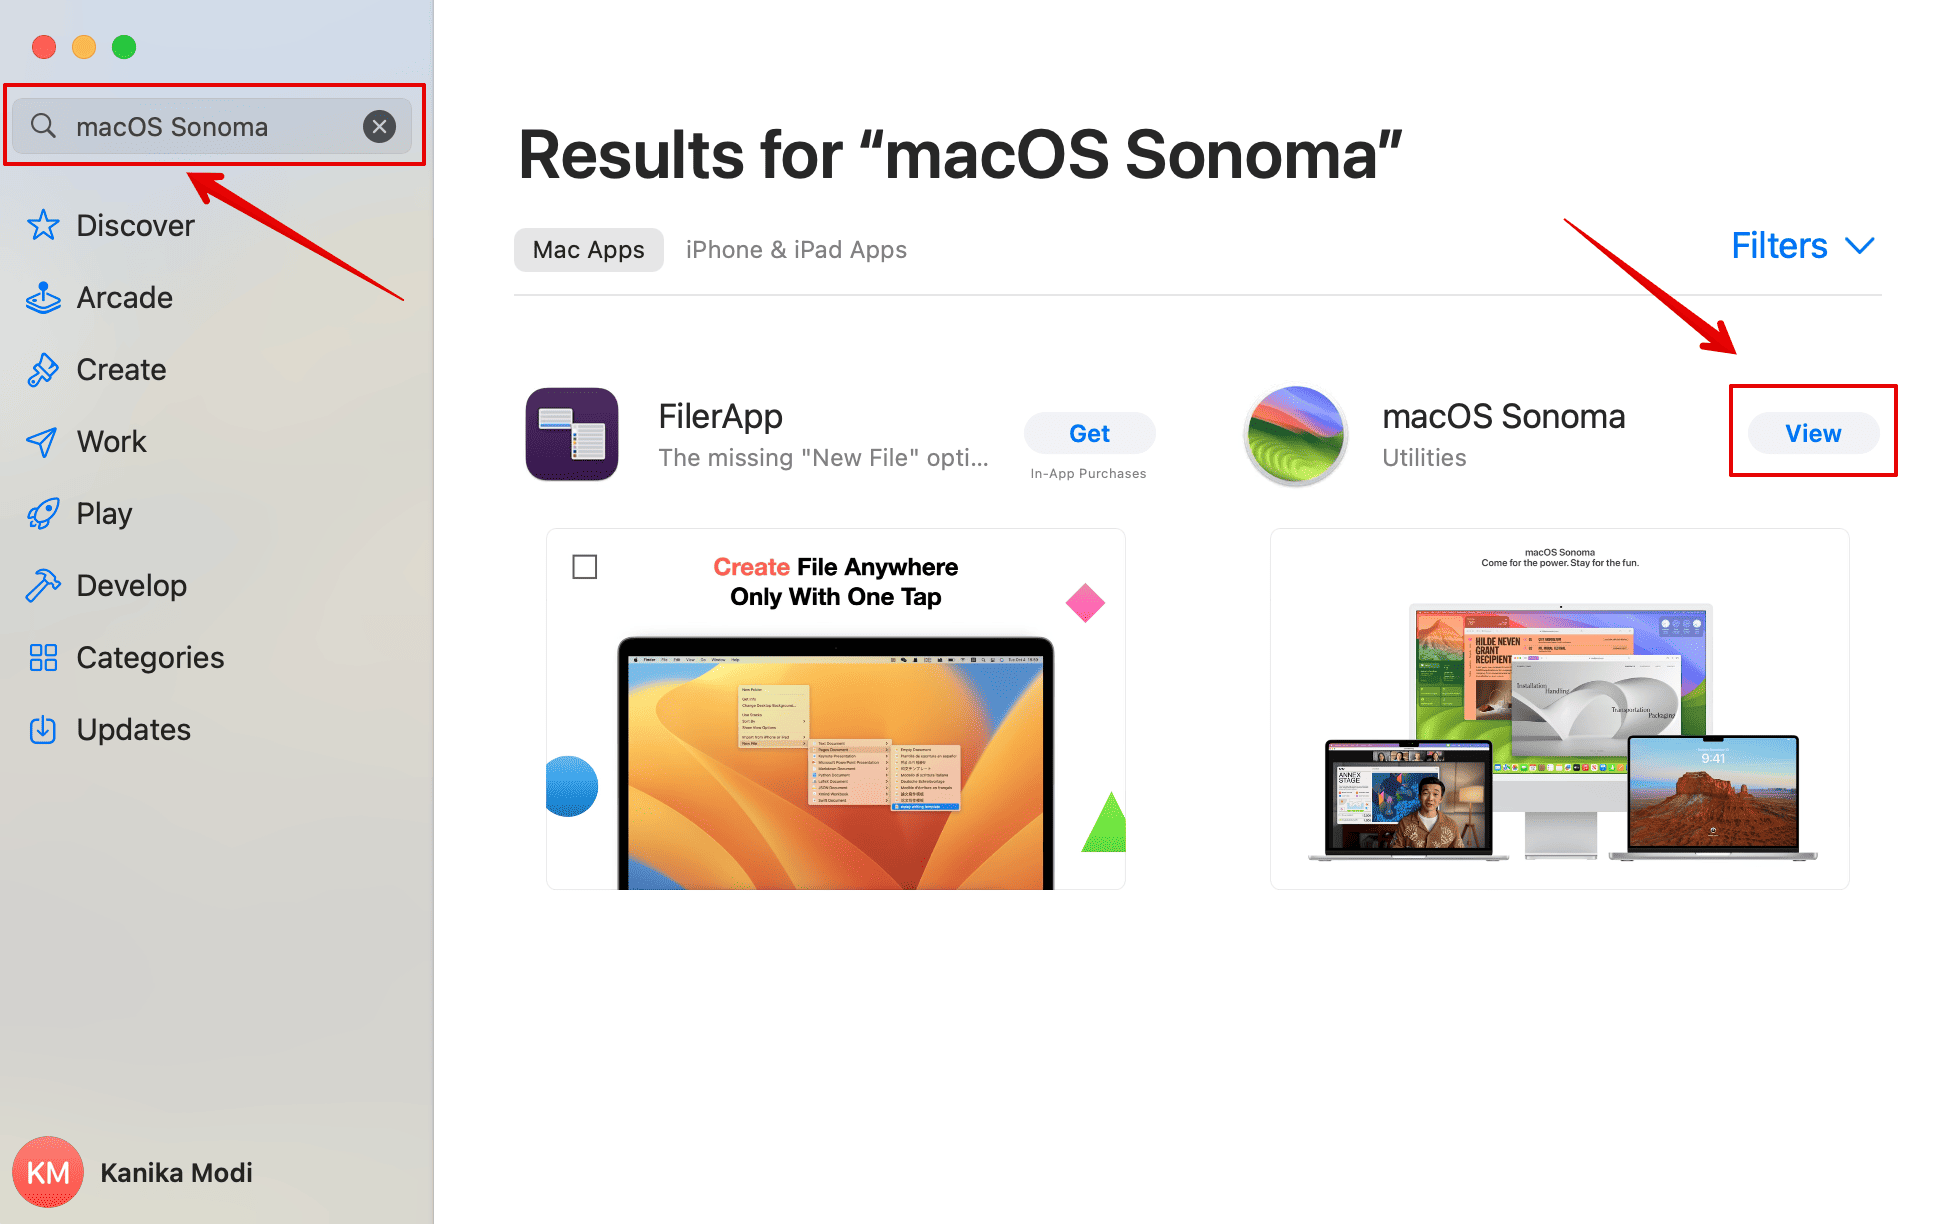
- Open the App Store from the Dock.
- Then, type macOS Sonoma in the search bar.
- Click on View.
- Now, click on Get.
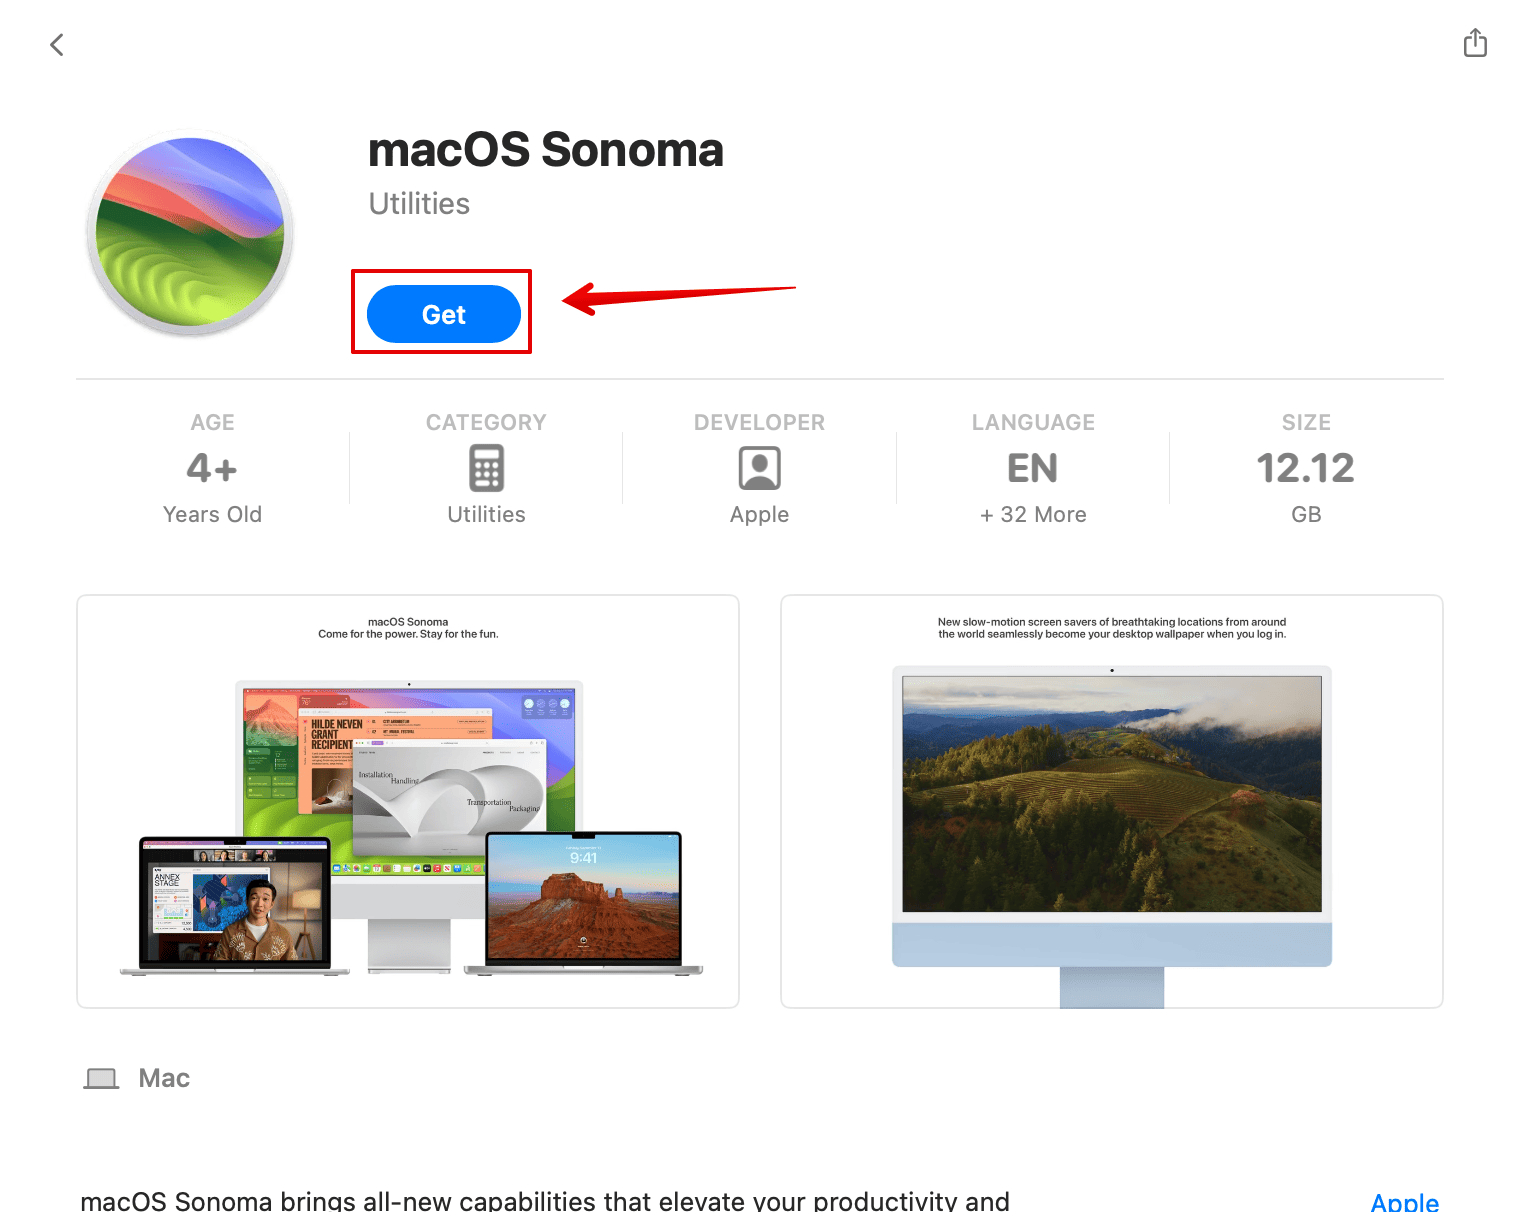
- The system will open the Software Update menu and the option to download the updated file.
- Click on Download.
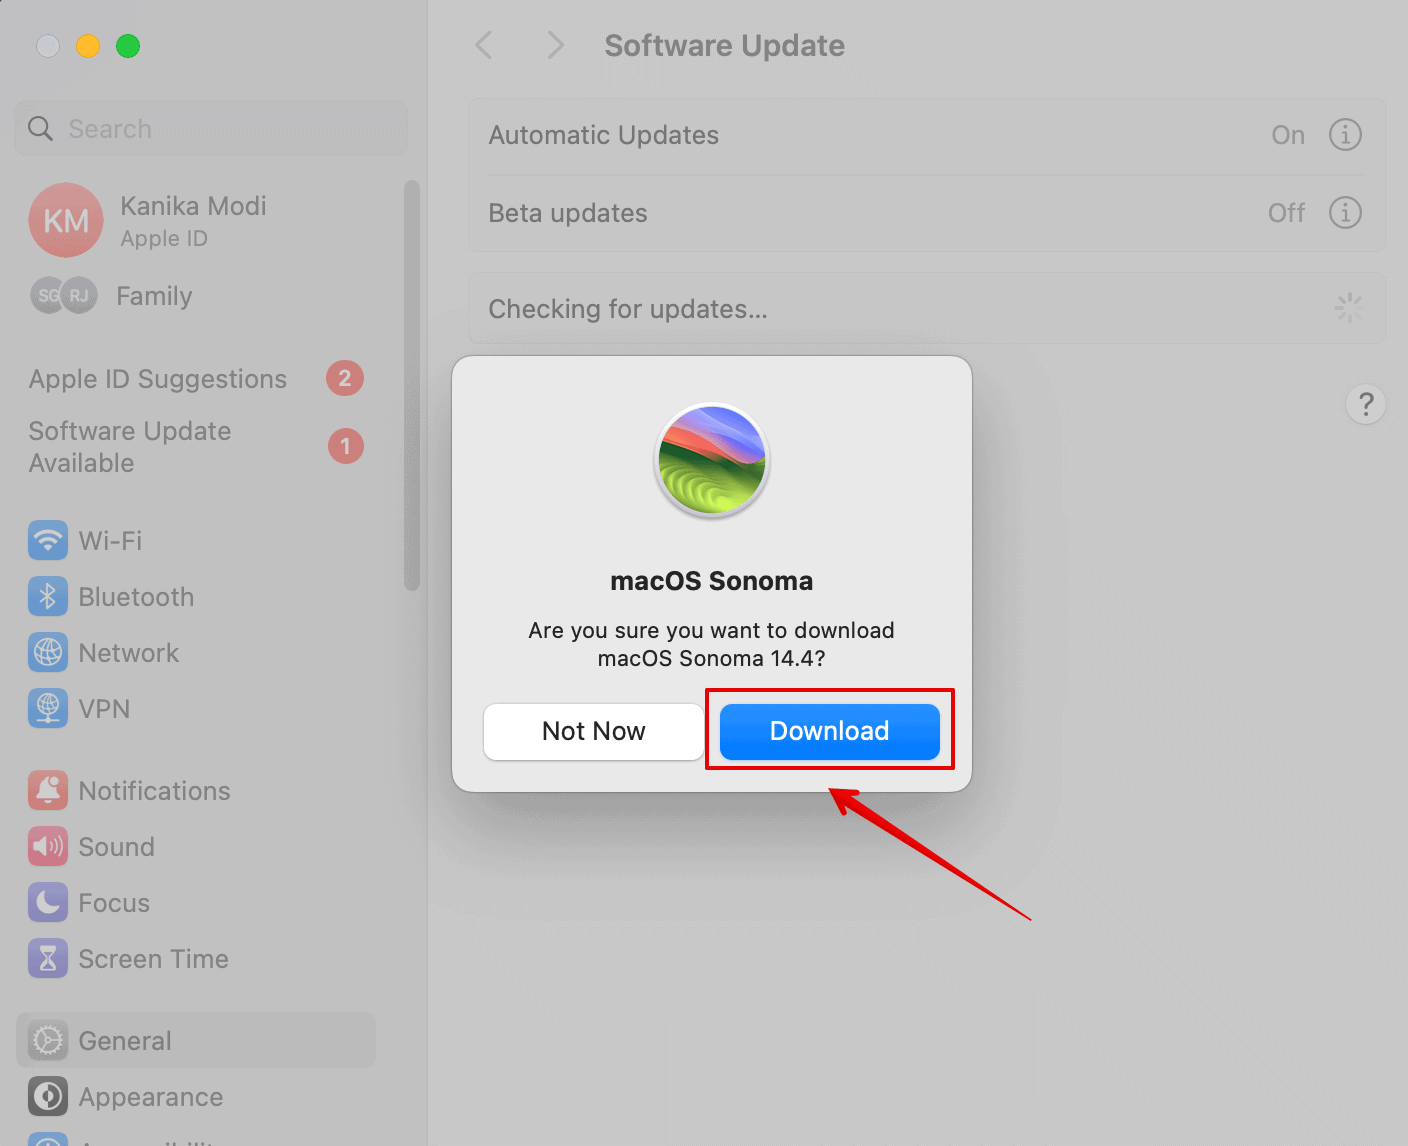


The update file will be downloaded to the Applications folder, and the installer will automatically open it to begin installation. However, you can choose to quit the process and install it later.
5. Create a Bootable Installer for macOS
This method does not involve using the Software Update method as we did in the abovementioned solutions.
Before moving ahead, make sure you have created a backup of your Mac using Time Machine to be on the safe side.
Let’s carefully check each step to create a bootable installer and get macOS Sonoma 14.7 on your system.
5.1 Get The USB Drive Ready
- Insert the USB drive with at least 16GB in your Mac.
- Then, press Spacebar + Command to open Spotlight Search.
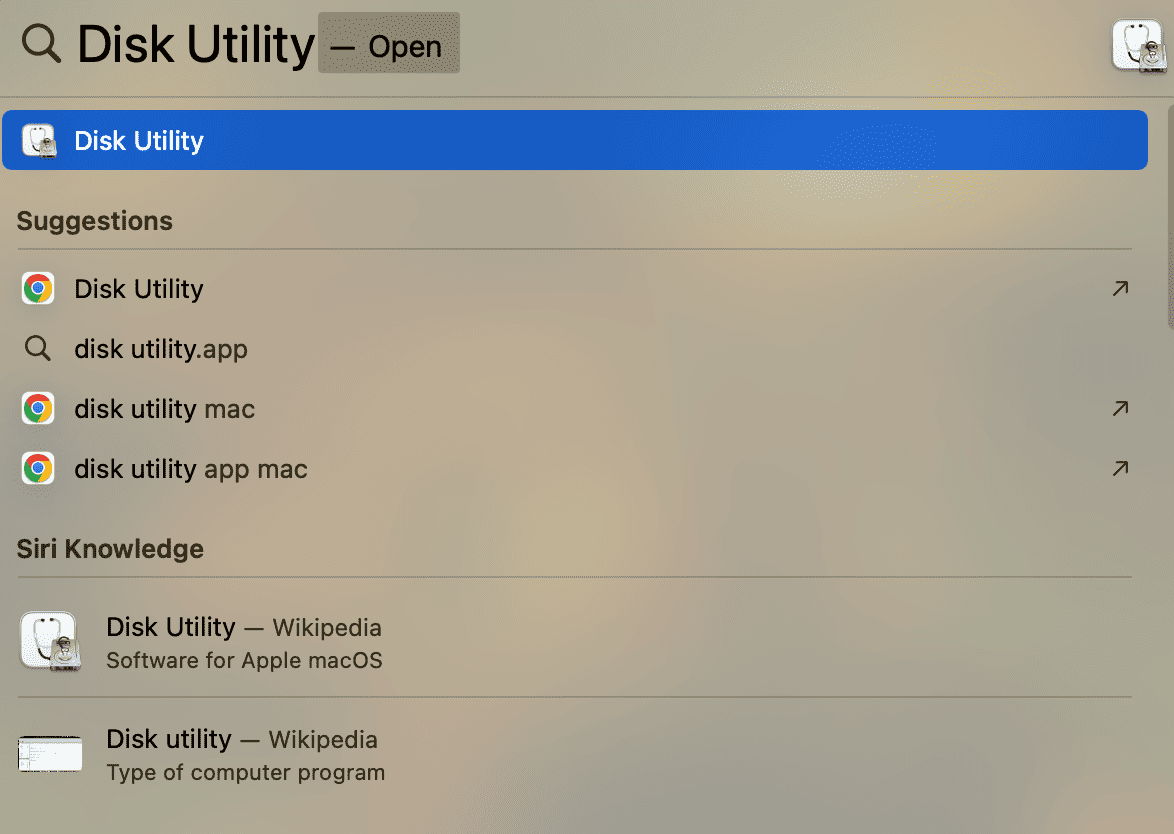
- Type Disk Utility and open it.
- Look for your USB on the sidebar and select it.
- Click on Erase on the top menu bar.
- Here, enter the name of your choice for the USB and select Format as MacOS Extended
- Click on Erase.


Now, you also need to download the macOS Sonoma installer file from the App Store.
5.2 Create A USB Installer
- Plug in the USB drive on your Mac.
- Then, press Spacebar + Command to open Spotlight Search.
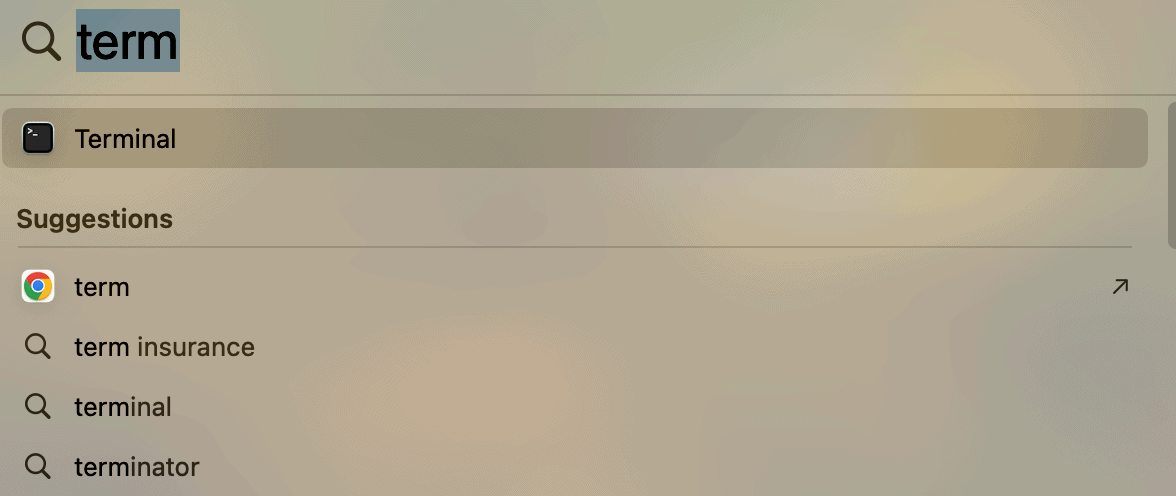
- Type Terminal and open it.
- Copy and paste the following command. Replace the MyVolume section with the name of your USB drive.

sudo /Applications/Install\ macOS\ Sonoma.app/Contents/Resources/createinstallmedia –volume /Volumes/MyVolume
- Press Enter and then enter your admin password when prompted.
- Type Y to confirm that you want to erase the volume and hit Return.
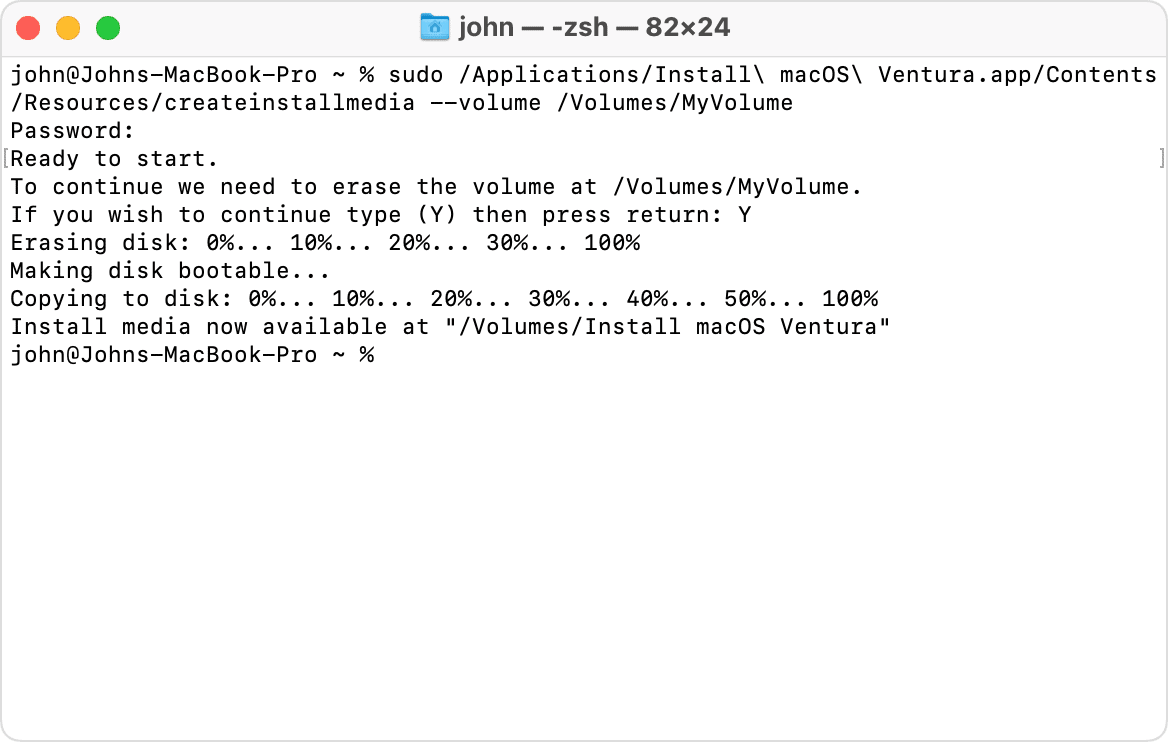
- Follow the onscreen instructions if asked to complete the process.

5.3 Use The USB Installer To Download macOS Sonoma 14.7
Your USB drive will be named Install macOS Sonoma once the above series of steps are completed. Also, make sure that your system has an active internet connection and it is plugged in with a charger.
- Plug in the USB Drive on your Mac.
- Press and hold the power button until the startup options window appears on the screen.
- Select the USB drive volume named Install macOS Sonoma and click on Continue.
- Follow the installation instructions on the screen and download the macOS Sonoma.
After the installation is completed, go to the Apple menu and open About This Mac to check if the update was successful.


