
I know how scary it can be when you open up your MacBook Air only to find that it won’t turn on. Luckily, a black screen or unresponsive device doesn’t always mean a costly repair or a trip to the nearest Apple Store. You can start with basic fixes like connecting a charger, turning up the brightness, or power cycling your Mac, or try more advanced fixes like reinstalling macOS by yourself before contacting Apple support.
This guide will take you through all seven DIY solutions to help you get your MacBook Air working again.
Why is My MacBook Air Screen Black & Not Turning On?
Several factors can cause your MacBook Air to display a black screen or prevent it from turning on. If you’re lucky, the issue may stem from a drained battery or incorrect brightness settings. However, in some cases, it may indicate a deeper issue, like a damaged display or a corrupted macOS installation.
How to Fix a MacBook Air That Won’t Turn On?
1. Connect Your MacBook to Power
If your MacBook Air’s battery is completely drained, it may not turn on even after you press the power button. You must connect your MacBook to a charger and allow it to charge for at least 15-20 minutes before you turn it on. If your Mac still won’t turn on, check the cable or the charger you’re using.
2. Try Turning Up the Brightness
It’s possible that your MacBook Air can turn on, but you’re unable to see anything due to low brightness. You may press the brightness-up key (usually the F2 key) multiple times to increase the brightness to an optimum level. If you have an older MacBook Air model, you can also shine a flashlight behind the Apple logo to check for a faint image. A faint image indicates that the screen turned on but it’s too dim to see.
3. Plug In An External Display
A faulty display can cause your MacBook Air to go blank and make it look like it isn’t turning on. To check if the issue is related to the display, connect your MacBook Air to an external monitor or TV using a USB-C to HDMI or a Thunderbolt cable. If you’re getting a display output, your MacBook is fine, but its screen may be faulty. However, If no image appears, the issue may be related to other hardware components.
4. Perform a Power Cycle
Time needed: 1 minute
Software glitches in macOS can sometimes cause the display to turn back or stop responding. If you’re experiencing a similar issue on your MacBook Air, you’ll be able to fix this by performing a power cycle.
- Disconnect the charger and all the accessories connected to your MacBook Air.
- Press and hold the power button (Touch ID button on newer models) for 10 seconds.
- Now, wait for a few seconds and press the power button again to start your MacBook Air.
5. Reset SMC and NVRAM
On Intel-based MacBooks, the System Management Controller (SMC) and Non-Volatile RAM (NVRAM) are responsible for storing essential settings related to power, display, and startup behavior. Resetting them should help you fix any hardware problems that may be preventing your MacBook Air from booting up.
- To Reset SMC: Press and hold Shift + Control + Option. While you’re holding them, press and hold the Power button and release all of them after 7 seconds. Then, press the Power button to start your Mac.
- To Reset NVRAM: Press the Power button, and immediately press and hold Option + Command + P + R for 20 seconds. You should hear two startup chimes and see the Apple logo appear and disappear twice.
6. Reinstall macOS From Recovery Mode
In some cases, problems related to your current installation of macOS can prevent your MacBook Air from booting up. You should be able to fix such problems by reinstalling macOS from recovery mode.
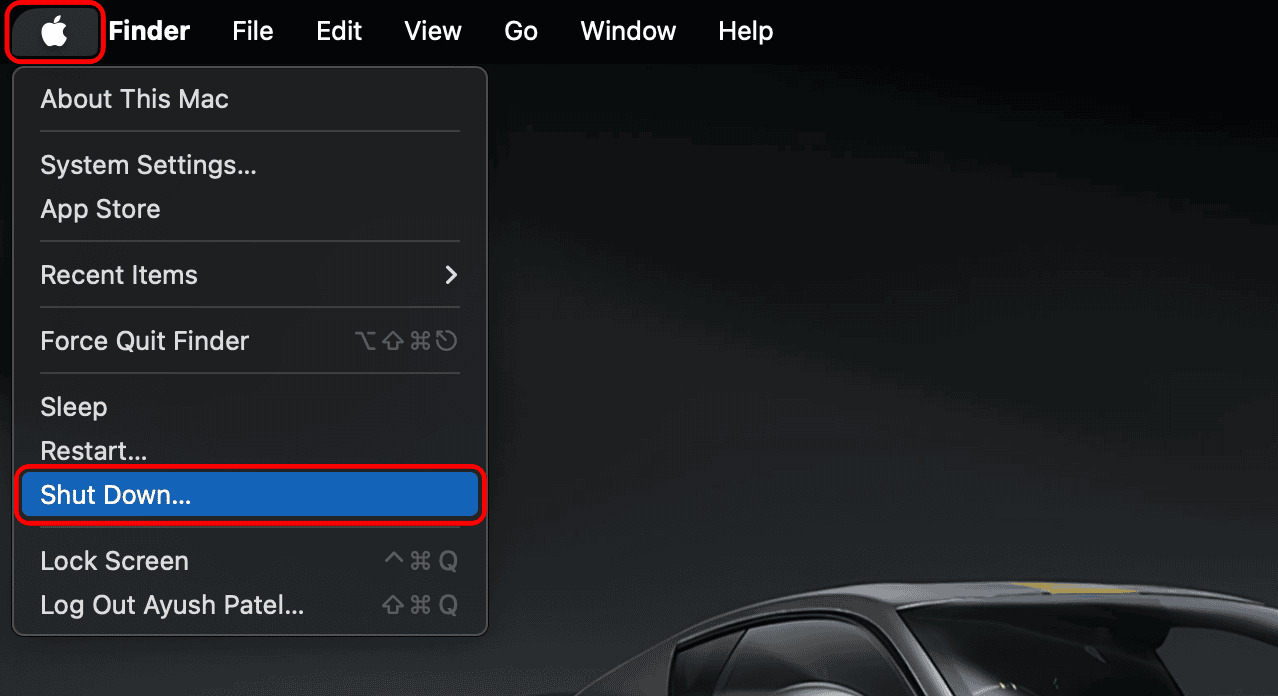
- Click the Apple logo in the menu bar and select Shut Down.

- Press and hold the power button on your Mac or MacBook.
- Let go when you see a System Volume and Options icon.
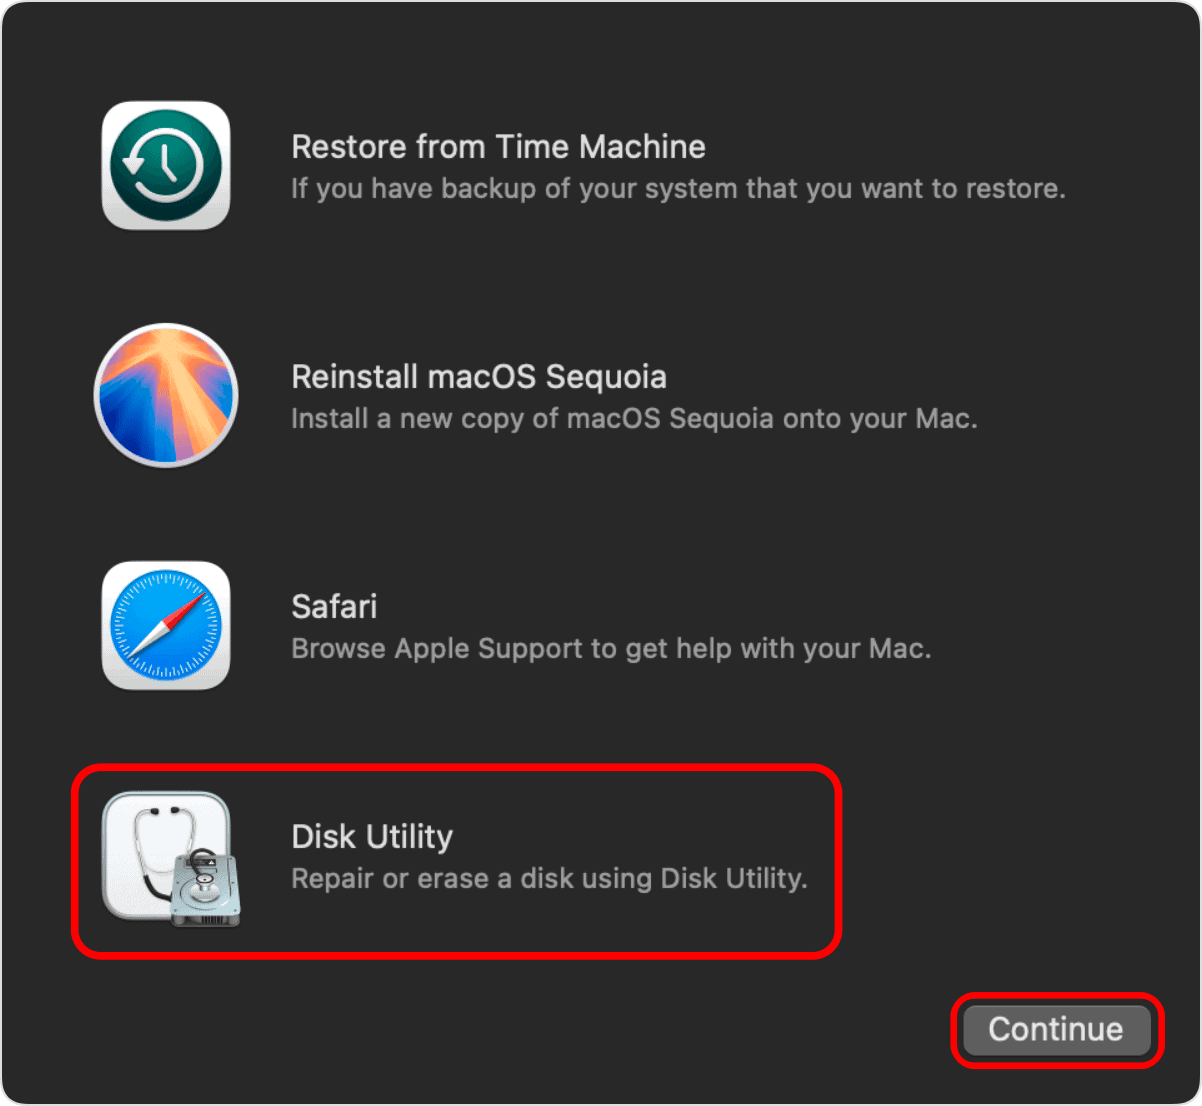
- Hit Options > Continue and enter your Mac’s passcode.

- Select Disk Utility > Continue. Then, click Erase Disk in the nav bar.

- Now, click Reinstall macOS > Continue, and follow the on-screen instructions.


7. Revive or Restore The Mac Firmware
If your MacBook Air still won’t turn on, its firmware may be corrupted. MacBooks with Apple silicon or the Apple T2 security chip can experience this issue if a software glitch or a power failure interrupts macOS installation. In such cases, you’ll need to revive or restore your MacBook’s firmware using another Mac.
- Connect both the Macs to power and unplug any other peripherals.
- Ensure the second Mac is turned on and connected to the internet.
- Identify the DFU port on your Mac and plug a USB-C cable into it.
- Connect the other end of the cable to any port on the second Mac.
- Press and hold the power button on your MacBook Air to turn it off.
- After your MacBook turns off, quickly press and release the power button.
- Immediately, press and hold left Control + left Option + right Shift + power button.

- Keep holding all four keys for 10 seconds. Then, release all keys except the power button.
- Keep holding the power button for up to 10 more seconds until the other Mac shows a DFU window.
(On Macs with a T2 chip, you must hold all four keys for 3 seconds until you see a DFU window.)

If everything goes correctly, your MacBook will show up in the Finder sidebar on the second Mac with options to revive or restore the firmware. From here on, the process is straightforward, as shown below:
- From the DFU window on the second Mac, click Revive Mac.
- Then, click on Continue and follow the on-screen instructions.
- If your Mac can’t be revived, click Restore Mac in the DFU window.
- Now, click Restore and Update and follow the on-screen instructions.

