
If you’re not so much into music and its technicalities or if you’re like me who just enjoy listening to it, chances are you used GarageBand only once or perhaps never. That’s too bad because Apple’s GarageBand is a fully equipped music creation studio sitting on your Mac, waiting for your musical awakening. One of the most useful features of GarageBand is its ability to save recordings as MP3 files. This allows you to play the music you created not just on Apple devices but on other music players supporting the format. If I have piqued your interest by now, let me show you how to save GarageBand recordings as MP3 files on iPhone and Mac.
What is GarageBand?
As mentioned, GarageBand is a music creation software package. It comes preloaded on Macs, iPhones, or iPads, which simply means that it’s free. The software works as a fully-equipped music creation studio and contains various instruments that you can play around with, including percussion, vocals, and rhythms.
As a music creation studio, GarageBand offers a plethora of features that both novice and expert musicians and most especially, non-musically inclined users such as yours truly, enjoy. For musicians, GarageBand allows them to plug in their instruments and create original musical compositions. For novice users like us, the software allows for simple mixing of music or creating musical backgrounds for videos and presentations and saving them to MP3 format.
How to Create and Save a GarageBand Recording into MP3 on Mac
To learn how to save GarageBand recordings as MP3 files, you must first learn how to create a simple recording. That is, if you haven’t tried recording in GarageBand before.
Time needed: 2 minutes
How to create your first GarageBand recording on your Mac:
- Open Applications > GarageBand.
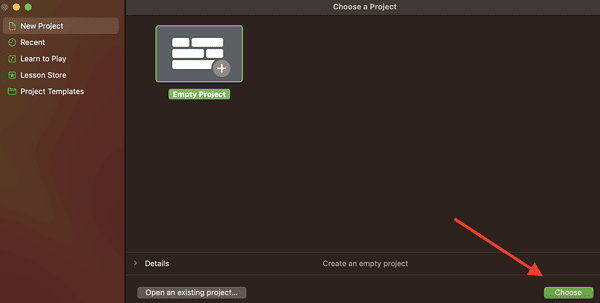
- Select the default Empty Project, then click Choose.
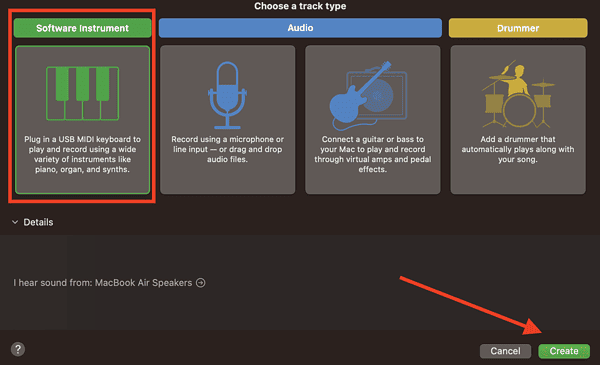
- Click the first Audio option under Choose a track type, then Create.
- Click the Record button.
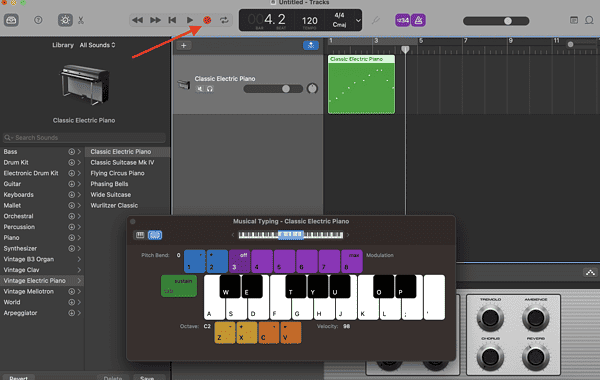
- Click the Stop button to stop recording.
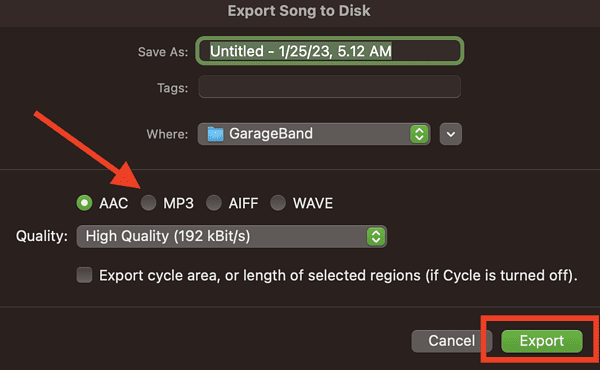
- Click Share > Export Song to Disk.
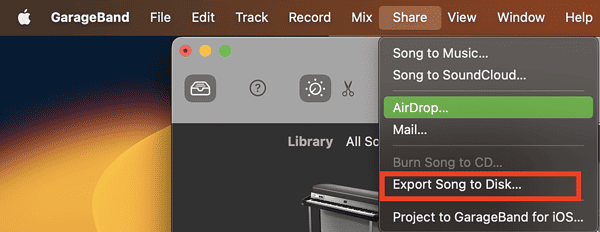
- Select MP3 as export format, then Export.


How to Save a GarageBand Recording into MP3 on iPhone and iPad
The process of saving a GarageBand recording into MP3 on iPhone and iPad is a little bit different from doing it on your Mac. That’s because GarageBand for iOS only allows you to save music files in the M4A format. But there is a workaround, using Apple’s Files app. For those not familiar with this app, it’s a file management system that Apple rolled out in 2017 to make the process of exchanging files between iOS apps easier.
After saving the GarageBand recording, you need to share it as a song using the Files app. You will then need to open the file using a document reader, such as the Readdle app Documents. Once you’ve saved the file, you need to visit an online file converter (such as Convertio) and upload the file, which is in m4a. Then you can download it as MP3 on your iPhone.
Final Words: Other Things You Need to Know
There may be times when you’re trying to load an MP3 song to GarageBand and it won’t accept it. If that happens, try changing the file extension of the song to lowercase “mp3.” Also, GarageBand often encounters playback speed issues with files that have higher parameters than 44.1 kilohertz (kHz) and a bit depth of 16 bits. So, pay attention to those parameters in the MP3 that you’re trying to load in GarageBand. Finally, you could also convert your MP3 file into AIFF (Audio Interchange File Format). GarageBand works better with files in that format.


