
Aside from changing its paid iCloud subscription service to iCloud+ when Apple rolled out iOS 15, the tech giant also introduced a new privacy feature. Apple named it iCloud+ Private Relay, a new privacy protection feature that many have construed as a VPN, or Virtual Private Network. However, according to Apple, iCloud+ Private Relay helps protect user privacy when browsing the web in Safari. And there lies the difference between iCloud+ Private Relay and VPN. Read along to find out everything you need to know about iCloud Private Relay.
iCloud Private Relay — What it Does
As mentioned, iCloud+ Private Relay helps protect your privacy when browsing using Safari. Apple stated that the feature was designed to protect your privacy by ensuring that no single party, not even Apple, can see who you are or what sites you are visiting when browsing the web using Safari.
When enabled, Private Relay sends your requests to two separate and highly secured internet relays. Apple operates one of these internet relays and, together with your network provider, can see your IP address. Although they also receive your DNS records, there’s no way for them to associate your IP address with your DNS records because that data is encrypted. Hence, your personal whereabouts will be safe and secure.
So what about the mentioned second internet relay? Operated by a third-party content provider, this relay generates a temporary IP address and decrypts the name of the website you request before sending you the website. All of the aforementioned processes are carried out using the latest internet standards to maintain a high-performance browsing experience for you while protecting your privacy.
How To Enable iCloud Private Relay on your iPhone, iPad, and Mac
Enabling the feature on your iPhone, iPad, and Mac is fairly easy to do. Just follow the steps outlined below to start using iCloud Private Relay.
Time needed: 1 minute
To enable iCloud+ Private Relay on your iPhone or iPad, follow these steps.
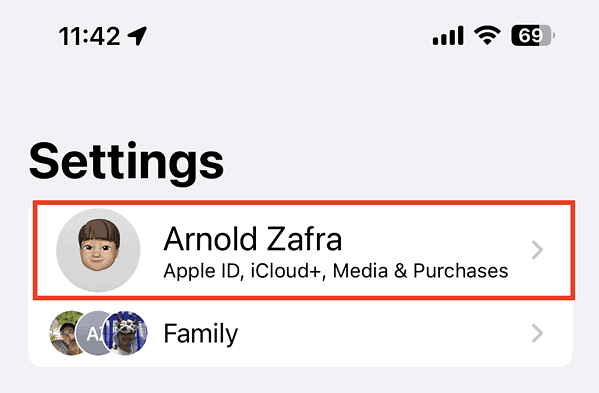
- Go to Settings, then tap your name.
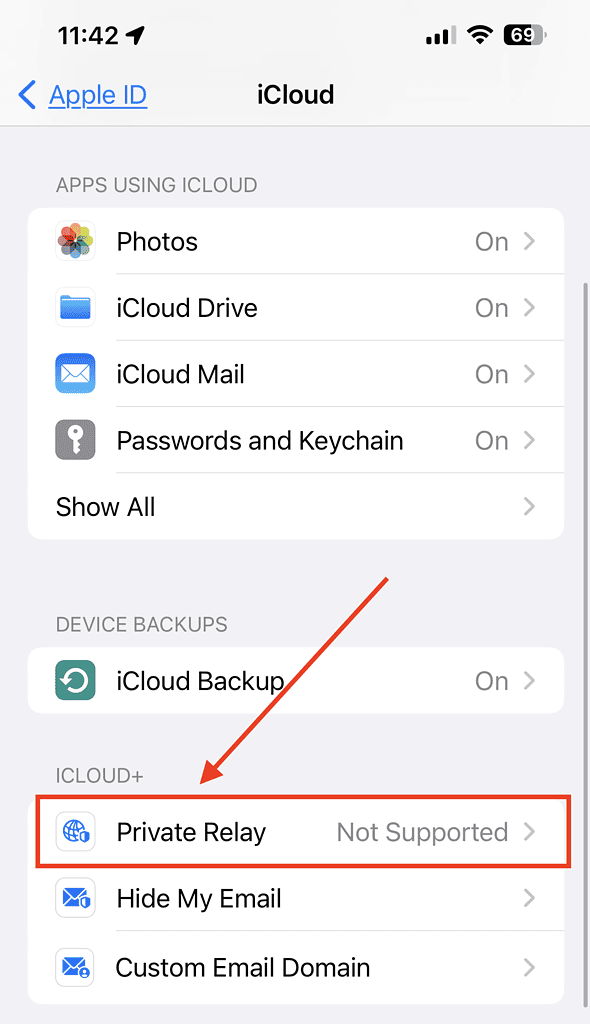
- Tap iCloud > Private Relay.
- Toggle on Private Relay.
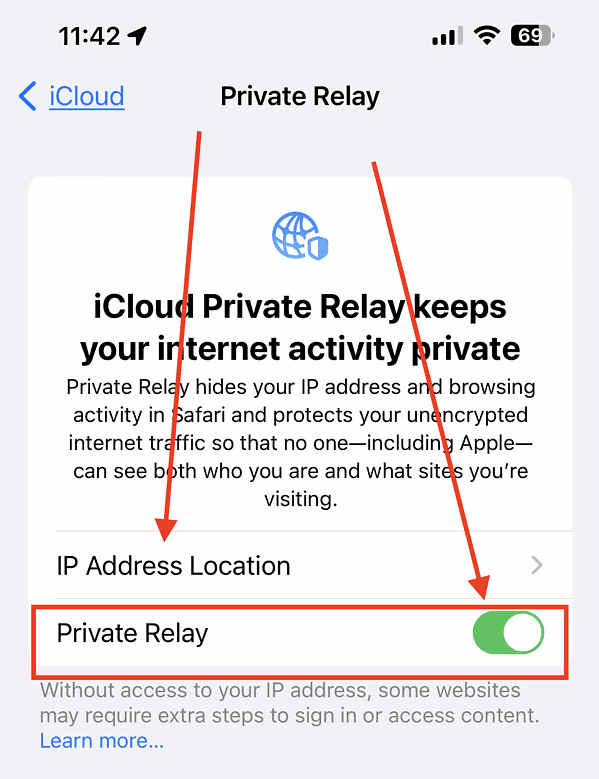
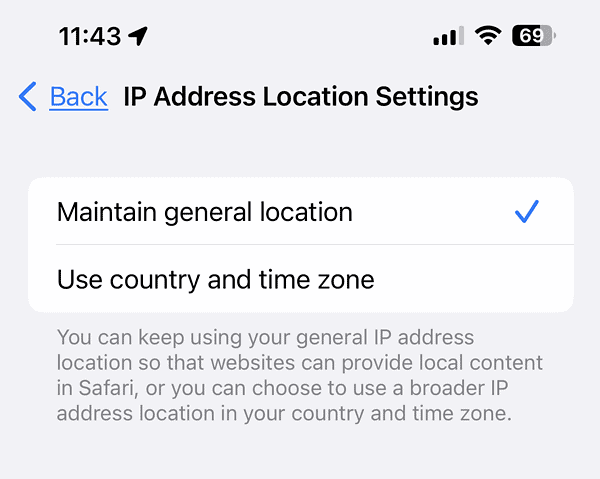
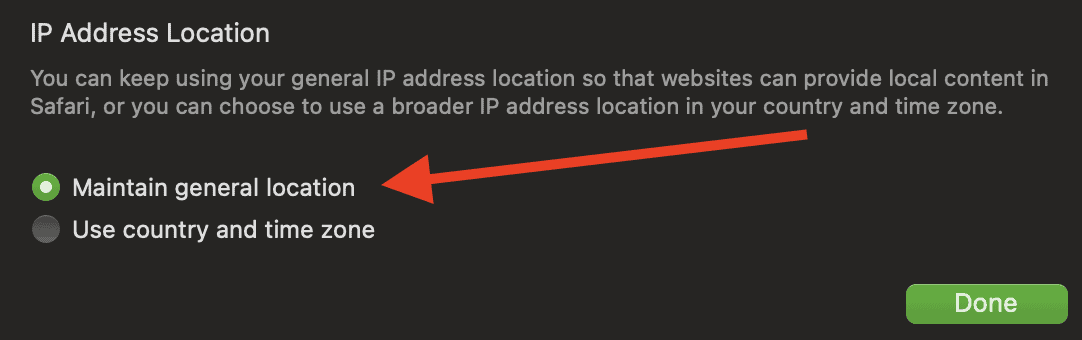
- Tap IP Address Location, then choose any of the two options below:
Tap Maintain general location if you want to let sites show you localized content in Safari while hiding your IP address. If you want to use a broader location, still within your country, and time zone for your IP address, tap Use country and time zone.


To enable Private Relay on your Mac running macOS Ventura or later, follow these steps:
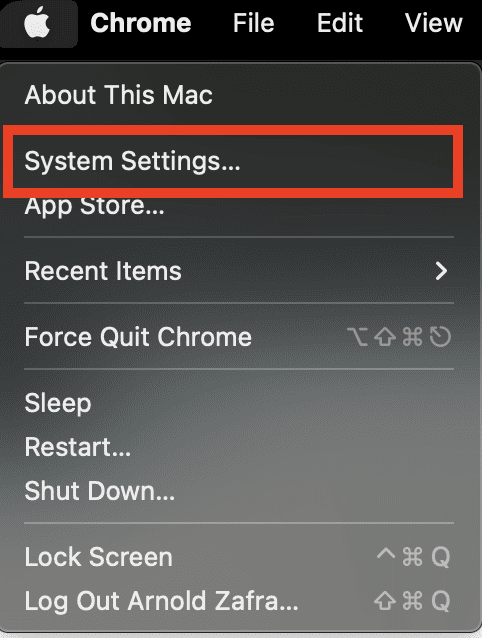
- Choose Apple Menu > System Settings.
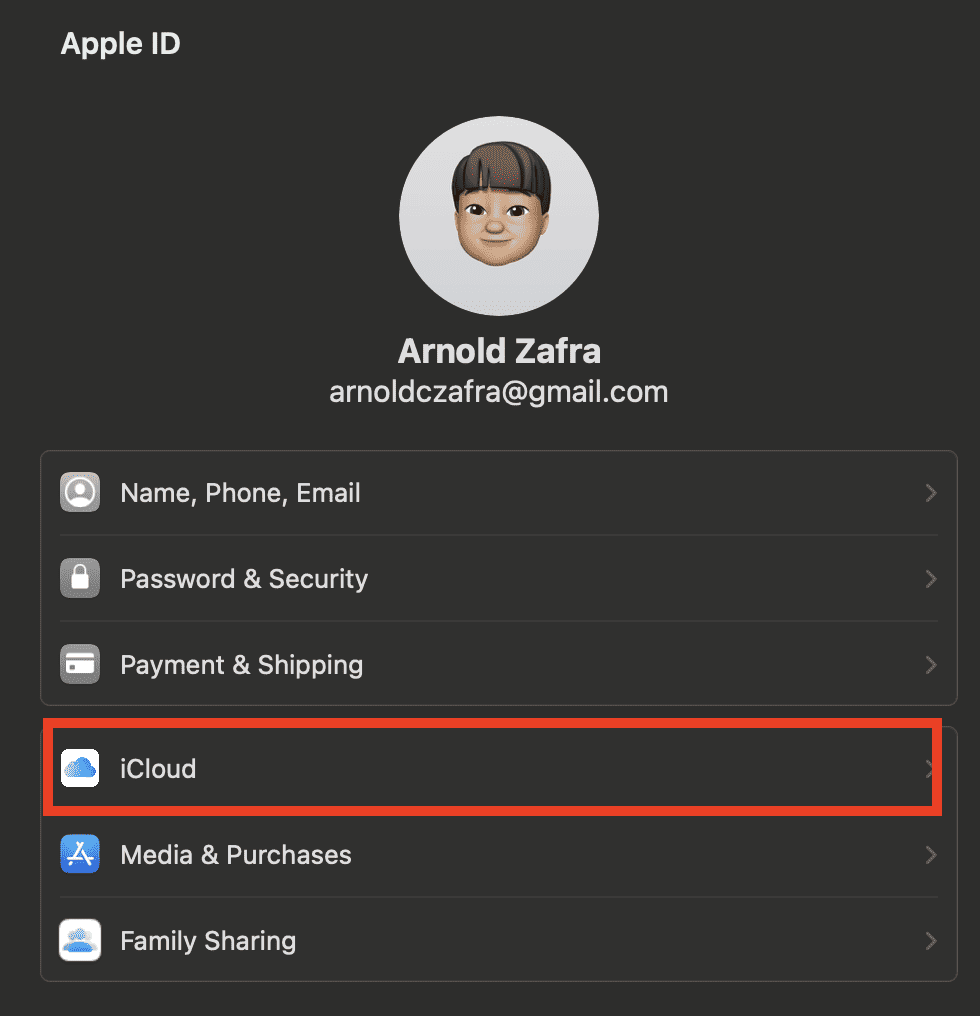
- Click your name, then select iCloud.
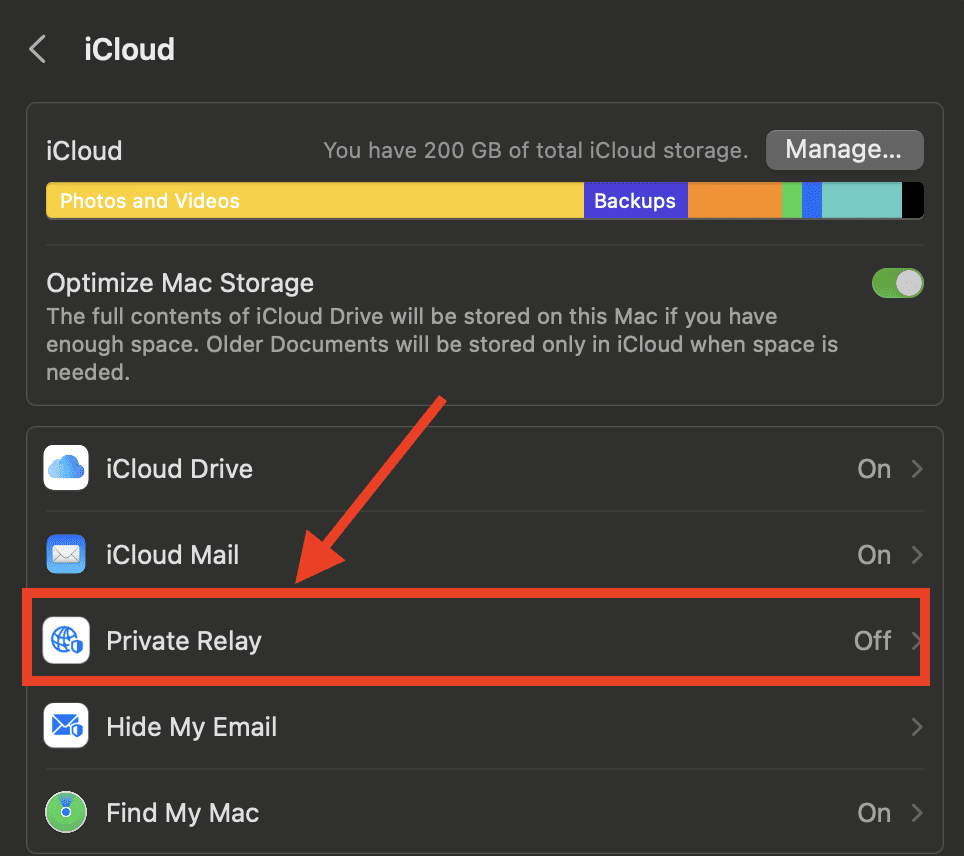
- Click Private Relay.
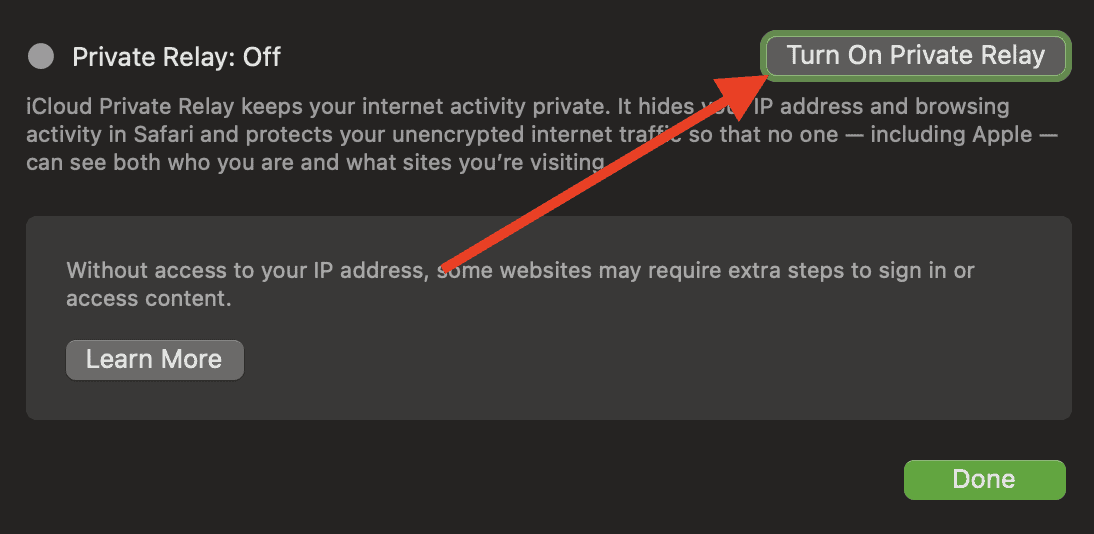
- Click Turn on Private Relay.
- Choose a setting for your IP address (see options as described in the preceding section), then click Done.


The steps differ slightly if your Mac is running macOS Monterey.
- Choose Apple Menu > System Preferences.
- Click Apple ID, then select iCloud.
- Click the checkmark next to Private Relay.
- Choose a setting for your IP address (see options in the preceding section)
How to Disable iCloud Private Relay
Remember, iCloud Private Relay is not currently available in all countries or regions. If it is available in your country, you can enable or disable the feature as you wish. You can disable it on your iPhone, iPad, or Mac by following steps 1 to 4 in the preceding section. Note that once you disable the feature, you won’t have that extra layer of protection the next time you browse the web using Safari.
Final Words: Other Important Things You Need to Know
Since iCloud Private Relay is not yet available in all countries and regions, it will automatically turn off when you travel to a country where it is unsupported. When you return to your own country or enter a new country where it is available, the feature will automatically turn back on. Additionally, your device will notify you whenever it becomes unavailable, as well as when it becomes available again.
There may be some cases while browsing the web using Safari when you may need to temporarily turn off Private Relay. Examples are when visiting websites that rely on filtering, monitoring, or rate-limiting. In these instances, you may be required to make your IP address visible. To do so, you don’t have to turn off and then turn on Private Relay. While browsing the website using Safari on your iPhone or iPad, you simply tap on the Page Setting button ![]()
The bottom line is that it’s still up to you to enable this feature on your Apple devices for that added layer of privacy when browsing websites on Safari. Note that this feature is an add-on to the premium iCloud+ subscription. So, it’s still part of an added expense after all.


