
Is your external monitor suddenly not working after the macOS 13.4 Ventura update? While the update introduced several new features, it also appears to have caused some unexpected problems, especially for those using multiple monitors. In this article, I’ll walk you through some practical solutions to fix it.
How To Fix External Monitor Not Working on macOS Ventura?
Here are some tried and tested methods to resolve this issue:
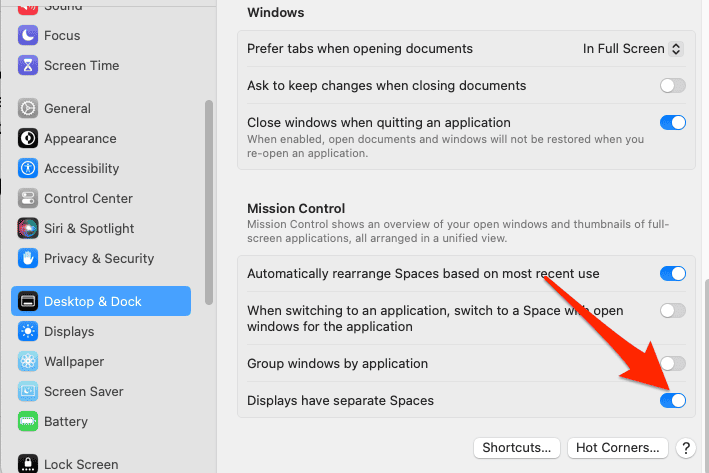
1. Configure Display Spaces
Time needed: 1 minute
One quick fix involves configuring the Mission Control settings:
- Go to System Settings > Desktop & Dock.
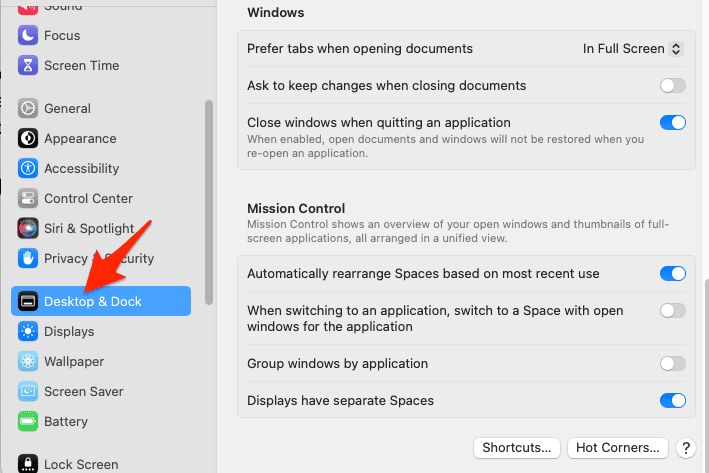
- Under Mission Control, ensure that Displays have separate Spaces is checked.
- Reboot your Mac in order to apply the changes made.
2. Power Cycling the Monitor
Sometimes the monitor might be in a state it can’t recover from due to the update. Unplugging the monitor for a few minutes and then plugging it back in can help. Note that simply using the power button to turn off and on may not be effective as it doesn’t fully reset the monitor.
3. Tinker with Resolution Settings
Another workaround is to play with the display resolution:
- Disconnect the external monitor then go to System Settings > Displays.
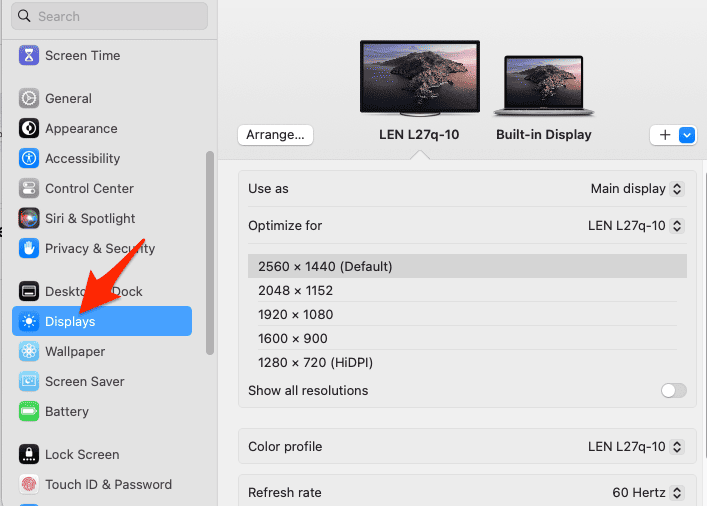
- Select any other resolution for your display and then revert to your preferred resolution.
- Reconnect your external monitor in order to see if it will now be detected by your Mac.
4. Delete Preference Files
Corrupted preference files could also be the culprit. Deleting them might solve the issue:
- Open Finder then click Go > Go to Folder.
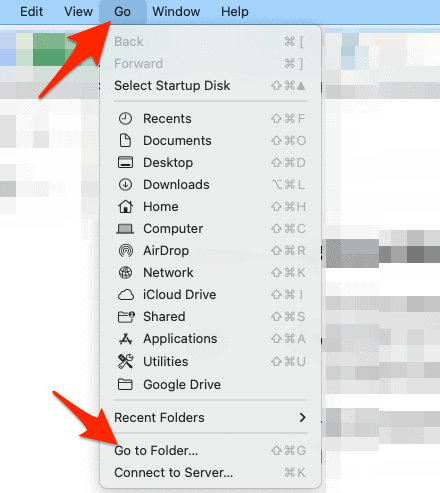
- Navigate to /Library/Preferences/ByHost/.
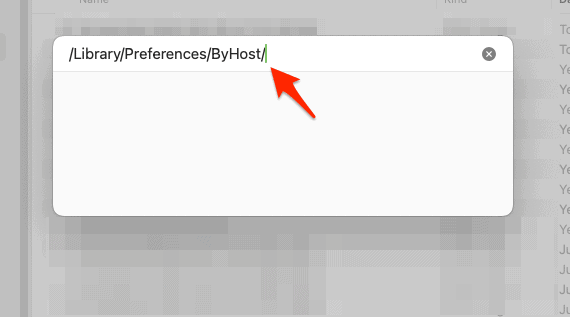
- Delete the file named com.apple.windowserver.display.{XXXX}.plist then restart your Mac.
5. Boot in Safe Mode
Another effective solution is to boot into Safe Mode. This will load only essential components, preventing third-party apps from interfering with the external monitor.
For Intel-based Macs:
- Turn off your Mac and press the power button, then immediately hold down the Shift key until the login window appears.
- Log in to your Mac (you may need to log in twice).
For Apple Silicon Macs:
- Shut down your Mac.
- Press and hold the power button until you see Loading startup options.
- Select your startup volume.
- Hold the Shift key and click Continue in Safe Mode.
Test if the external monitor is detected in Safe Mode. If it is, restart your Mac and check if the issue persists.
How Do I Force Detect Displays on Mac Ventura?
- In System Settings go to Displays.
- Then press and hold the Option key. This will change the Night Shift button to Detect Displays. Click on Detect Displays to force detect external displays.
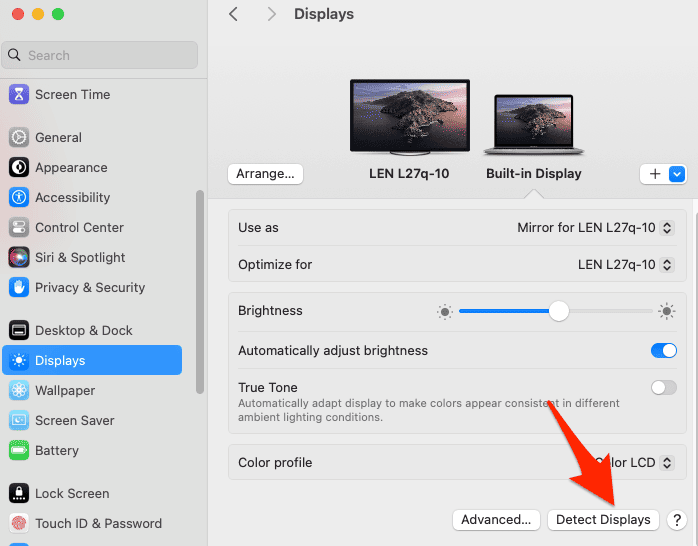
- However, if Detect Displays is not working on your Mac with macOS Ventura, try our solutions above to fix it.
macOS 13.4 Ventura is not without its quirks, but with these solutions, you should be back to dual-display productivity in no time.


Thanks for the interesting article. There is a serious bug in macOS Ventura (not previous versions) for Intel Macs (not Apple silicon ones) like iMac (missing HDMI port) using “Apple USB-C Digital AV Multiport Adapter” since it does not detect Panasonic televisions (no problem with others). There are many reports on Internet like this one:
macOS 13 Ventura BREAKS Panasonic TV connection via HDMI
https://discussions.apple.com/thread/254775822
And worst of all, Ventura updates will stop soon. Apple should fix it now.