
The fastest way to open System Preferences on a Mac is by clicking the Apple menu in the top-left corner and selecting System Preferences. On newer Macs, this is called System Settings, but the process is the same. You can also use Spotlight Search by pressing Command + Space, then typing “System Preferences” or “System Settings.”
Table of contents
How to Open System Preferences on a Mac
If you’re using a newer Mac, the app is now called System Settings, but it works the same way as System Preferences.
Method 1: Use the Apple Menu
- Click the Apple logo in the top-left corner of your screen.
- Select System Preferences or System Settings from the dropdown.
- A new window will open with all your system configuration options.
This is the most direct and consistent method.
Method 2: Use Spotlight Search
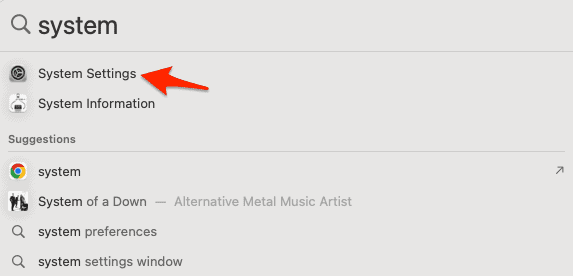
- Press Command (⌘) + Spacebar to open Spotlight.
- Type “System Preferences” or “System Settings.”
- Press Return when it appears in the results.
This is great if you prefer using the keyboard or if the app isn’t in your Dock.
Method 3: Open It from the Dock
- Look for the gear-shaped System Preferences/Settings icon in your Dock.
- If it’s there, just click it to open.
If it’s not visible, you can add it using the tips section below.
Method 4: Use Launchpad
- Click the Launchpad icon (a silver rocket) in the Dock.
- Type “System Preferences” or “System Settings” in the search bar.
- Click the icon to open it.
Launchpad mimics the iOS-style app grid and works well for visual users.
System Preferences vs. System Settings: What’s Different?
If you notice your Mac shows System Settings instead of System Preferences, don’t worry. Apple recently redesigned the settings interface to look more like the iPhone or iPad, with a left-hand sidebar and cleaner layout.
Though the name changed, the functionality remains the same. You can still manage things like:
- Displays: Adjust screen resolution and arrangement
- Trackpad: Customize gestures and clicks
- Users & Groups: Manage accounts and parental controls
- Privacy & Security: Control app permissions, firewall, and FileVault
Some options now require an administrator password before changes can be made, especially for sensitive settings like security or system-wide changes.
Tips for Navigating Mac Settings
1. Pin System Preferences/Settings to the Dock
- Open the app once using any method above
- Right-click the icon in the Dock
- Choose Options > Keep in Dock for quick future access
2. Use the Search Bar Within Settings
At the top of the System Preferences or Settings window, you’ll find a search bar. Type in terms like “Bluetooth,” “password,” or “mouse,” and the system will highlight the correct section for you.
3. What If a Setting Is Grayed Out?
If an option is grayed out, it may require administrator access. Click the lock icon in the lower-left corner and enter your Mac password to unlock changes.
This commonly applies to parental controls, startup disk, and certain privacy settings.
Frequently Asked Questions
Some settings require admin access. Look for the lock icon in the bottom-left corner of the window, click it, and enter your administrator password to make changes.
System Preferences (or System Settings) is located in the Applications folder. You can also find it using Launchpad or Spotlight Search.
Press Command + Space to open Spotlight, then type “System Preferences” or “System Settings,” and press Return to open it instantly.
Summary
- Open System Preferences via the Apple menu, Spotlight, Dock, or Launchpad.
- On newer Macs, System Preferences is now called System Settings.
- Use the search bar inside the app to quickly find specific settings.
- Admin access is sometimes required for locked or grayed-out options.
- You can pin the app to your Dock for faster access in the future.
Conclusion
Accessing your Mac’s settings doesn’t have to be confusing. Whether you’re looking to tweak your display, change your wallpaper, or manage user accounts, getting to System Preferences (or System Settings) is quick and straightforward.
The newer layout might look a bit different, but everything you need is still there, just a click or keystroke away.