
To prevent any data loss and hardware damage, it’s important to safely eject a USB drive from your Mac. The simplest and most common method is to use the eject button directly within the Finder window. You can also use the File menu, Disk Utility, Keyboard shortcuts, and Terminal commands to remove a USB drive. Keep reading for more details and step-by-step instructions.
How Do I Safely Remove a USB Device From My Mac?
 NOTE
NOTE
1. Using Finder
Time needed: 2 minutes
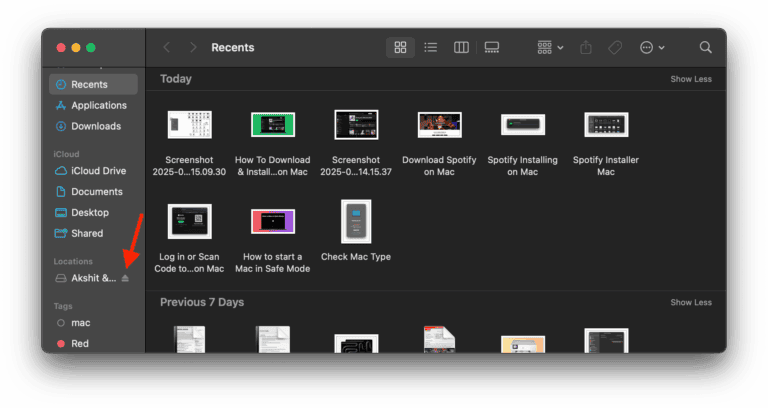
You can quickly and safely remove a USB flash drive from a MacBook Pro, MacBook Air, or iMac using the Finder sidebar.
- Open a Finder window on your Mac.
- In the sidebar under Locations, find your USB device.
- Click the small Eject icon next to its name.

2. Right-click and Eject the USB Device
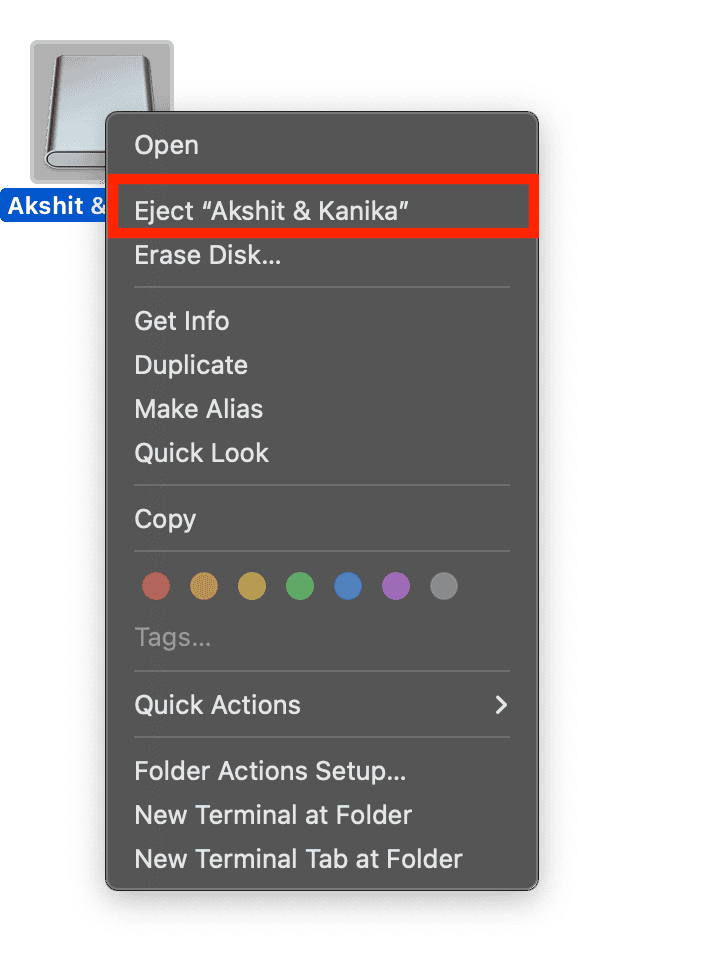
For some reason, if the eject button in the Finder sidebar isn’t working, you can remove the USB drive with a right click.
- Right-click (or Control + click) on the USB drive icon on your desktop or in Finder.
- From the menu that appears, select Eject [Device Name].

3. Drag to Trash
When you move the USB drive icon to the Trash, it activates the eject function.
- Locate the USB drive icon on your desktop.
- Click and drag it to the Trash in the Dock.
- The Trash icon will change to an Eject symbol.
- Release to safely eject.
4. Using File Menu
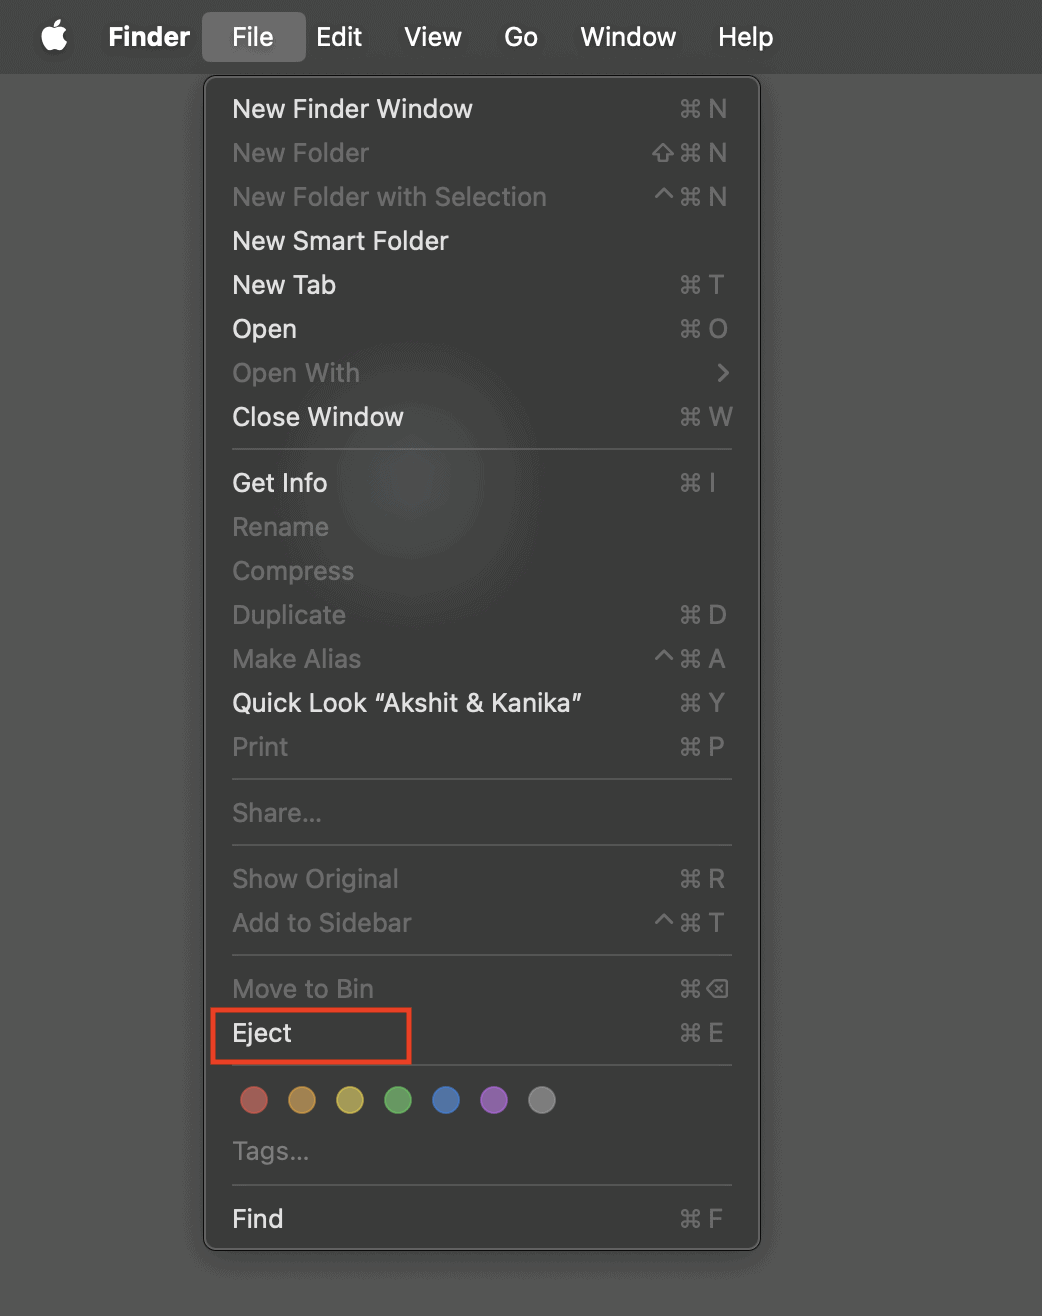
You can also use the File option in the Menu Bar to properly remove a USB device from your Mac.
- Open Finder and select your USB device.
- Go to the top menu and click File > Eject “[Device Name]”.

5. Using Disk Utility
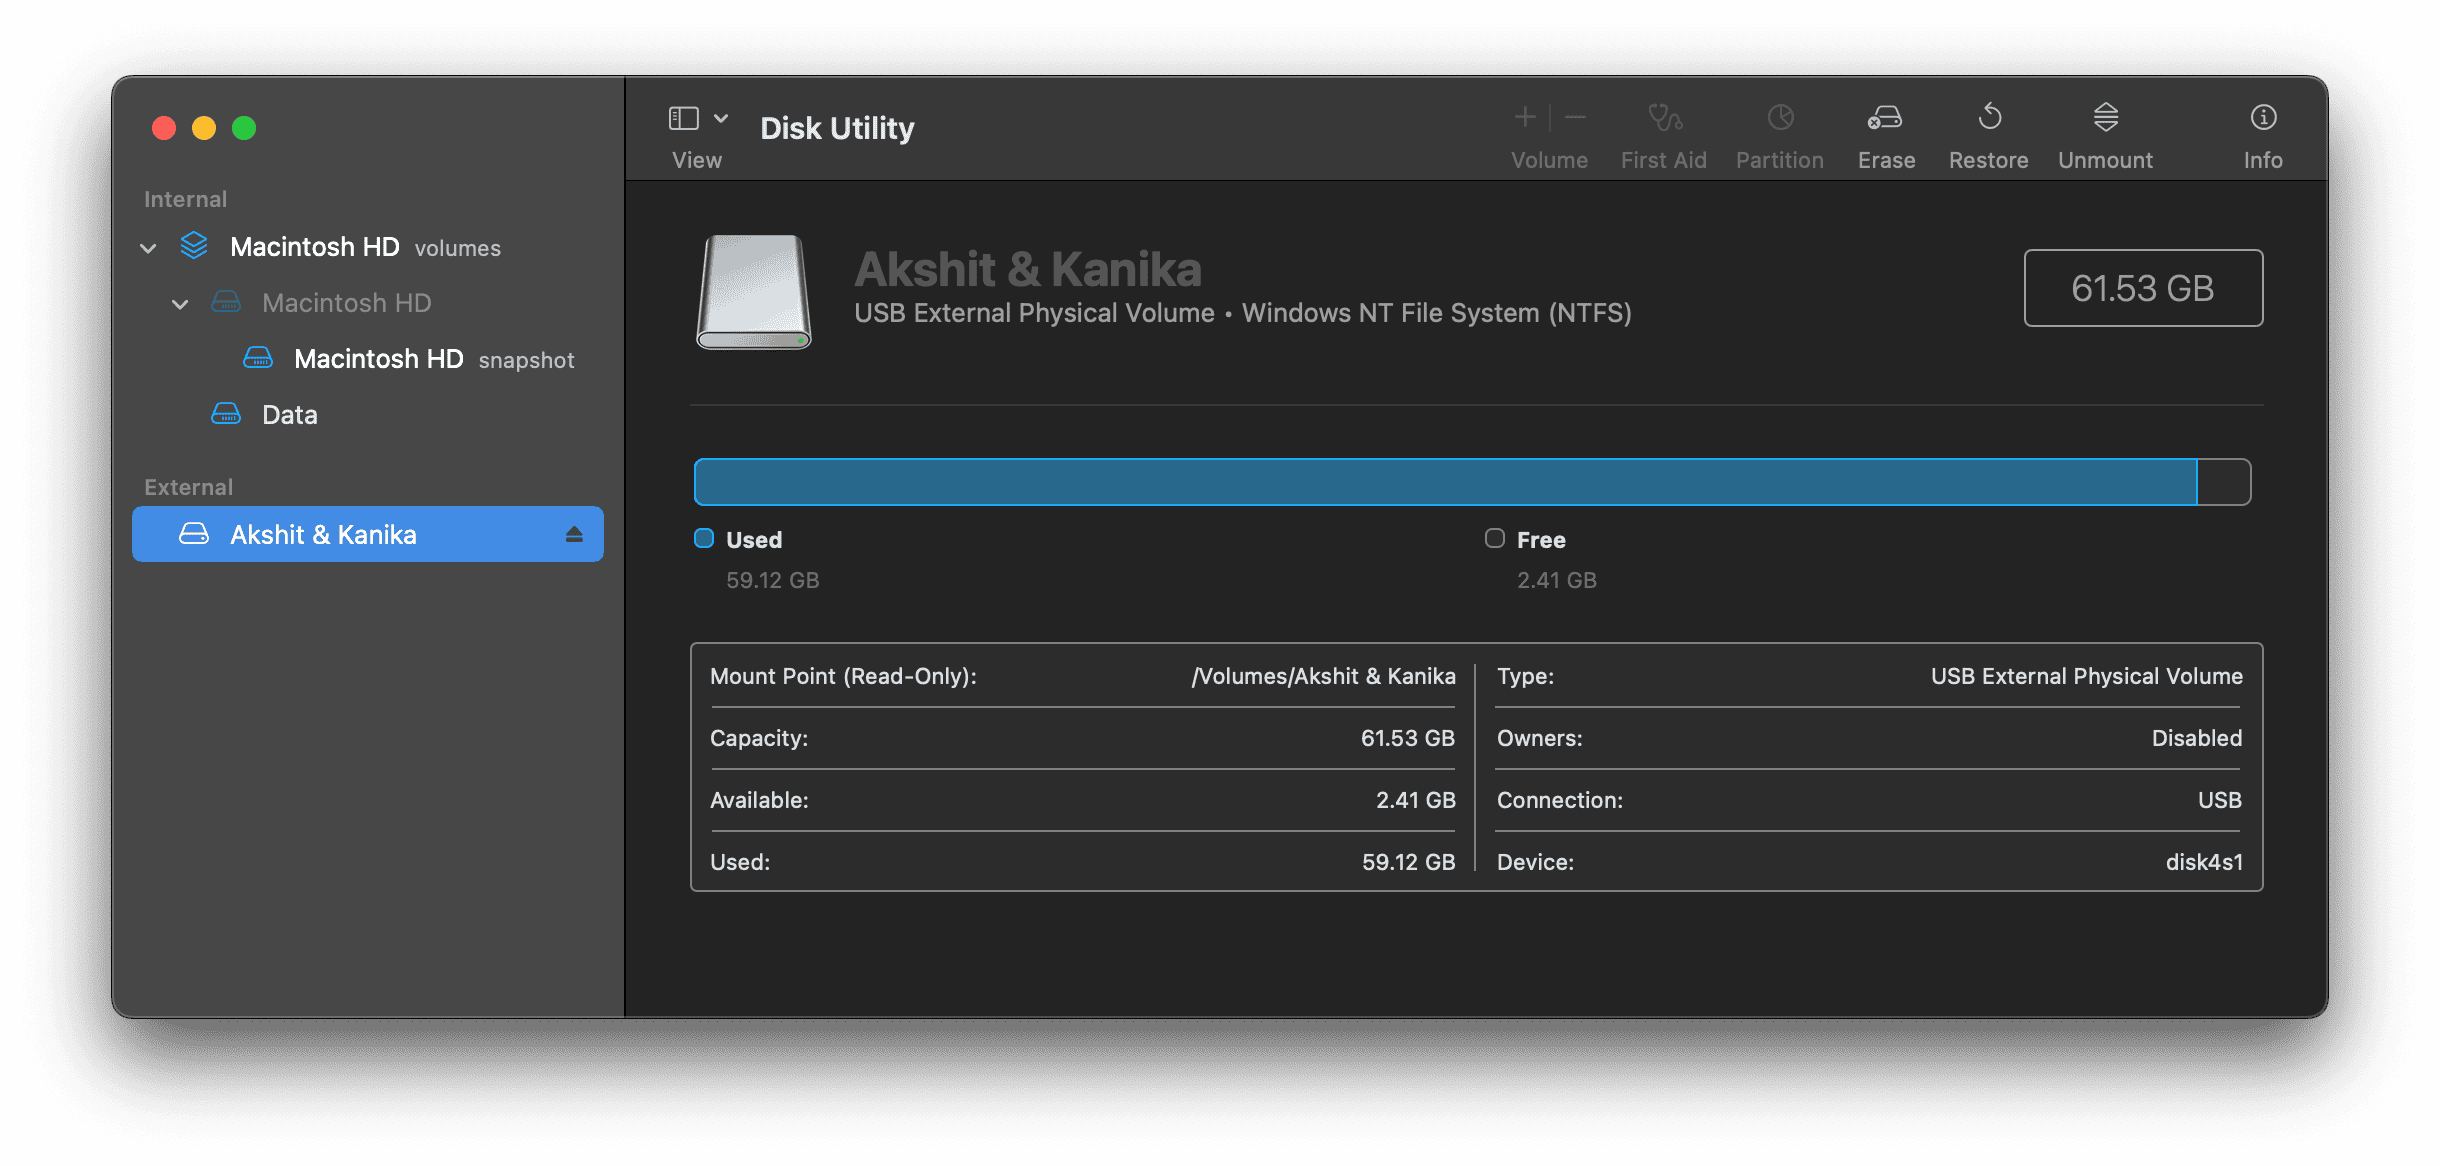
For stubborn drives that won’t eject or display error messages, you can use Disk Utility to forcefully and safely eject them from your Mac.
- Open Disk Utility (Applications > Utilities > Disk Utility).
- Select your USB device in the sidebar.
- Click the Eject button.

What Is the Shortcut to Eject USB on Mac?
You can also eject a USB on a Mac using keyboard shortcuts. While there isn’t a direct, one-step keyboard shortcut to eject a USB drive, you can use this quick method:
- Select the USB drive in Finder or on your desktop.
- Press Command + E to safely eject it.
How To Eject USB From Mac When There’s No Icon?
If a USB drive’s icon isn’t visible on your Mac’s desktop or in Finder, you can still eject it safely using Finder’s sidebar or Disk Utility. You can also force-quit Finder to refresh the connected devices and trigger a safe eject.
If the above steps don’t work, you can also use Terminal to eject the USB which won’t show up anywhere visually.
- Press Command + Space to open Spotlight Search.
- Start typing Terminal. When it appears, hit Return.
- Type the following command and hit Return to view the connected drives.
diskutil list - From here, find your USB (look for its name or size).
- Run this command to eject it:
diskutil eject /dev/[diskX] - Replace
diskXwith the correct identifier (e.g.,disk2).


