How to Slow Down a Video on iPhone

slowdownvideoiPhoneFebruary2023Featured

For those that like to shoot video, they should know there is a way to slow down or speed up their video on an iPhone. Maybe you’re a skateboarder that just filmed a bunch of tricks, and you want to slow one of them down to really add emphasis. That, or maybe you recorded an important play during a specific sport, and want to see details of the play. No matter what your reasoning, I’m going to take a look at how to slow down video on an iPhone using iMovie.

Before we get into adjusting the speed of a video that was already filmed, remember that if you are using an iPhone 5s or newer, then your Camera app should have the option to record in slow-motion. From the Camera app, simply navigate to Slow-Mo, allowing you to record your footage with slow-motion already enabled. Of course, if you want to edit a video clip to adjust the speed, I think iMovie is the way to go.

How Do You Make a Video Slow-Motion on iPhone After Recording?

When it comes to slowing down or adjusting the speed of a video on an iPhone, you will need to use iMovie. Available for free for Apple users, iMovie is Apple’s own film-editing software, and in addition to being able to add slow-mo to video, the app also provides plenty of other features as well. Of course, there is other free video-editing software available, however, going through iMovie will be the quickest and cheapest solution.

Using iMovie, iPhone users are able to adjust the speed of their videos. You can slow your footage down, or speed it up so that everything is moving at lightning speed. Additionally, users can even divide their clips, and then add as much speed as they would like to each individual segment. This can create some really cool effects, or add a bit of dynamic flair to certain clips that you enjoy.

How Do I Slow Down Video Speed?

To adjust the speed of a clip in iMovie for iPhone, follow these steps:

Time needed: 2 minutes

Adjust the speed of a clip using iMovie on an iPhone.

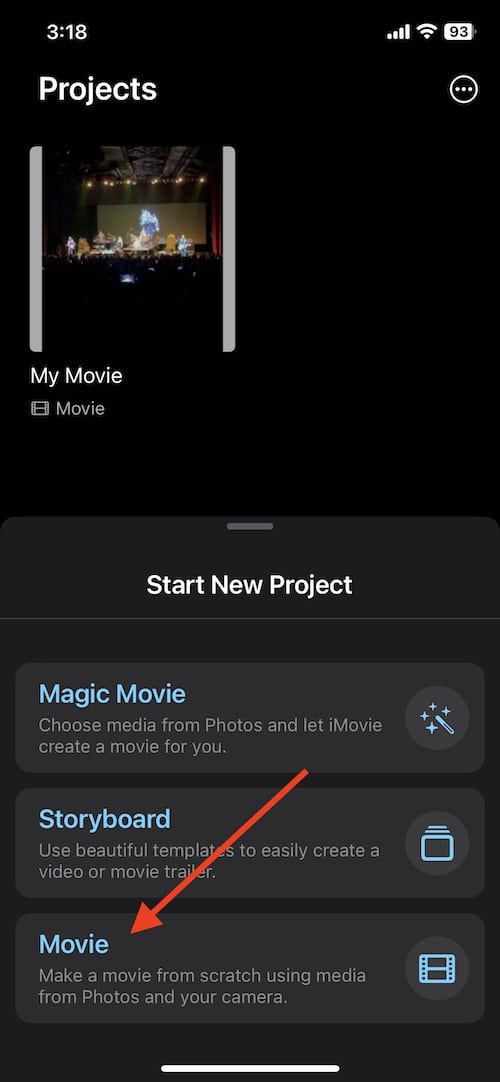
  1. Go to iMovie on your iPhone and start a new project. You can also open a project if you already have one in the app.

  2. If starting a new project, once you select ‘Movie,’ the next screen will show you the media you can add to your project. Select the clips you would like to add.

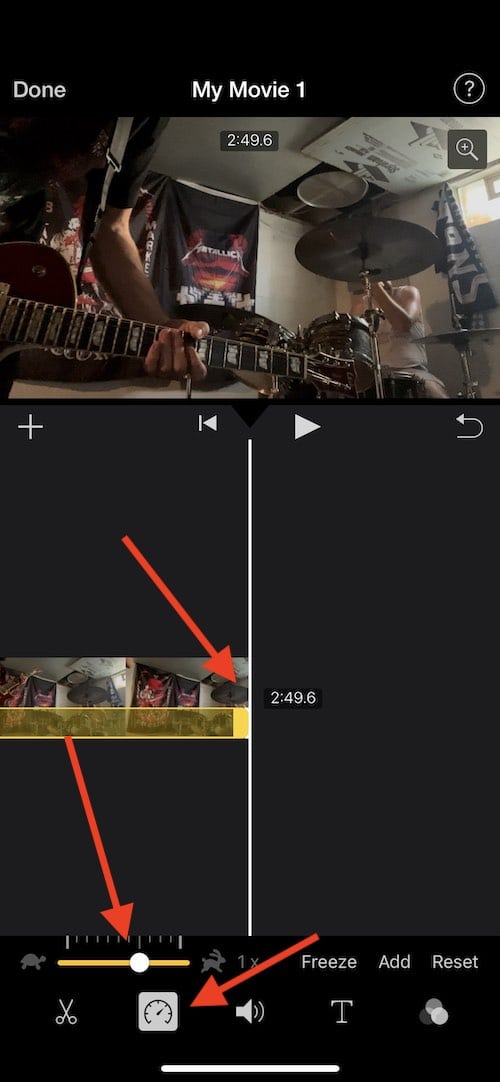
  3. Looking at the timeline, tap a clip. This will reveal the inspector at the bottom of the screen.

  4. Select the Speed button. This will bring up a yellow bar. Adjusting this will adjust the speed of your clip.

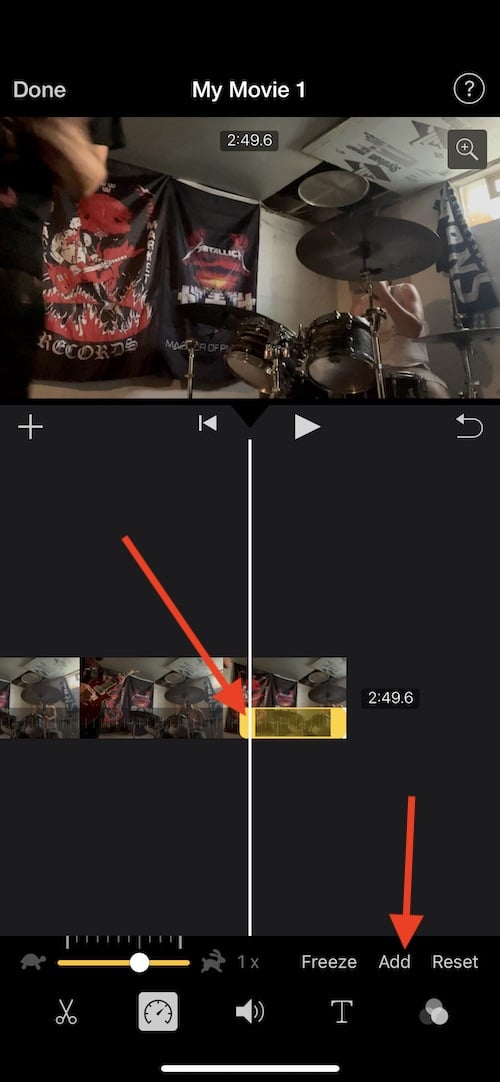
  5. You can also then create ranges within a clip.

    You can do this through two methods: you can either drag the yellow range handles at the start and end of a clip, or you can select Add within the inspector to create another range.

  6. If you want to create additional ranges, select a portion of a clip outside of the range currently selected.

    You can also tap Add within the inspector to create a new range border at the playhead position. Remember that each range you create will see an indication via a vertical white line at the bottom of a clip.

  7. When you’re finished, tap anywhere outside of the inspector to dismiss it.

Things to Note

Essentially, you can find the speed button within the inspector, and you can then adjust the speed from there. Following all of the steps above will allow you to create different sections for different speeds. This allows for fine-tuning of the exact moments where you want to change the speed.

It is also good to know that when it comes to sound, iMovie defaults the audio to preserve the pitch of clips that are sped up or slowed down. This means that while your video clip may be faster or slower, the audio will stay the same. If you want the audio to speed up or slow down alongside your video, this can be changed in Settings. Simply click the Settings icon (a gear) and select “Speed changes pitch”.

How to Add Freeze-Frame to a Project in iMovie

Users should also know that they can add a freeze frame within iMovie, even on the iPhone. This can create a cool effect wherein a single frame is shown for a brief period of time. This can really help emphasize specific moments within your video.

To create a freeze frame in iMovie, simply follow these steps:

  1. Open a movie project in iMovie, or create a new one.
  2. Touch and hold a clip within the timeline, and swipe left or right until you find the frame that will be frozen.
  3. Tap the video clip within the timeline to bring up the inspector.
  4. Select the Speed button. A yellow bar featuring range handles will appear below the clip.
  5. From the inspector, tap Freeze. This will freeze the frame that is at the tip of the playhead. You can drag the yellow range handles in order to adjust the length of this frozen frame. You can remove the freeze frame by tapping anywhere within the range of the freeze frame, and then tap Freeze within the inspector.
  6. You can then tap anywhere outside of the inspector to work on something else.

Adjusting the Speed of Video in iMovie

Being able to adjust the speed of a video clip can be incredibly useful, especially when you are trying to add emphasis to a specific detail. Be sure to follow these steps carefully, and remember that the undo button is always your friend when editing video. If you are a novice with iMovie, it may take a couple of tries to get things exactly the way you want them.

Whether you’re trying to edit a really cool clip of your child’s soccer game, or simply want to add more action to a video, then I think going with iMovie for iPhone is the best solution. Getting access to iMovie is rather easy, as it is available in the App Store. Additionally, following the steps to slow down or speed up a video is also rather easy. When you are finished, the result will be something you can truly call your own.

Leave a Reply

This site uses Akismet to reduce spam. Learn how your comment data is processed.