
Capturing a glowing Christmas tree is often difficult. Low light and twinkling bulbs create a smudged, out-of-focus mess. Consequently, your holiday memories look like colorful blobs instead of festive masterpieces. Most people struggle because their automatic phone settings misinterpret the festive glow. You can solve this problem by taking manual control over your camera’s light and focus processing.
Table of contents
Expert Tips for Sharp Holiday Photography
1. Disable Macro Control and Auto-Focus Lock
The iPhone’s Macro Control causes lens-switching jitter in low light. This creates a “hunting” effect where the camera struggles to focus on needles or ornaments. You should disable this feature to maintain a consistent focal point for your festive shots.
Don’t miss the best of The Mac Observer
Set us as a preferred source and our Apple reporting ranks higher in your Google Search results and Discover feed — one tap, no account changes.
- Open the Settings app and tap Camera.
- Scroll down and toggle off Macro Control.
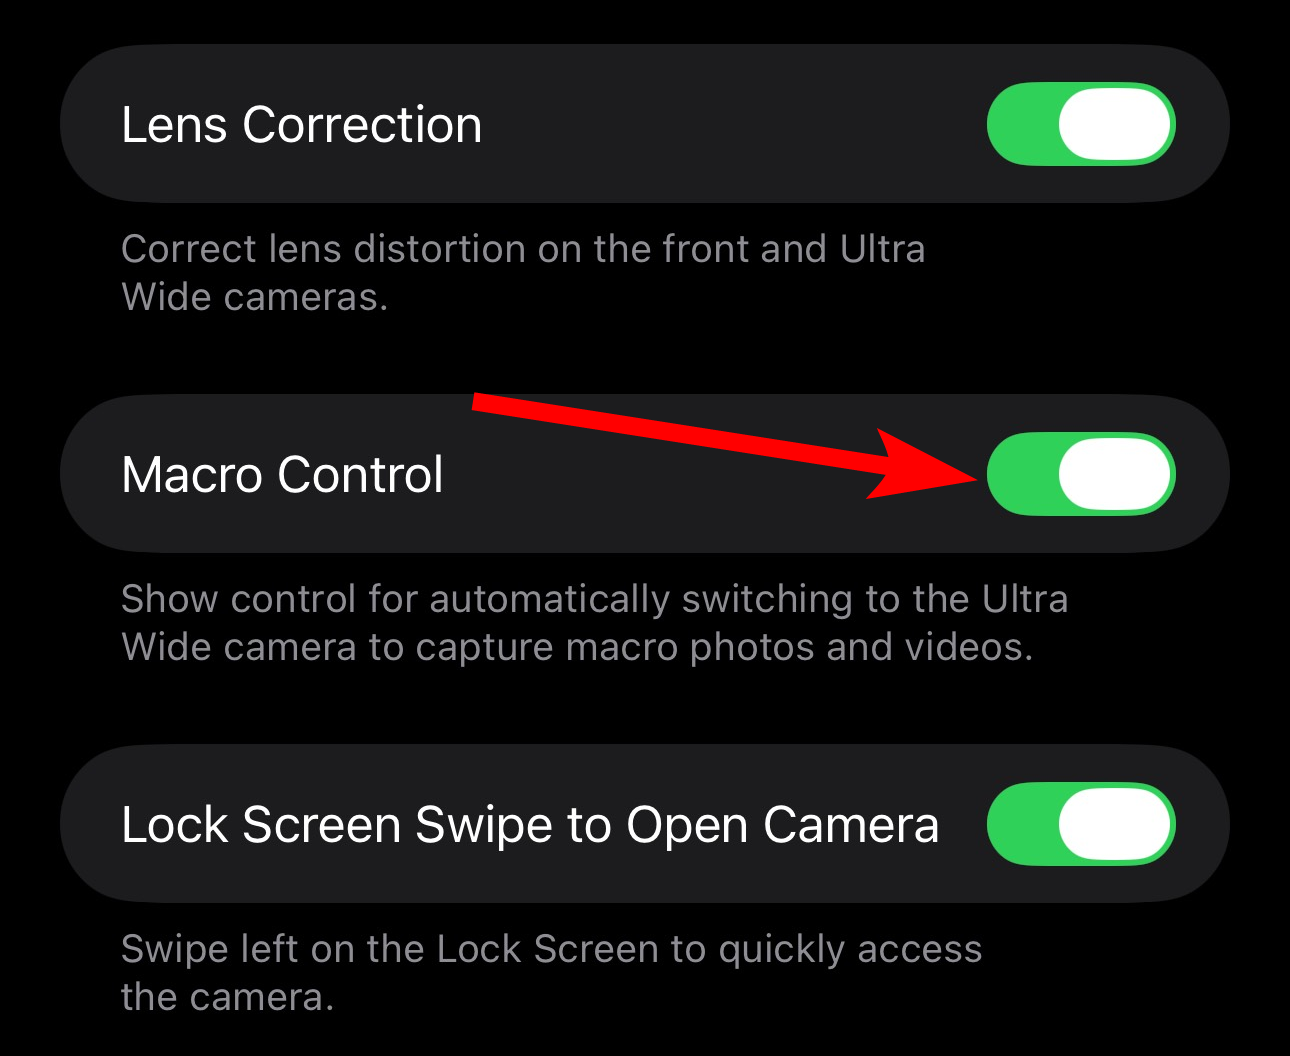
- Tap and hold the screen to engage AE/AF Lock.

However, your hardware might still struggle with focus. You may need to fix iPhone 15 Pro blurry and out-of-focus camera issues related to the high-resolution sensor.
2. Adjust Exposure and Night Mode Intervals
Christmas lights often trick your camera sensor. Specifically, the device thinks the room is brighter than reality. You must manually control the light intake to add clarity. Lowering the exposure prevents the bulbs from appearing as white, blown-out spots tonight.
- Open the Camera app and tap the Six-dot icon.

- Select the Night Mode icon.
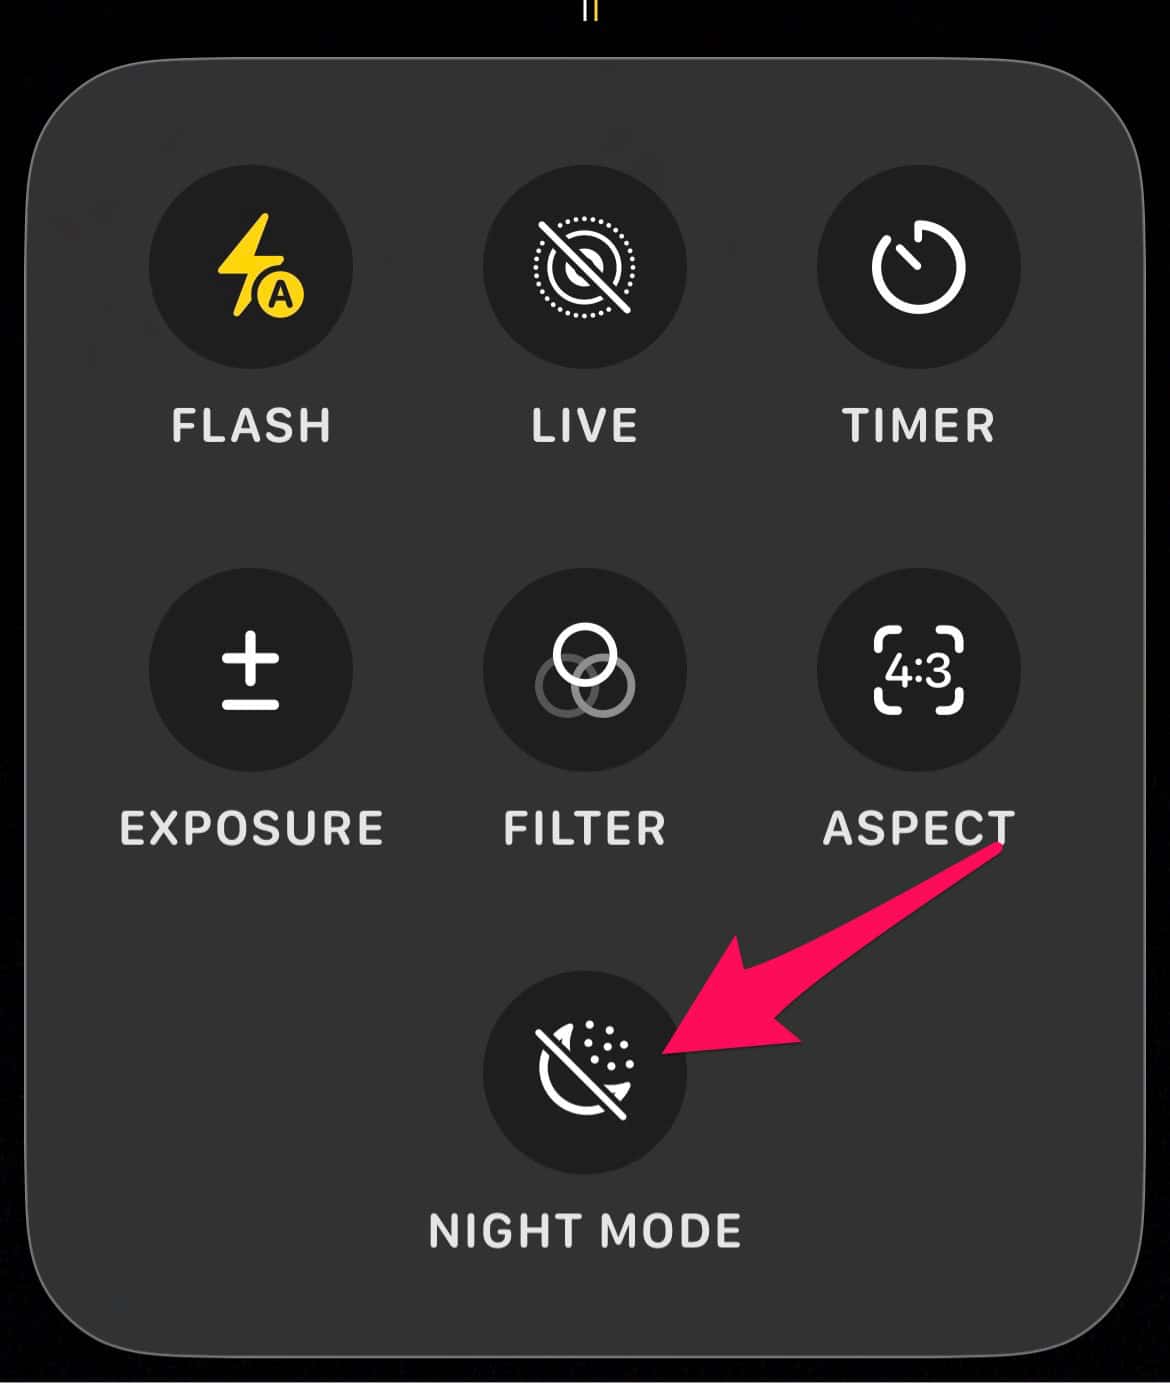
- Slide the timer to a specific second count.
- Slide the Exposure tool to the left.
Furthermore, a great photo might look fuzzy on your home screen. You should fix iPhone lock screen wallpaper blur to ensure your photography looks sharp on your display.
3. Manage Depth and Background Clarity

Portrait Mode often struggles with the intricate edges of tinsel. This results in “halo” artifacts around the branches. Therefore, you should switch to standard Photo Mode for better edge detection. This method prevents the software from blurring important holiday details.
- Select standard Photo Mode instead of Portrait.
- Use the “Edit” function later to blur background iPhone photos manually.
- Clean your camera lens with a microfiber cloth.
- Lean against a wall to eliminate camera shake.
- Use a tripod for the best stability.
FAQ
Slow shutter speeds usually cause this blurriness. Small hand movements create motion blur while the shutter remains open.
No. Flash flattens the image and destroys the warm glow. Always use Night Mode instead of the flash.
Wipe your lens thoroughly. Fingerprint oils catch the light and create a “starburst” effect.
Mastering Your Festive Photography Skills
Don’t let technical glitches ruin your holiday spirit. First, master your exposure settings. Next, disable intrusive auto-macros. These steps ensure you capture the season with professional clarity. If you still see graininess, you must fix a blurry iPhone camera on iOS by checking for software updates.


Discussion