
One of the most used tools in iMovie is known as the Ken Burns effect. This effect adds the illusion of motion when presenting photos through panning, zooming, and transitioning. Although the Ken Burns effect is most often used for animating presentations made up of still photos, it is now also being used in videos. With this effect, videos captured while the camera is in a stationary position can be spiced up to have the appearance of being in motion. In this guide, I will show you how to use the Ken Burns effect in iMovie using your iPhone, iPad or Mac.
What is the Ken Burns Effect?
As mentioned, the Ken Burns effect is a panning, zooming, and transitioning tool that adds the illusion of motion in photos. The effect was named after Ken Burns, a documentary filmmaker who popularized the editing technique. The Ken Burns effect has been used in many historical documentaries that mostly used archival photos. Applying the Ken Burns effect while presenting historical facts made the documentaries more engaging and entertaining.
Don’t miss the best of The Mac Observer
Set us as a preferred source and our Apple reporting ranks higher in your Google Search results and Discover feed — one tap, no account changes.
How to Use the Ken Burns Effect in iMovie on Your Mac
Using the Ken Burns Effect in iMovie, whether on your iPhone or iPad or Mac, is pretty simple. Through the efforts of former Apple CEO Steve Jobs, a Ken Burns button was officially added to iMovie. This was after Steve Jobs asked Ken Burns himself for permission to use his famous editing effect in Apple’s iMovie software.
By default, iMovie applies the Ken Burns effect automatically when you load a photo in iMovie on your Mac.
Time needed: 1 minute
To use or modify the Ken Burns effect in your own video on Mac, here’s what you need to do.
- Open the iMovie app.
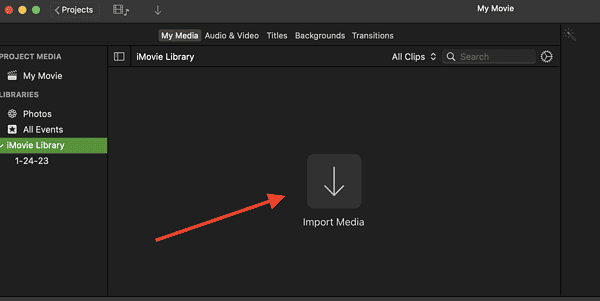
- Click File > Import Media.
- Select your media, then drag and drop them to the project timeline.

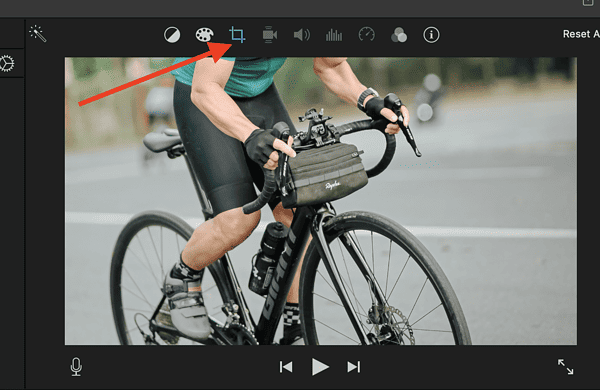
- Click the Crop icon at the top of the preview section (upper right of the screen).
- Click Ken Burns.
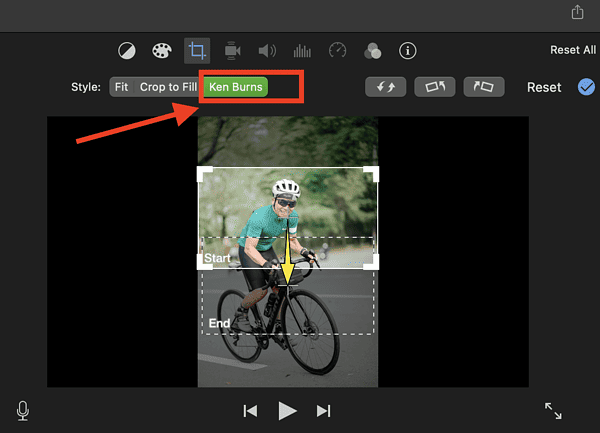
- From here you can change or swap the start and end areas of the effect, rotate the clip clockwise or counterclockwise and even resize the image as the Ken Burns effect progresses.
- Click the check mark icon to apply the effect.
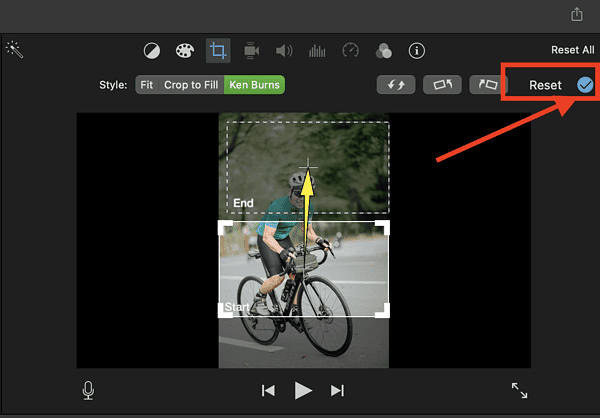
- Preview the effect on your media by clicking the Play button in the preview window.


How to Use the Effect on your iPhone or iPad
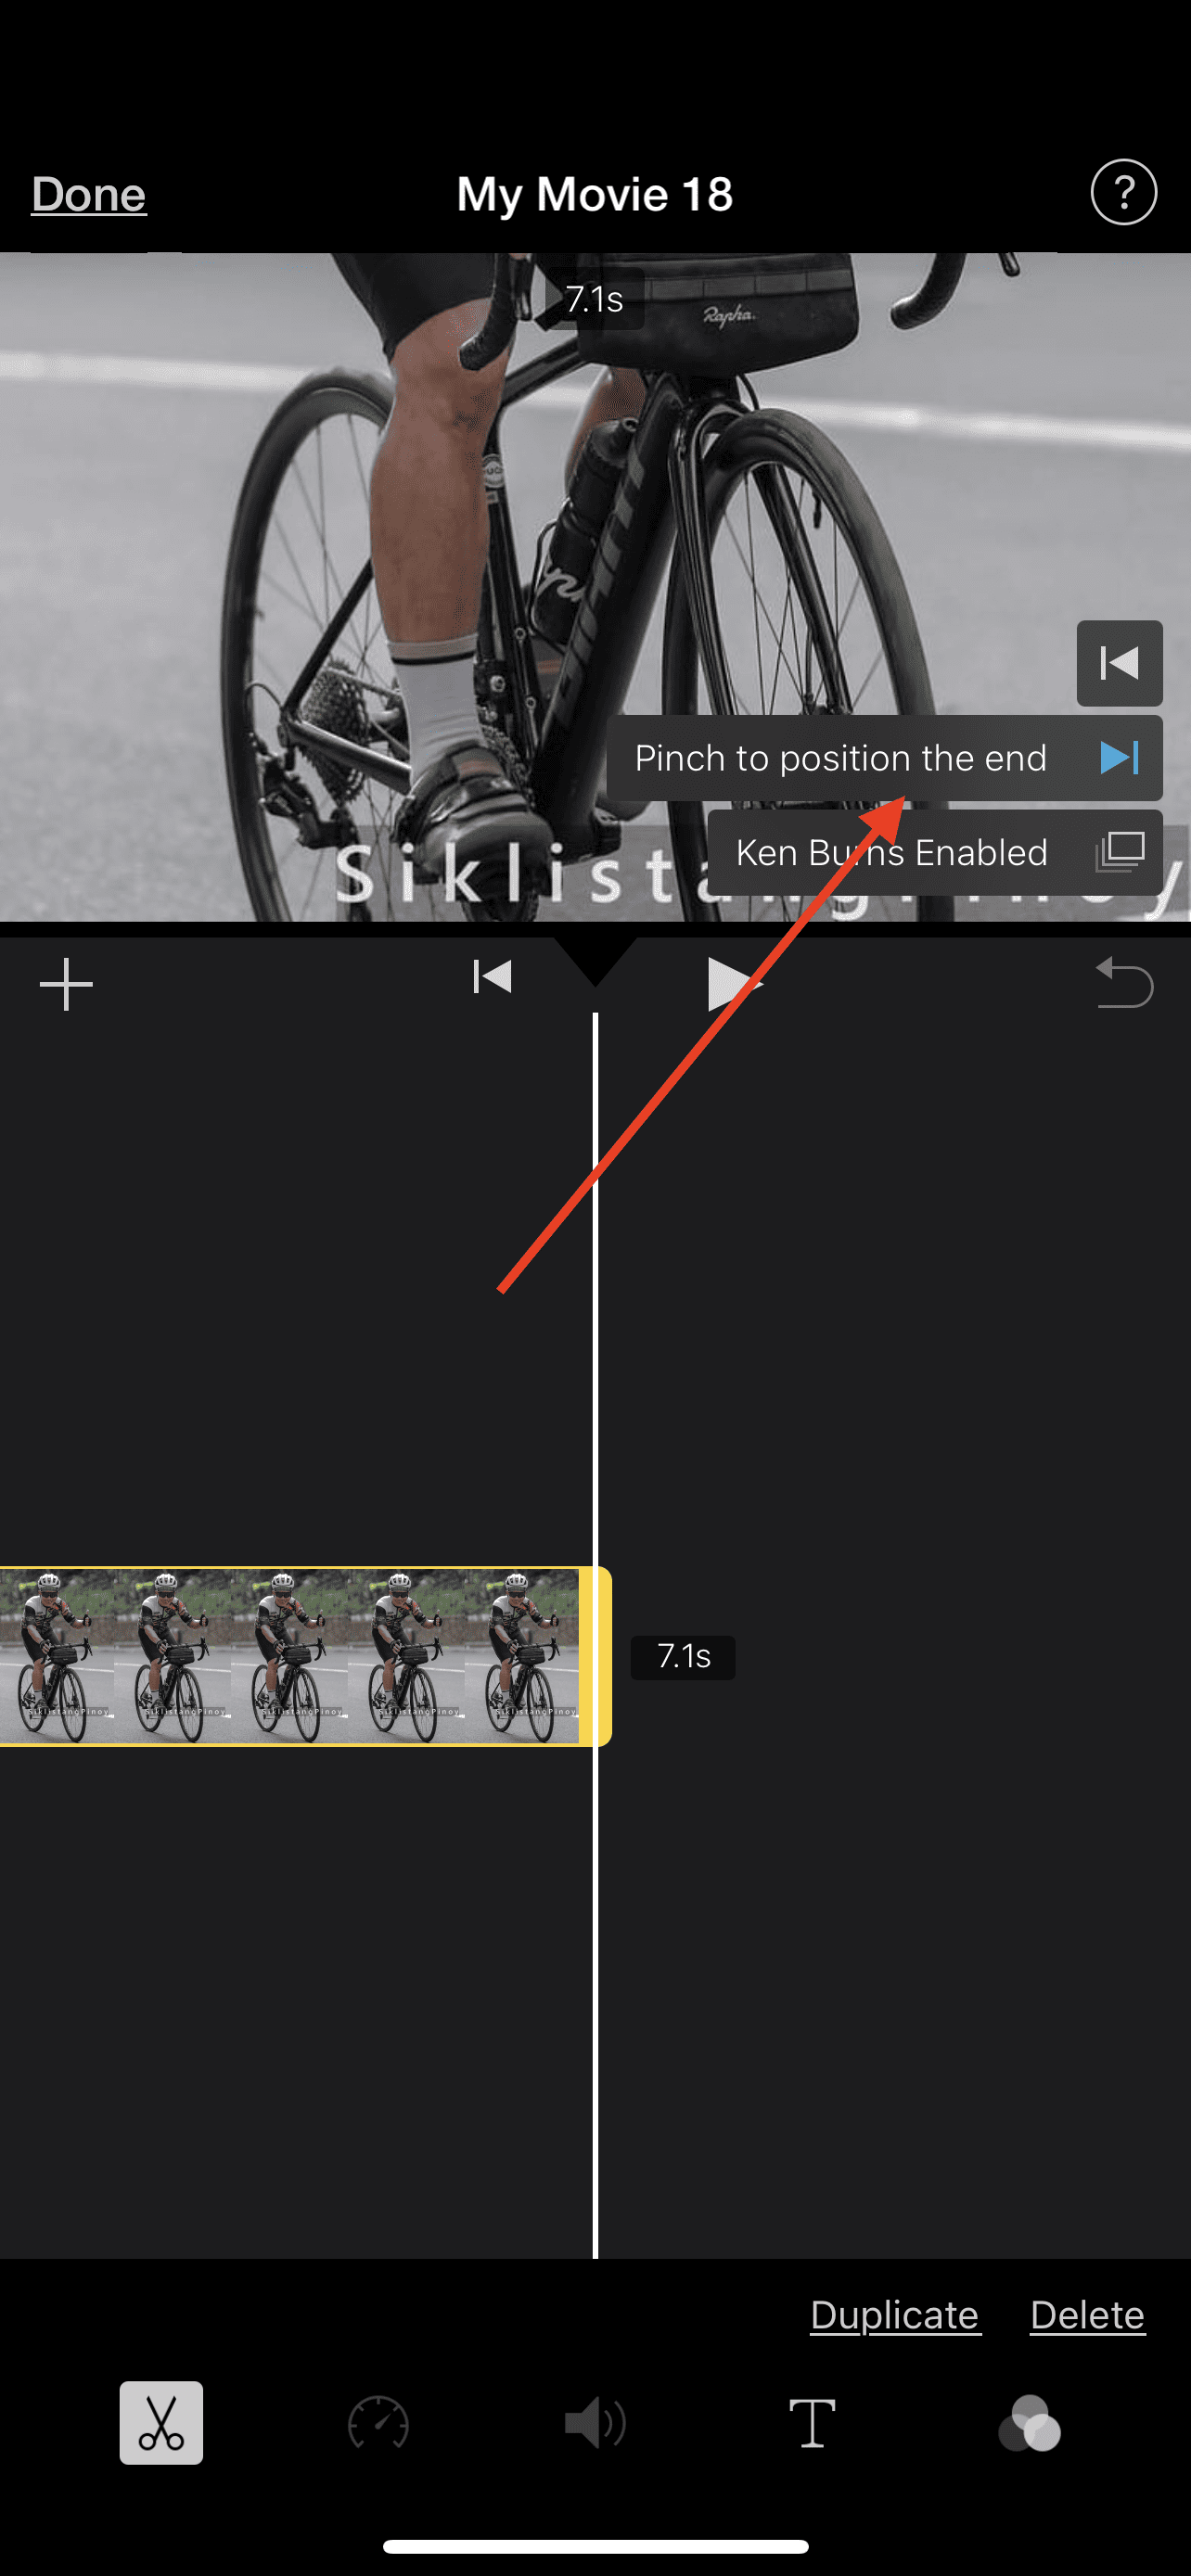
Similar to iMovie for Mac, Ken Burns is also enabled by default when you load a photo in a new project timeline.
- Open the iMovie app.
- Click Start New Project > Movie.
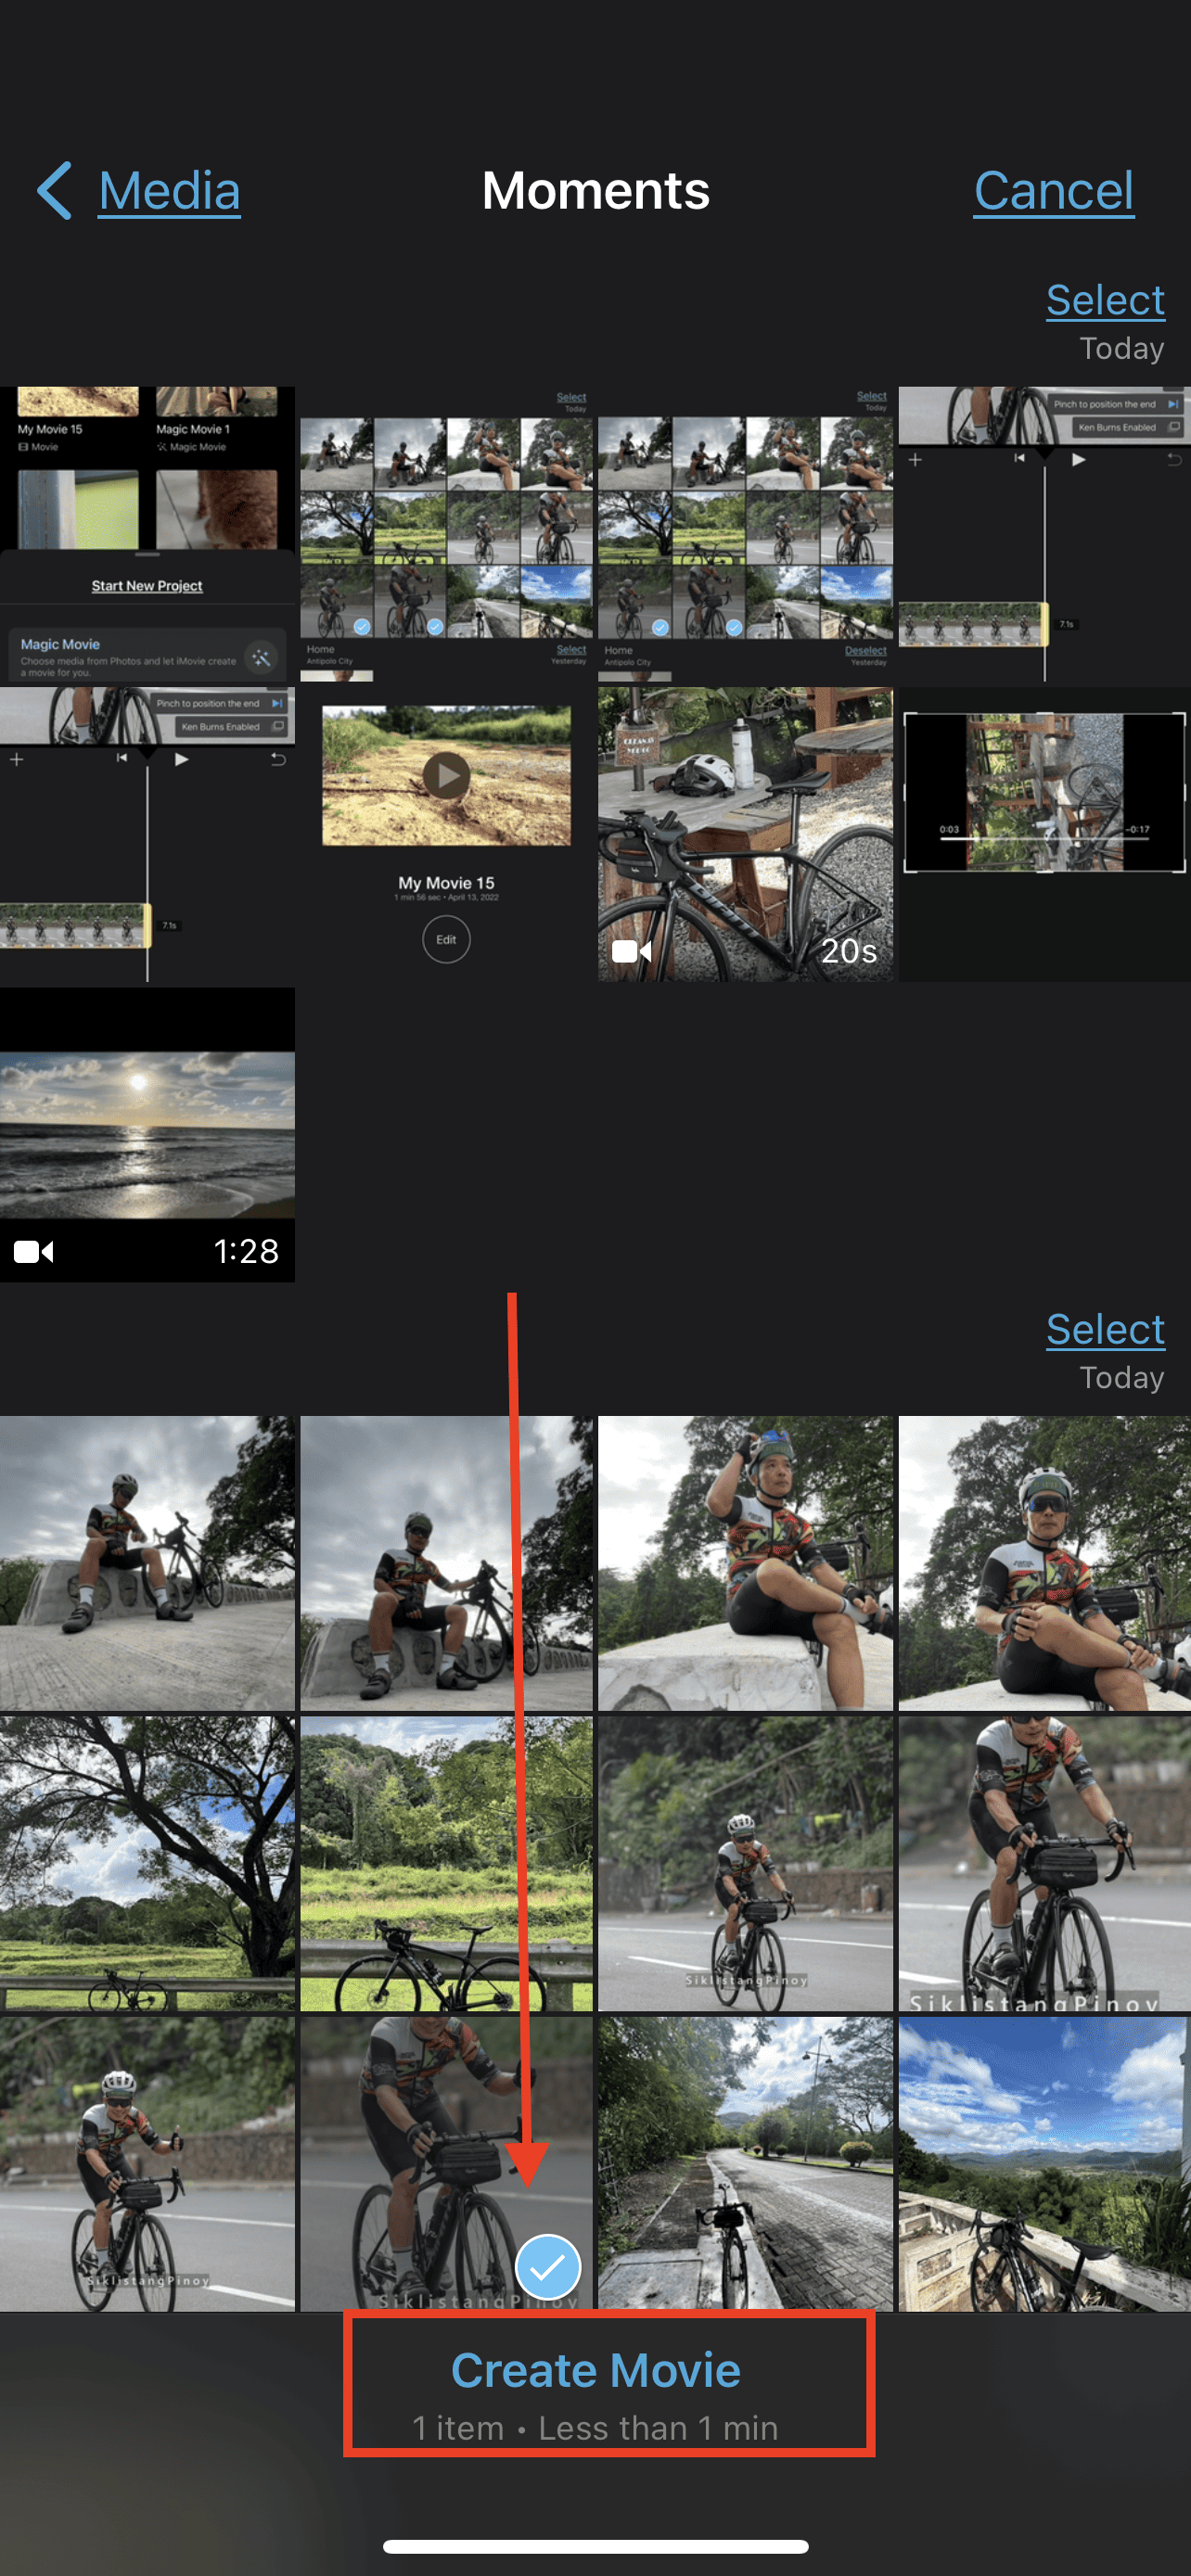
- Select a photo.
- To edit the default Ken Burns effect, simply pinch on the preview window to position the end of the Ken Burns effect.


How to Use the Ken Burns Effect on a Video in iMovie on Your Mac
Unlike when applying the Ken Burns effect on photos, the effect is not enabled by default when you’re working with videos. But of course, you can still apply the effect. This is particularly useful when adding a panning effect on a clip. All you need to do is to select the part of the video where you want to apply the effect. Then click Ken Burns and you will see two boxes in the preview windows: the start and end. You can use these windows to adjust the beginning and end of the Ken Burns effect.

Final Words: When and How Long to Use the Effect in a Video
Back when I was uploading workout videos to my YouTube channel, I used the Ken Burn effect countless times. But until now, I could never say that I’ve mastered using it. It takes patience to effectively use the effect on your media project. There is no doubt as to its usefulness. But like many other skills, it takes patience and practice before you can maximize its full potential. The key here is knowing when to apply the Ken Burn effect, how long to apply it, and most importantly, when not to use it.


Can we get carriage returns fixed in comment boxes? By default it erases white space.
“By default, iMovie applies the Ken Burns effect automatically when you load a photo in iMovie on your Mac.”
.
By default it shouldn’t be automatically applied, it should be an option. And then it should be at least as difficult to apply than it is to turn it off when automatically applied. That being said I pretty much stopped using iMovie on the Mac and instead I use Final Cut Pro. I occasionally use the iOS version of iMovie, but just for video.