
Consider this scenario: you’re trying to install macOS Ventura on your Macintosh HD, but suddenly an error prompt says, “macOS Ventura cannot be installed on Macintosh HD.” Then you start panicking and ask yourself, “can macOS Ventura be installed on Macintosh HD?” Since that’s the default volume name for any macOS installation, the answer should be yes. Follow the troubleshooting tips below to resolve the issue and successfully install macOS Ventura on your computer.
Reasons Why macOS Ventura Can’t Be Installed on Your Mac
Below are some of the reasons why macOS Ventura won’t install on your Macintosh HD.
- Corrupted macOS installer file.
- Mac Startup Disk problems.
- Poor internet connection.
- Hardware incompatibility.
- Damaged installer path.
- Storage space issue on your Macintosh HD.
How to Fix the macOS Ventura Cannot Be Installed on Macintosh HD Error
Ensure a Fast, Stable Internet Connection
If you’re installing macOS Ventura using a downloaded installer, you will still need a fast and stable internet connection during the installation process. That’s because the installation process involves verification from servers as well as important information about your Mac and the firmware available. So, if your Wi-Fi is slow or unreliable, you may want to use a wired internet connection instead.
Try Rebooting Your Mac
Sometimes, a quick reboot can solve many issues, most especially if you’re installing from a downloaded installer and not through Software Update. After restarting your Mac, try installing macOS again and see if it works this time. You may need to restart your Mac several times before this method works.
Verify Your Mac’s File System
In case you’re not aware, macOS Ventura requires the APFS file system format, while some older versions of the operating system still use the Mac OS Extended (Journaled) HFS+ format. If this is the case with your Mac, you will need to convert your HFS+ volume to APFS before macOS Ventura can be installed on your Mac.
Follow the steps below to convert HFS+ volume to APFS. Note that although this may not cause data loss, I would still suggest to run a TIme Machine backup before doing the steps below.
Convert Your Mac’s Startup Disk to APFS
- Boot your Mac into Recovery Mode (follow the steps to boot M1 or Intel-based Mac in recovery mode.
- Go to Applications > Disk Utility
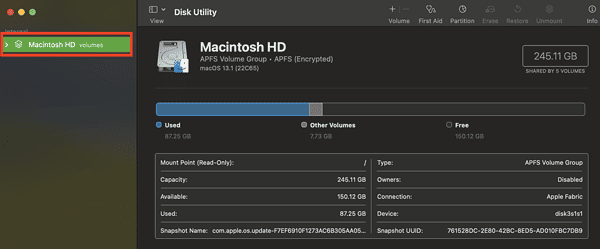
- Select HFS+ Startup Drive (Usually named Macintosh HD)
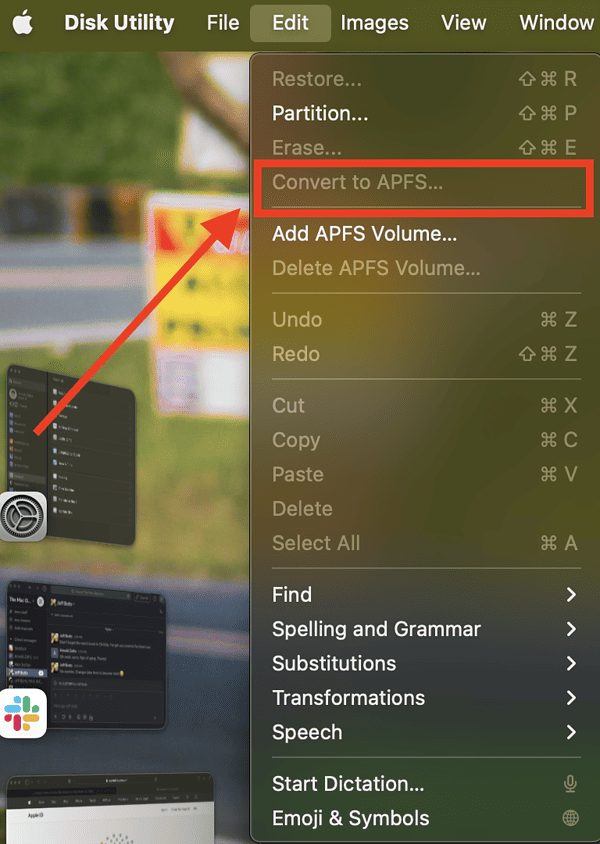
- Click the Disk Utility Edit Menu
- Select “Convert to APFS”
- Click on the Convert button
- Click “Done” when the conversion has finished. You may allow the system to send the conversion report to Apple for Quality Control analysis. Or not.
- Try again to install macOS Ventura again and see if this method works.


Check Your Mac’s Correct Time and Date
During the macOS installation process, your computer may fail to connect to Apple’s servers due to an incorrect time and date setting on your Mac. Fix this by simply going to System Preferences > Date & Time.

Can’t Install macOS Ventura Due to a Corrupted Installer
The most common problem when you are unable to install macOS Ventura on Macintosh HD is a corrupted installer file. This means you need to delete the installer and re-download it. Make sure to delete the installer from your Applications folder, and Empty Trash on your Mac. Once done, download the macOS Ventura installer and try again to install the new operating system.
Sometimes, you may also need to update your current macOS to its latest version before you start installing macOS Ventura. So, if it’s not a bother, do that first then try the macOS Ventura installation again.
Repair Your Mac Startup Disk
If your Mac’s Startup Disk has errors, you may not be able to install macOS Ventura on your computer. So, check and, if necessary, repair your Mac’s startup disk before reattempting the installation.
- Boot your Mac into Recovery Mode.
- Intel-based Mac: Press Power Button + Command + R keys, then release when the Apple logo appears.
- Apple Silicon Mac: – Press and hold the Power Button until Loading startup options appear.
- Click Options > Continue.
- Click Disk Utility > Continue
- Click View > Show All Devices
- Select your Startup Disk, then click First Aid > Run
After the First Aid process is done, reboot your Mac and try again.
Free Up Storage Space on Your Mac
Finally, macOS Ventura cannot be installed on Macintosh HD without the required storage space. The full macOS Ventura installer requires around 12GB of space but you’ll need at least 35GB of space on the drive if you upgrade from macOS Sierra or later. If you’re upgrading from an earlier version than macOS Sierra, you will need at least 44GB of storage space on your drive.
To check your Mac’s available storage:
- Click on the Apple menu > About This Mac.
- Click Storage > Manage.
- Check each item and delete unnecessary files to free up space.

Now, if all of the above steps still won’t work, the last thing that you can do (which I hope you won’t need to do) is to perform a clean install of macOS Ventura. However, that means deleting all the data on your Mac. So, if you are forced to do this step, be sure to back up your data first.


