
If you’ve been holding back on using Microsoft Outlook for Mac before due to its license fee or Microsoft 365 subscription fee, you’ll be glad to know about a recent announcement by Microsoft. You guessed it right, Microsoft Outlook is now free to use. This means that you can now add not only your Gmail account but your Apple Mail account into Outlook for Mac as well. In case you haven’t done it before, this guide will teach you how to set up your Gmail email account in Microsoft Outlook for Mac.
Download and Install Outlook for Mac First
The first thing you need to do is to download and install Microsoft Outlook for Mac. As mentioned, it’s now free to download from the App Store and you can use it right away without the need for a license or a Microsoft 365 account. After installing it, you can log in using your existing Outlook account or create a new personal account if you only have an account issued by your organization.
How to Set Up Gmail Email in Microsoft Outlook for Mac
You can easily add your Gmail account in Microsoft Outlook for Mac, the same way that you do with your Apple email account. Follow the steps below to do so.
Setting up Gmail in Microsoft Outlook for Mac
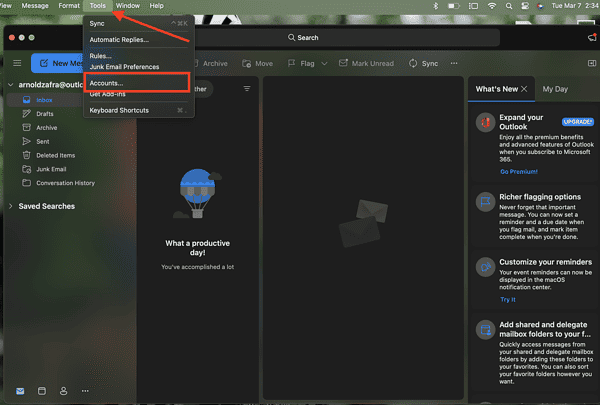
- Open Microsoft Outlook for Mac.
- Click Tools > Accounts.
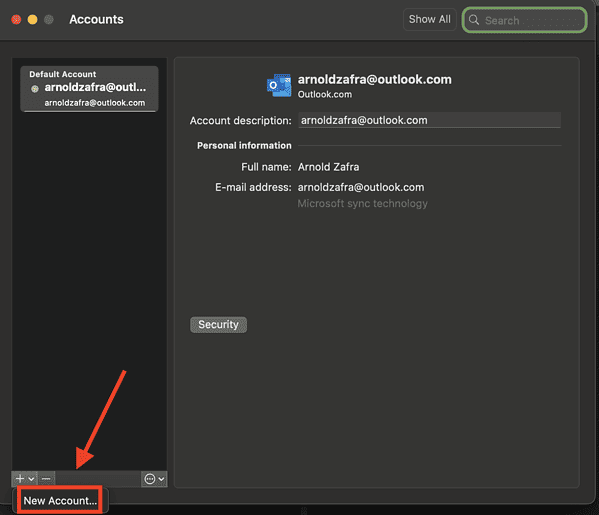
- Click the plus (+) sign at the bottom left of the window, then New Account.
- Click the Gmail icon, then enter your Gmail address.
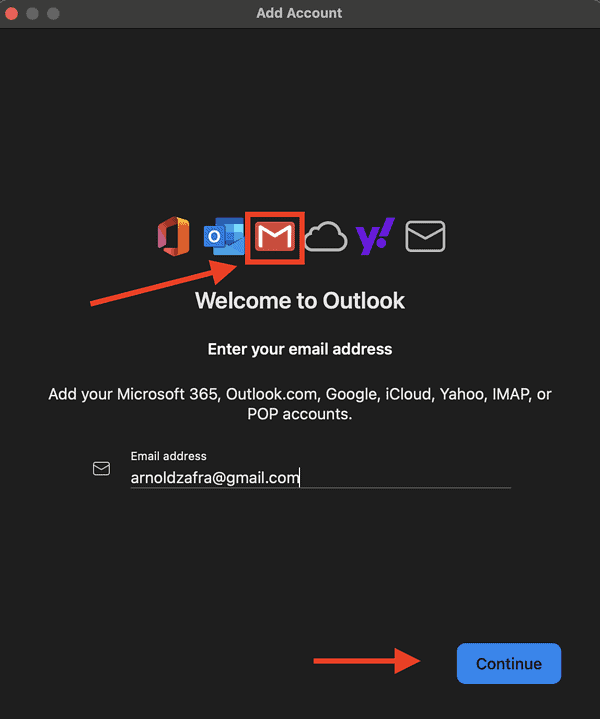
- Click Continue > Continue.
- This will open up a browser window where you will need to sign in to your Gmail account.
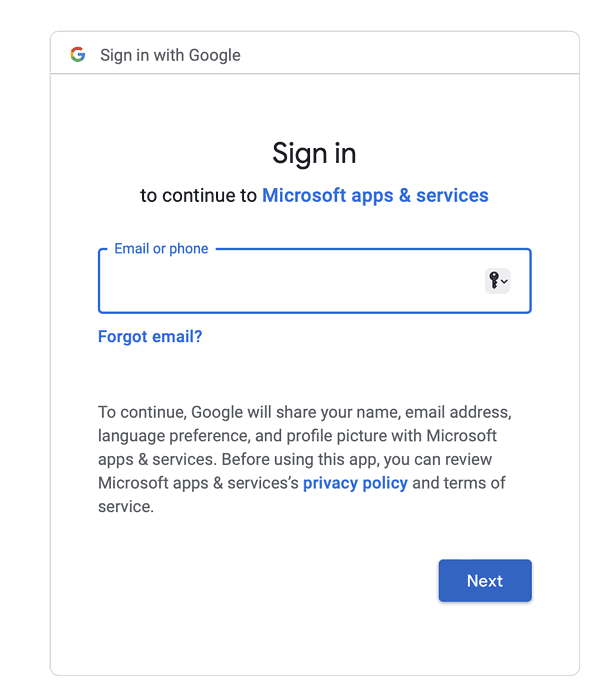
- Enter your Gmail name and password, then click Next.
- Click Allow to allow Microsoft Apps and Services to access your Google account.
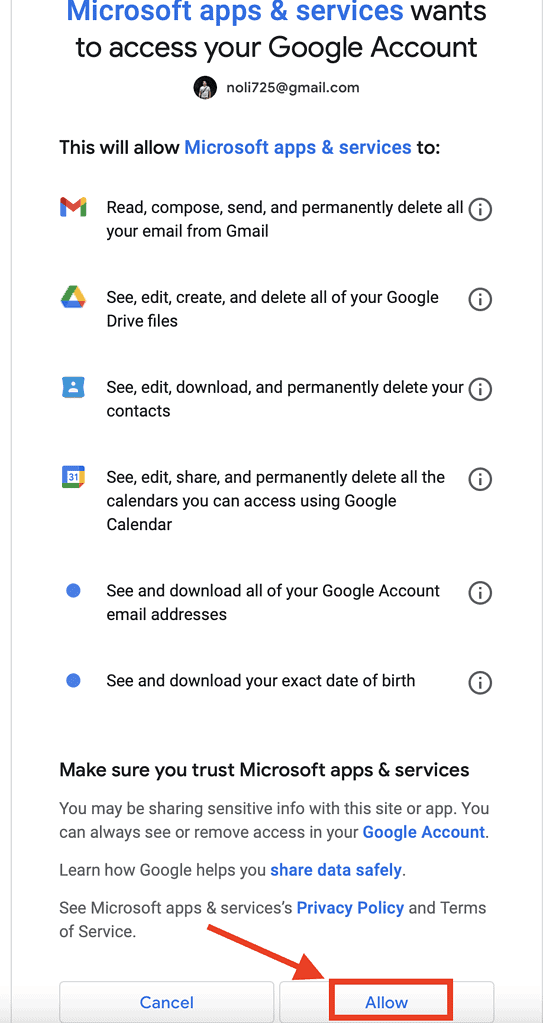
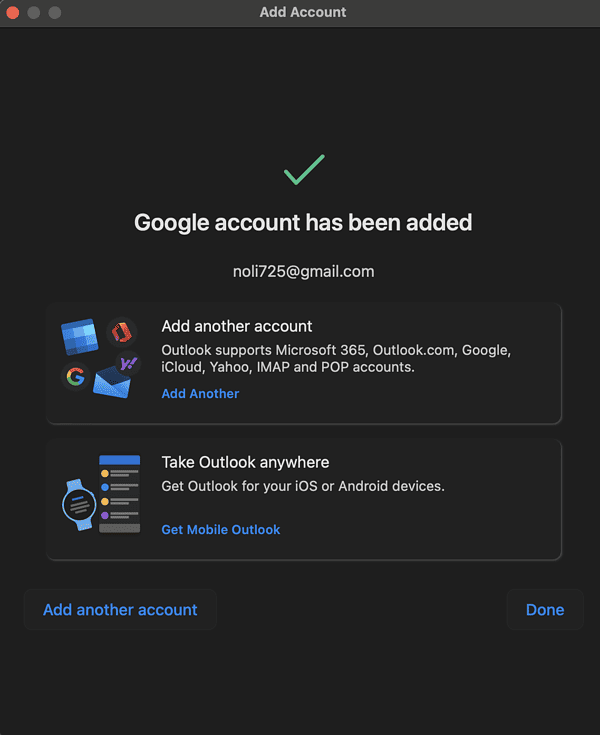
- Click Allow > Done.


How to Enable Two-Factor Authentication and App Password to Set Up Gmail on Microsoft Outlook for Mac
There’s a chance that when you enter your Gmail password, Microsoft Outlook for Mac might reject it. Don’t worry, this simply means that you might be using a version of Outlook that does not support the method for adding Gmail email as described above.
There are two ways of working around this issue. You can either enable two-factor authentication and use an app password or enable a setting that would allow “less secure apps” to connect to your Outlook account. For obvious reasons, I would not recommend doing the second step.
So, let’s proceed with enabling two-factor authentication on your Gmail account and generating an app password.
- Open your Mac’s Safari browser and go to gmail.com.
- Click on the Google Apps icon on the upper-right side, next to your account icon.
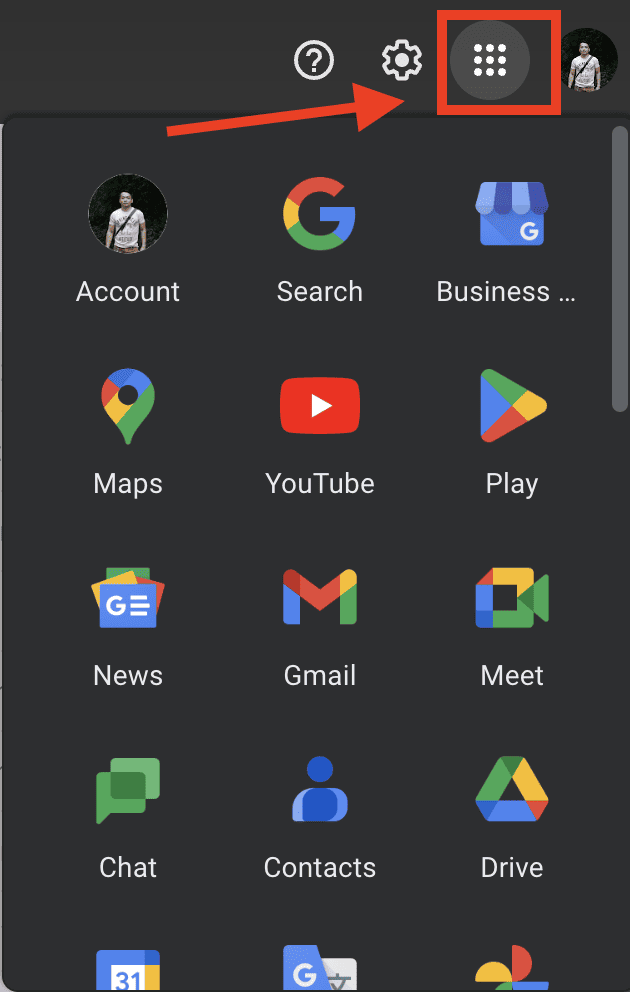
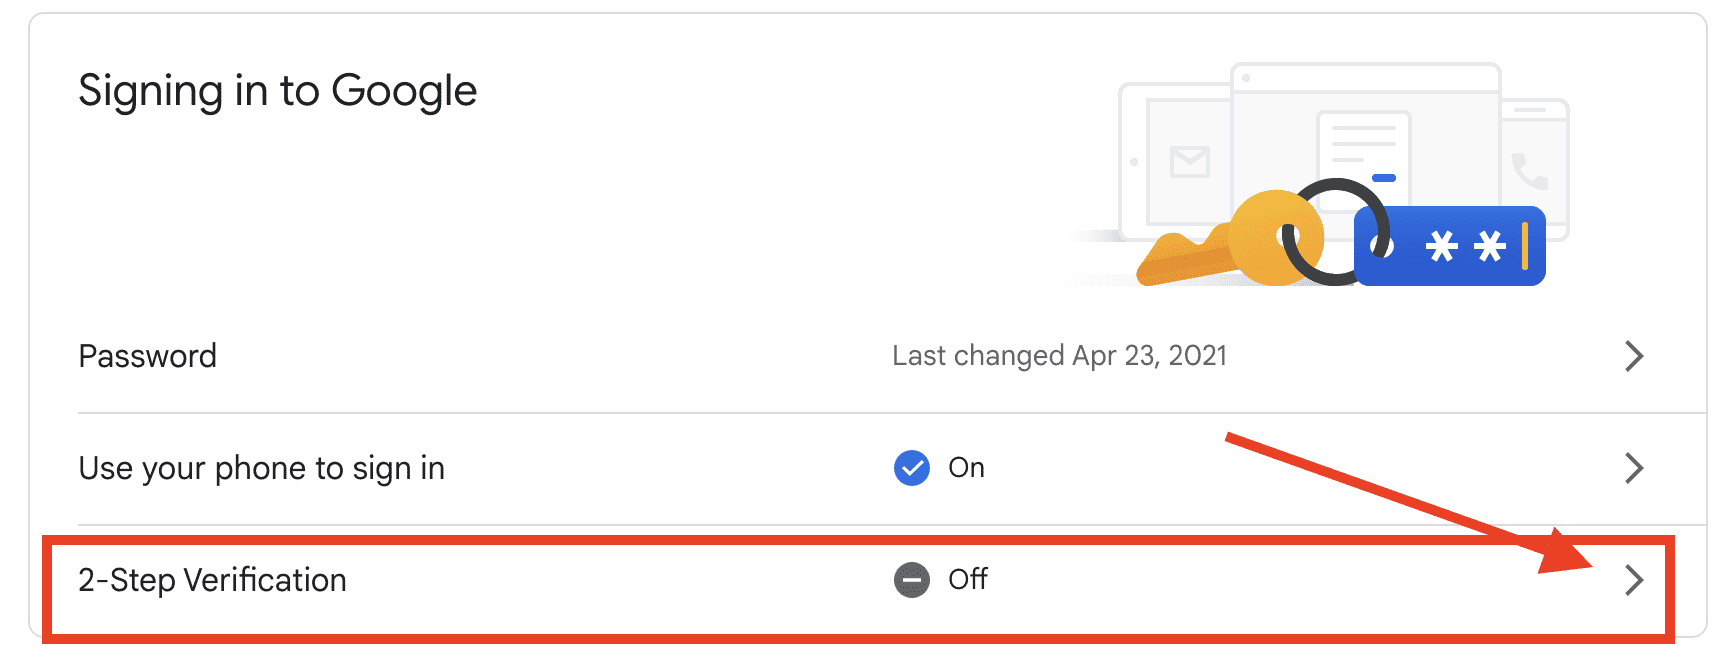
- Click on your account, then click Security on the left sidebar.
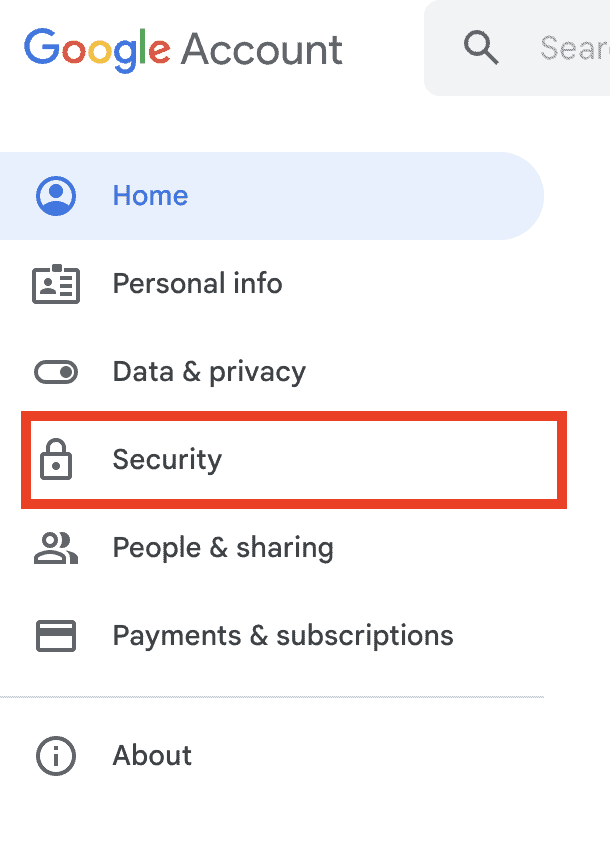
- Under Signing in to Google, toggle 2-Step Verification on.
- Click Continue.
- Enter your Google password if prompted, then click Continue.
- Enter your phone number and select whether you want to receive your verification codes by text message or phone call. Then click Next.
- Enter the code you received, then click Next.
- Click Turn On to finish setting up 2-step verification.

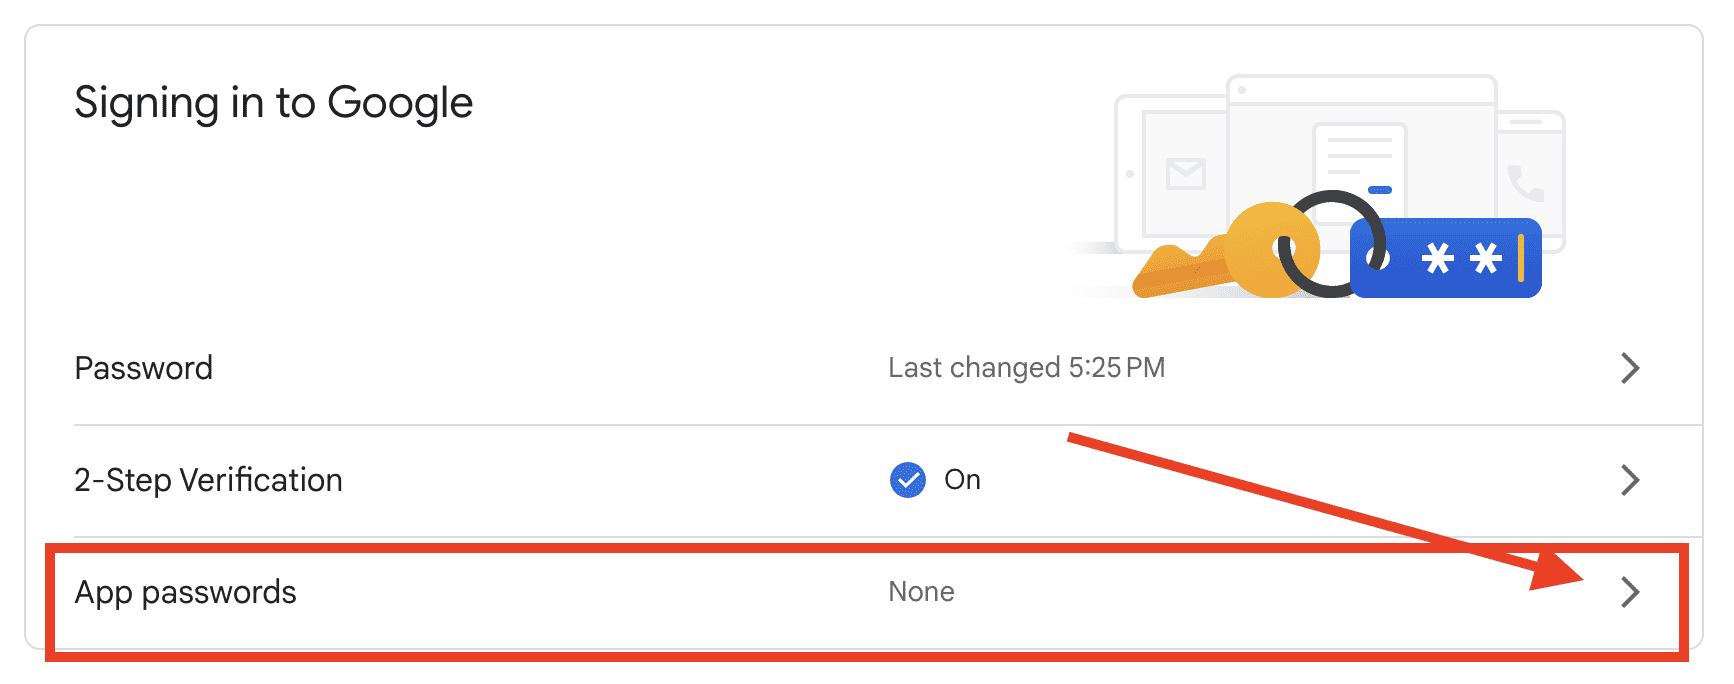
- Click the left arrow at the top of the screen, next to 2-step Verification.
- Click the right arrow next to App passwords under Signing in to Google.
- Enter your Google password, then click Sign in.
- Select Mail and Mac from the drop-down lists.
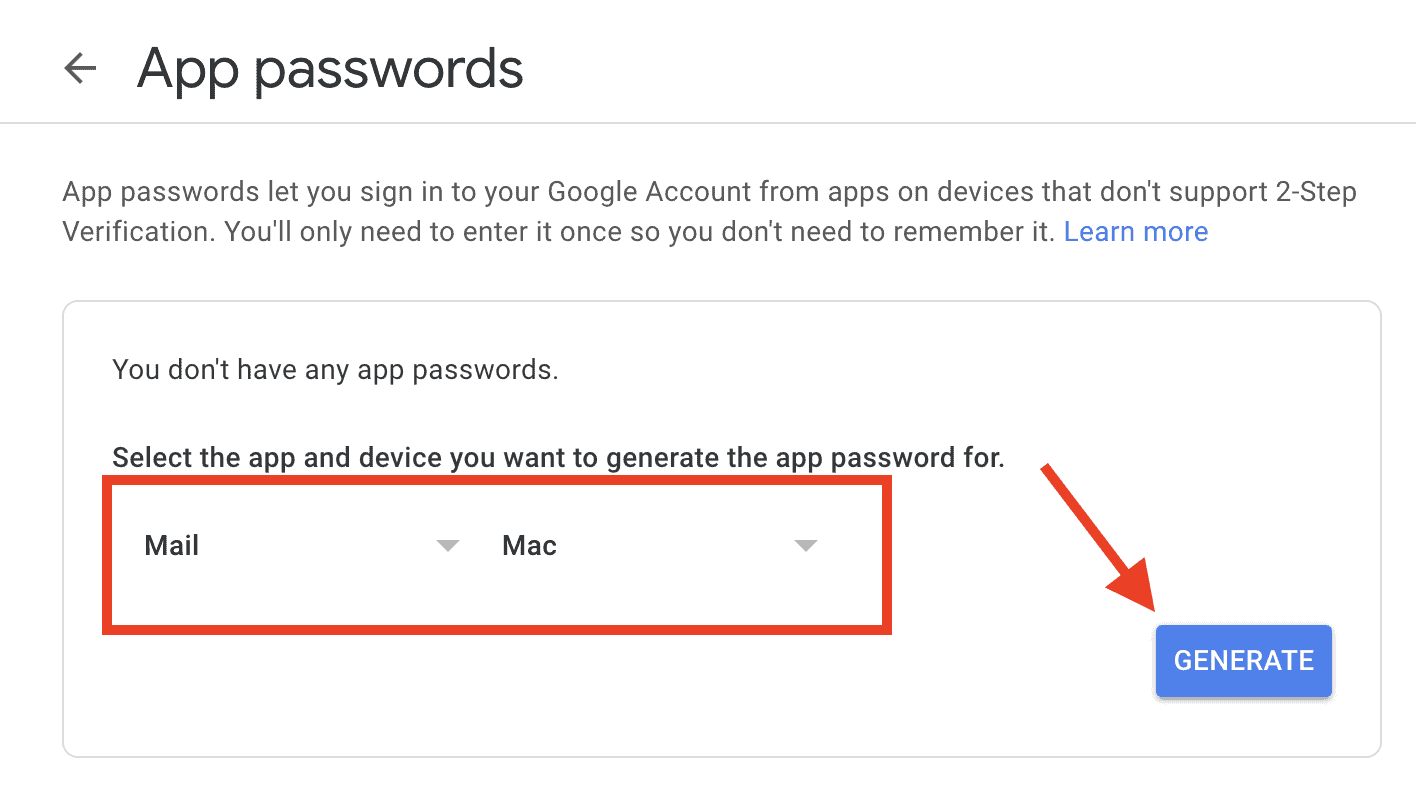
- Click Generate.
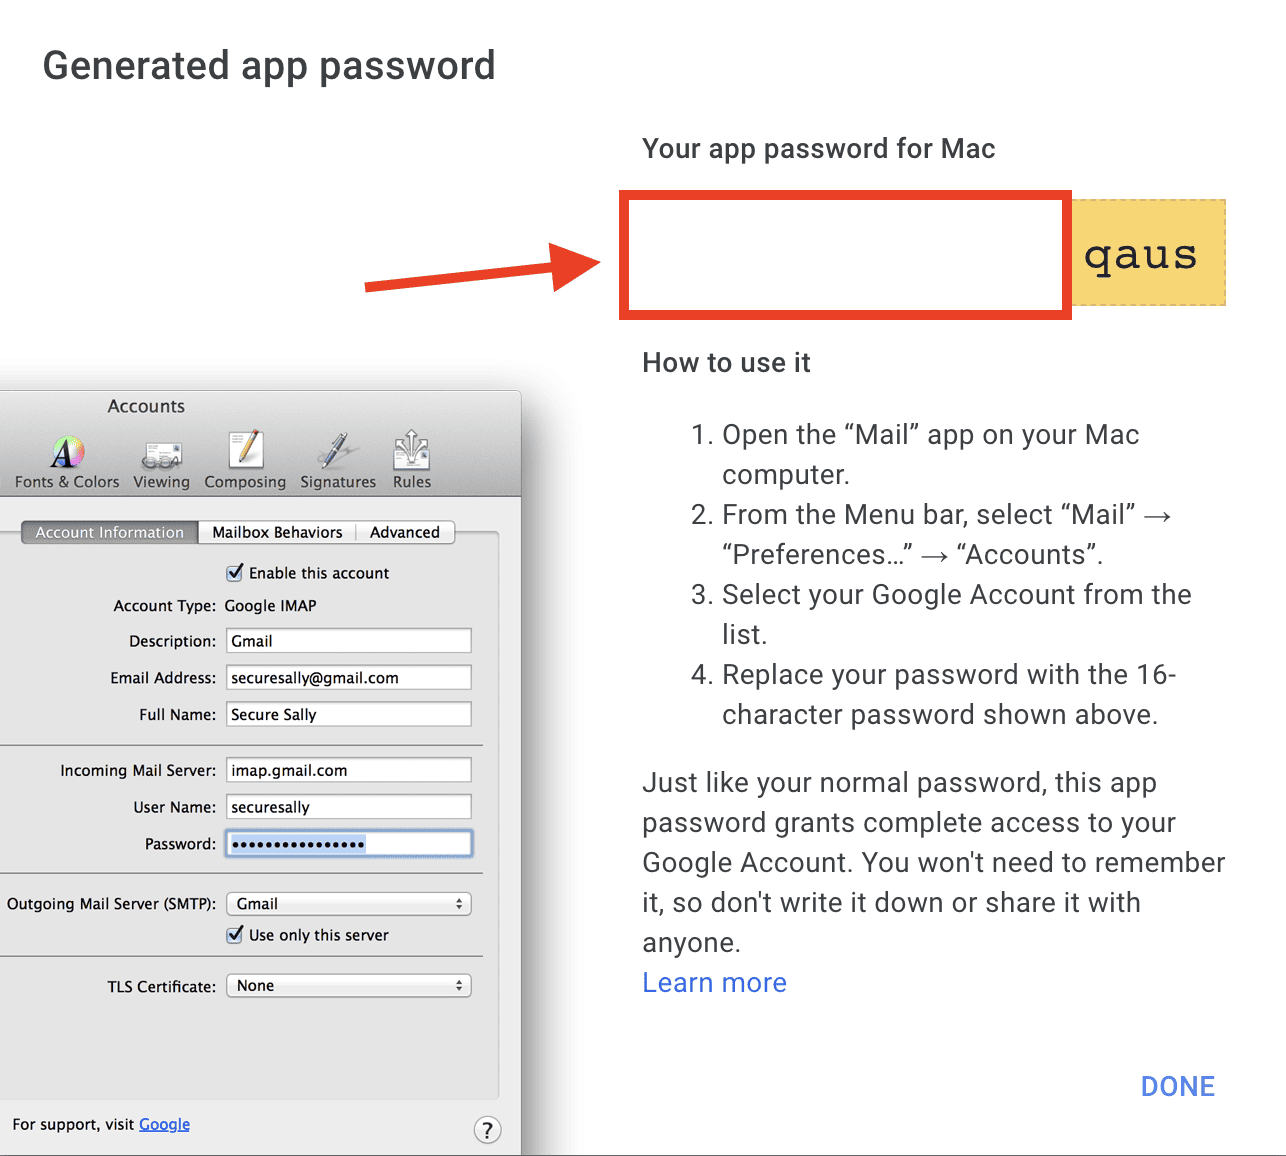
- Use the password when adding Gmail email on Outlook for Mac, if it prompts you.


Bonus Tip: Making Outlook for Mac a More Efficient Email Client
If this is your first time using Microsoft Outlook, you might as well know about some of the features that make it more efficient. Like other email clients, Outlook for Mac has several customization features that will enable you to fully utilize it. Some of these noteworthy features include Folder organization, Email Rules, Signatures, and Contact Lists.
The key here is to explore the app and get to know its nooks and crannies. In time, you may grow to love it, making it your preferred email client where you can view all your emails from your various accounts, including Apple’s iCloud email.


