
Mac users may be glad to learn that Microsoft announced that Outlook for Mac is now free to use. So for those of you who wanted to use Microsoft Outlook but didn’t want to pay for a license fee or subscribe to Microsoft 365, you are now free to download Microsoft Outlook for Mac, install it and then set up your iCloud email with the email client. If you don’t know how to do it, this guide will show you how to set up iCloud email in Microsoft Outlook for Mac.
Create an iCloud Email Then Set it Up on Microsoft Outlook for Mac
Before you can set up your iCloud email in Microsoft Outlook for Mac, you need to create a primary email address for iCloud Mail. Follow the steps below to create a primary iCloud Mail address on your iPhone, iPad, or Mac.
On your iPhone or iPad, follow these steps:
- Go to Settings, then tap your name.
- Tap iCloud > iCloud Mail, then follow the on-screen instructions to create your iCloud email address.
- If you don’t see onscreen instructions, that means you already have an iCloud email address.
To do this on your Mac, the process is quite similar.
- Choose Apple Menu > System Settings (System Preferences for macOS 12 or earlier).
- Click your name (or Apple ID for macOS 12 or earlier) > iCloud.
- Click iCloud Mail > Turn On.
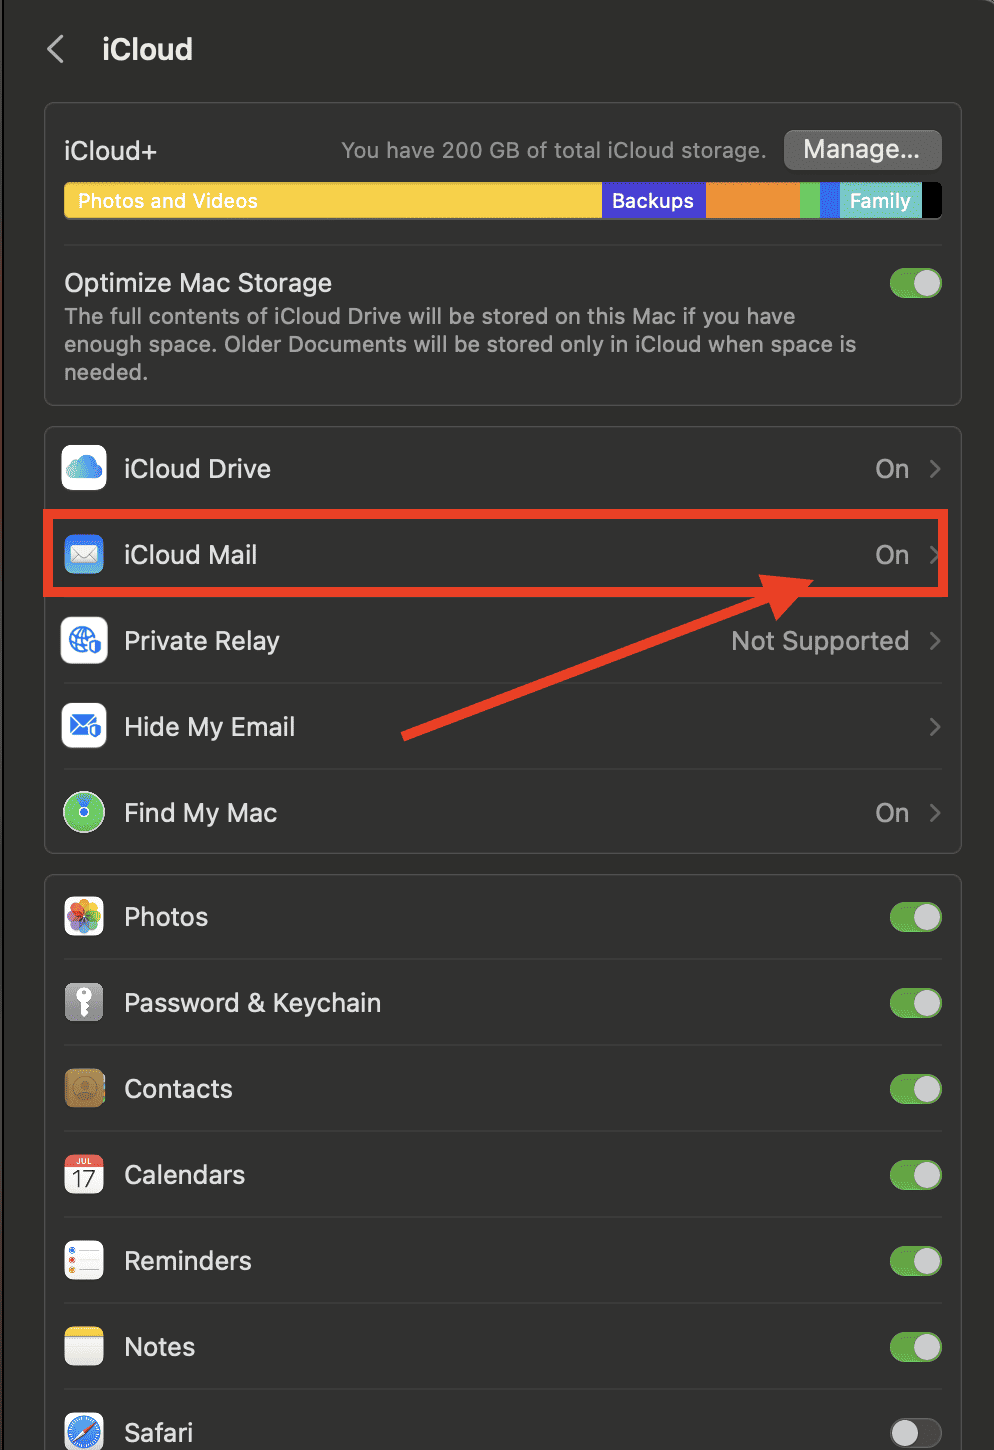
- Follow the onscreen instructions to create your iCloud email.
- If you don’t see onscreen instructions, that means you already have an iCloud email address.

Find out more about how to create an iCloud email address in our dedicated article.
How to Set Up iCloud Mail on Microsoft Outlook for Mac
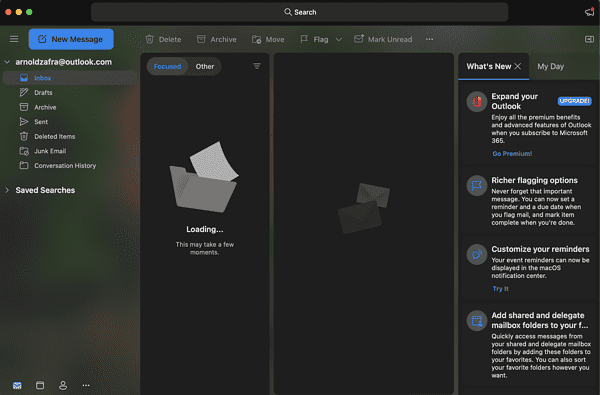
If you have Microsoft Outlook for Mac already installed on your laptop, simply follow the steps below to view your iCloud email. In case you haven’t installed it yet on your Mac, you can download Microsoft Outlook for Mac from the App Store.
Time needed: 2 minutes
To set up your iCloud Email on Microsoft Outlook for Mac.
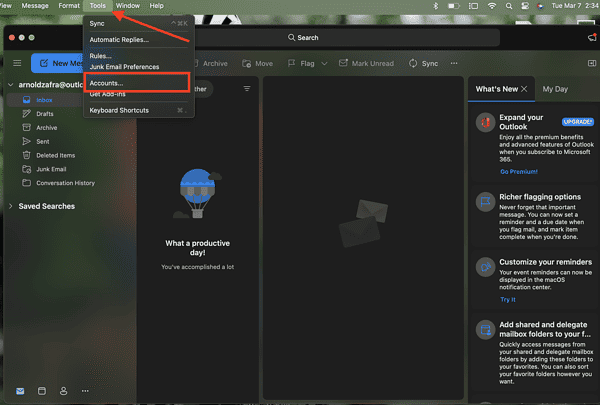
- Open Microsoft Outlook for Mac.
- Click Tools > Accounts.
- Click the plus (+) sign below the left sidebar, then New Account.
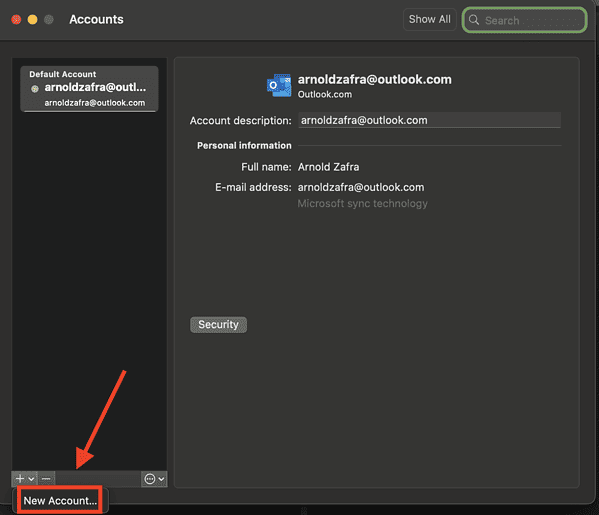
- Click the iCloud icon/logo, then enter your iCloud email address and password.
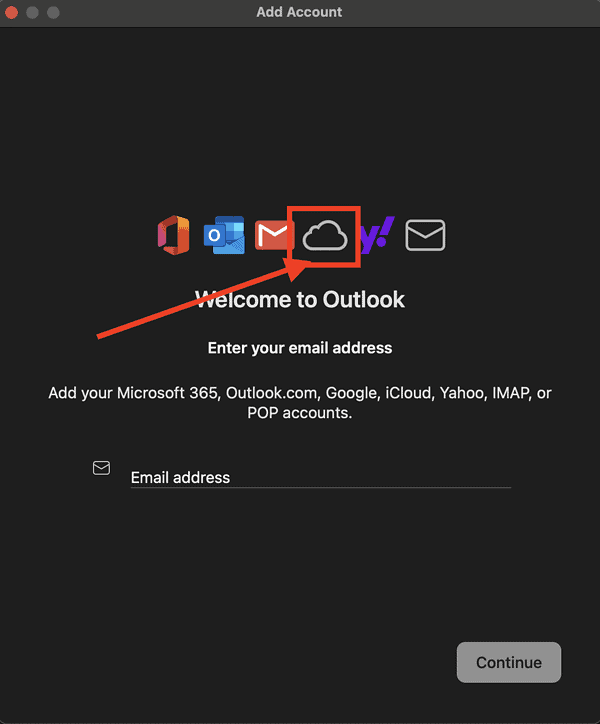
- Click Next.
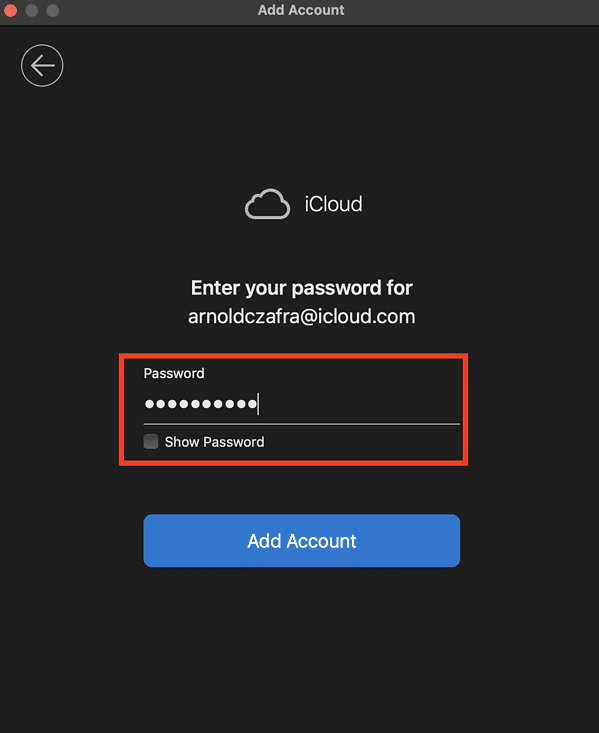
If prompted, enter your password again.
- Click Add Account > OK.


How to Get an App-Specific Password for Microsoft Outlook for Mac
Sometimes, Microsoft Outlook for Mac won’t accept your password when you’re trying to set up your iCloud email. This is because your iCloud email account requires additional security. In this case, you need to generate an app-specific password, or app password, so that you can add your iCloud email account to Microsoft Outlook for Mac. Follow the steps below to do so.
- Open the Safari browser and go to the Apple ID website.
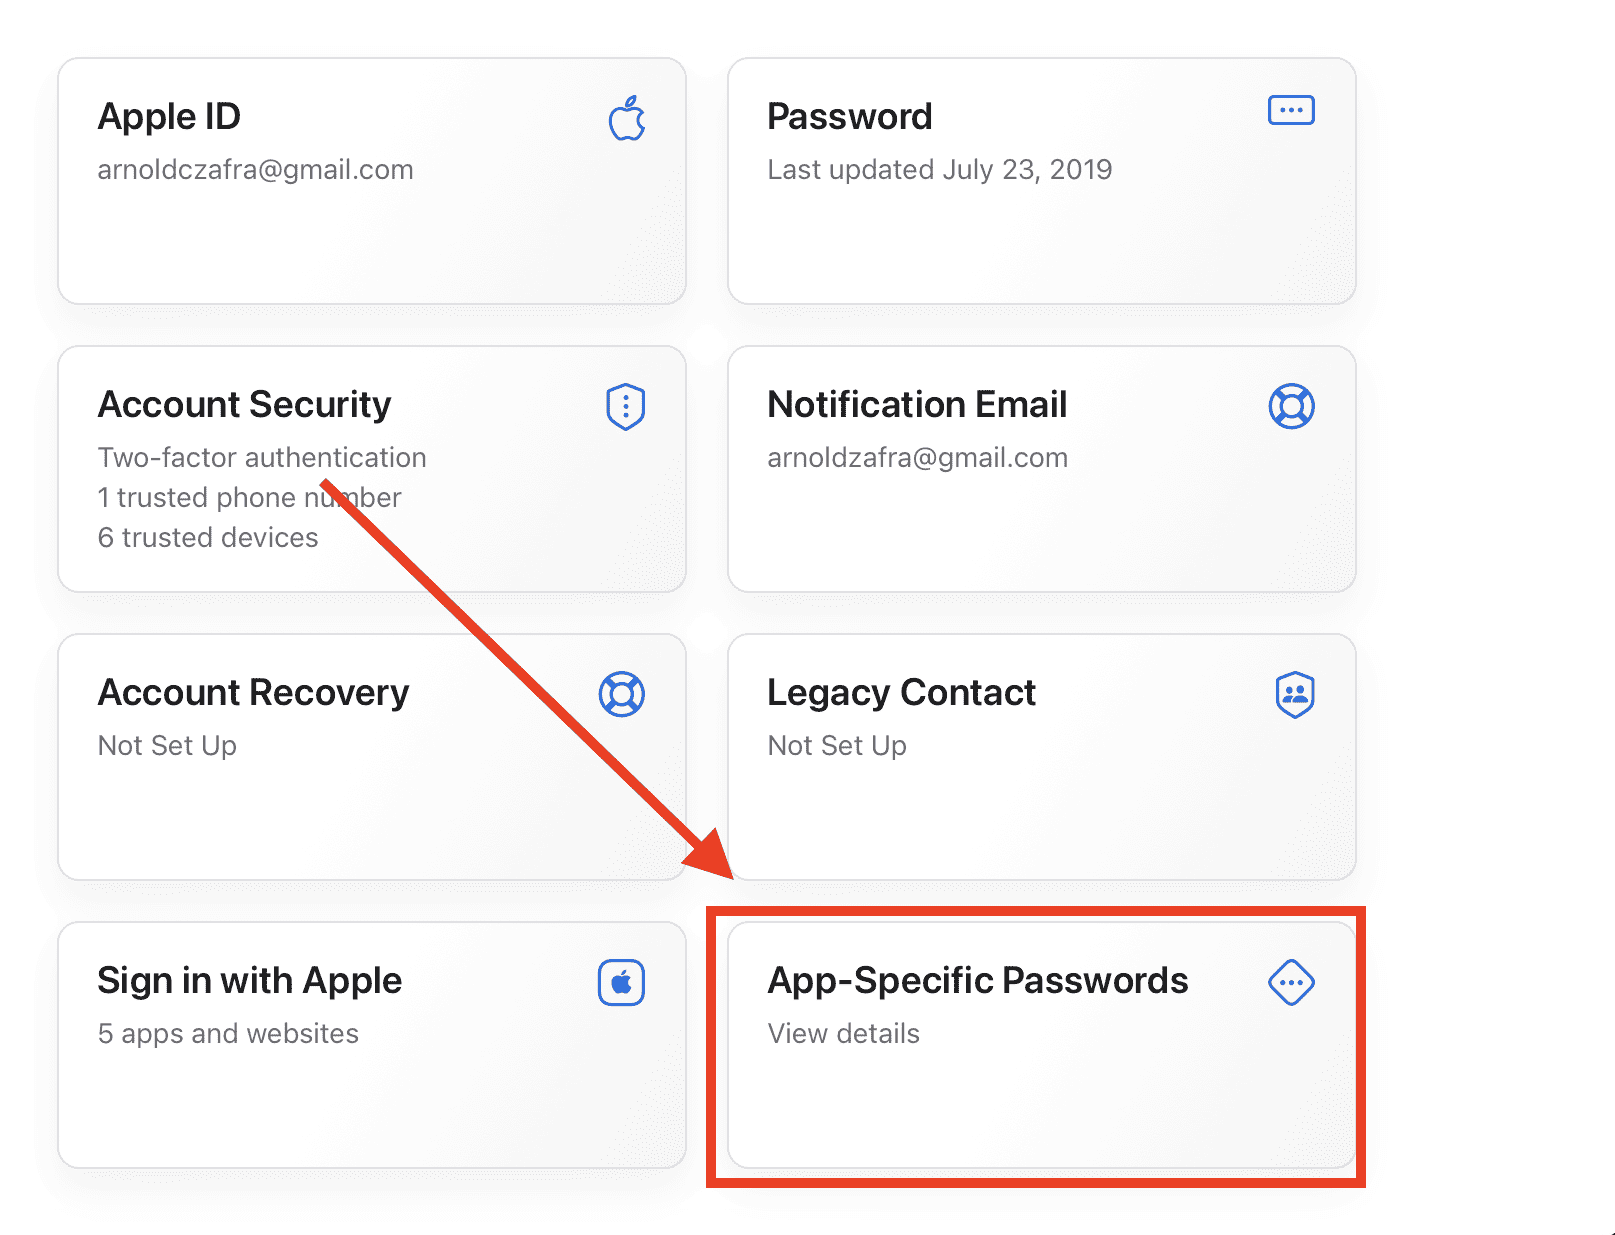
- Click App-Specific Passwords under the Security section, then select Generate Password.

- Enter a name for your password, e.g. Outlook for Mac.
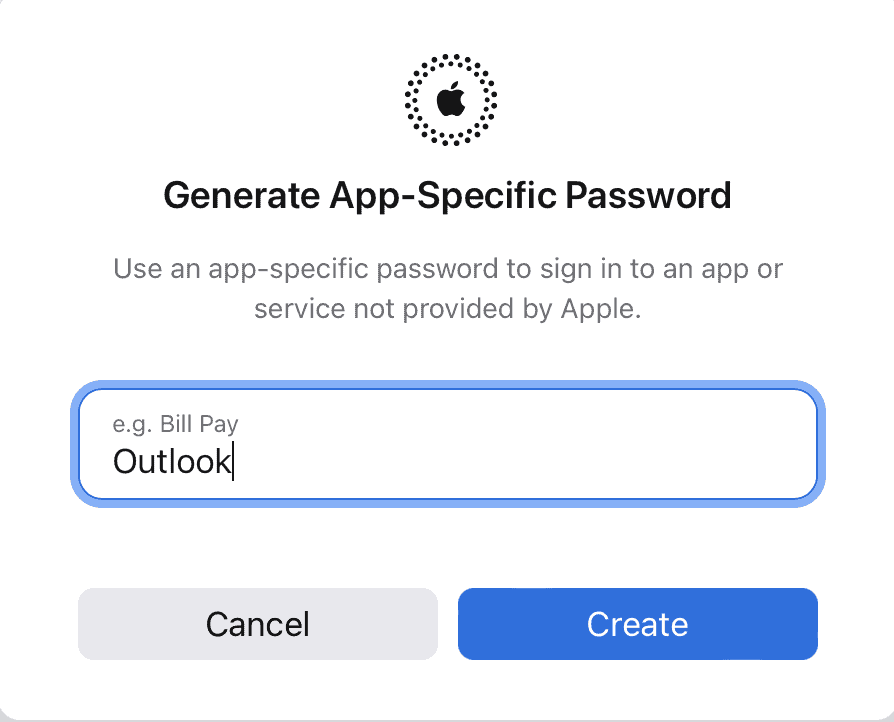
- Copy the password that will be displayed, then paste it on the password prompt on Microsoft Outlook.


Final Words: Maintaining One Client for All Your Email Accounts
Today, it’s the norm to have multiple email accounts from different platforms. Fortunately, most email services are interoperable. This means you can view your email from one account to another by following simple setup procedures.
Now, the question is which email platform should you maintain to integrate all your incoming and outgoing email messages? That, of course, is a matter of personal preferences. Whether it’s Gmail, iCloud, Yahoo, or Microsoft Outlook for Mac, each of them has strengths and weaknesses.
Test out different email clients to find which one has the most features that work best for you, and access all your email accounts using that client.


