
For those that like to edit movies, I want to take a look at how they can move text in iMovie. There’s a lot of great features that come fresh from the box with Apple’s free movie-editing app, though there are some notable differences between the Mac, iPad and iPhone versions. Depending on how you want to move the text, it may be really easy, or you may need to get a bit more creative.
For those using a Mac, while there are a lot of powerful options and features available, there isn’t a way to move text directly within the screen itself. You can choose when the text shows up, but you can’t manually determine where on the screen it will show up. There are a lot of options within the app itself, but getting it exactly where you need it will take some finesse. Let me explain.
Can I Move Text Around in iMovie?
When it comes to adding text to a project in iMovie, there’s the Titles option. There’s a lot of different styles and options here, so I would recommend checking out all of them, as this the only official way to add text to your screen. Note that you will not be able to move where the Title is located within the movie itself. However, there is another option. Before diving into the unofficial option, let me briefly explain the official means.

If you are looking to simply move the Title you created to a different position in your movie, such as moving it from the beginning to the end of the film, you simply need to click the Title/Text in the Timeline and drag it left or right on the screen to adjust the exact time the Title or text shows up. However, if you’re looking to move the text around the screen itself (I.E: where it shows up on the screen in the exported project), you’re going to need to get more creative.
Additionally, in another related article, I told readers how easy it is to add subtitles to projects in iMovie. Though it can be an involved process, the gist of it allows users to add their own text to the screen. If you’re not sure how to already add text to a screen in iMovie, I would suggest starting with this guide.
How Do I Adjust the Text in iMovie?
Using the Titles provided in iMovie should give you enough options to position your text. But, if you’re not happy with any of these, there is a way you can create your own text and add it manually into iMovie. On the one hand, this can be a great way to add text and have it in the exact position that you want it. On the other hand, you’re going to need to use a photo editing app.
Luckily, all you’re going to need to use is Apple’s Preview app, and the picture-in-picture feature that is available in iMovie. I also talk about the benefits of Picture-in-Picture in another article.
If you want text exactly where you want, when you want it, simply follow these steps.
First: Create the Text-Image
- First, open any picture in Preview. Simply go to any image that’s not animated, and open it via Preview. Unless you have changed the default image editor, double-clicking an image file will bring up Preview. You can also find Preview in your Applications folder.
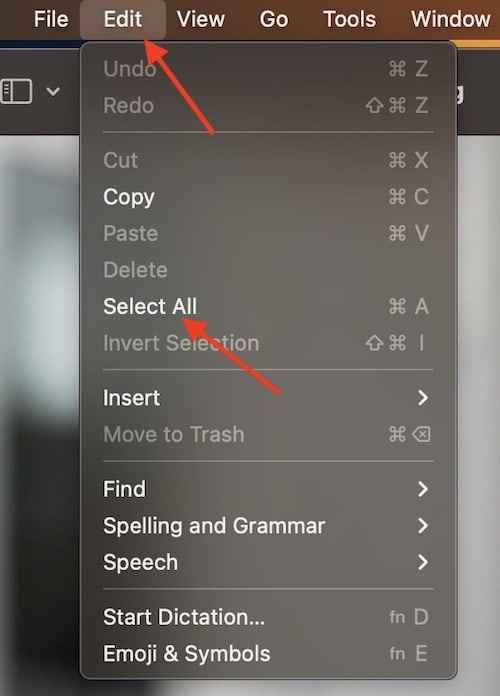
- Once you’re in Preview, go to Edit > Select All. This will select your entire image.
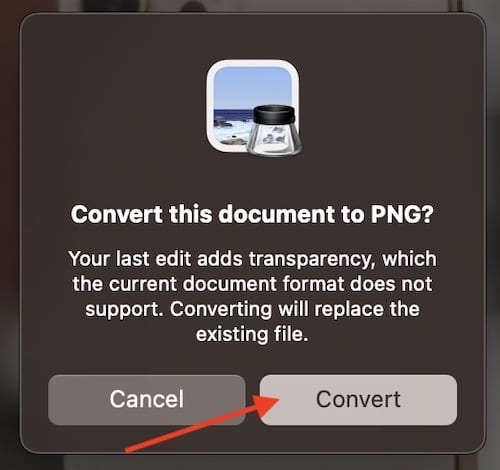
- Hit your Delete key to delete the image. Preview may ask to convert the file to a PNG. Select Convert.
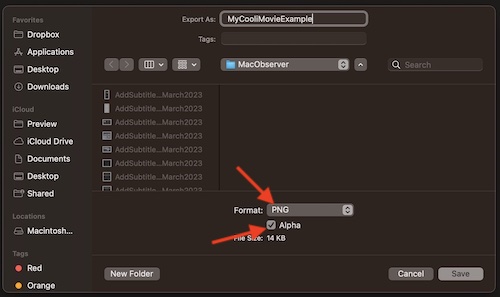
- Now, export this new image as a PNG, and ensure that Alpha is selected. Export it wherever is easiest for you to locate it. If you want to ensure that your original image was not deleted, hit the Edit > Undo option in the Menu Bar. (or Command-Z) to bring the original image back. You should now have two different images. You can now close out of the original image.
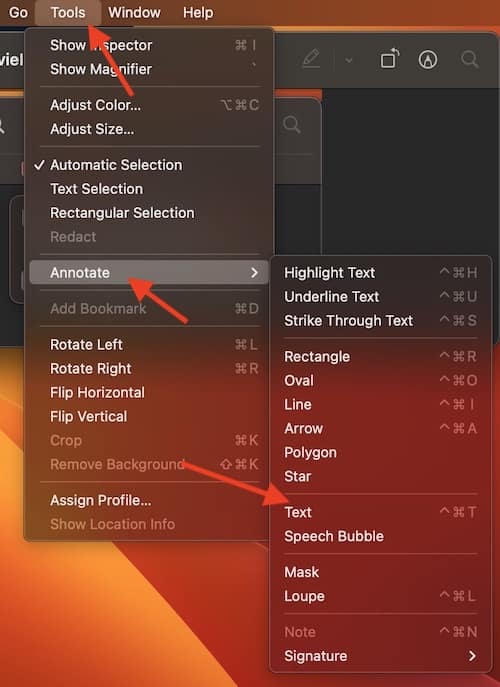
- Now, using your new, blank PNG image, open it again in Preview, and go to Tools > Annotate > Text. A Text box should appear in the Preview window.
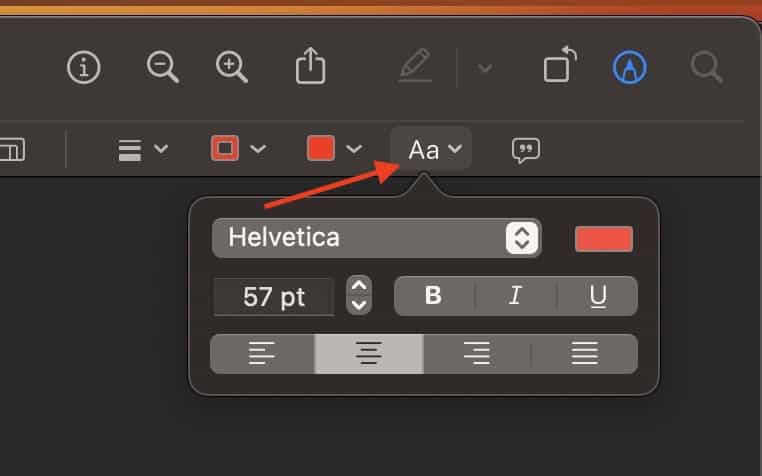
- You can now add whatever text you want to the image. When you are finished, you can change certain settings, including font style and color, through the Text button at the top of Preview. You can also adjust the size of the Text box directly in preview. Again, remember to save it as a PNG with the Alpha option selected.


Second: Add the Text-Image to iMovie
Time needed: 2 minutes
Add your own text to iMovie
- Now that you have your text image, you can add this to your iMovie project.
With both iMovie open and the Finder window containing your image being open, drag the image into iMovie, and place it somewhere above the clip in your Timeline where you want the Text to appear.

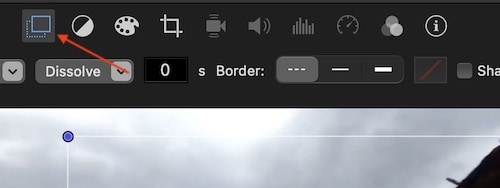
- Next, above the Preview window, click the Video Overlay Settings, which looks like two rectangles stacked on top of another. Select this.
You may need to have selected the text overlay in your Timeline first before this setting will appear.
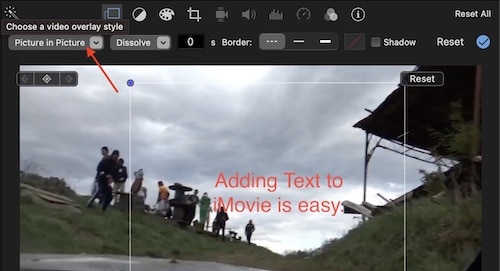
- Choose Picture-in-Picture. From here, you can also choose the duration of the text, and you can also move the text around and adjust its size within the Preview window.
Note that you can move the text wherever you would like within your Timeline as well. Also note that you have some transition options to the right of Picture-in-Picture. Set the Timer to zero if you do not want transitions.


And that’s all there is to it! Keep in mind that you can also use a photo-editor to achieve the same effect. I went with Preview, as everyone has preview on their Mac, and it is the fastest way to go about doing this. If you’re going to use a different photo editor, make sure the background is transparent.
Remember that you can also adjust the length of time that the text appears in the project by dragging the handles of the clip within your Timeline. Dragging the clip itself will adjust where it begins to play. Also, remember that since you are going with a PNG image for your text, you will not be able to animate it outside of the simple transitions available.
How Do You Move Text in iMovie on iPhone?
If you’re looking to move text around in iMovie for iPadOS and iOS, this is fortunately easier to do. All you need to do is select a place in your Timeline where you want the text, then hit the Text icon (the T icon. You’ll have your usual options, but you can move the text itself in the movie by simply clicking it and dragging it. Within iPadOS and iOS, all you need to do is click and drag the text anywhere on screen to move it within the movie itself. If you need to move it on the Timeline, that’s a bit different.

If you’re using an iPad, you should be able to adjust the exact position of the text by clicking and dragging the yellow bars. However, if you’re using an iPhone, you’re going to need to split the clips to ensure that the text is not prevalent throughout the whole movie. When you add text to your Timeline within iOS, it adds it to the whole clip. Make sure you are splitting your clips before adding your text. You can split a clip by selecting the area you want to split, and the click the Scissors icon and select Split. Depending on what version of iMovie you have on iPadOS, you may need to follow this step as well.
Crafting Your Own Vision
While it is sort of annoying that this is the only way to truly move text around in iMovie, once you have it figured out, it’s relatively straight-forward. Again, if you’re a novice with iMovie, I would recommend simply using the Titles that are available within the program itself. There’s a lot of different options available, with most of them being the typical locations you would want to have text.
When it comes to creating a project in iMovie, some users simply want the most customization options as possible. If you’re not happy with the text options that are available in iMovie, there is a rather simple and creative way to make your own. There’s a lot of ways to get creative using this movie-editing software. While it may seem small, the applications and options are mighty. Always remember to experiment in this program to see what possibilities you can discover.


