
You can create an iCloud email address on your iPhone, iPad, Mac, or even non-Apple device. For iPhone and iPad users, go to Settings, tap your name, iCloud, turn on Mail, and then follow the on-screen instructions. On macOS, go to System Settings, click your Apple ID, and select iCloud. On non-Apple devices (e.g., Windows or Android) you can just go to the iCloud website.
Although the process is pretty straightforward, some buttons might not feel so intuitive. Here’s a closer look.
Don’t miss the best of The Mac Observer
Set us as a preferred source and our Apple reporting ranks higher in your Google Search results and Discover feed — one tap, no account changes.
How To Create an iCloud Email Address on iPhone
Time needed: 3 minutes
Here’s how to create your account on an iPhone or iPad:
- Open the Settings app.
- Tap your Apple ID name at the top.
- Tap iCloud.
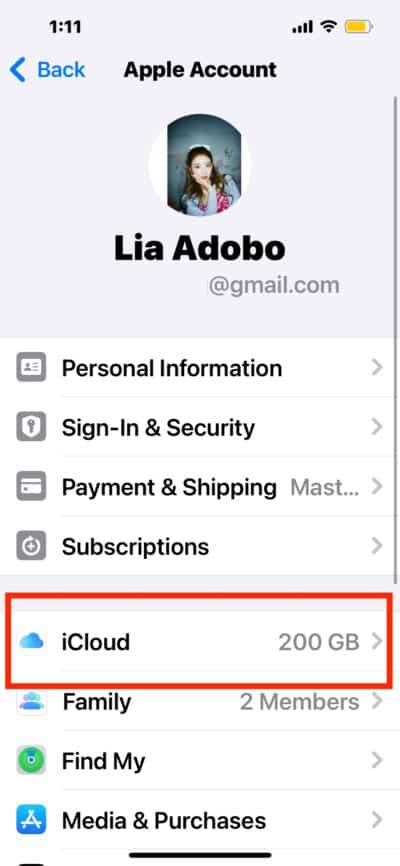
- Select iCloud Mail. You may see it as Mail under Apps Using iCloud.
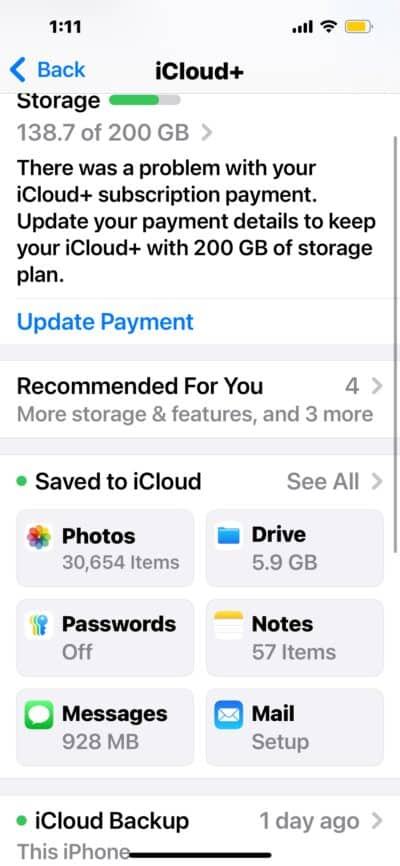
- Toggle it on.
- You’ll be prompted to create an @icloud.com email address.
- Enter your desired email prefix (e.g., marky.mark).
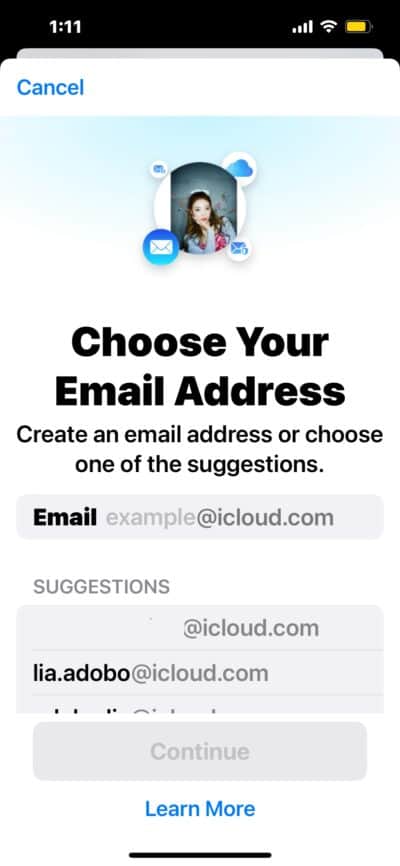
- Tap Next, then confirm by tapping Done.
- Once completed, this @icloud.com address becomes linked to your Apple ID and will sync across devices using iCloud. You cannot change it afterward.


How To Create an iCloud Email Address on Mac
For Mac, the steps are pretty similar. Here’s where to go:
- Open System Settings.
- Click your Apple ID at the top of the sidebar.
- Select iCloud from the main panel.
- Click iCloud Mail.
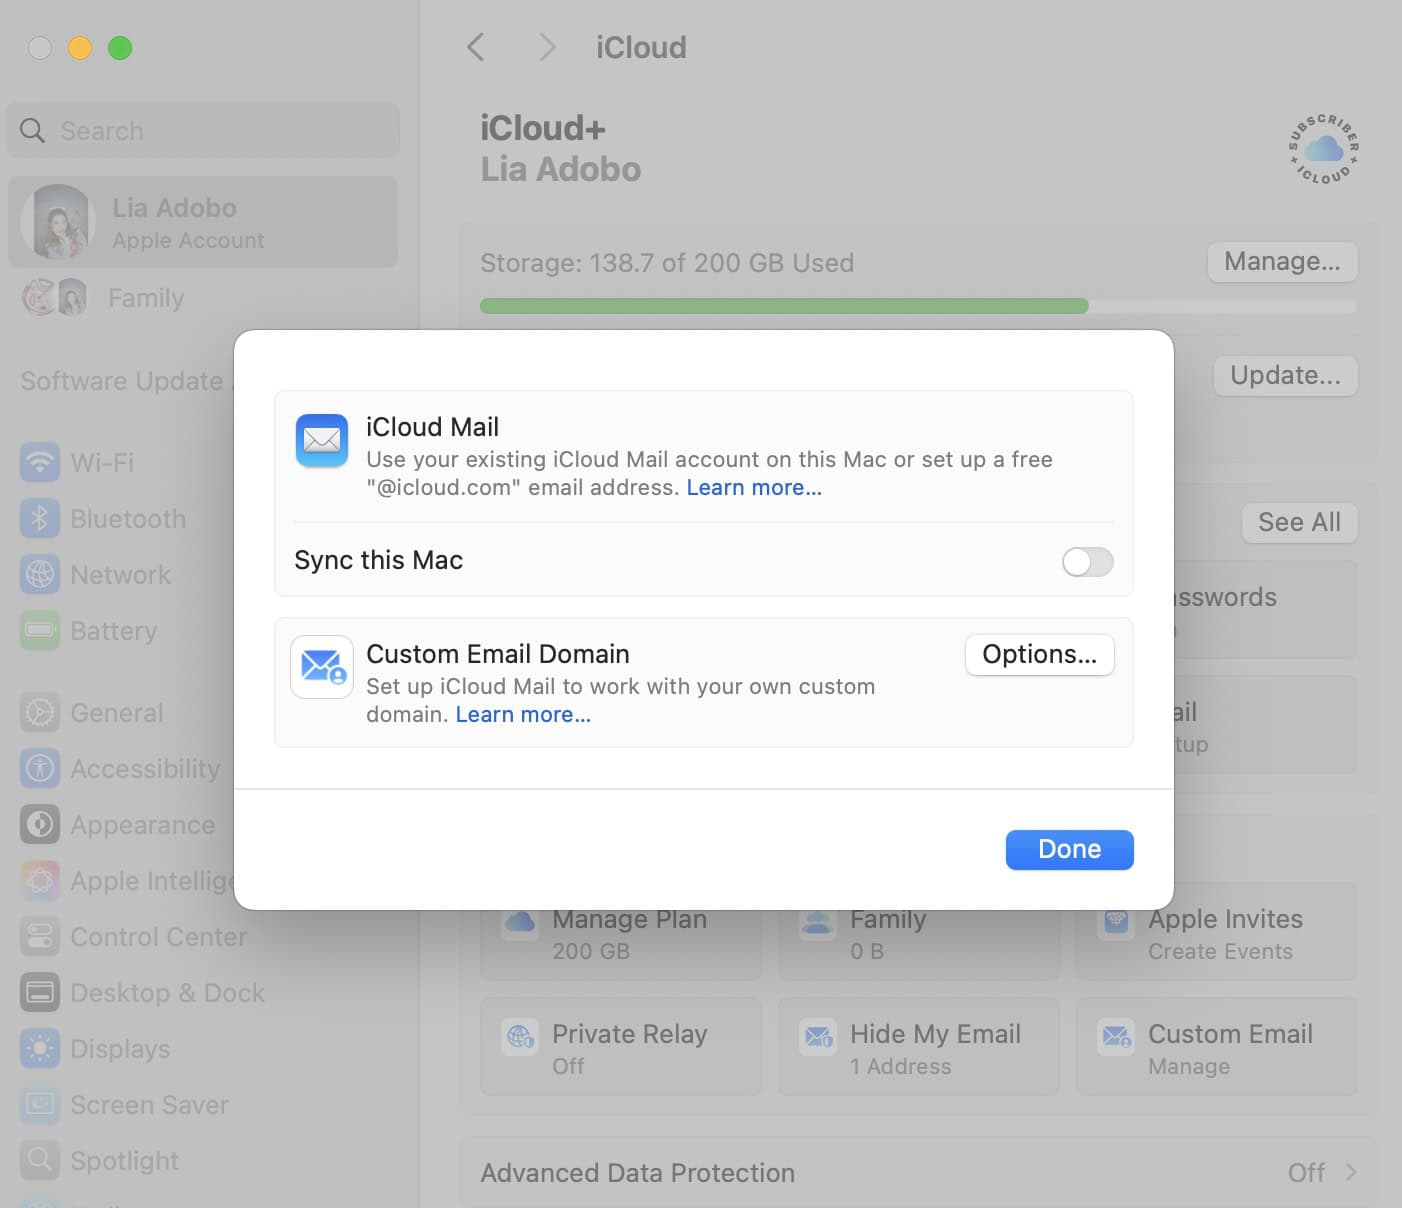
- If prompted, enter your preferred email address.
- Tap Continue and confirm your choice.

How To Create an iCloud Email Address Online
For non-Apple OSes like Windows and Android, you can set up an @icloud.com address directly through iCloud.com. This only works if your Apple ID doesn’t already have one. Afterward, you can use your account to access iCloud Mail without using an iPhone or Mac.
- Open any browser and go to iCloud.com.
- Sign in with your Apple ID.
- Click Mail from the home screen.
- If prompted, follow the instructions to create your @icloud.com email address.
- Enter a unique email handle and confirm.

How To Create an iCloud Email Address for Your Child
A dedicated iCloud email makes it easier for your child to use school portals, sign up for learning apps, and communicate with teachers. That way, personal messages won’t mix with another inbox.
The above steps mentioned are available to them. However, by creating the account through Family Sharing, you can manage screen time, approve app downloads, set location sharing, and monitor purchases. You stay in control while your child gets a personalized experience.
- Open Settings on your iPhone or iPad.
- Tap your Apple ID banner at the top.
- Go to Family > Add Member > Create Child Account.

- Follow the on-screen steps to create an Apple ID for your child.
- When prompted, choose a username for their @icloud.com email.
- Complete the setup and verify parental consent (may require payment method).

How To Create an iCloud Email Address Without Apple ID
An iCloud email address (@icloud.com) is tied directly to your Apple ID. You must have an Apple ID to generate one. There’s no way to create a standalone iCloud email that isn’t linked to an Apple account. I suggest making one prior. You don’t really need an Apple device since, as I mentioned before, the iCloud browser version is available to anyone.
Why Would You Want an iCloud Email Address?
There are three main reasons why you’d want one, especially on an Apple device.
1. Seamless Integration Across Apple Devices
An iCloud email address is specifically made for your Apple ID. Once created, it’s automatically available in Mail on your iPhone, iPad, and Mac. You don’t need to configure servers or sync settings. You’ll see new messages, drafts, and folders stay consistent across all your Apple devices, so management is way easier. You won’t need third-party apps or web logins.
2. Access to Hide My Email

Hide My Email is a privacy-focused feature that generates randomized addresses that forward to your iCloud inbox. It’s built into Safari and Sign in with Apple. If you want to sign up for newsletters, apps, or websites without giving away your real address, this tool keeps your identity private and reduces spam. It’s available to anyone with an iCloud address, and it works across the Apple ecosystem.
3. Completes Your iCloud Ecosystem

If you already use iCloud Drive, Notes, Calendar, and Photos, having an iCloud email address rounds out your experience. It ties everything to one Apple ID and streamlines communication within Apple services. For example, sharing a Pages document or collaborating on a Reminders list becomes easier when everyone’s using iCloud email. It keeps things in sync and within Apple’s walled garden.
Once you’ve set up your iCloud email address, you’re good to go. But if you ever run into setup issues, like being unable to accept Apple’s updated terms, there’s a fix for that too. Check out our guide on how to resolve iCloud Terms and Conditions errors so you can get everything running.


Good day. I am struggelling to create an icloud account formyself. I have never had an icloud.