

Syncthing is maybe my favorite app ever. The idea of joining the permanent availability of cloud storage with the security of a local drive is just amazing. As someone who uses two, sometimes three computers, I love how clever the app’s approach to sharing is. There’s one aspect that Syncthing lacks, though: mobile apps — both for iOS and for Android. Here’s how you can work around this limitation.
Is There A Syncthing App for iOS?
Until last December, there used to be an official Syncthing client for Android. You won’t find a “Syncthing”-branded app on iOS, though. That’s because Syncthing’s developers don’t offer one. However, that doesn’t mean you can’t use the app on iOS—you’ll just have to do so through third-party clients.
Syncthing Clients for iOS
For years, there was a single Syncthing iOS client, Möbius Sync. Last year, a new app was developed, Synctrain, but it’s still in the testing stages. We’ll talk briefly about both below.
Don’t miss the best of The Mac Observer
Set us as a preferred source and our Apple reporting ranks higher in your Google Search results and Discover feed — one tap, no account changes.
1. Möbius Sync
Presently, Möbius Sync is the only widely available way of using Syncthing on iPhone and iPad. The app has a limited free version and a paid one.
The former is basically a trial, just so you can make sure everything is working with your setup before purchasing. It has a 20MB storage limit, and files are kept in a sandbox — other apps can’t access them. You can still share the files with other apps from within Möbius Sync, though.
To have the full experience, you either make an in-app purchase in the free version or buy Möbius Sync Pro. In both cases, it’s a one-time purchase, not a subscription.
2. Synctrain
Last September, a developer announced another iOS Syncthing client, called Synctrain. It’s open-source, but it requires you to compile the app and install it yourself.
A paid version is in the beta stage. You can try it through Apple’s TestFlight, which allows users to download pre-release apps and give feedback to developers.
How To Use Möbius Sync
After downloading Möbius Sync from the app store, setting it up is pretty much the same as on a computer. Check the steps below:
Time needed: 15 minutes
- The initial screen shows your device’s information. Here, you can see its name and ID — that huge character string used to pair with other devices.
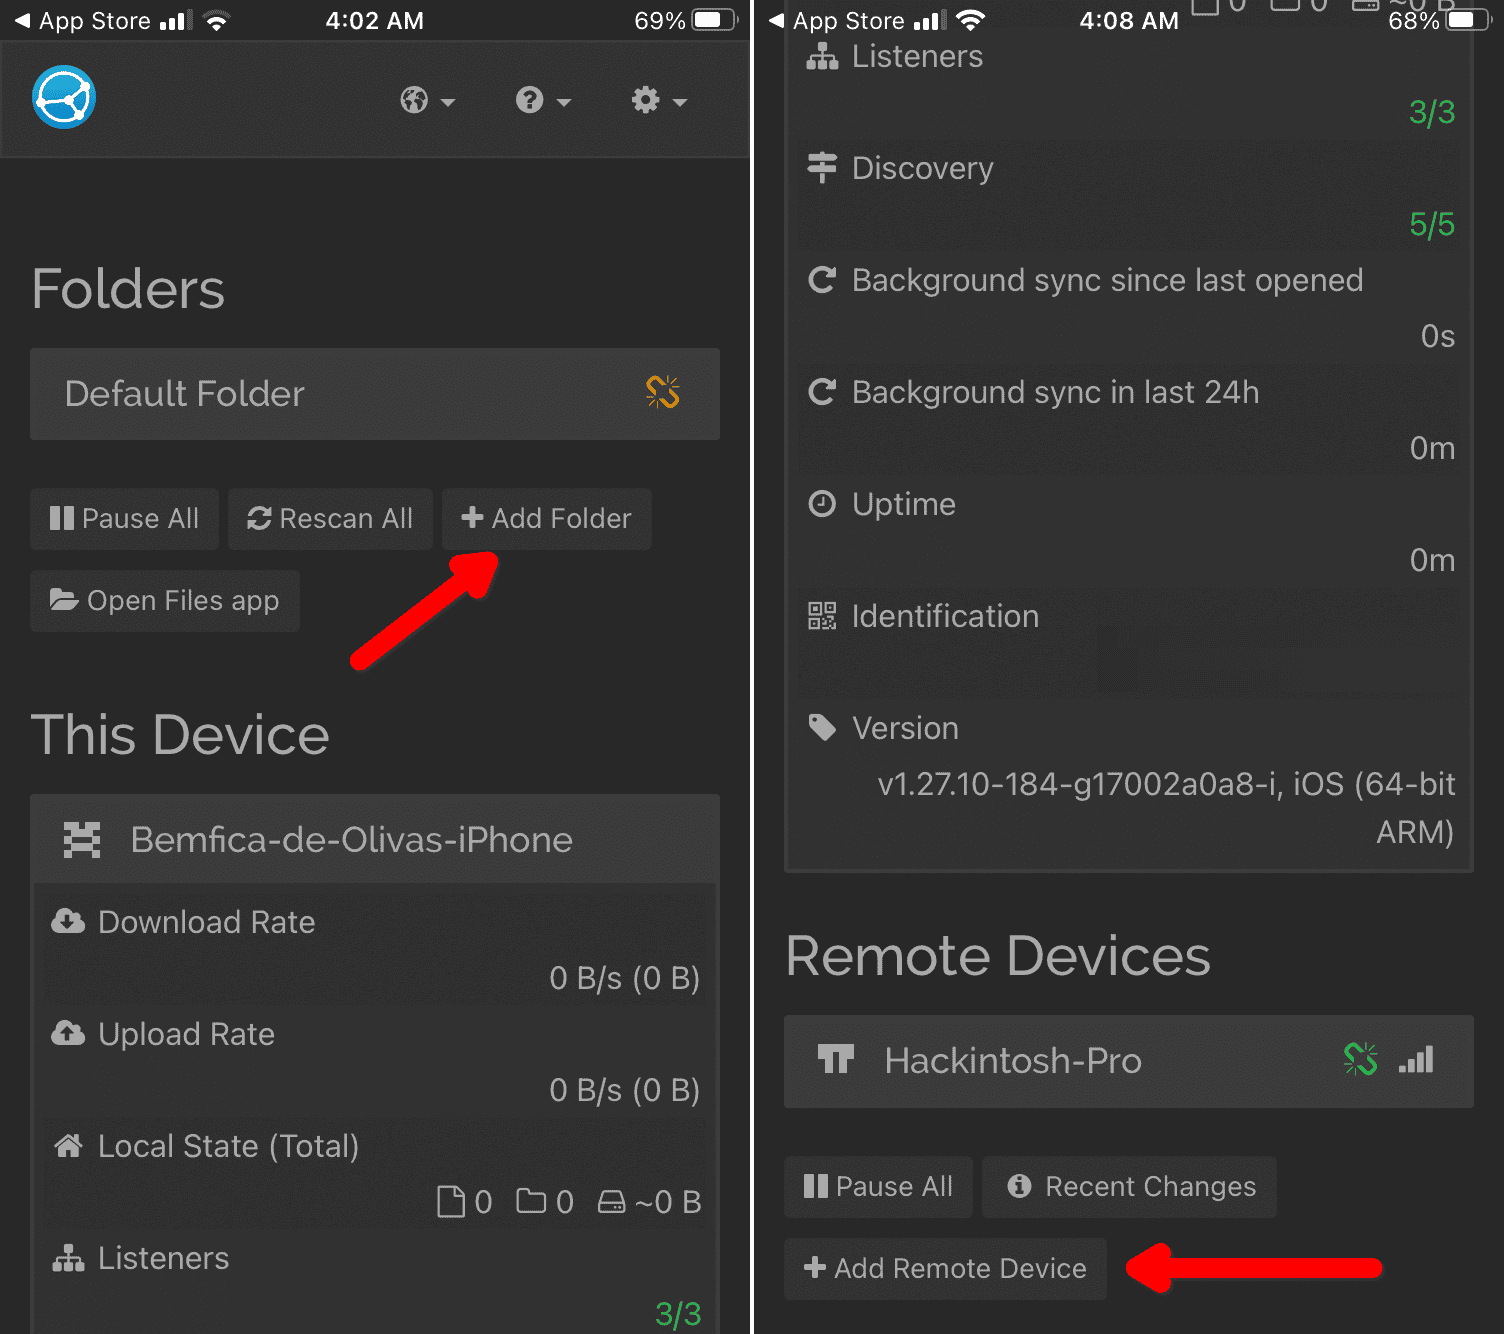
- At the bottom of this screen, you’ll find a list of connected devices. There’s a button to add new ones and one to pause syncing. Tap the Add Remote Device button.
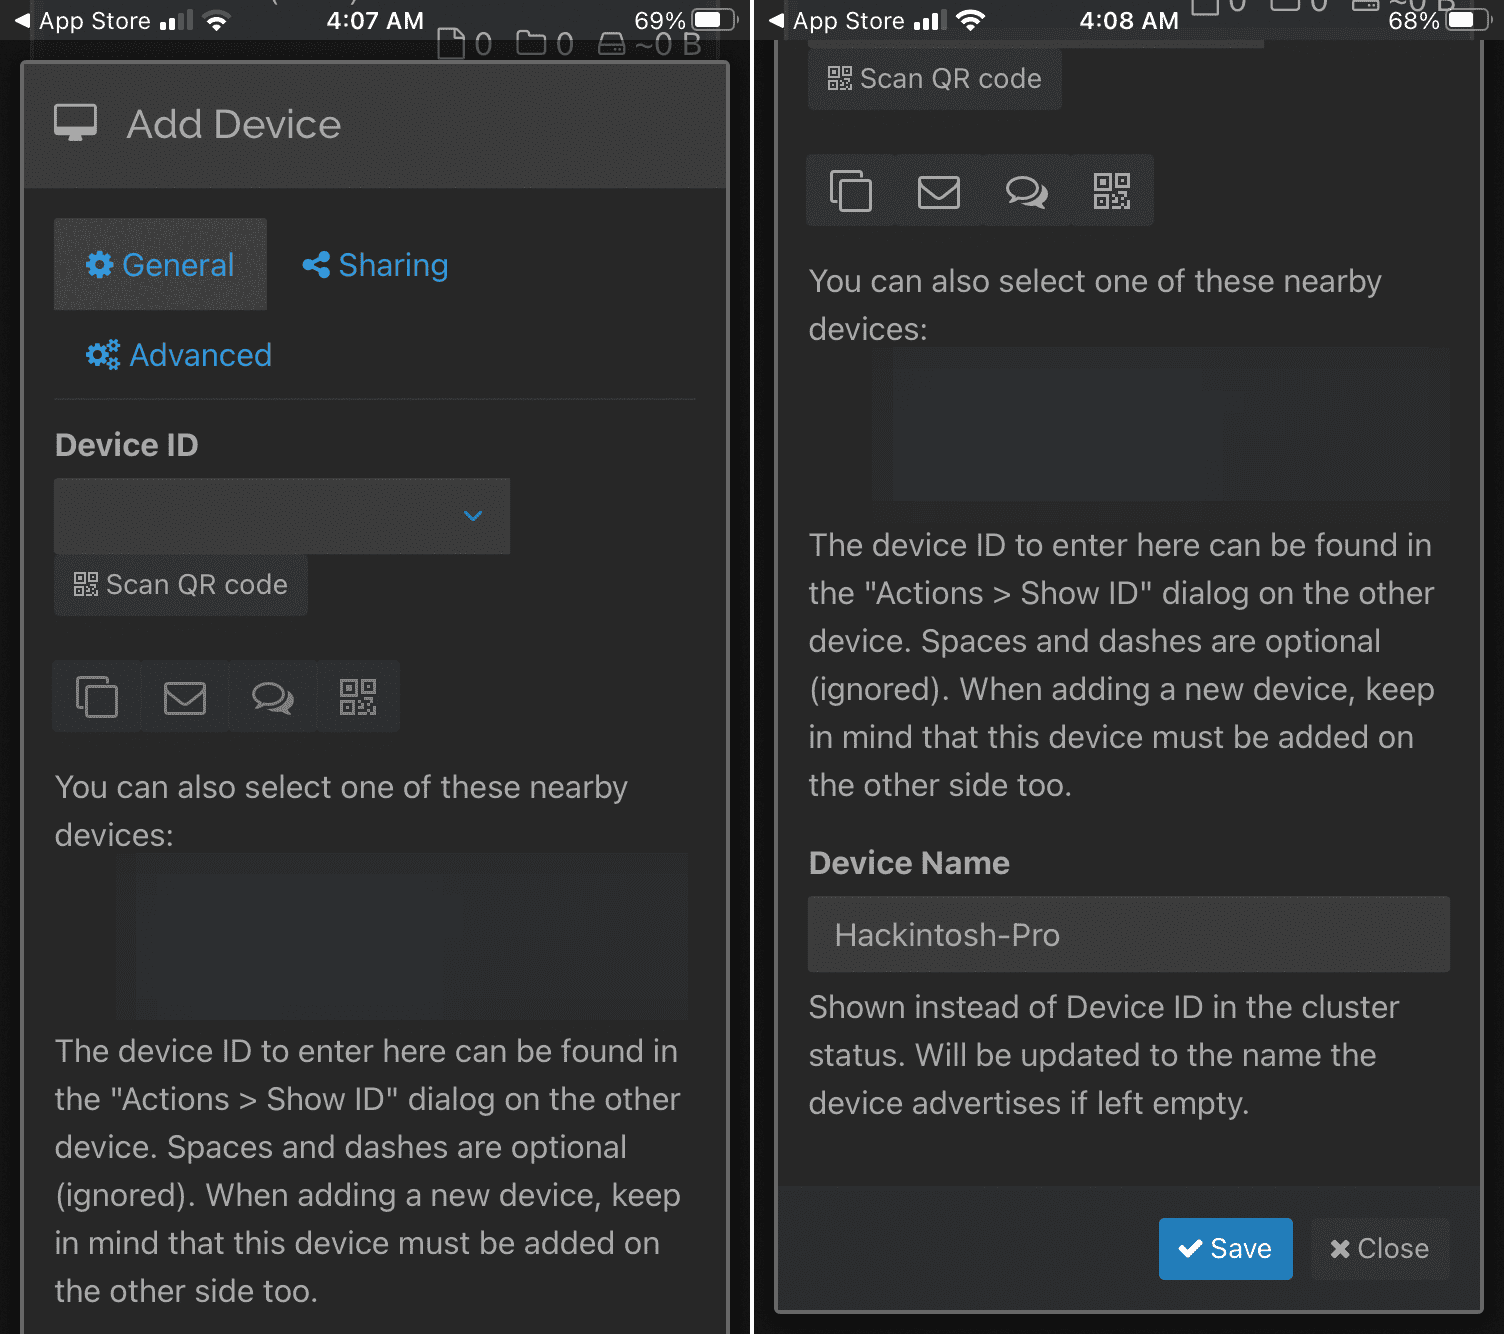
- A dialog will appear. You can get the ID in a few ways, including typing it manually. Considering the string length, I recommend you either scan the QR code or, if available, use the “nearby devices” option. Tap Save, and you’ll be back on the initial screen.
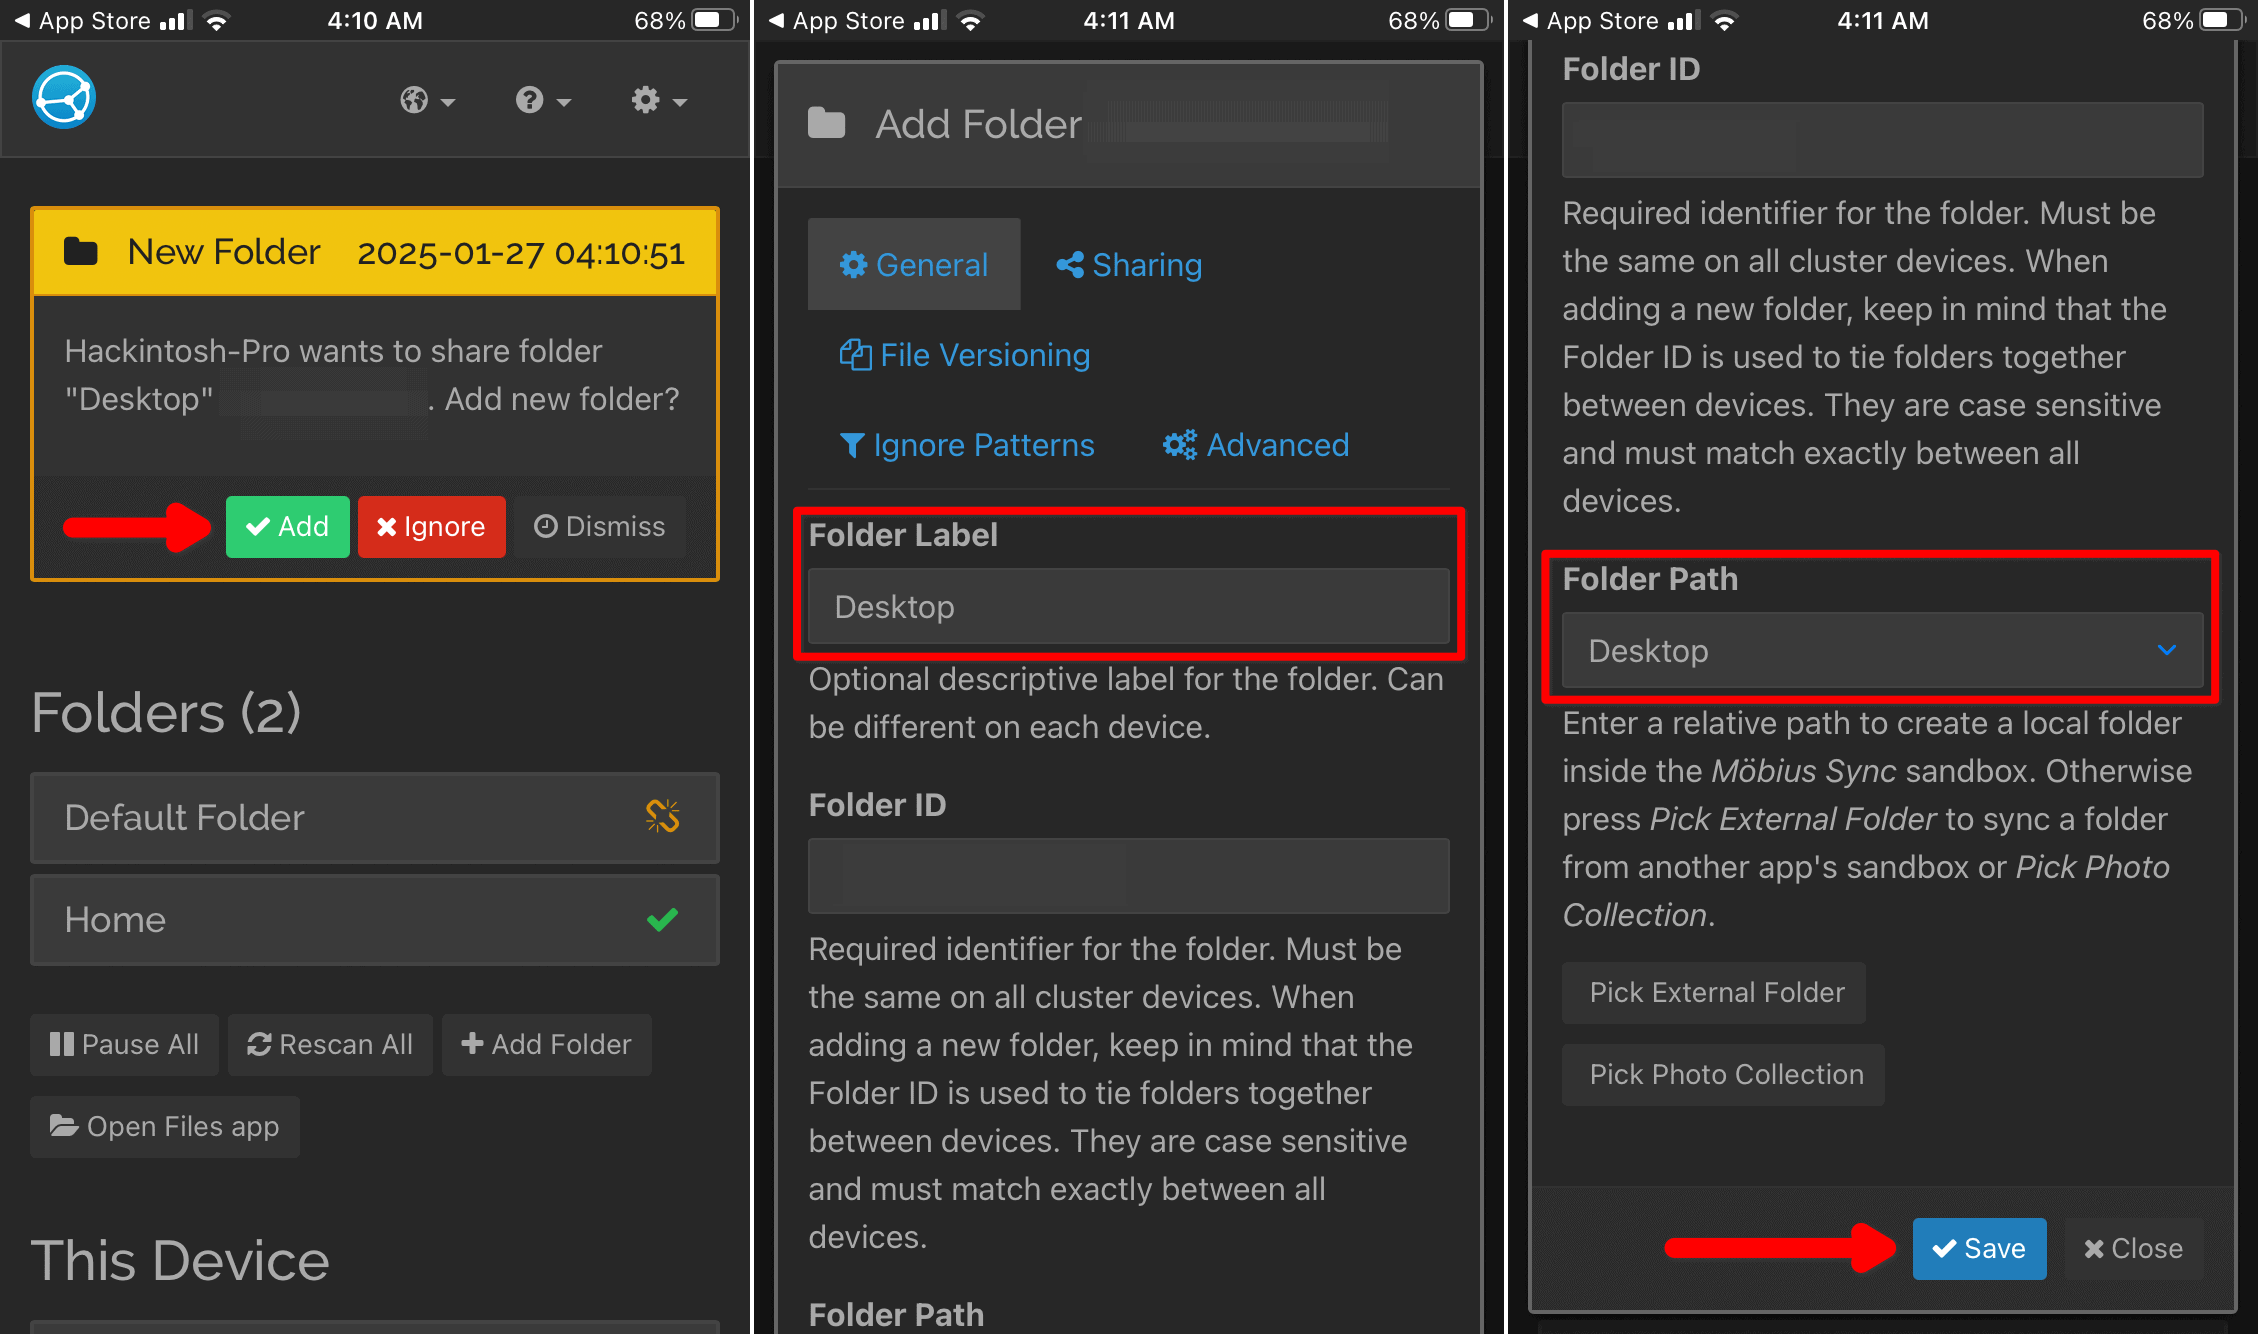
- Tap Add Folder if you want to share a folder that’s not available on other devices. You’ll be able to give it a name (under Folder Label) and, on the paid version, set a different location.

- On the Sharing tab, you can choose which of your paired devices can access this folder. When you select a device here, it will receive a notification to accept or ignore the request.
- Similarly, when you share a folder from another device with your iPhone, you’ll see a notification. Review the folder information, and tap Save to add it to your phone.


Syncthing takes a bit to get used to. After you understand, it, however, having multiple devices becomes a breeze. With instantaneous file sharing, they function pretty much like one computer. With the proper configuration in iOS, even your iPhone can join the Syncthing party.


Discussion