
Apple uses the High Efficiency Image File Format (HEIF). This format uses the .heic file extension. HEIF offers benefits like smaller file sizes and better image quality. However, not all devices support the HEIC format. Converting your Apple Photos is necessary for broad compatibility. You can convert them to common formats like JPEG or PNG easily. Conversion is helpful when sharing with non-Apple users. It is also important when uploading to various platforms. Fortunately, macOS and iOS have simple, built-in conversion methods.
On a Mac
1. Export Photos Using the Photos App
The native Photos application is the easiest Mac conversion tool. You can convert and export photos in various formats easily. This method controls the file type and quality. Use it for a single image or a batch of images. This is essential if you need to access your Apple Photos on a Windows 10 PC. HEIC files may not open there natively.
- Open the Photos app. Then select the image(s) you want to convert.
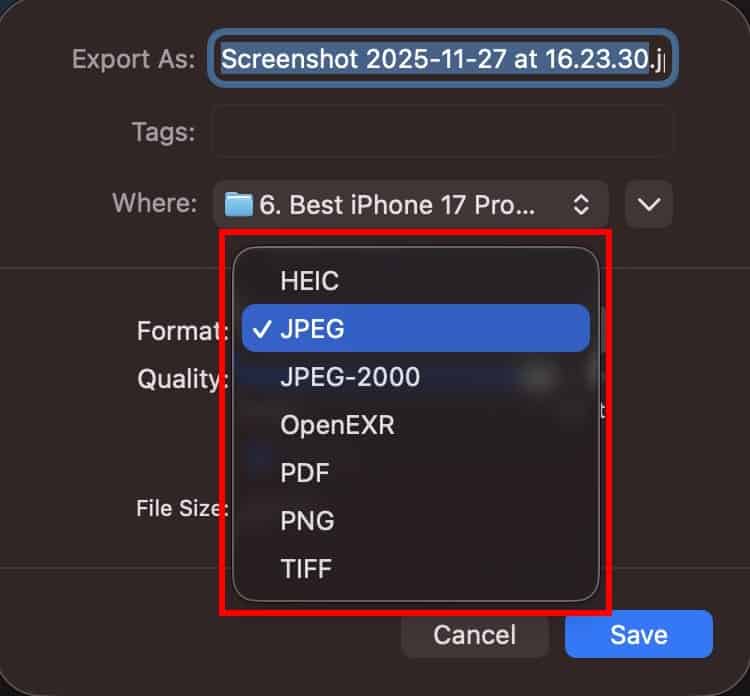
- Go to the File menu. Next, choose Export. Finally, select Export [Number] Photos….
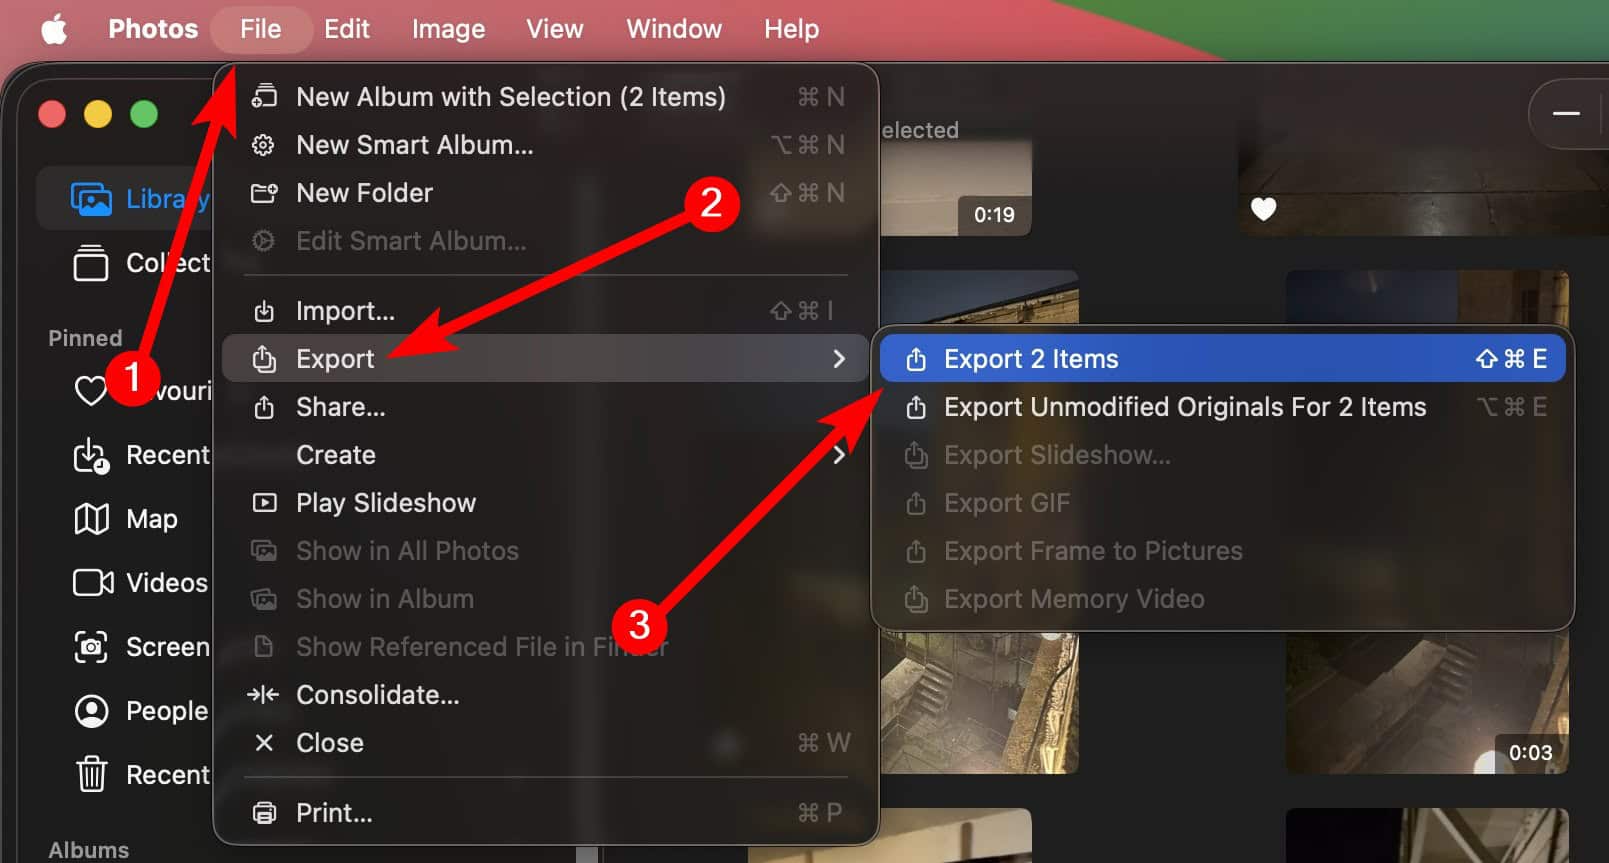
- In the export dialog box, click the Photo Kind dropdown menu. Choose the desired format, like JPEG, TIFF, or PNG.
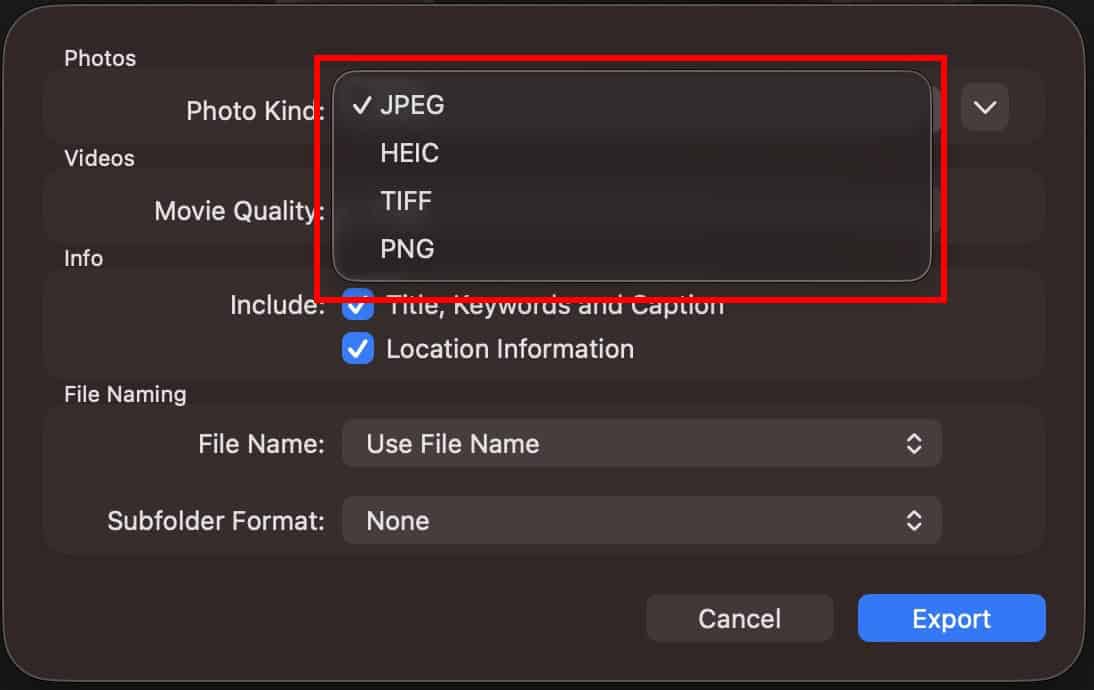
- You can optionally adjust the JPEG Quality slider. Adjust other format-specific settings too.
- Click Export. Choose a save location. Then click Export again.


2. Use Preview for Format Conversion
The Preview application is the default Mac image viewer. It offers a fast way to convert a single image file. Use it for files already exported or in the Finder. This is useful for images not in your Photos library. To efficiently select many images, review how to select all in Apple Photos.
- Locate the image file in Finder. Double-click it to open it in Preview.
- Once the photo opens, go to the File menu. Select Export.
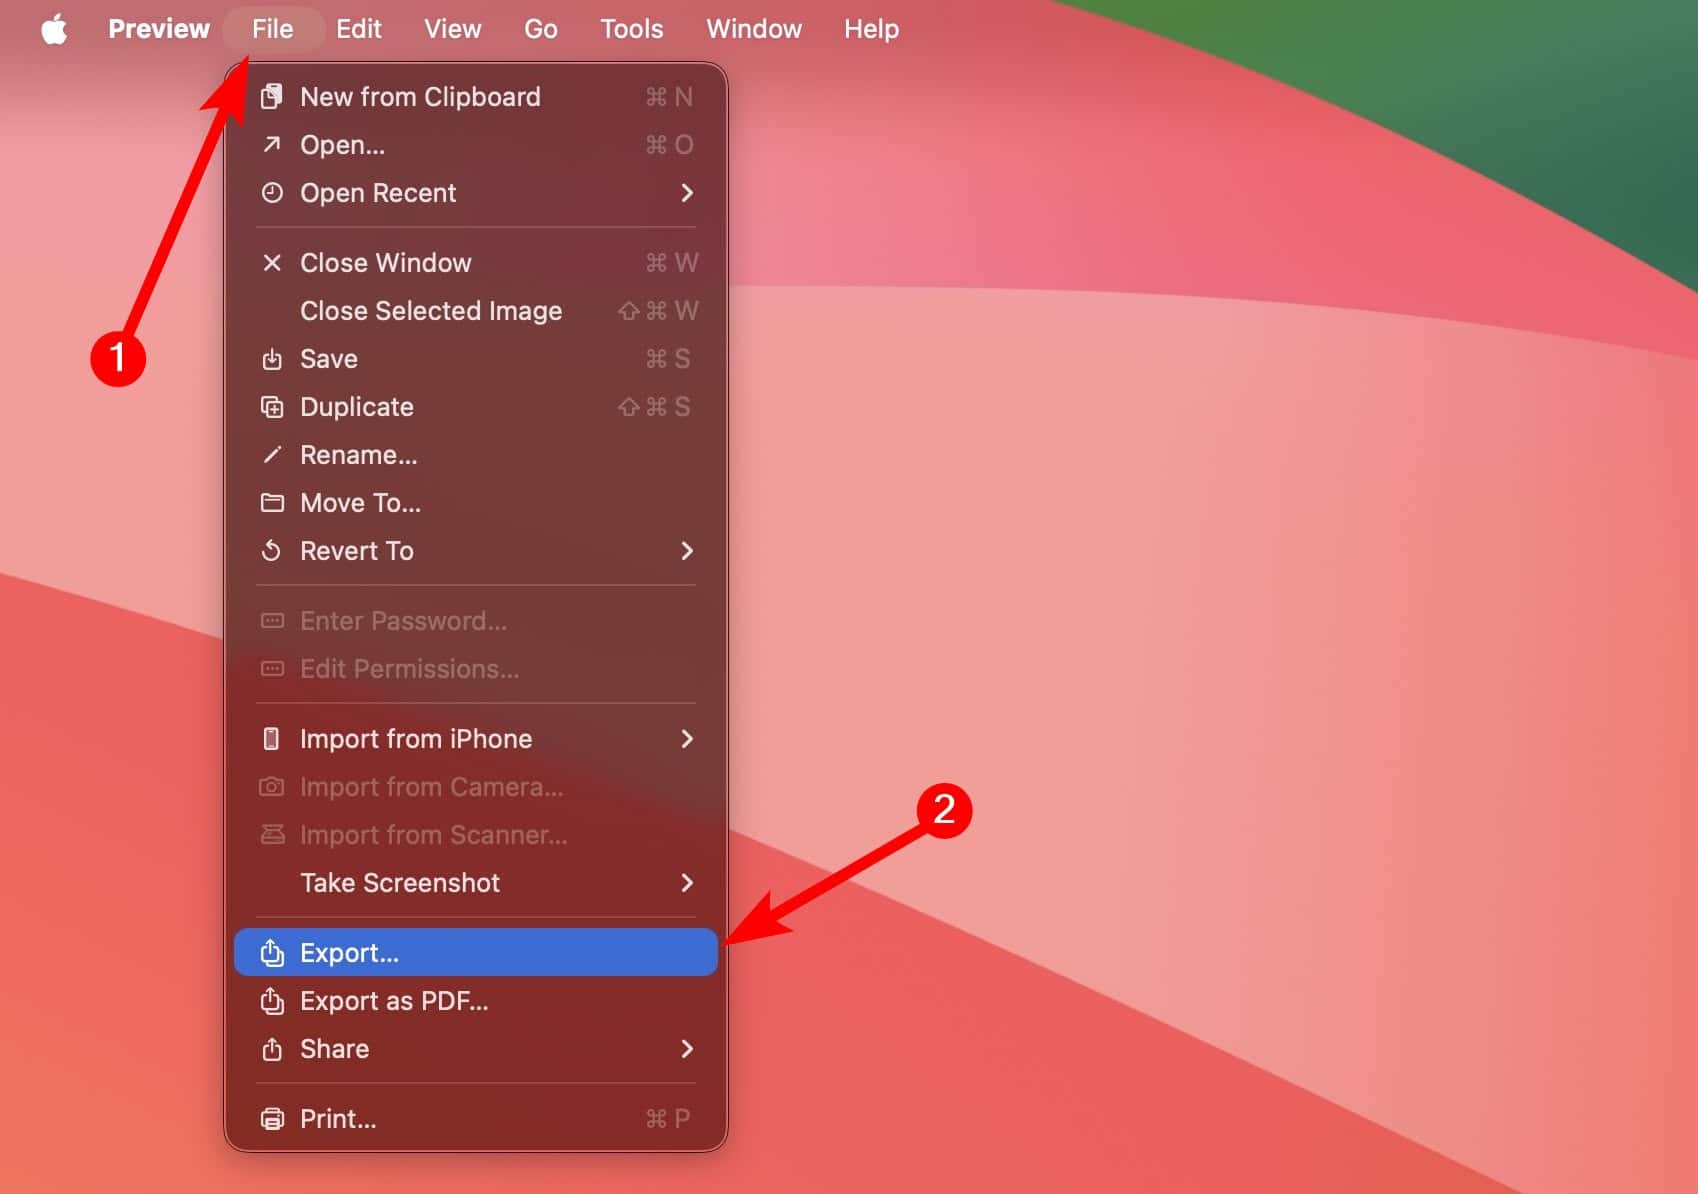
- In the save dialog, click the Format dropdown menu.
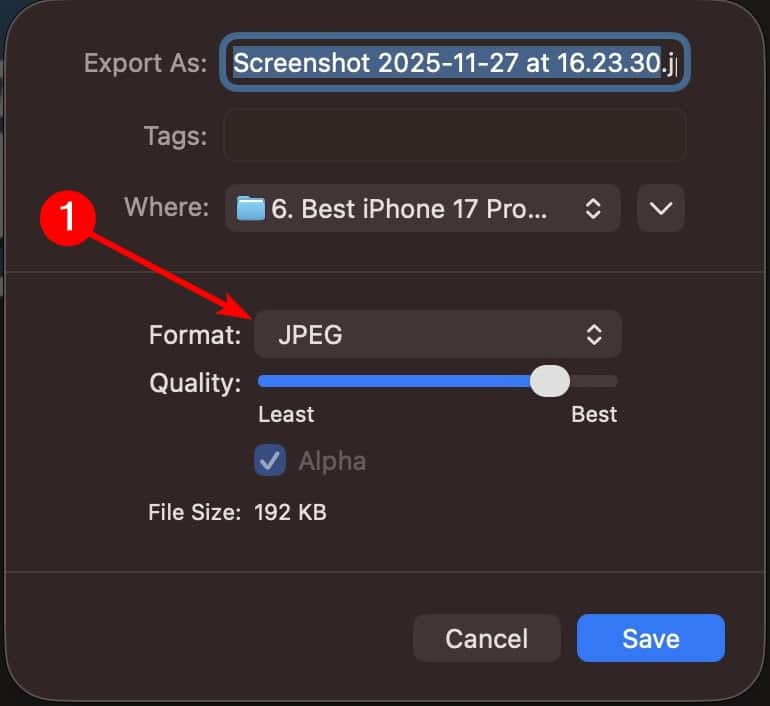
- Choose the new format you want, such as JPEG. Adjust the quality slider if it is available.
- Enter a new name. Choose the save location. Then click Save.


On an iPhone or iPad
1. Change Formatting in Settings
iOS and iPadOS let you adjust the camera capture formats. This determines if new photos save as HEIF or JPEG. Changing this setting affects all future photos and videos. Therefore, it ensures a smoother sharing process later.
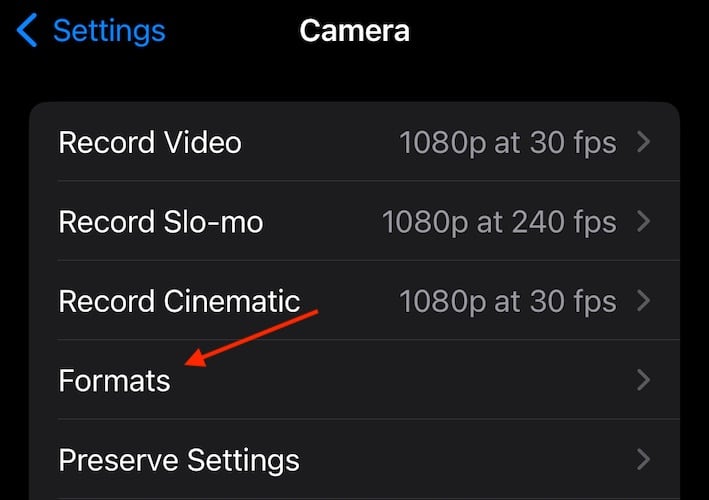
- Open the Settings app on your iPhone or iPad.
- Scroll down and tap on Apps > Camera.
- Next, tap Formats.
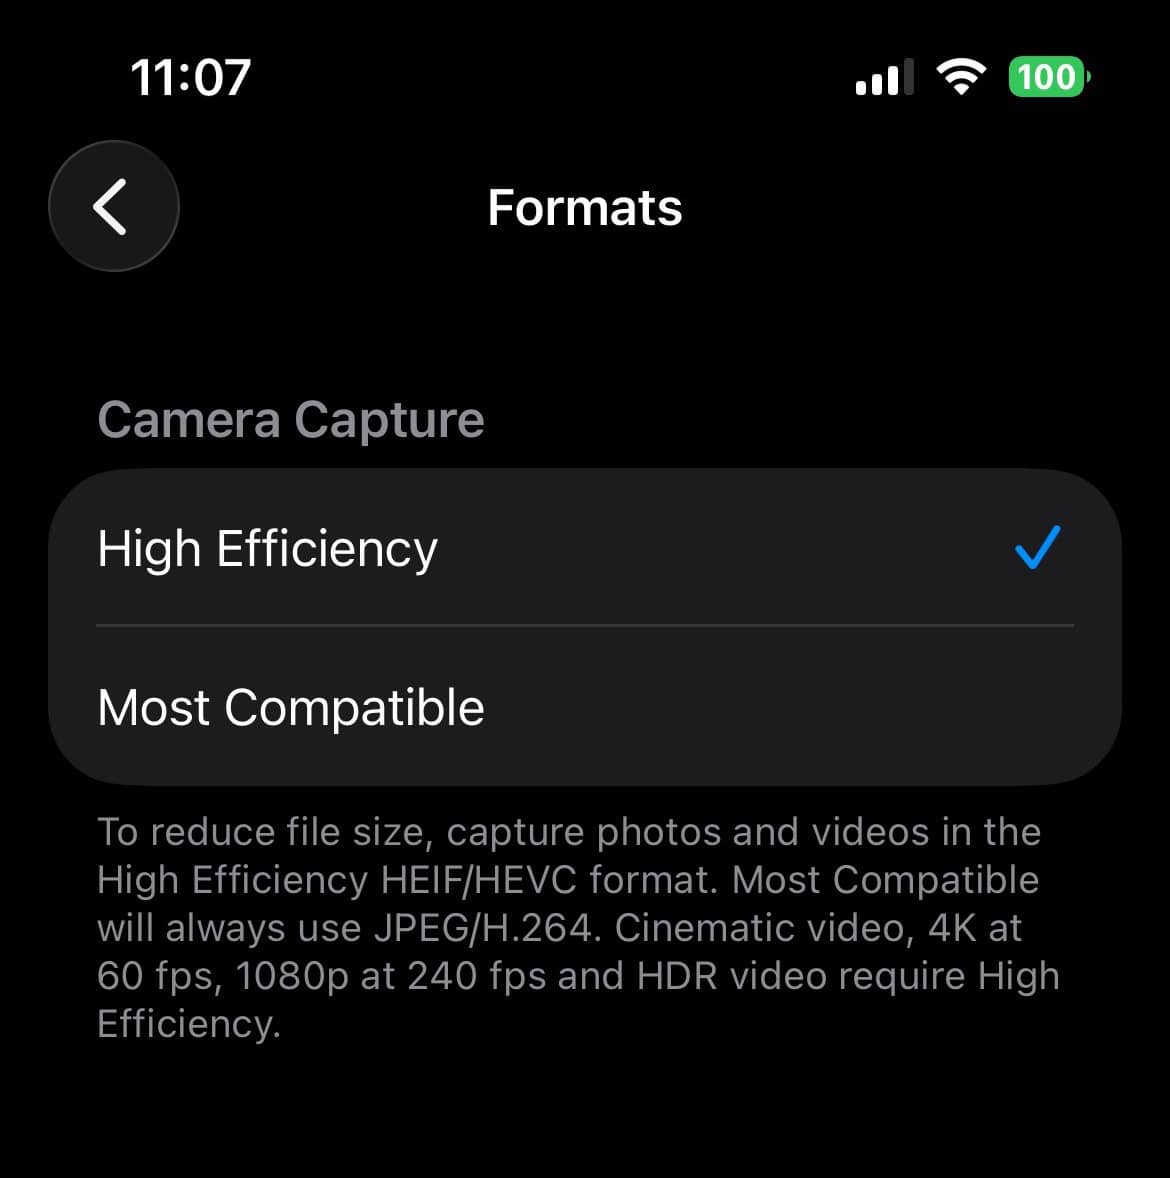
- Select Most Compatible. This ensures all new photos save in the JPEG format. Choose High Efficiency if you prefer HEIF to save space.


2. Use the Share Option
The Share feature converts existing HEIF photos when you send them. You can send them to another app or person. When you share a photo, iOS automatically converts the file. It changes it to a widely supported format like JPEG. Furthermore, this function integrates images into productivity apps. This is useful when you need to take a photo in Apple Notes directly.
- Open the Photos app. Select the image(s) you want to convert.
- Tap the Share button, which is a box with an upward arrow.
- Select a sharing method or app, such as Mail or Messages.
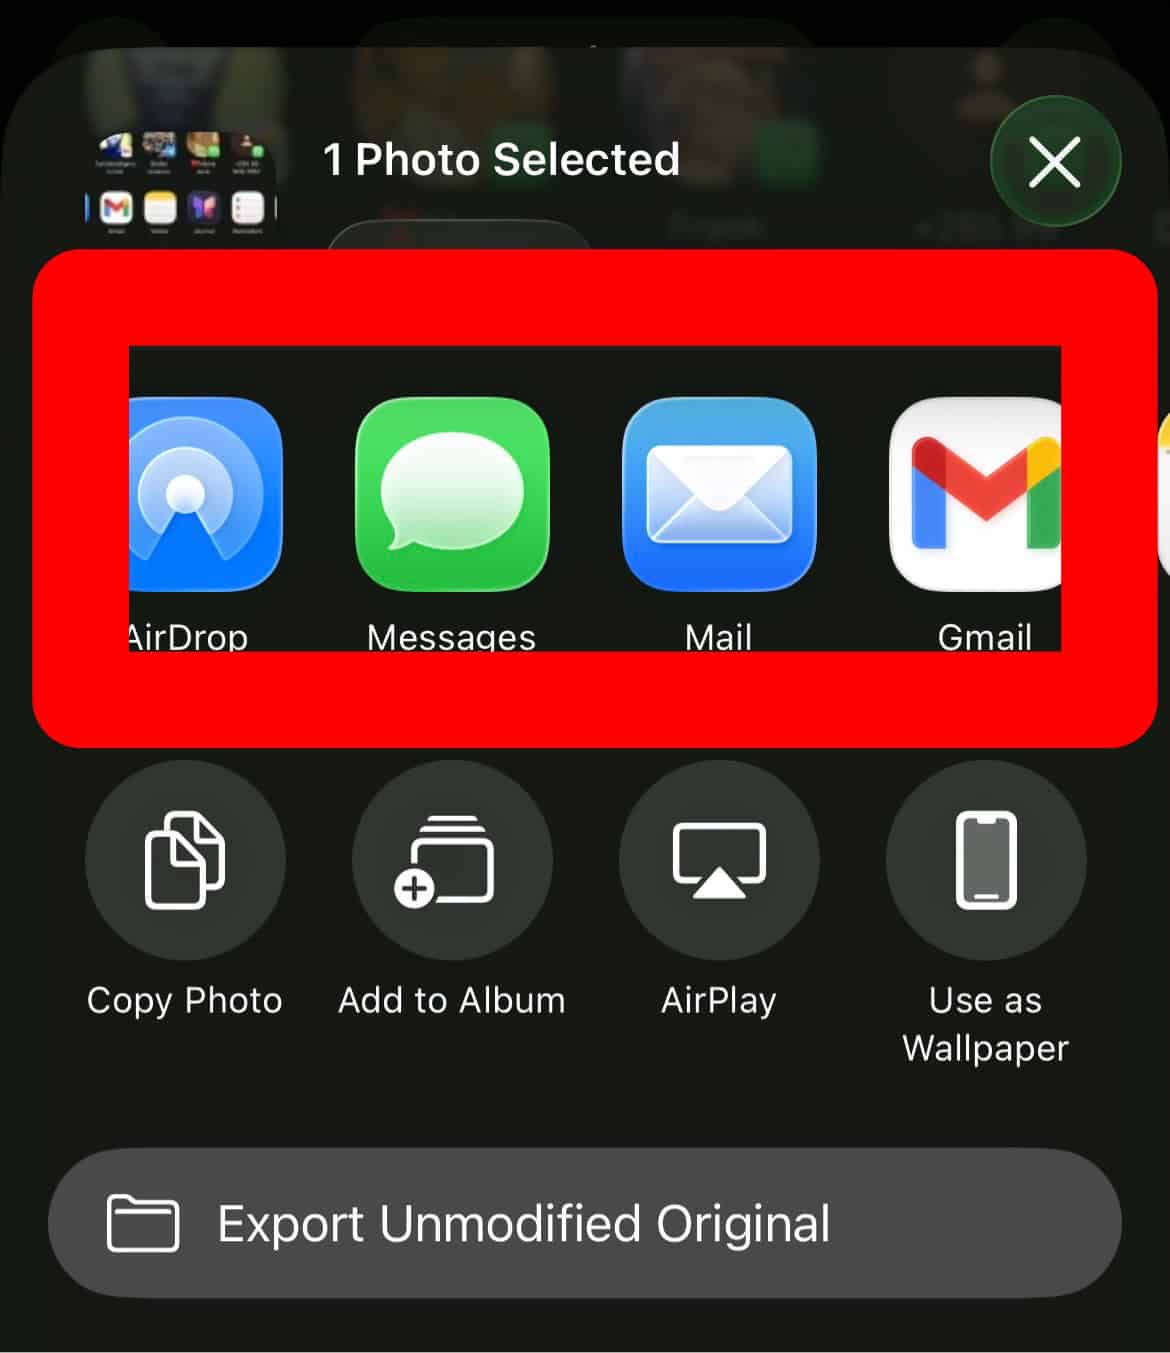
- iOS typically converts the HEIF photo to JPEG automatically before sending.

3. Save as Files
You can use the Files app on your iPhone or iPad. This converts HEIC files to JPEG effectively. Copy the photo and paste it into a local folder. This is a manual conversion technique. It uses the device’s internal file handling features.
- Open the Photos app. Select the desired HEIC photo(s).
- Tap the Share button. Then select Copy Photo.

- Open the Files app. Navigate to a folder like “On My iPhone” or “iCloud Drive.”
- Press and hold in an empty area. Select Paste from the context menu. The photos will paste as standard JPEG files.

FAQ
Converting from HEIC to JPEG is lossy compression. The quality difference is often negligible for most users. However, it technically loses some data from the original HEIC file.
Yes, in the Photos app, select multiple images. Then use the Copy Photo and Paste into the Files app method. This converts them in a batch.
Essential Photo File Management
Learning these conversion methods makes photo management easier. This is true whether you use macOS or iOS. They help when HEIC format causes compatibility issues. Adjust your default camera settings on your iPhone. Alternatively, use the Mac Photos app’s Export function. You retain total control over your file formats. For tips on cloud storage and troubleshooting, check information on iCloud Photos not syncing.


