
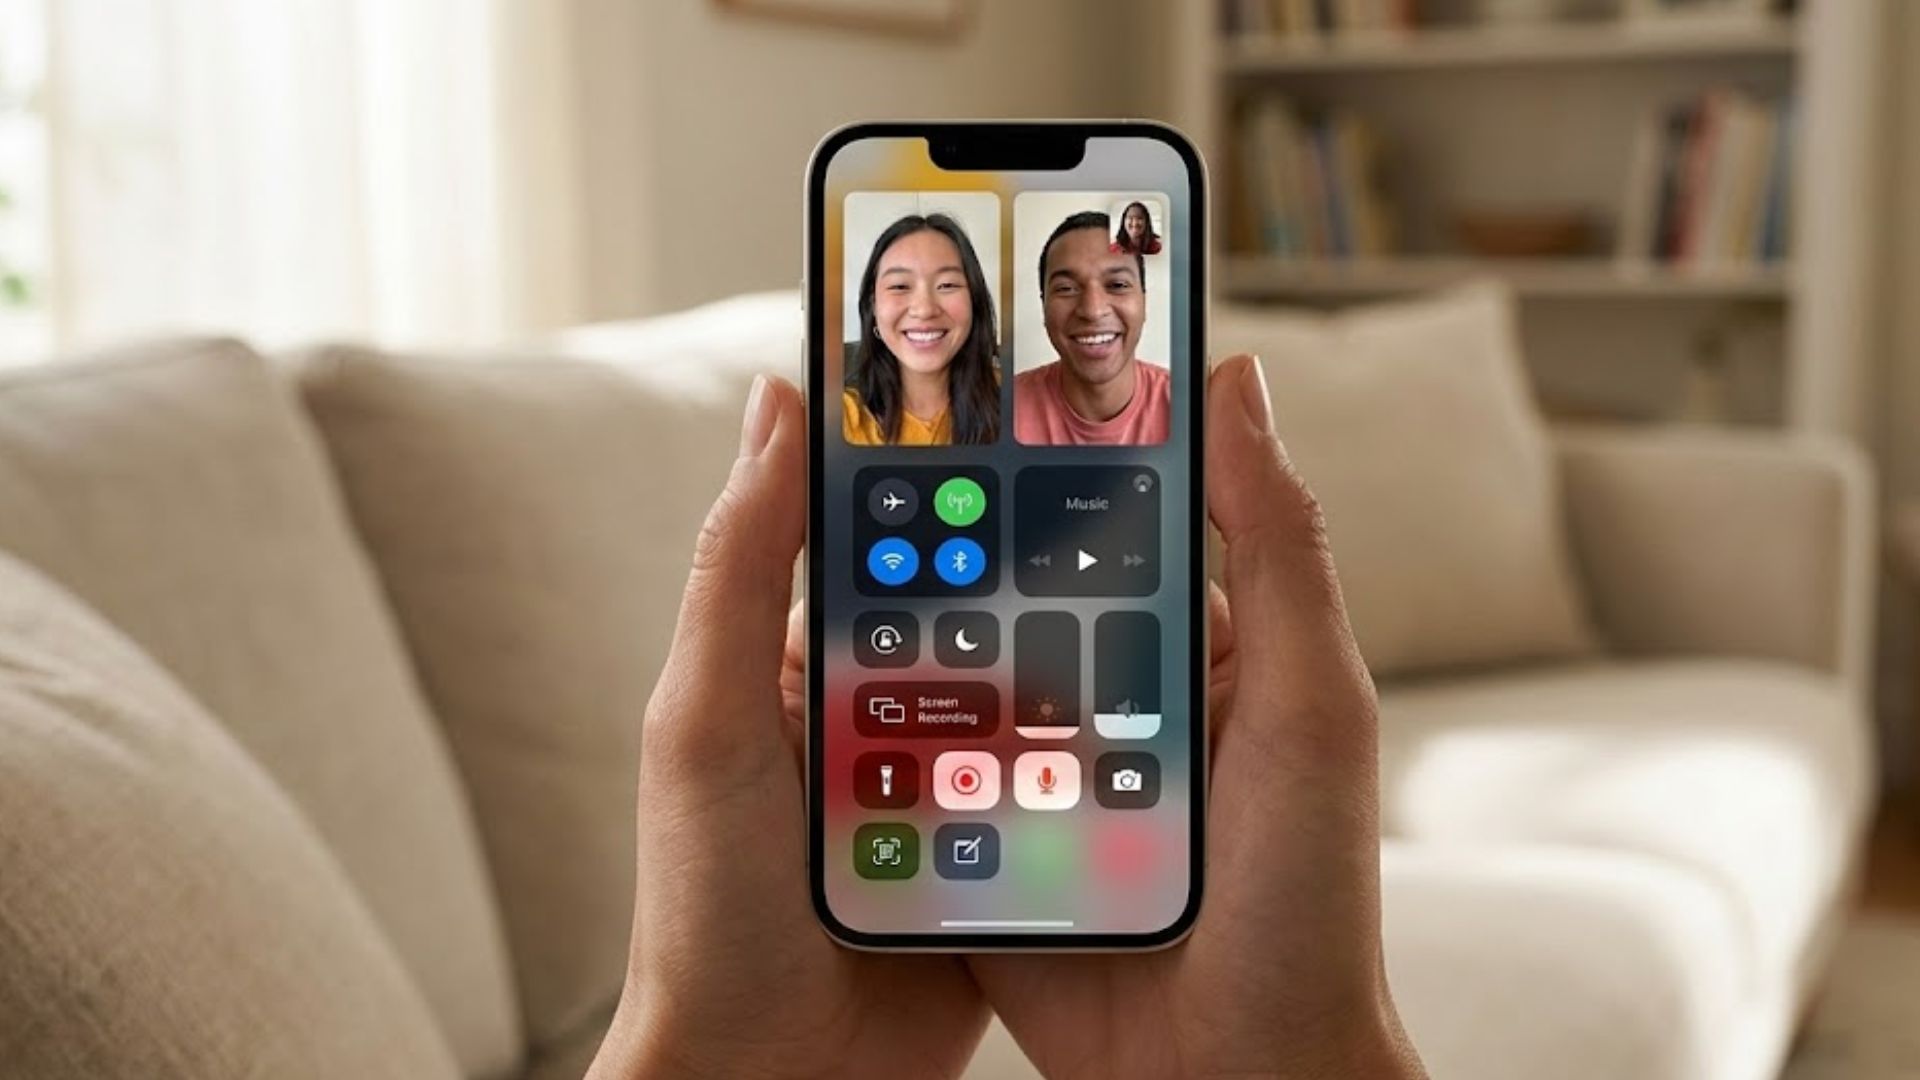
FaceTime is where the magic happens, from sharing big news to laughing at inside jokes. Sometimes a memory is just too good to let go, and you want to keep it forever. While screenshots are easy, recording a full video conversation with audio can be tricky if you do not know the right settings.
By default, the iPhone screen recorder captures video but leaves your replay silent. But do not worry! There is a simple hidden toggle that fixes this. If you are new to video calling, you might want to start with our FaceTime guide for beginners to learn the ropes. For everyone else, let’s get that audio working!
Table of contents
What You Need to Screen Record
Before you start recording, you need to ensure your Control Center is set up correctly. The screen recording tool is built right into iOS, but it is often hidden by default.
Don’t miss the best of The Mac Observer
Set us as a preferred source and our Apple reporting ranks higher in your Google Search results and Discover feed — one tap, no account changes.
Here is what you need:
- An iPhone: Running iOS 11 or later.
- Control Center Access: You must add the Screen Recording button to your quick menu.
- No Headphones: You must disconnect AirPods or wired headphones. This method only works if the audio is playing through the device speakers.
- Volume Turned Up: Since the iPhone microphone needs to “hear” the audio from the speaker, your volume cannot be on silent or too low.
If you find that your calls are glitching before you even start, check out our guide on how to fix FaceTime not working to ensure a smooth connection.
Here’s How to Screen Record with Sound
The secret to capturing sound lies in a “long press.” Most people just tap the record button, which captures video but mutes the microphone. To get sound, you have to tell your iPhone to listen to its own speakers.
1. Add the Screen Record Button
First, make sure the button is ready to use.
- Open Settings.
- Tap Control Center.
- Scroll down to the “More Controls” section (or just “Controls” in newer iOS versions).
- Find Screen Recording and tap the green + icon next to it.
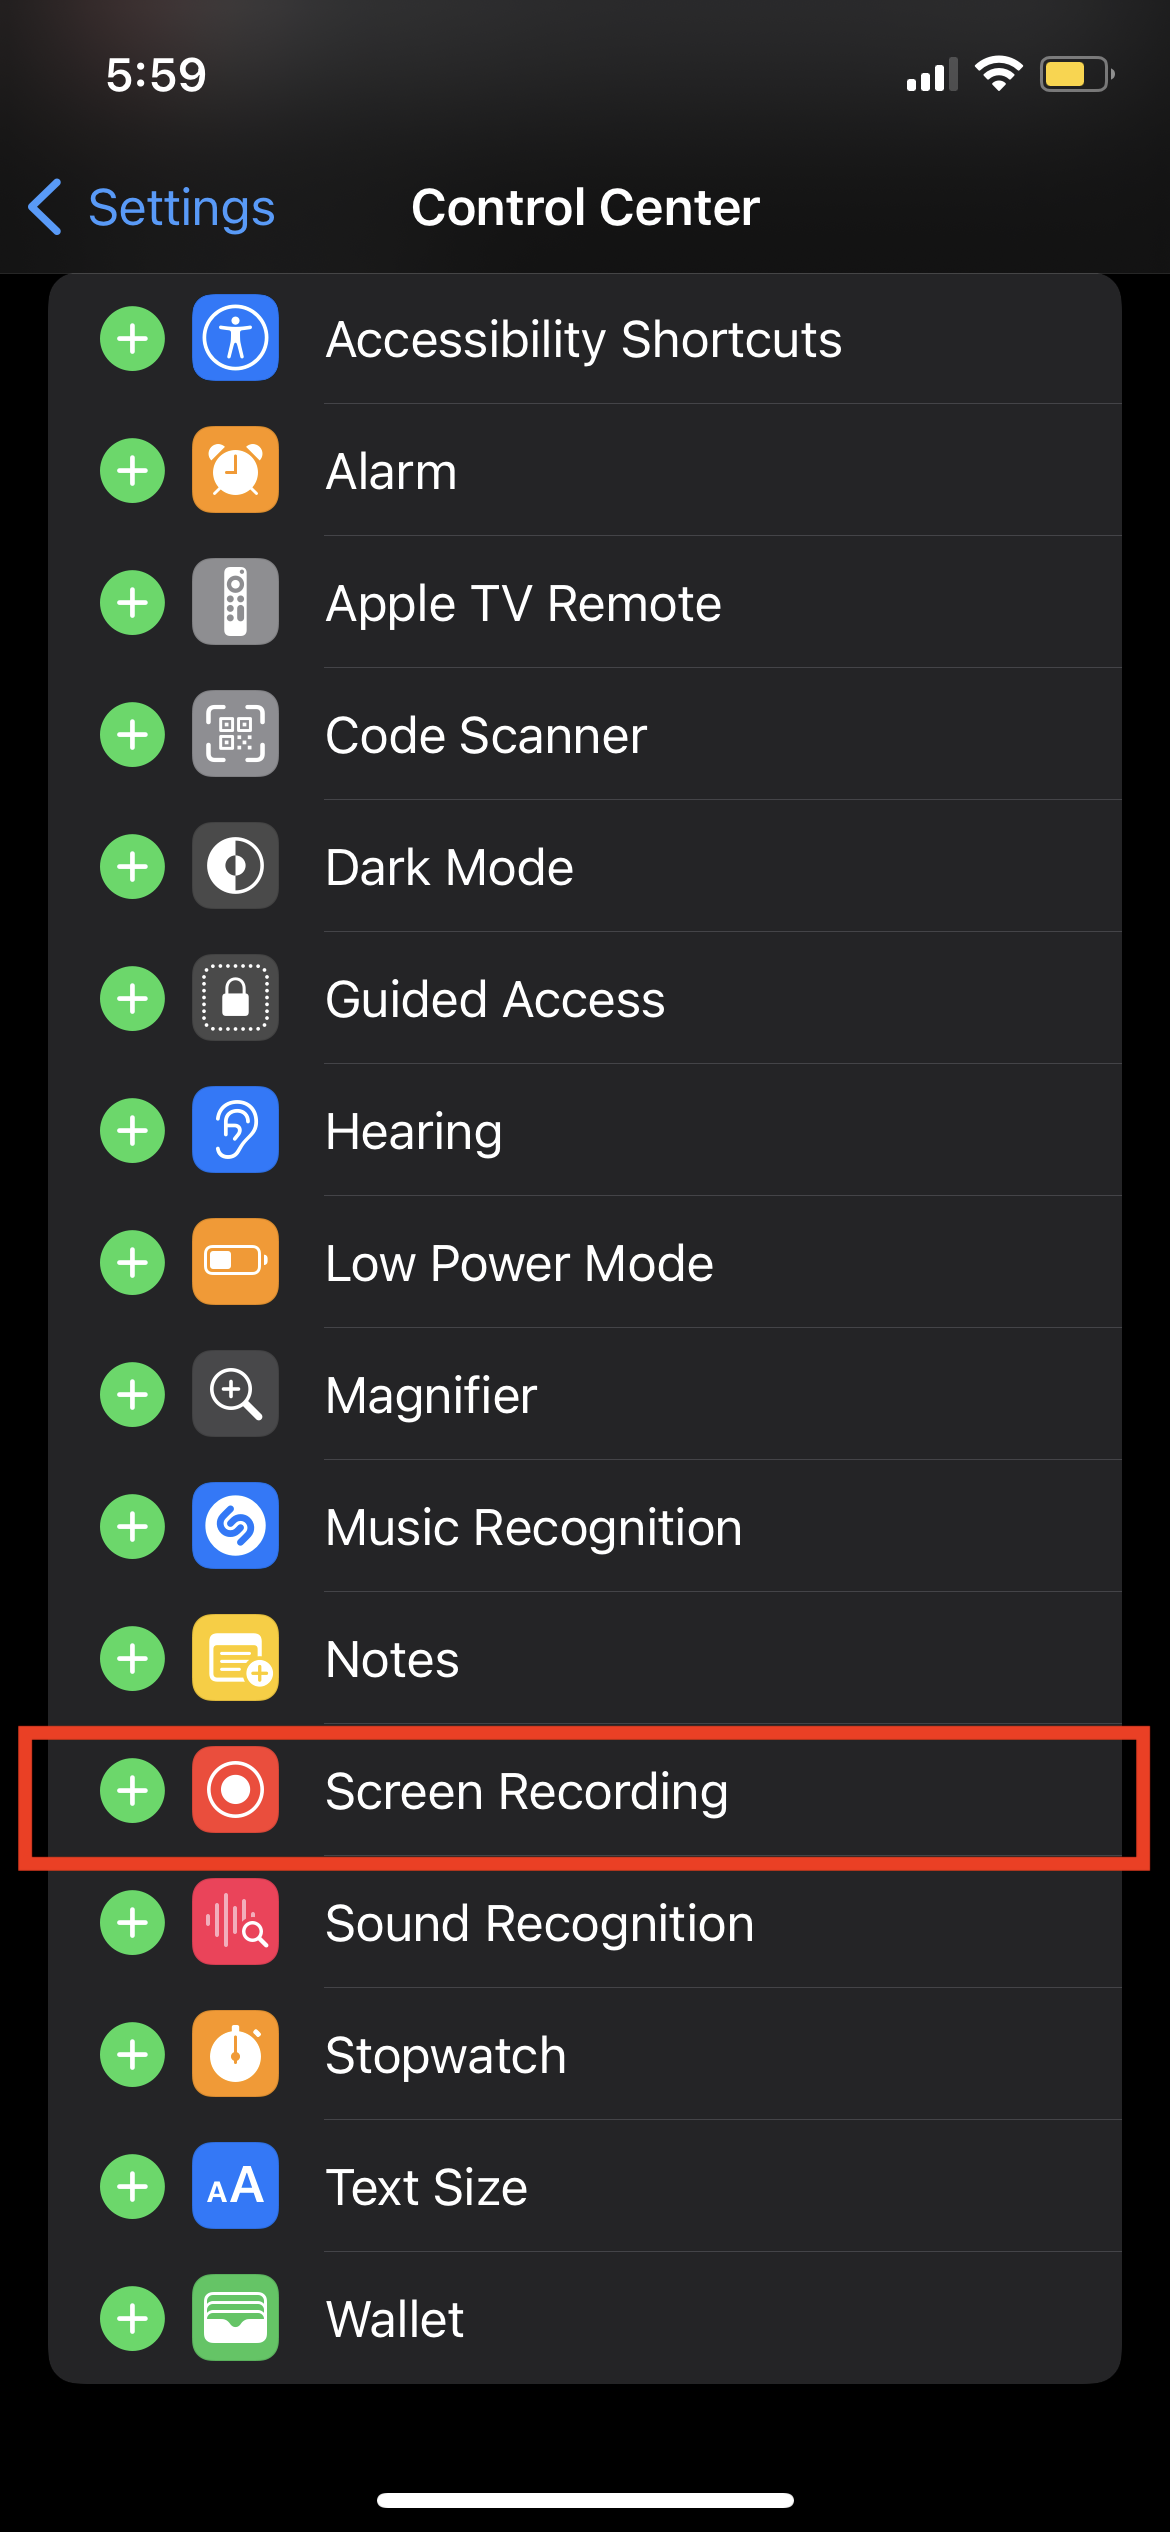
- It will now appear in your “Included Controls” list.
2. Enable the Microphone
This is the most important step.
- Swipe down from the top right corner of your screen (or up from the bottom on older models) to open the Control Center.
- Find the Screen Record icon (it looks like a solid circle inside a ring).
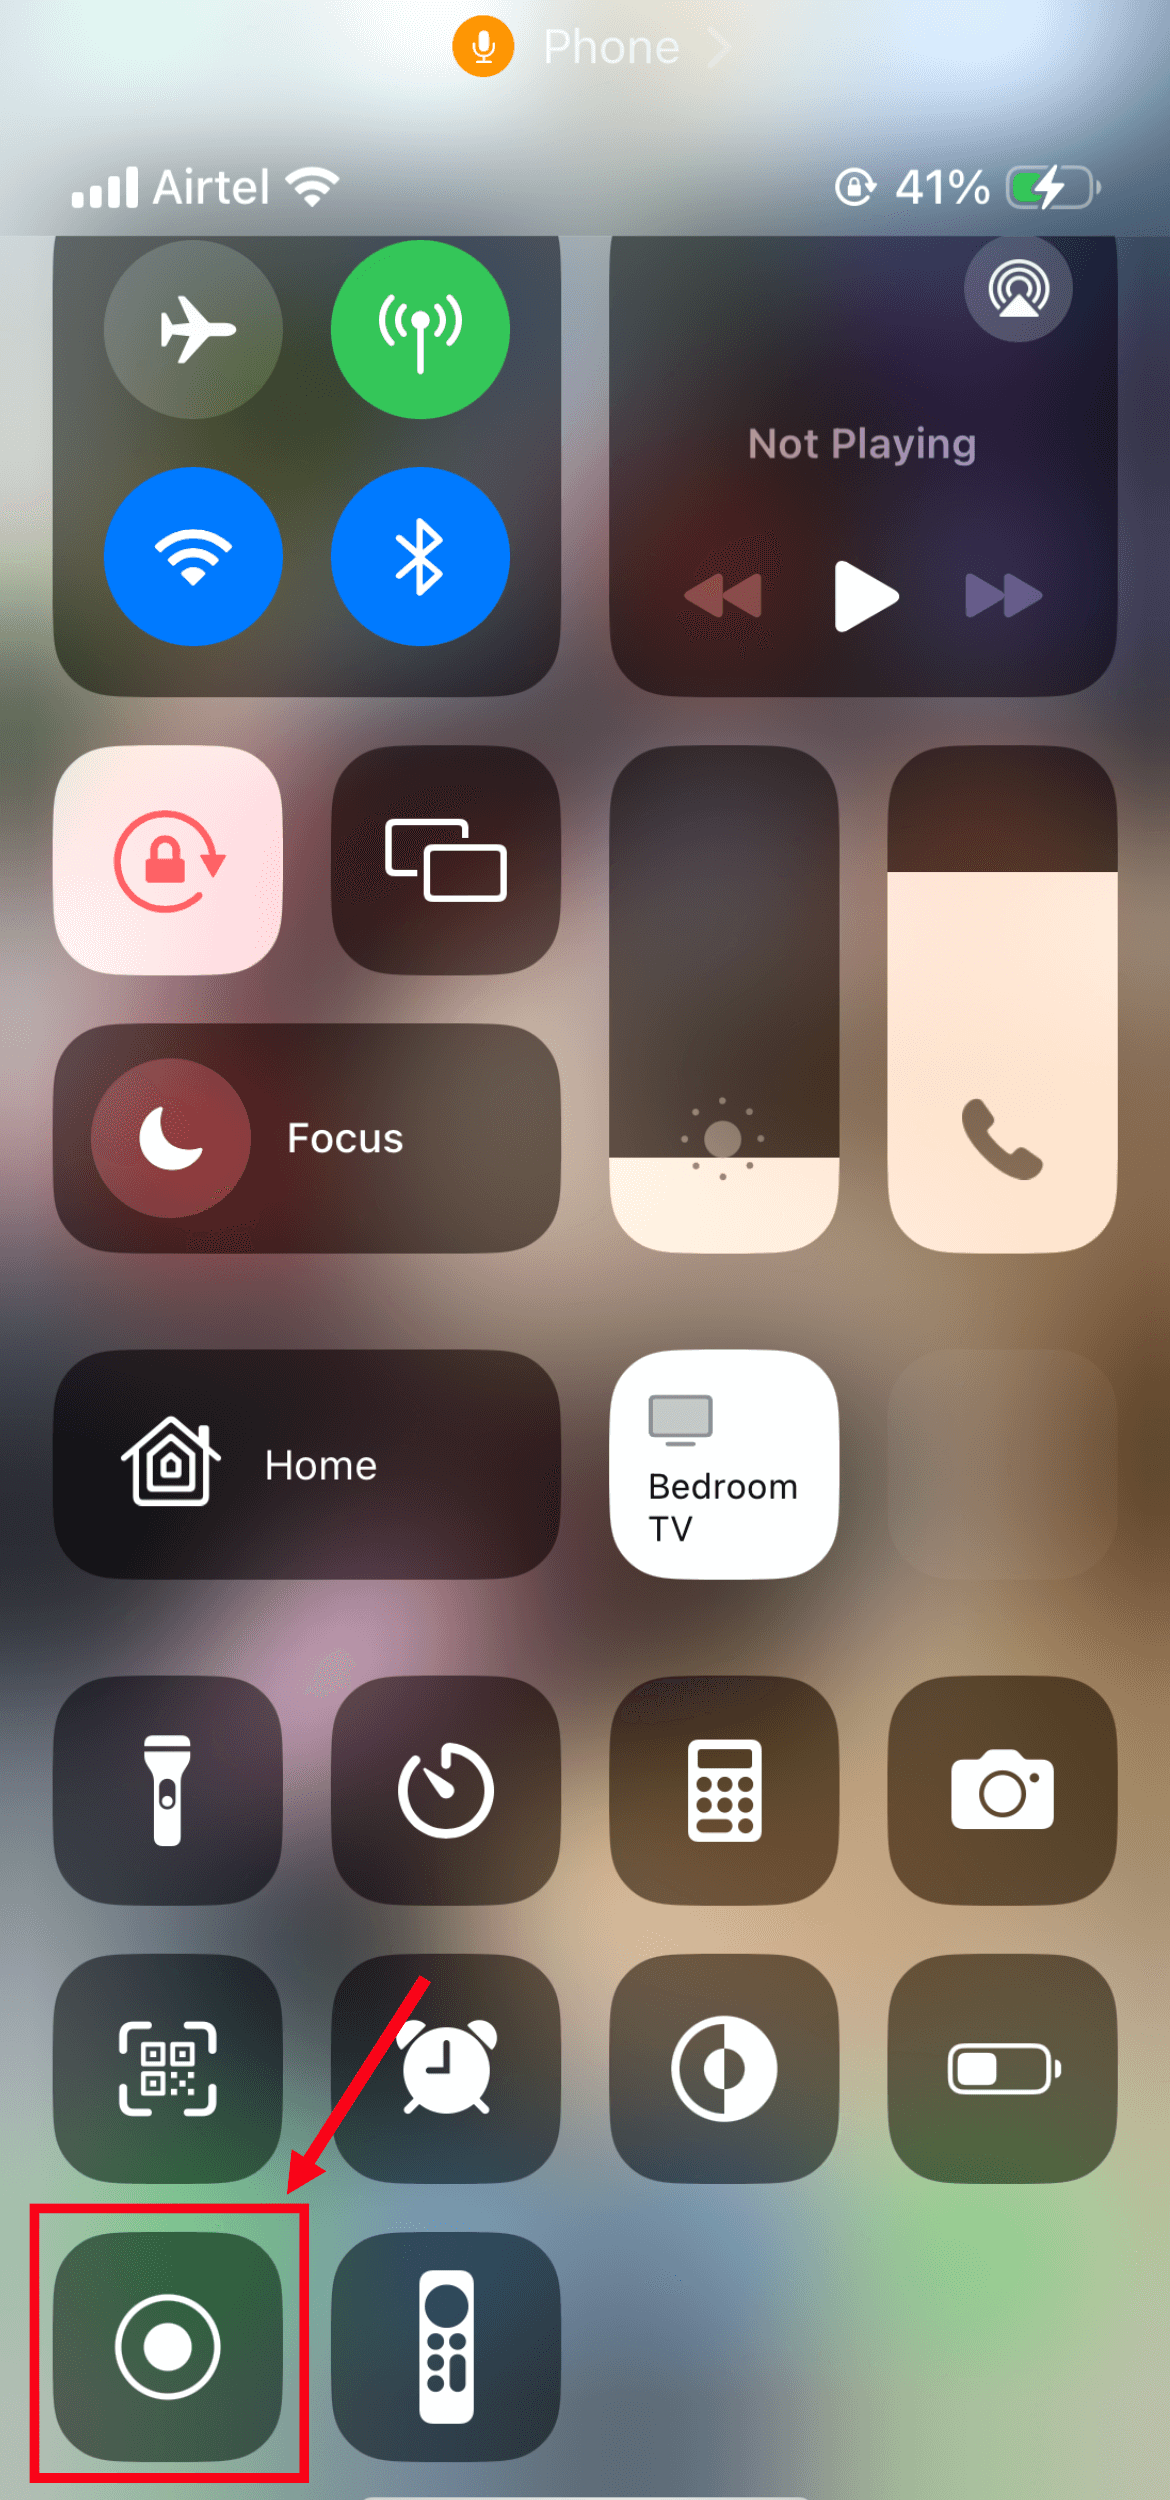
- Long press (hold down) the icon until a new menu pops up.
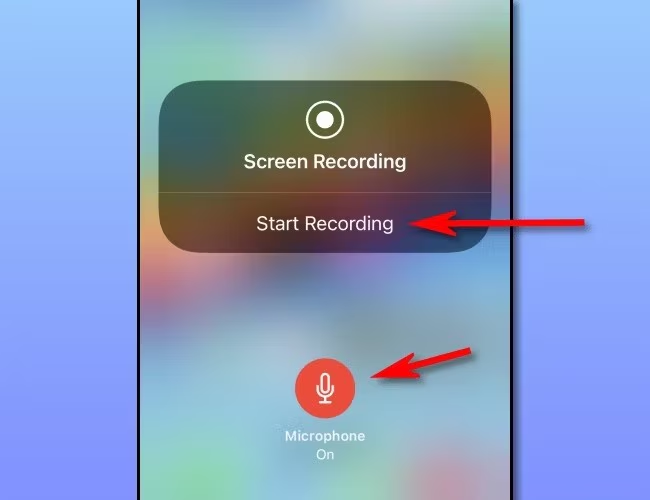
- Tap the Microphone icon at the bottom of the screen so it turns Red and says “Microphone On.”
3. Start Recording
Now you are ready to capture the call.
- Critical Step: Disconnect any headphones and turn your volume up high.
- Tap Start Recording from that same menu.
- You will see a 3 second countdown.
- Tap the background to close the Control Center and return to your FaceTime call.
- The clock in the top left corner (or a red bar) will turn red to indicate you are recording.
This method works great for capturing candid moments, which is just one of many iOS FaceTime features that make connecting with friends so enjoyable.
4. Stop Recording
When the call is over or you have captured what you need:
- Tap the red clock or red bar at the top of your screen.
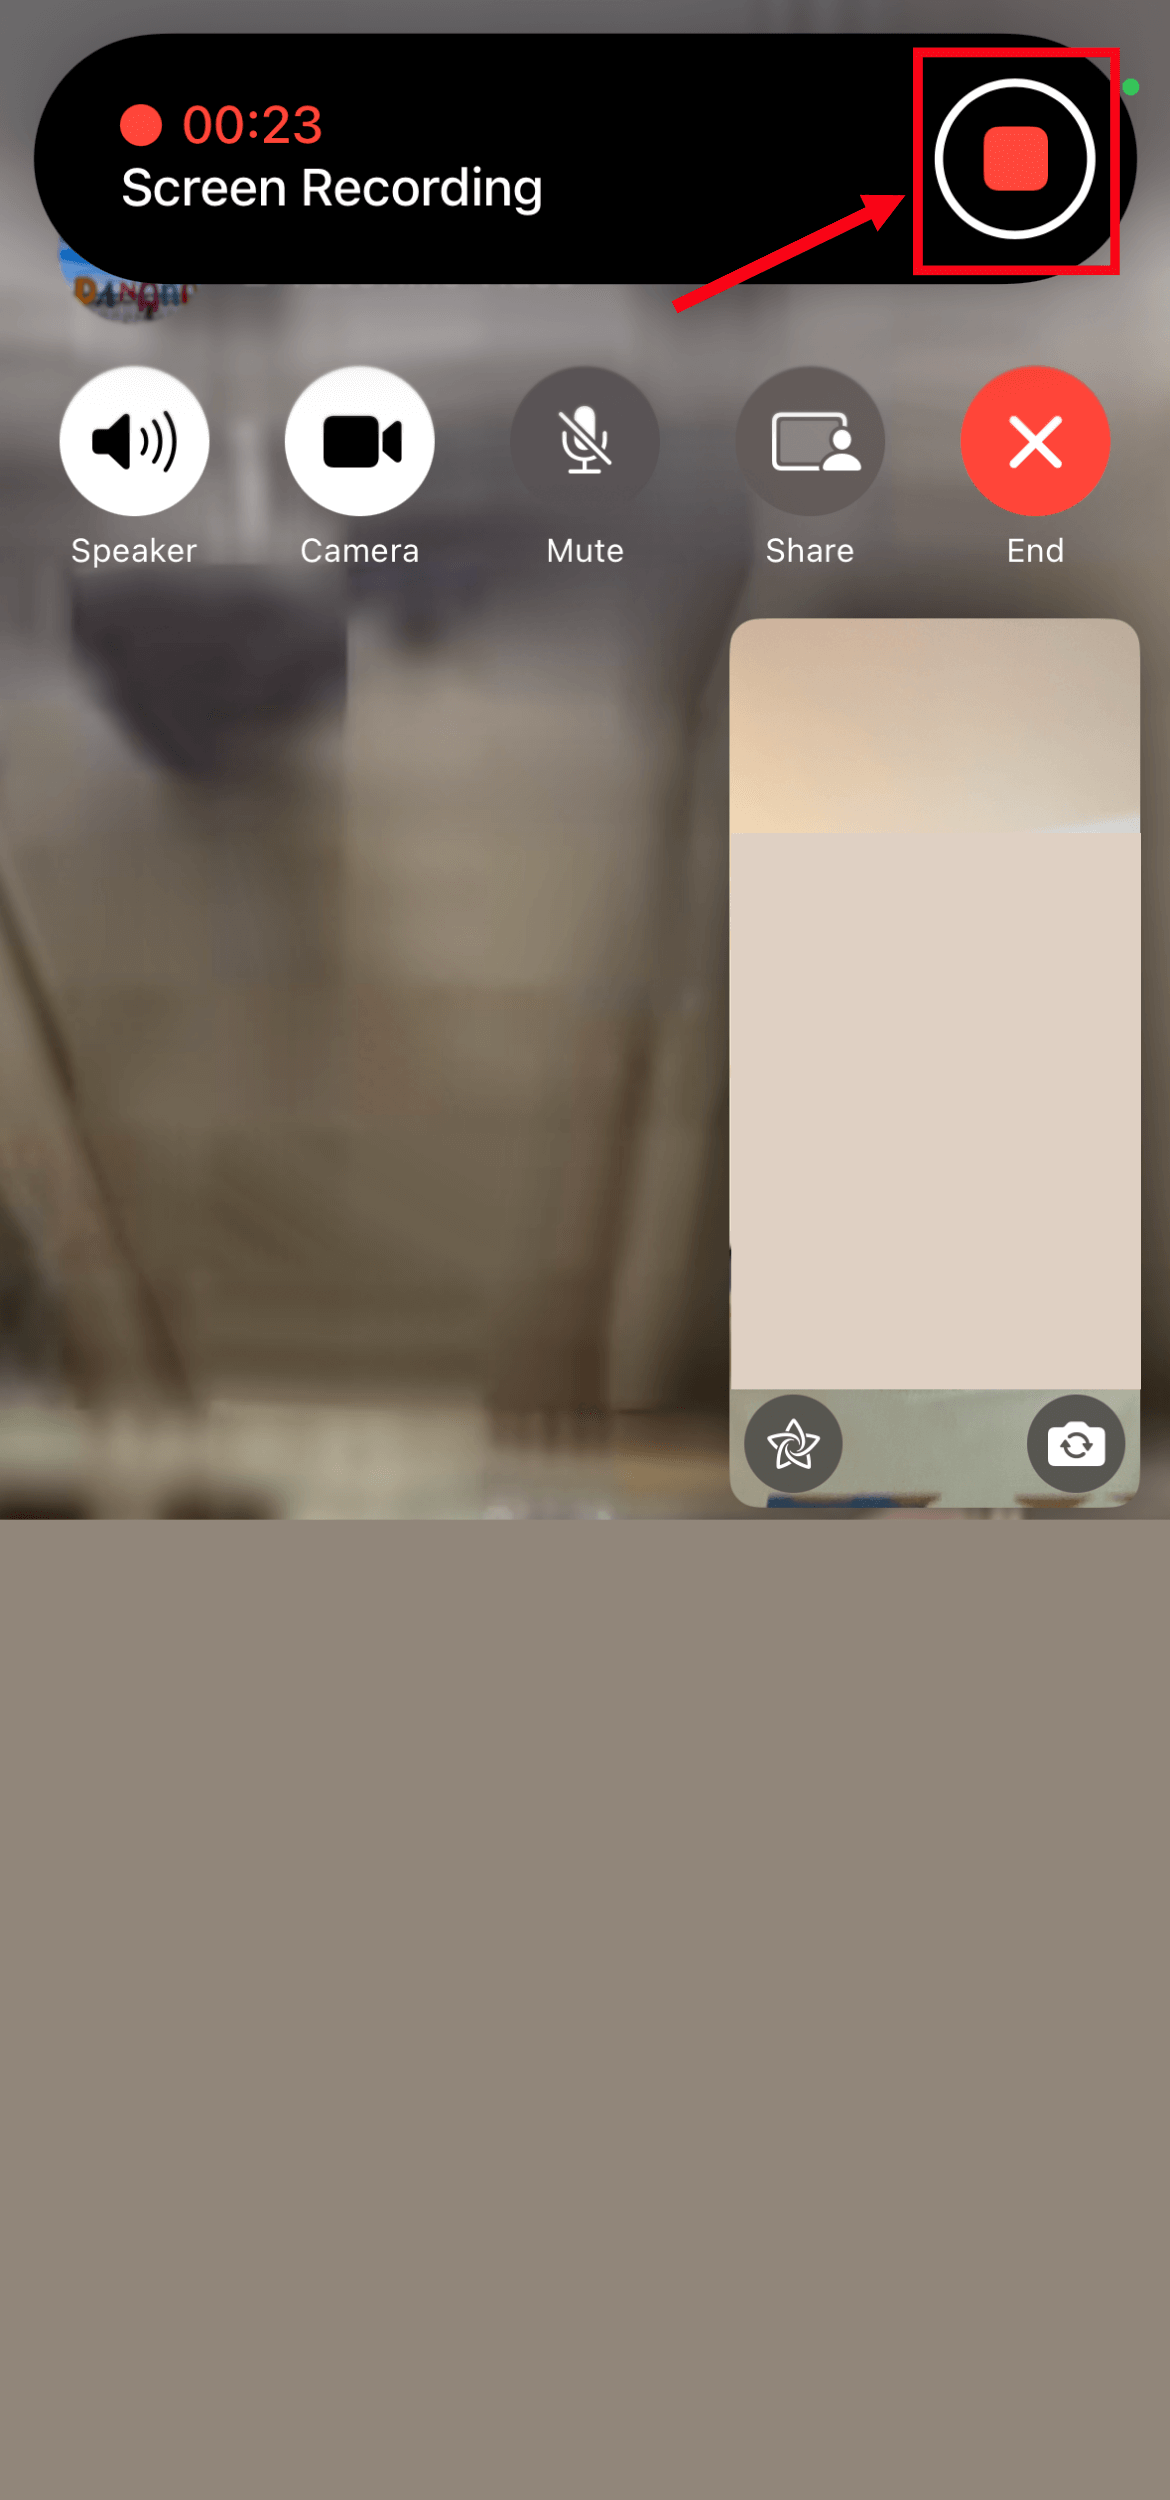
- A confirmation box will pop up.
- Tap Stop.
- The video will automatically save to your Photos app.
Additional Tips
- Use Speakerphone: Because the iPhone uses the internal microphone to record the audio coming out of the speakers, the other person’s voice needs to be loud. Keep your hand away from the microphone holes at the bottom of the phone.
- Notify the Caller: FaceTime does not notify the other person that you are screen recording. It is always polite (and in many places, legally required) to let them know you are recording the conversation.
- Do Not Disturb: Notifications can ruin a recording. Turn on Do Not Disturb to keep banners from popping up over your video.
- Need a Break?: If you find yourself recording too often or just need to disconnect, you can easily learn how to turn off FaceTime on iPhone to stop receiving calls for a while.
Final Thoughts
Screen recording with sound is a fantastic workaround to preserve memories that would otherwise disappear the moment you hang up. While it requires a quick settings tweak and the use of speakerphone, the result is a video that sounds as good as it looks. Just remember to respect the privacy of the person on the other end of the line. Now, go capture those special moments!
FAQs
The most common reason is that the Microphone was not toggled on. You must long press the Screen Recording button in the Control Center and tap the Microphone icon until it turns red. Also, ensure your volume is up high.
No, Apple does not send a notification to the other user when you start a screen recording. This is different from a FaceTime Live Photo, which does alert them.
No, this is a major limitation. If you wear headphones, the sound goes directly into your ears and not out of the speakers, meaning the iPhone microphone cannot “hear” the other person to record them. You must use the speakerphone.
All screen recordings are saved directly to your Photos app. You can find them in your main library or under the “Screen Recordings” media type album.


Discussion