
When you unbox your new iPad, one of the first things you will likely come across in the control center. If we’re honest, it looks quite dull. However, you can customize it to become extremely helpful.
Accessing the iPad’s Control Center
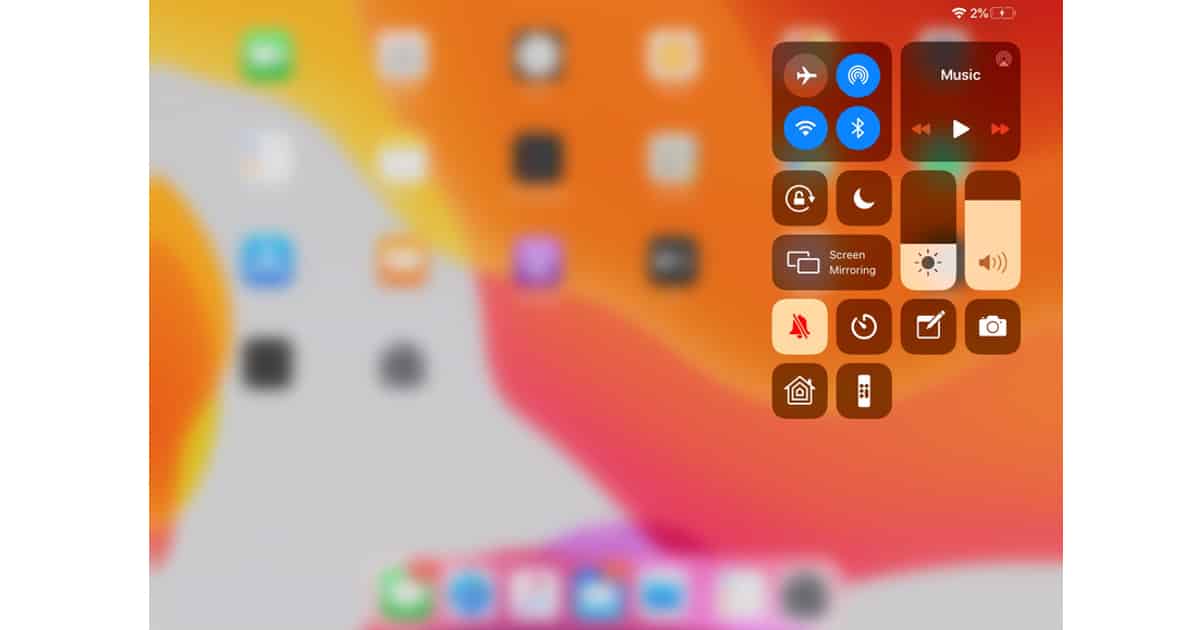
First things first. To access Control Center, pull down from the top-right corner of your iPad. You can even do this when the device is locked. You will notice when you load it, there are some things there by default: Sound on/off, Timer, Notes, Camera, Home, and TV Remote. These can be useful, but you do not have to keep them. Instead, you can choose from a whole range of options.
Don’t miss the best of The Mac Observer
Set us as a preferred source and our Apple reporting ranks higher in your Google Search results and Discover feed — one tap, no account changes.
[Use SideCar to Make Your iPad a Secondary Display For Your Mac]
Change Settings Via System Preferences
To customize Control Center, go to System Preferences > Control Center. You can decide where or not you want to be able to access Control Center whilst you’re using another app. To change what appears in Control Center whenever you load it, tap the ‘Customize Controls’ option.

In that screen is a list of the functions that are potentially available, including things like Screen Recording or Voice Memos. Anything currently in the Control Center is list under the title Include. To remove something, tap the red minus button > Remove. This removal is not permanent. If you realize you miss a certain tool you can always re-add it. Items not currently in the Control Center are just below, under the More Controls label. Simply tap the Green Plus Sign next to any one of those options, and it is added.

When you next load Control Center, the exact tools you want will be waiting for you.


Discussion