
Software glitches, faulty USB ports, macOS security settings, and hardware failures are some of the most common reasons why macOS Sequoia isn’t recognizing USB flash drives. You can fix them by checking the USB ports, restarting your Mac, adjusting macOS security settings, reinstalling macOS, and more. Let’s take a more in-depth look at each of these solutions.
Why is macOS Sequoia Not Recognizing USB Flash Drives?
There are several reasons why macOS Sequoia isn’t detecting your USB drives, including faulty USB ports, damaged cables, unsupported or corrupted file systems, and hardware failures. Also, some security and privacy settings may block access to external drives. Other possible reasons could be:
Don’t miss the best of The Mac Observer
Set us as a preferred source and our Apple reporting ranks higher in your Google Search results and Discover feed — one tap, no account changes.
- Software glitches.
- Incompatibility with USB flash drivers, especially the newer models.
- Finder isn’t set up to recognize external devices.
- Unstable system settings post the update.
How to Fix USB Flash Drive Issues on macOS Sequoia
1. Check the USB Port and Cable
Time needed: 6 minutes
As your Mac gets older, the ports can wear out or malfunction, which may prevent external devices from being recognized. Testing them is a simple way to rule out any physical damage. You can try the following:
- If available, plug the flash drive into a different USB port on your Mac.

- If you have another USB flash drive, plug it into the same port. This will help you identify if the port is functional or not.
- Inspect the USB port for any dust, dirt, or debris, and clean it with a soft brush or Q-tip. Sometimes, even such tiny particles can disrupt the connection between your Mac and USB drive.
- If you’ve connected the drive via a cable, thoroughly inspect the cable for any visible signs of damage such as bends, frays, or exposed wires.
- Avoid using a USB-C adapter, hub, or docking station temporarily, and plug the drive directly into your Mac.

2. Restart your Mac
Restarting your Mac will fix connectivity issues and restore the system’s ability to detect USB drives properly.
- Click on the Apple Menu in the top left corner.
- Select Restart.
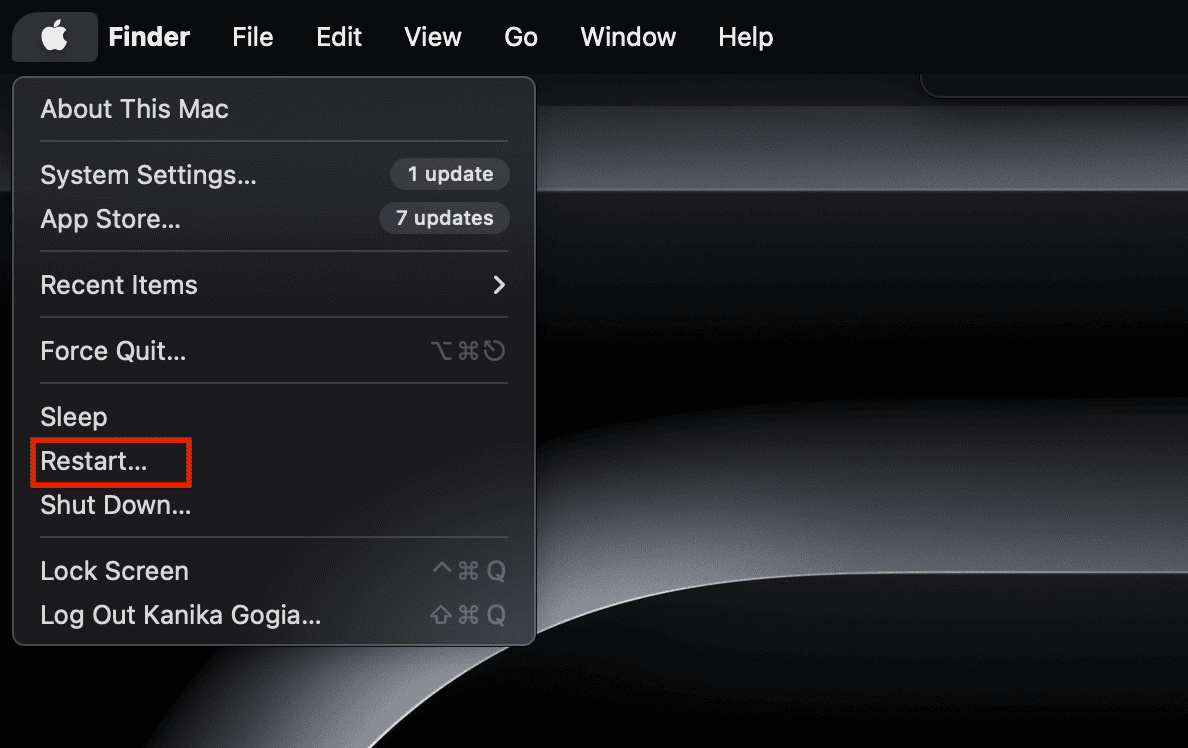
- Once your Mac reboots, reconnect the USB drive.

3. Test the Flash Drive on Another Device
Sometimes, the problem might not be your Mac but the USB Flash drive itself. To verify, try connecting the drive to another computer. If the drive is recognized by the other machine, it’s clear that the issue is specific to your Mac. However, if the drive doesn’t work on the other device as well, it’s likely faulty and needs to be replaced.
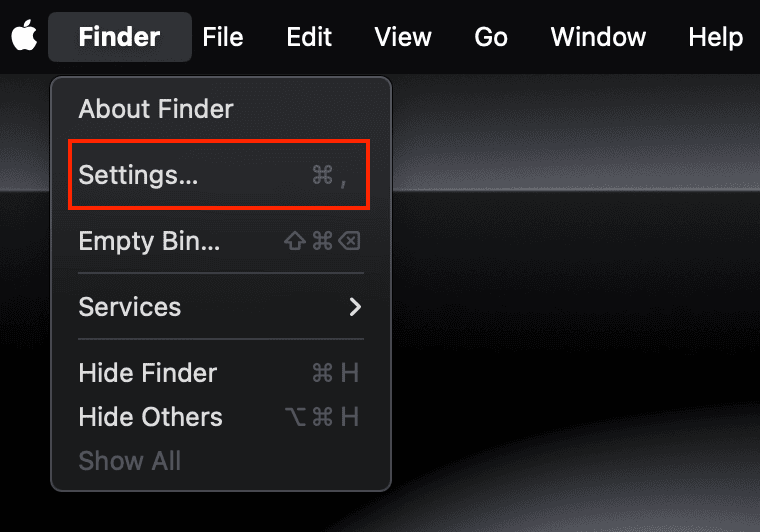
4. Modify Finder Settings
Sometimes, the Finder app may not be configured to display your devices. Fortunately, a quick adjustment in the settings can make the flash drive visible on your Mac.
- Open a Finder window on your Mac.
- From the top-right, click Finder and select Settings.
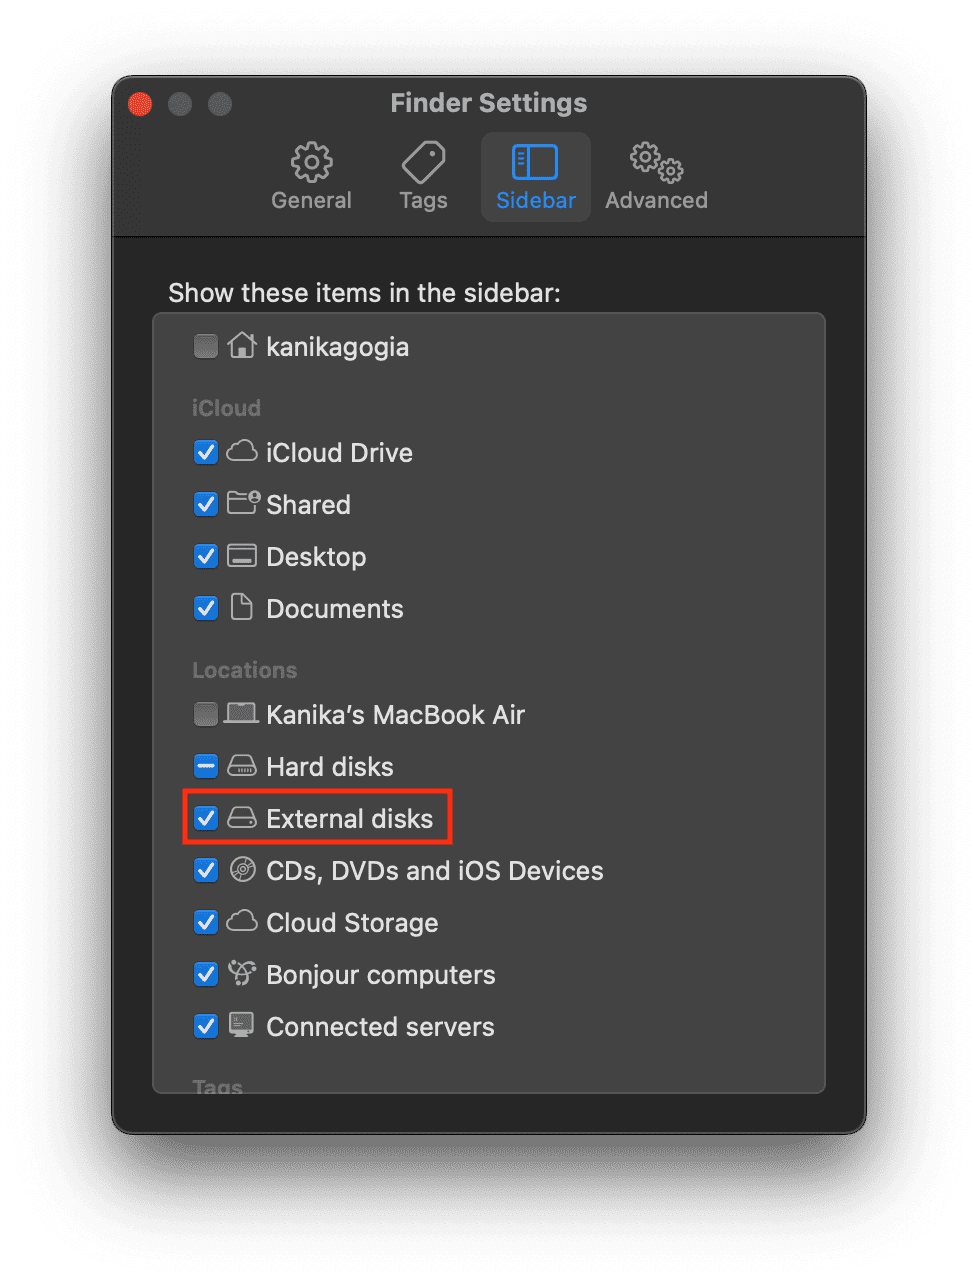
- In the General tab, make sure to check the External disks option to make your USB drive visible on the desktop.

- Now, click the Sidebar tab. Under Locations, make sure there’s a checkmark next to the External disk option. This will ensure that the flash drive shows up in the Finder sidebar.


5. Adjust macOS Security Settings
It could be possible that macOS security settings are preventing USB flash drives from being mounted or recognized on your Mac.
- Open the System Settings app on your Mac.
- Select Privacy & Security from the left sidebar.
- Under the Security section at the bottom, click Accessories.
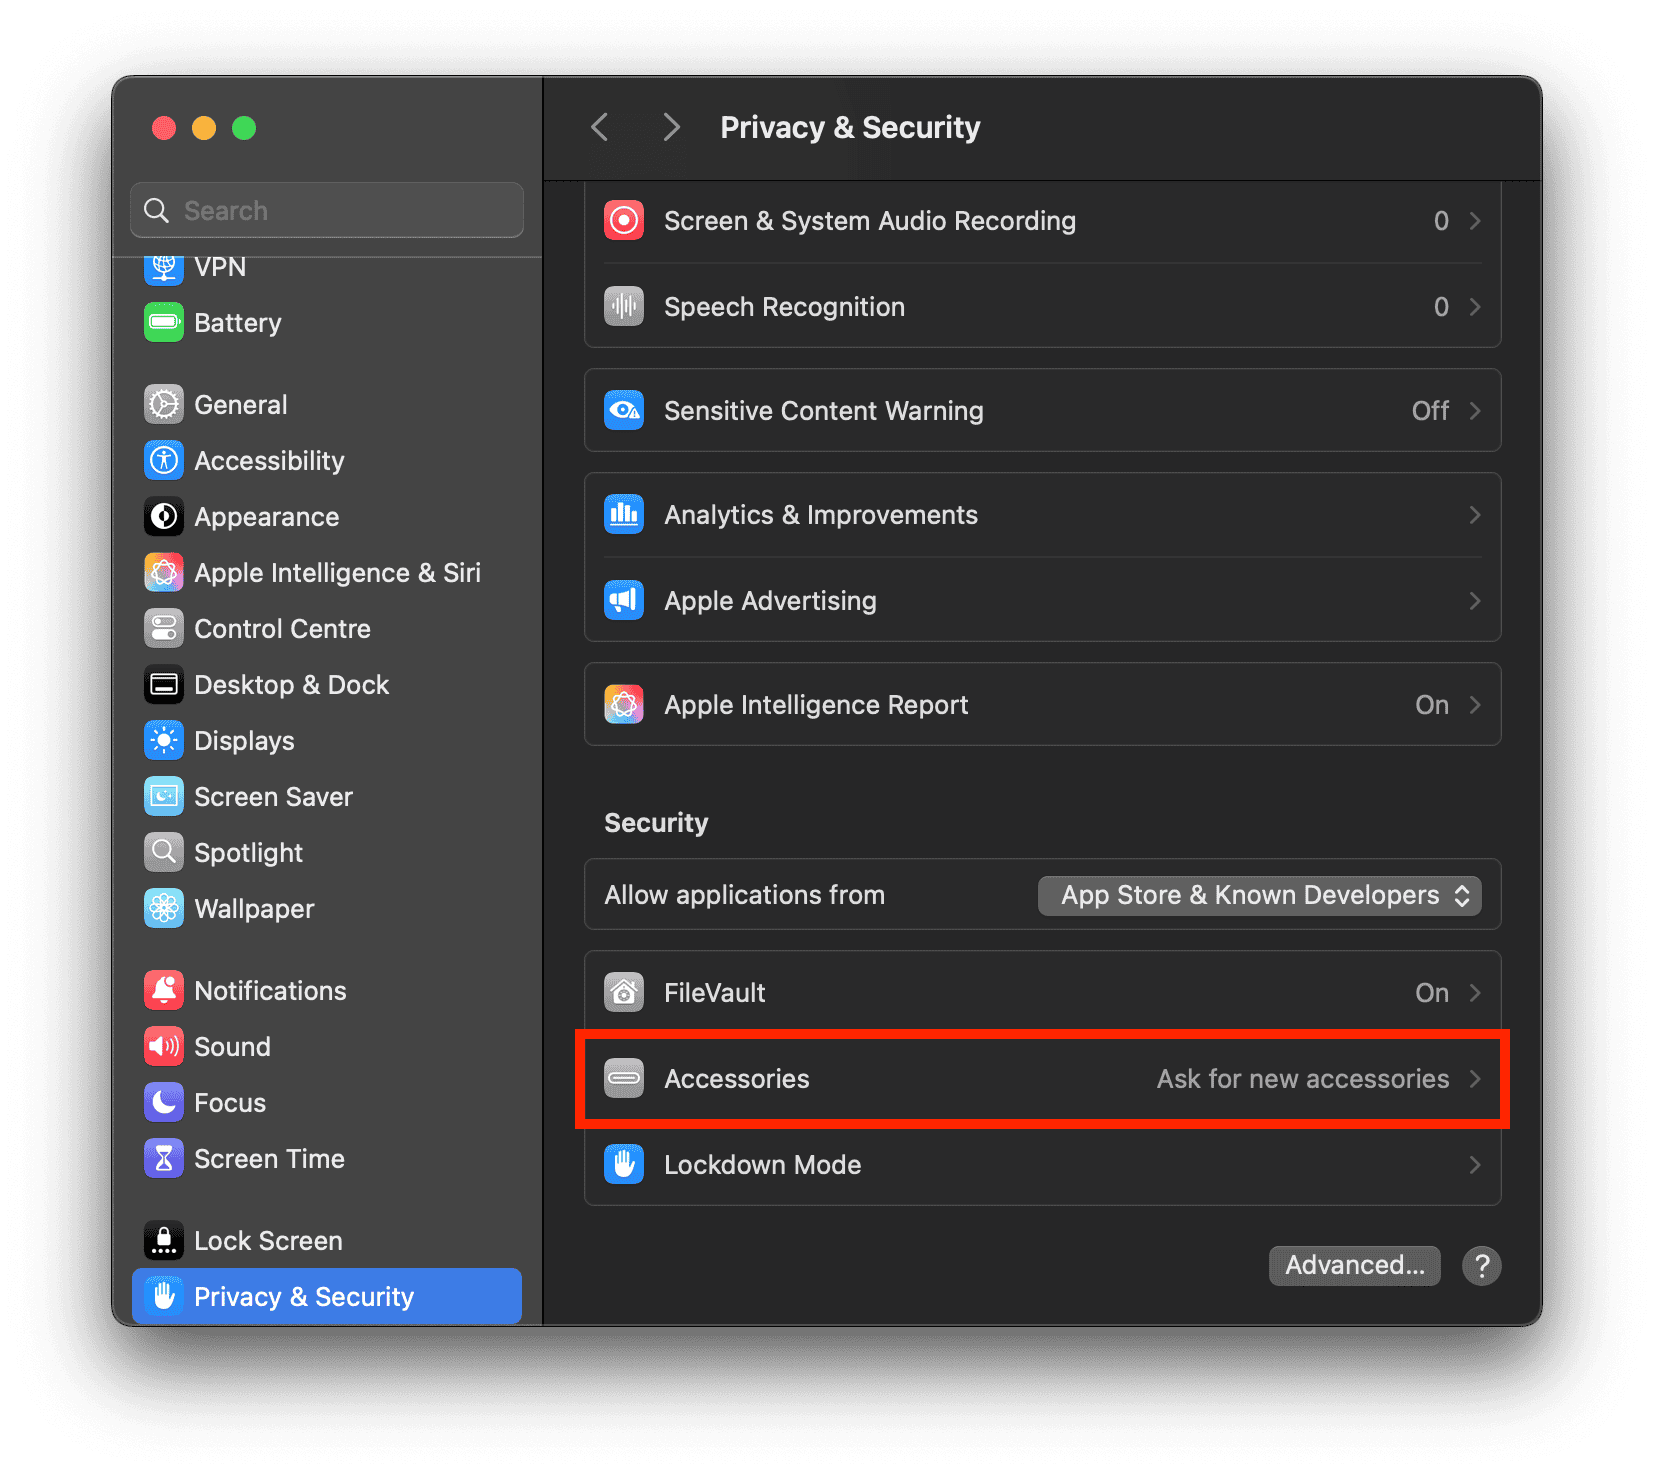
- Click the drop-down menu next to “Allow accessories to connect” and choose the Always allow option.
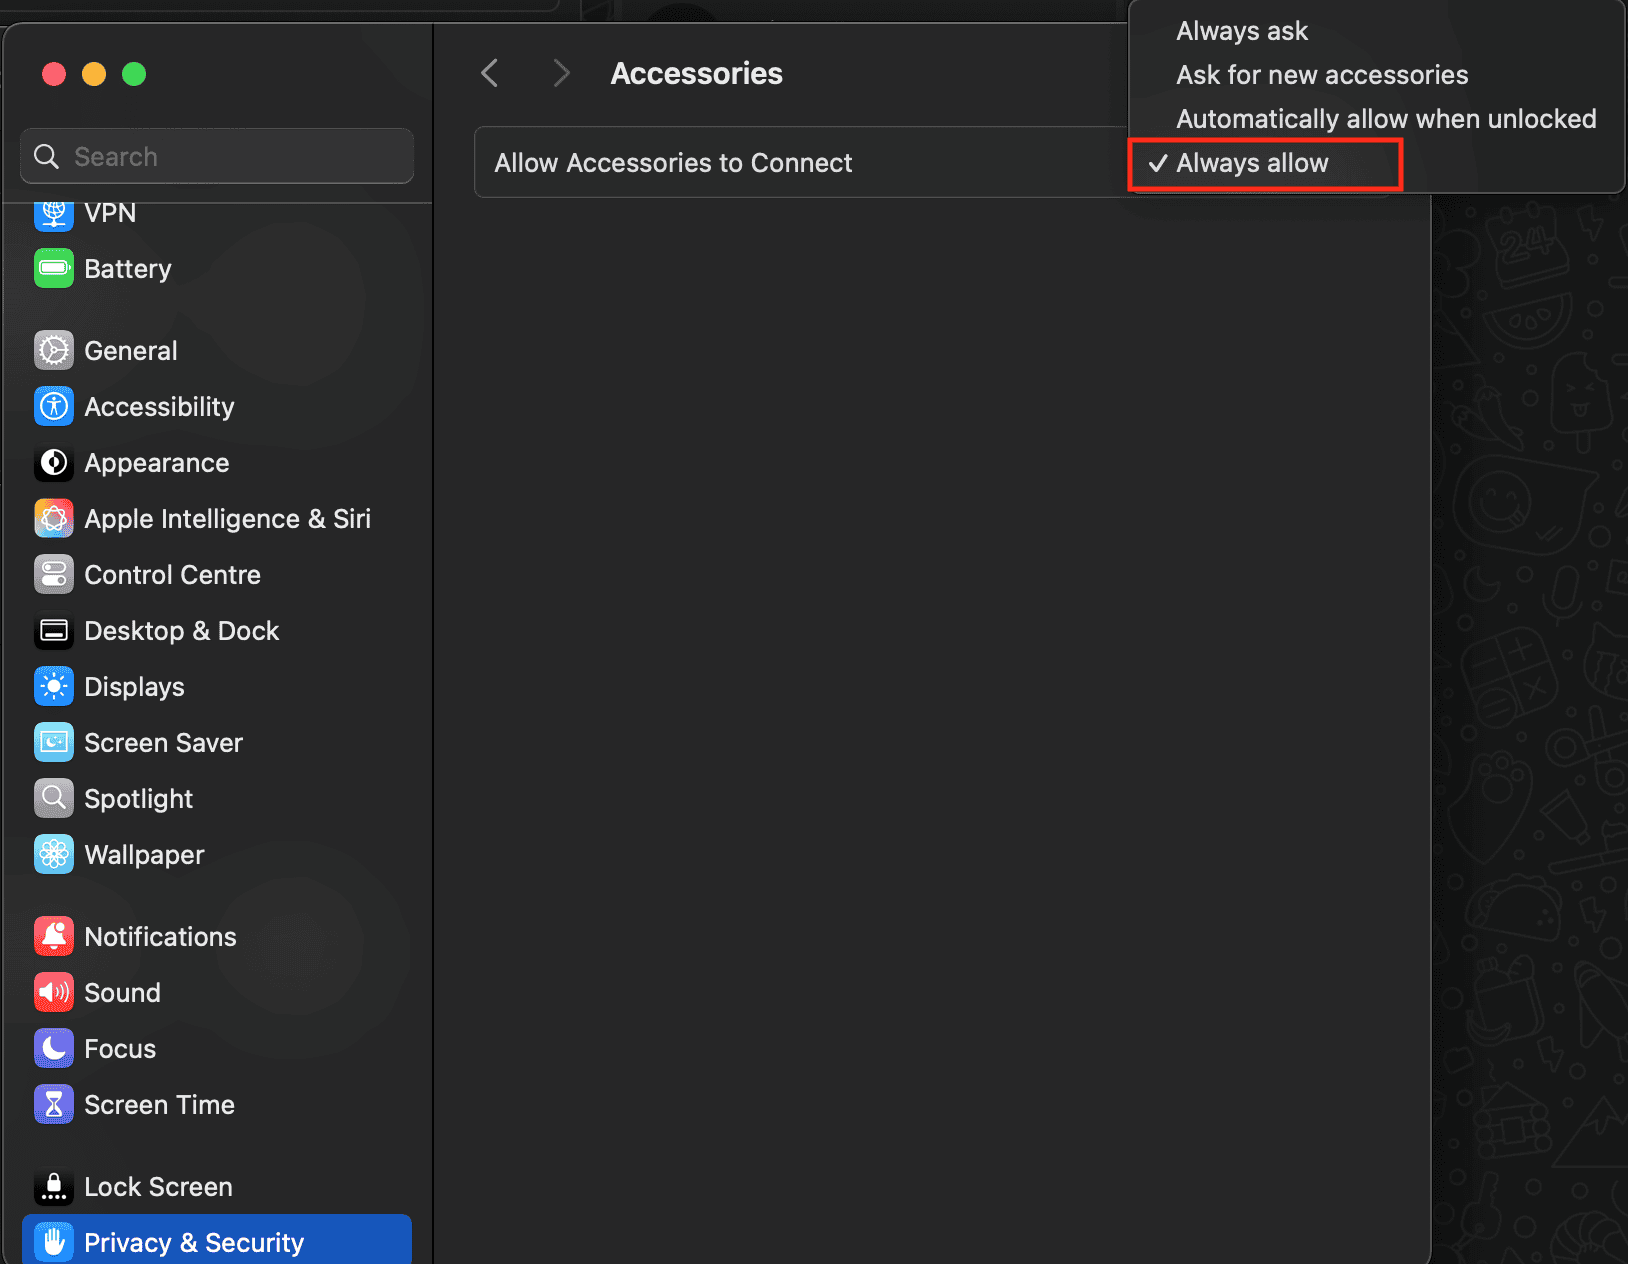
- Authenticate your Touch ID or enter your password to make this change.


6. Try Using a Power Supply
Larger USB devices require more power than your Mac’s port can deliver. Try connecting the drive through a powered USB dock or hub. This would determine if the drive needs additional power to function properly.
7. Check for Software Updates
To ensure your Mac has the latest drivers for handling external devices, it’s recommended to keep your Mac up to date.
- Open System Settings on your Mac.
- Click General from the left sidebar.
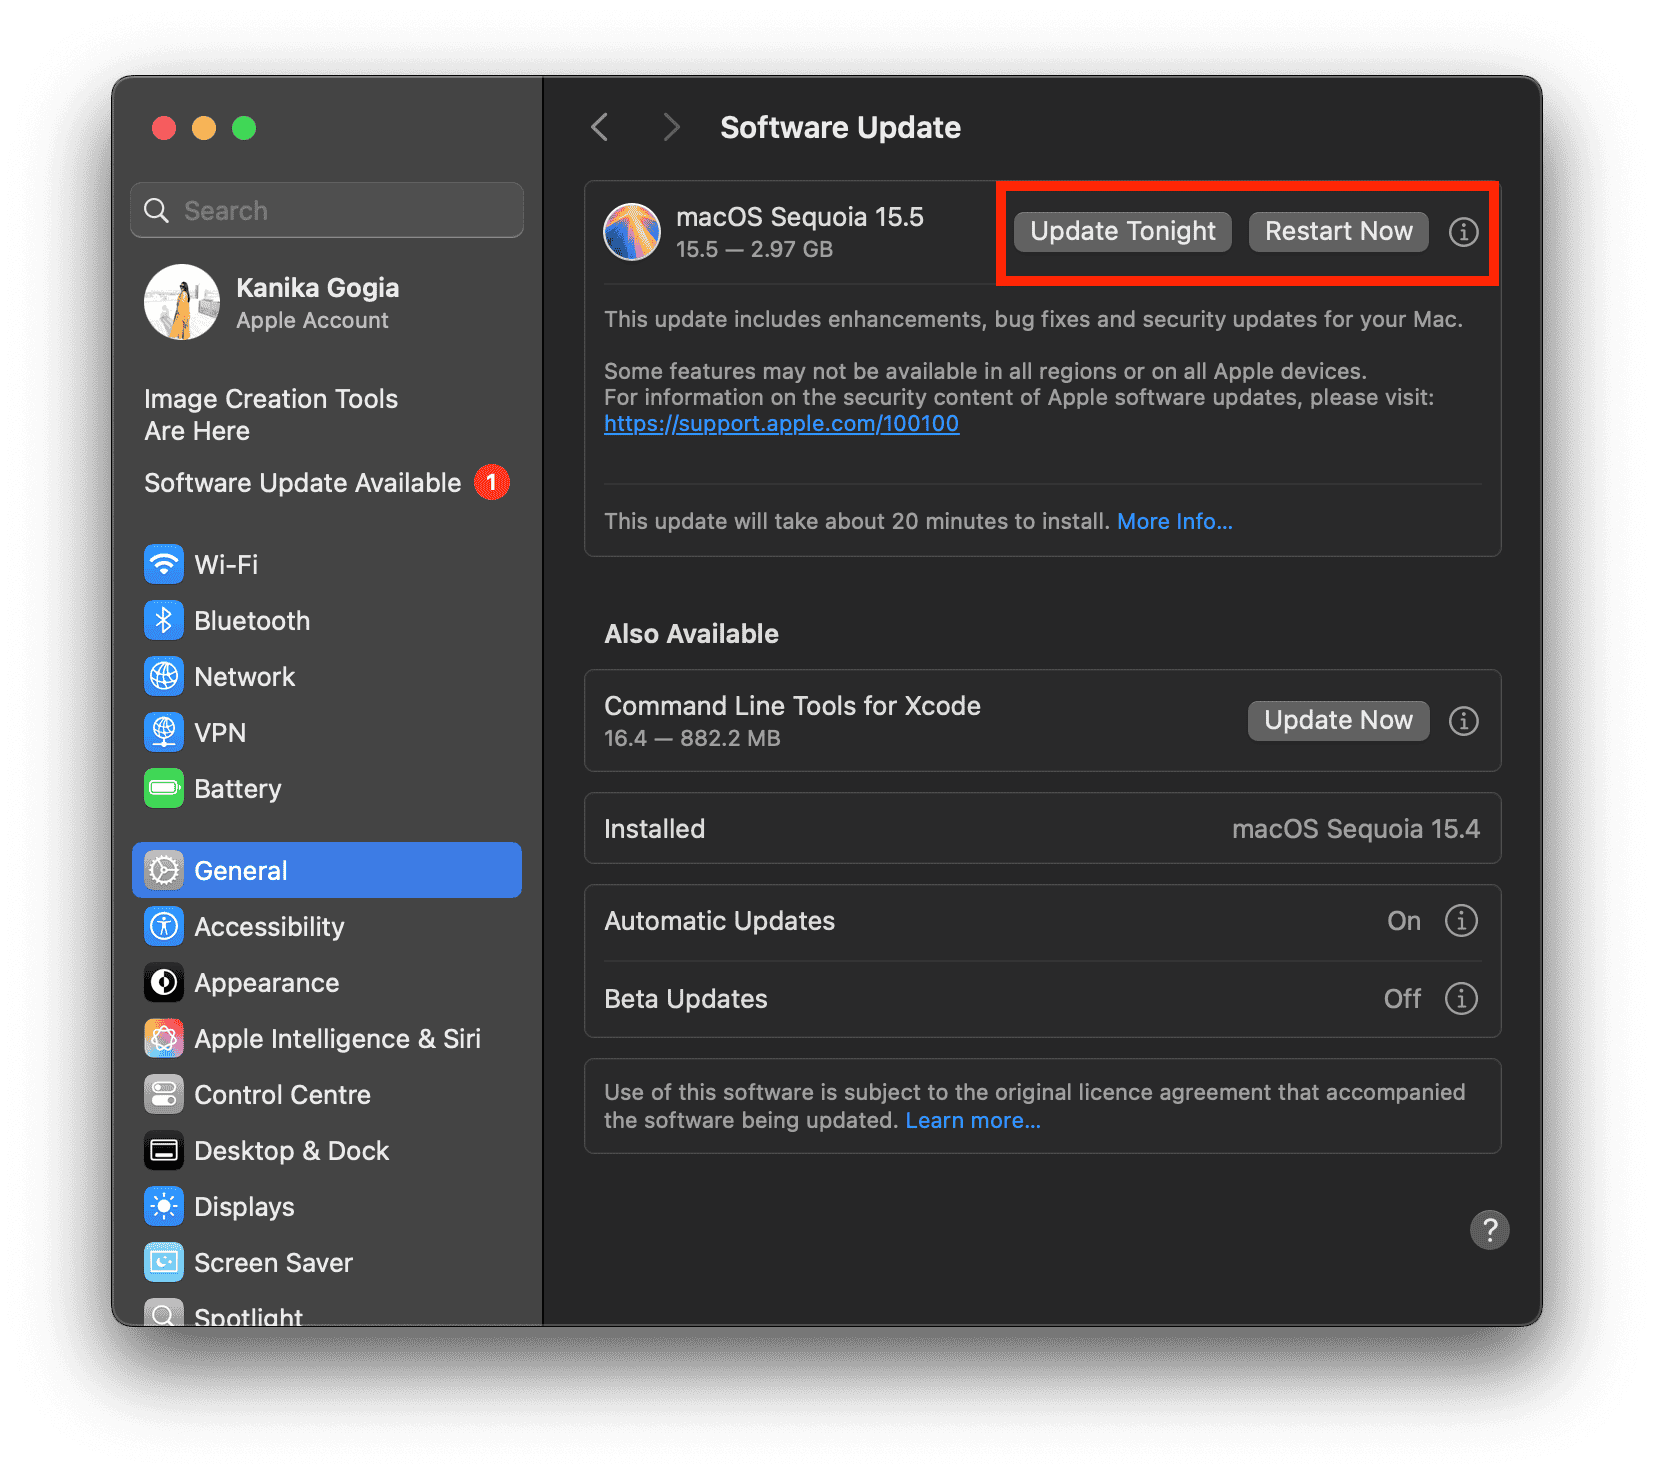
- Select Software Update.
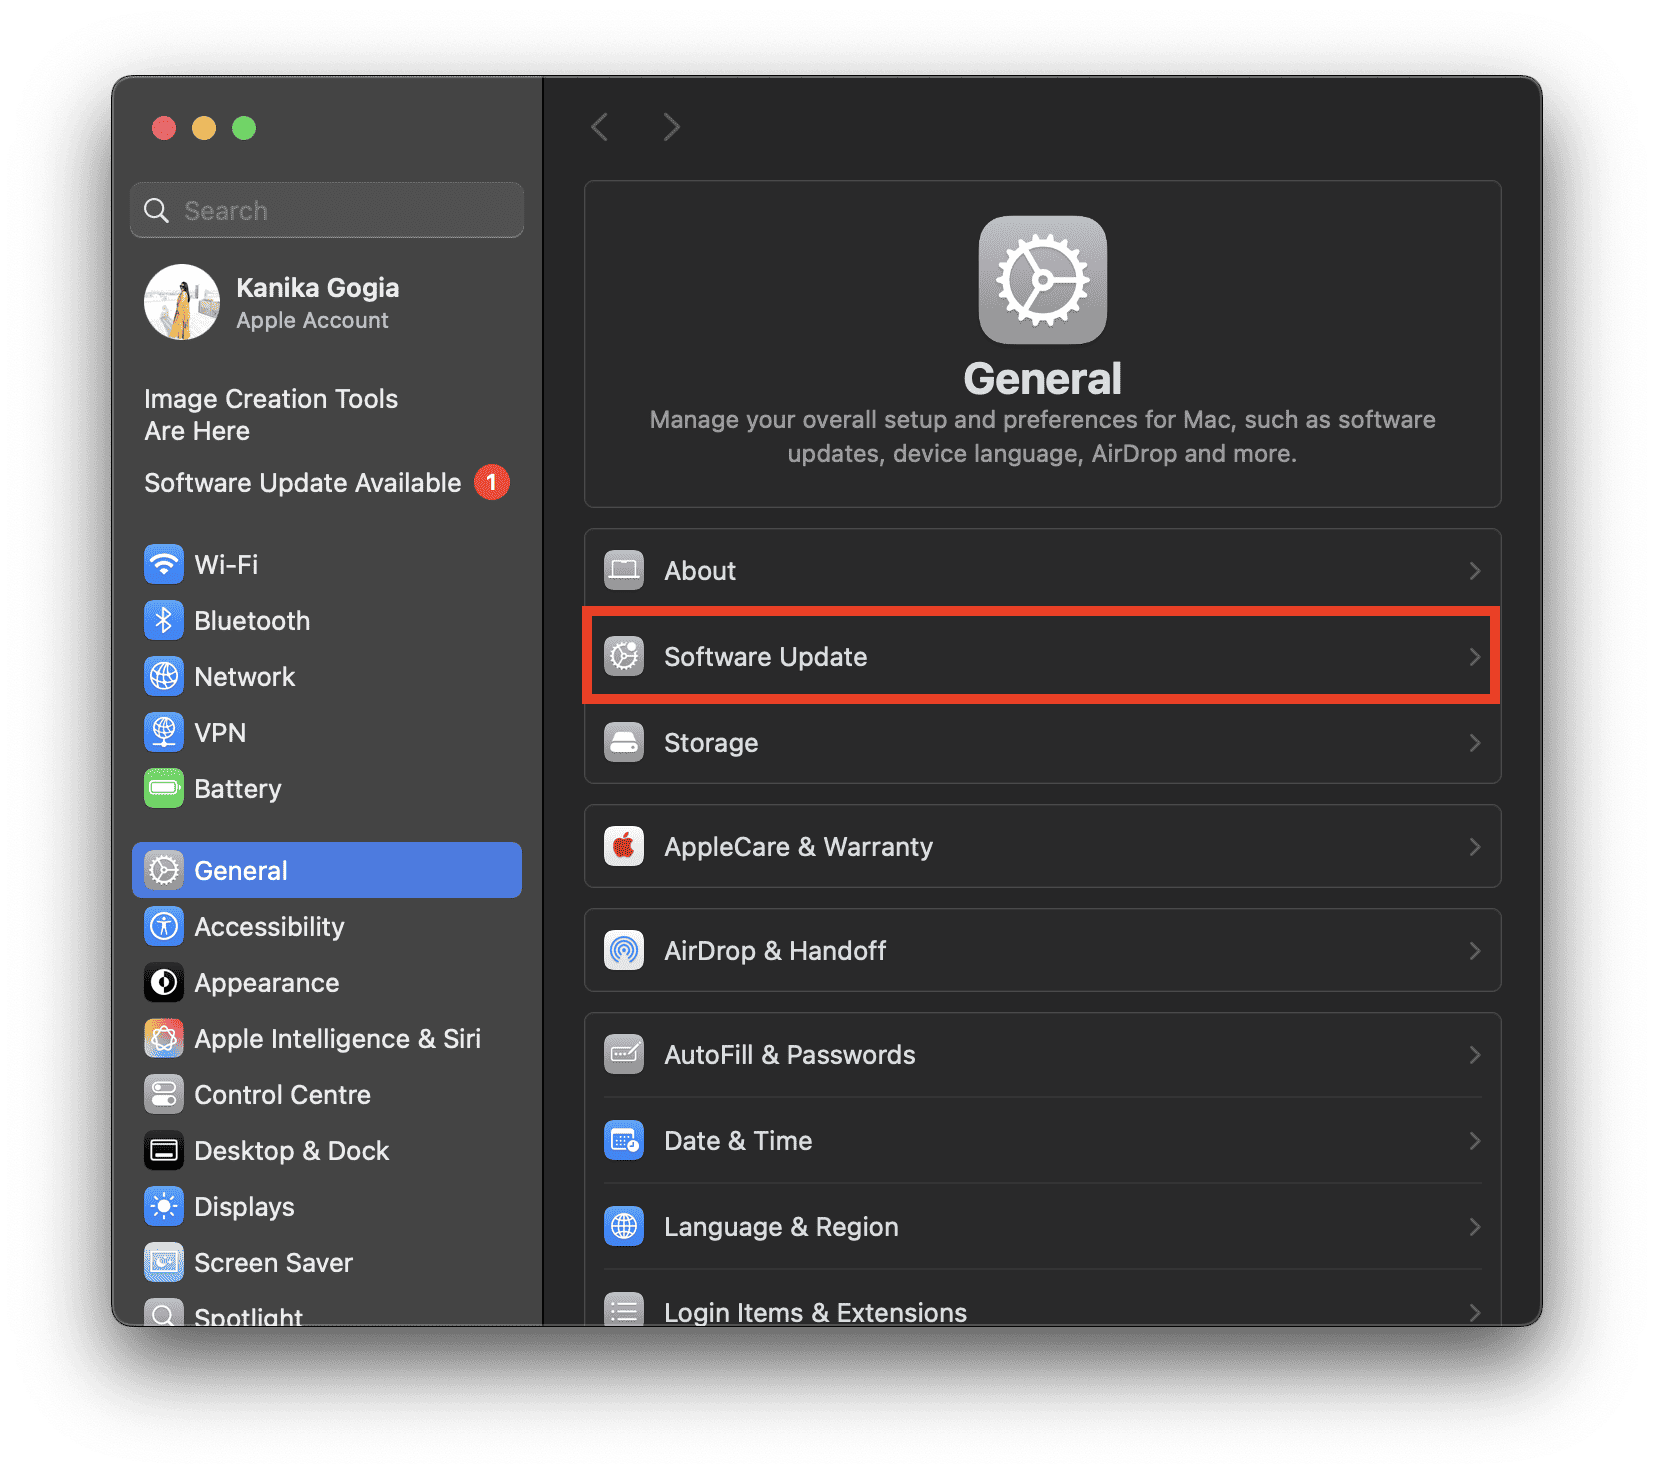
- If a more recent macOS version is available, download and install it.


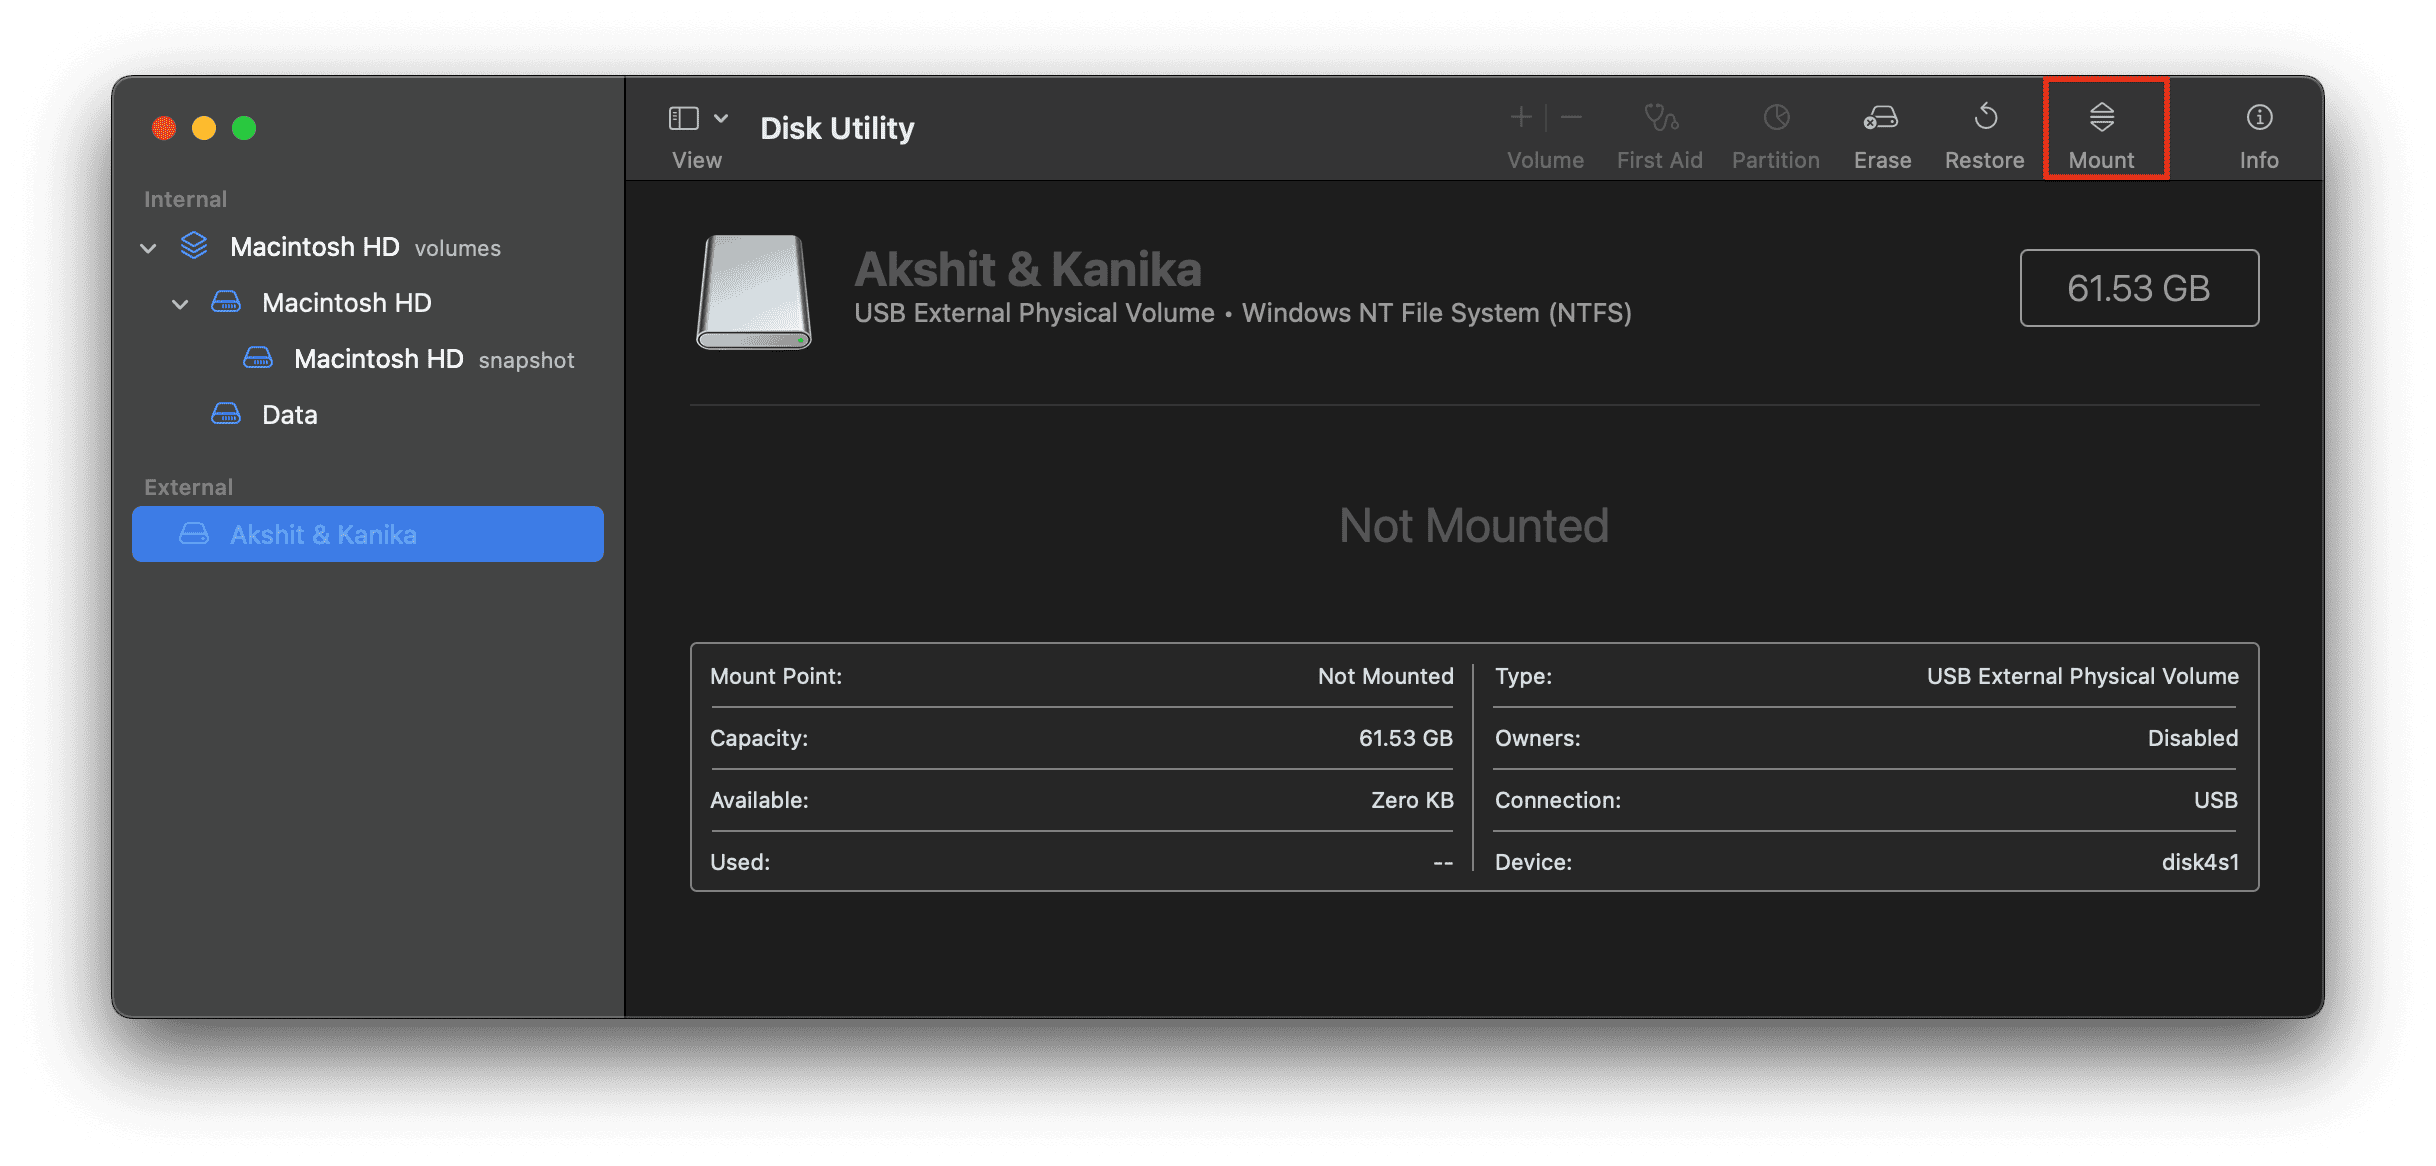
8. Use Disk Utility
If macOS Sequoia doesn’t mount your USB drive automatically, you can use Disk Utility to force a manual mount.
- Press Command + Space to launch Spotlight Search.
- Start typing Disk Utility. When it appears, hit Return.
- Locate your USB flash drive in the sidebar.
- If the drive is listed but greyed out, select the USB drive and click Mount in the toolbar.

9. Reformat the Flash Drive
Sometimes, macOS may not be able to read your USB flash drive due to an unsupported file system. Reformatting the drive in a compatible format can fix the issue.
 NOTE
NOTE
- Open Disk Utility and select your USB drive.
- Click the Erase option at the top of the window.
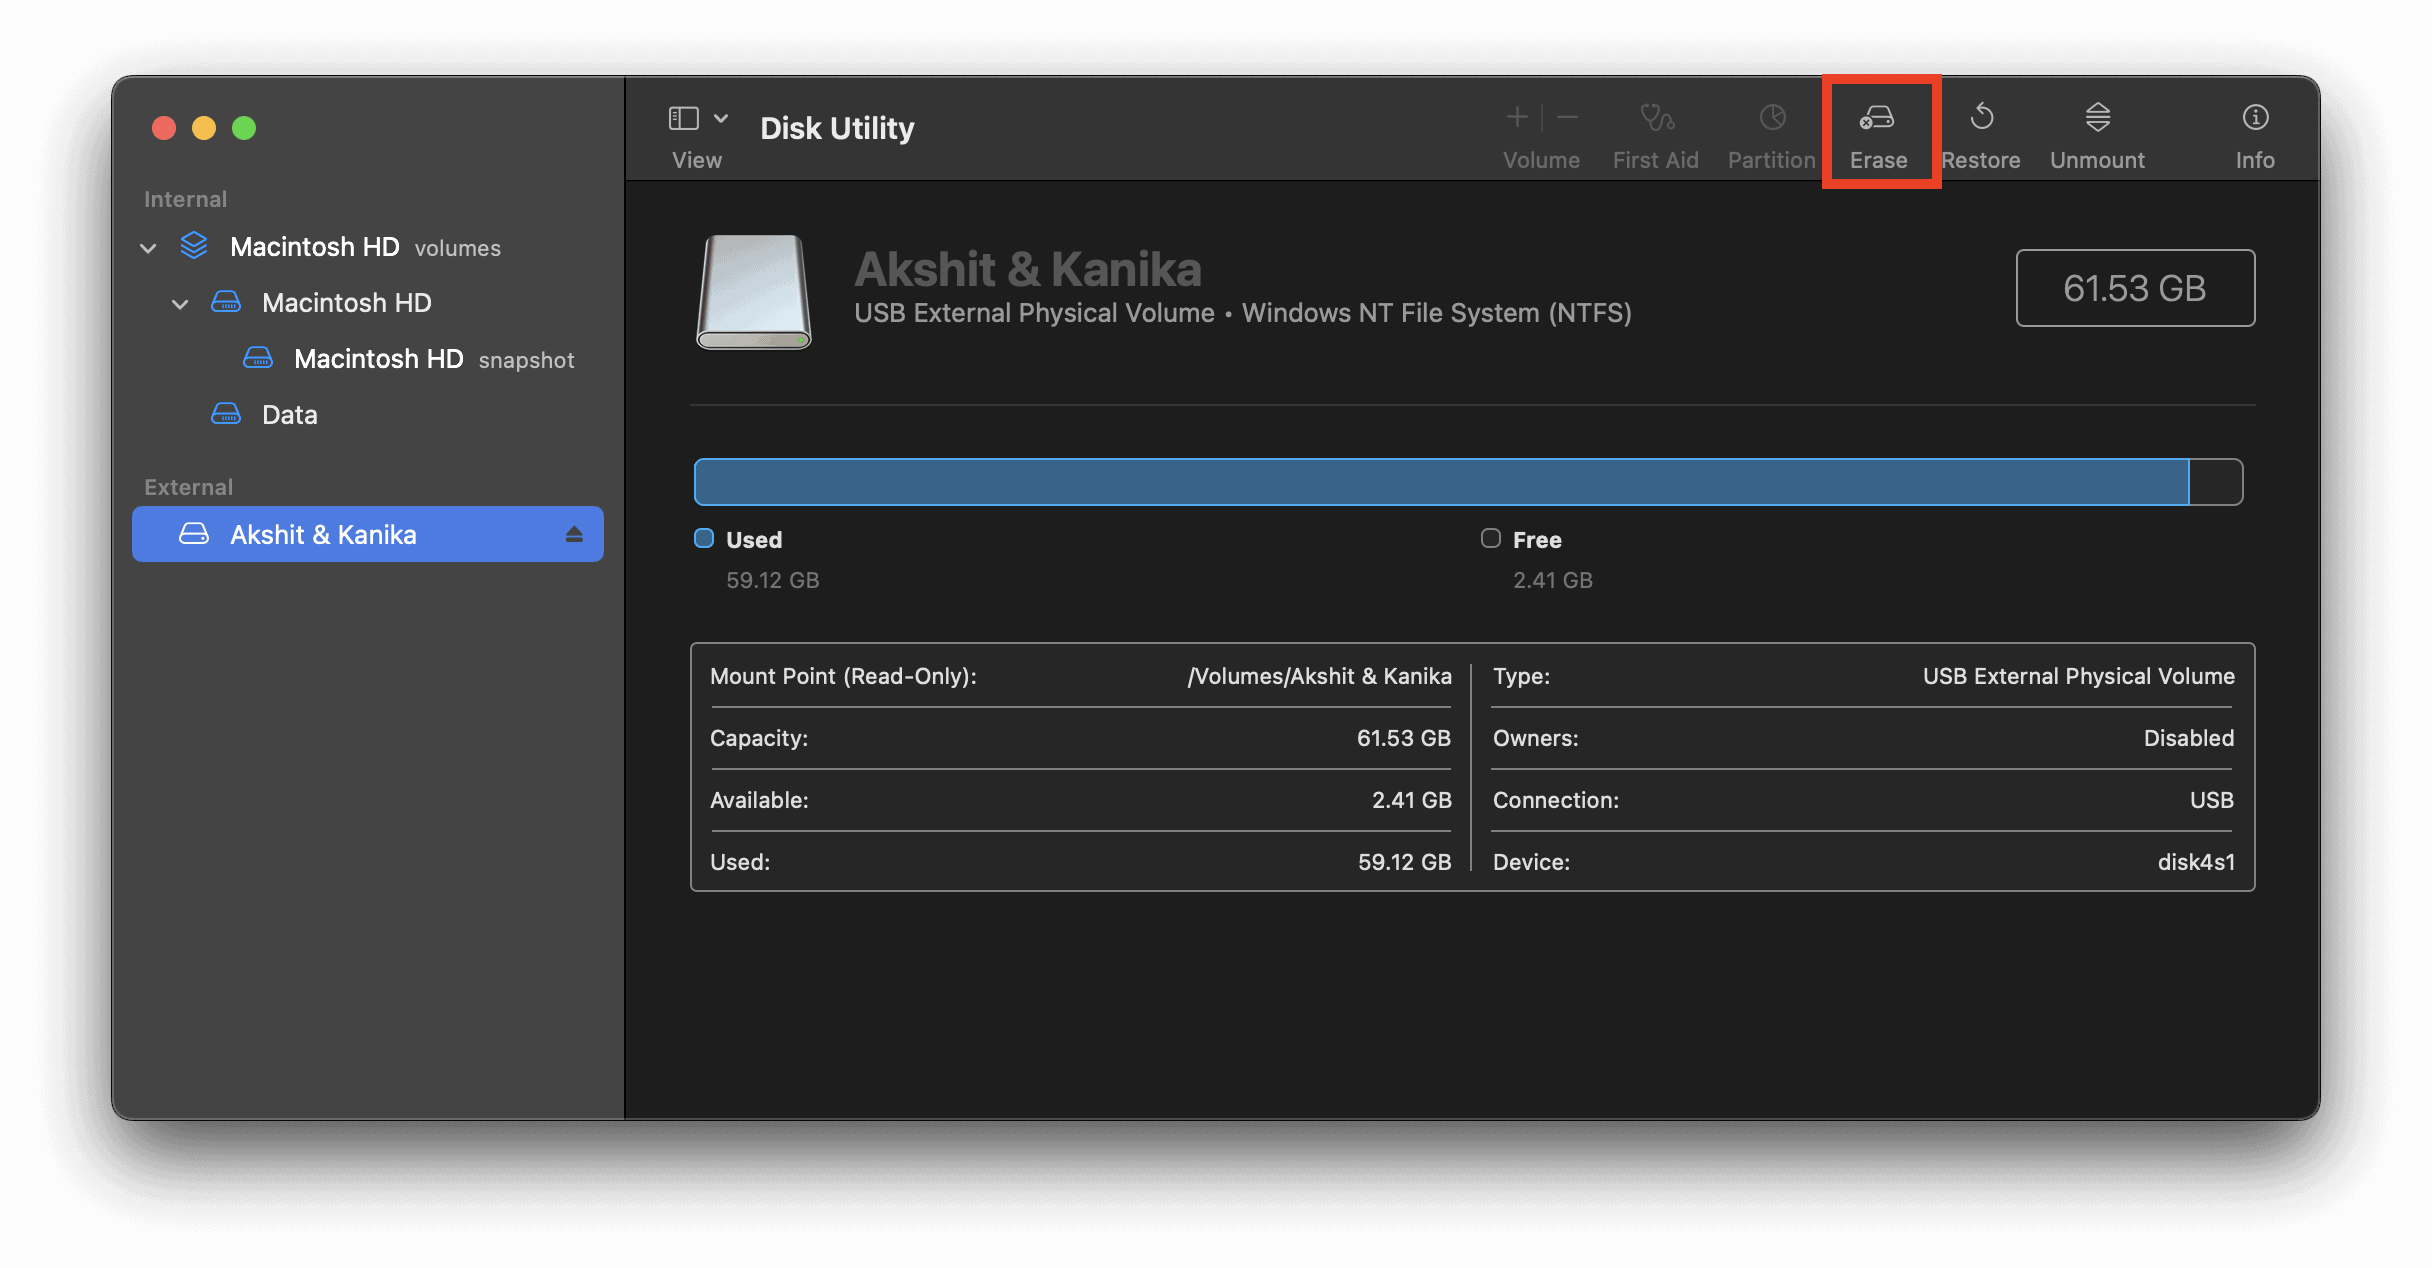
- Choose a macOS-compatible format like APFS or HFS+.
- Hit the Erase button to confirm.
- Once you’re done, reconnect the USB flash drive.

10. Boot Mac in Safe Mode
- On Apple Silicon Macs, go to the Apple menu and choose Shut Down.
- Once your Mac is fully shut down, press and hold the Power button until you see “Loading startup options“.
- Select a volume.
- Hold the Shift key, and click Continue in Safe Mode.
- Your Mac should now restart automatically.
- You should see “Safe Boot” in the top menu bar, indicating success.
11. Reset NVRAM and SMC (Intel Macs only)
NVRAM is a small amount of memory that stores important system settings, while SMC is a chip that manages several hardware-related functions. Resetting both can help address bugs preventing macOS Sequoia from detecting USB flash drives.
For complete details, here’s our step-by-step guide on how to reset PVRAM and SMC on a Mac.
12. Use Terminal Commands
If Disk Utility doesn’t help, you could mount the USB drive in Terminal.
- Press Command + Space to launch Spotlight Search.
- Start typing Terminal. When it appears, hit Return.
- Type the following command and hit Return.
diskutil list - It will display all the connected disks and identifiers for your USB drive.
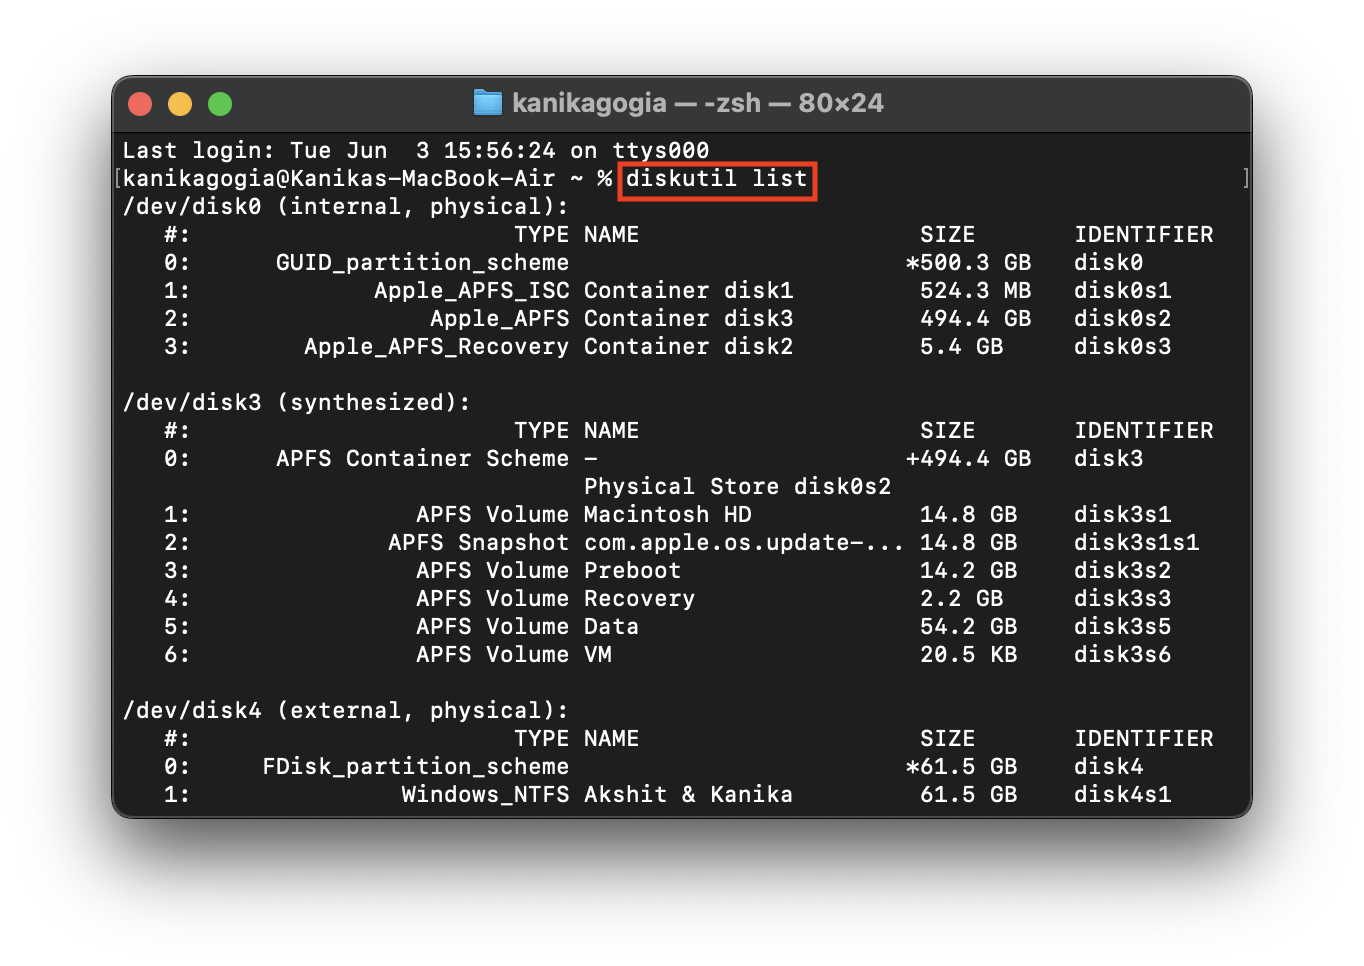
- Once you identify the correct disk, enter the following command:
diskutil mount disk_identifier(such as disk2)
13. Reinstall macOS
NOTE
- On Apple Silicon Macs, press and hold the Power button.
- Continue to hold the key as your Mac turns ON and loads startup options.
- Release the key when you see Options.
- Now, select Options, and click on Continue.
- When prompted, enter your Mac’s password and follow the on-screen instructions.
If the issue persists, we recommend visiting an authorized Apple service provider to have your Mac diagnosed with more complex problems or potential hardware issues. And if macOS Sequoia isn’t detecting an external display, here’s how to fix it.


Discussion