
If your second display isn’t detected, the first step is to figure out whether the problem is with macOS, the monitor, or your Mac. Skip hardware repairs unless you know what you’re doing. For software-related issues, however, you’ve got a few solid options, like switching from HDMI to DisplayPort, manually detecting displays, disabling mirroring, or removing display arrangement files. And if none of those work, Safe Mode and a full reset are still on the table.
Let’s walk through each step.
Don’t miss the best of The Mac Observer
Set us as a preferred source and our Apple reporting ranks higher in your Google Search results and Discover feed — one tap, no account changes.
1. Use a USB-C to DisplayPort Cable Instead of HDMI
Time needed: 5 minutes
macOS Sequoia has known compatibility issues with HDMI, especially through dongles or multiport hubs. Signal translation from USB-C to HDMI often causes handshake failures or refresh rate mismatches. DisplayPort works more reliably with macOS and supports full resolution with fewer dropouts. A direct USB-C to DisplayPort connection eliminates the middle layer and usually solves detection problems.
- Unplug your current HDMI or USB-C hub.
- Use a USB-C to DisplayPort cable to connect directly to your monitor.
- Go to System Settings > Displays and check if the second screen is recognized.
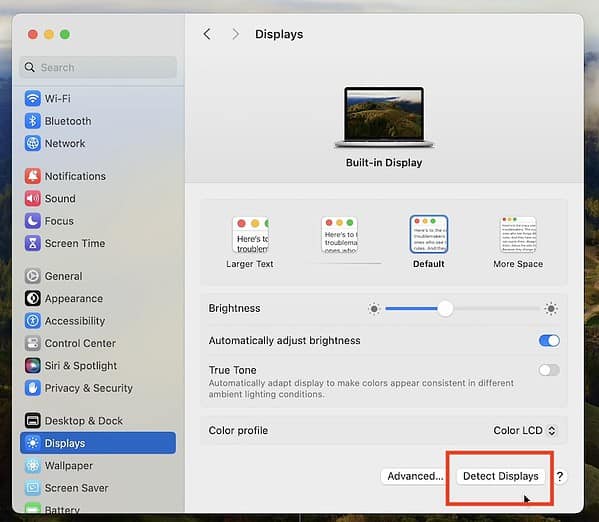


2. Manually Detect Displays in System Settings
In some cases, macOS won’t reinitialize a second display after a resolution change, OS update, or faulty hot-plug. You can manually force macOS to scan for connected displays. This triggers a refresh of the display stack and is useful when the physical connection is working but the display doesn’t show in settings.
- Open System Settings > Displays.
- Scroll down and click Advanced.
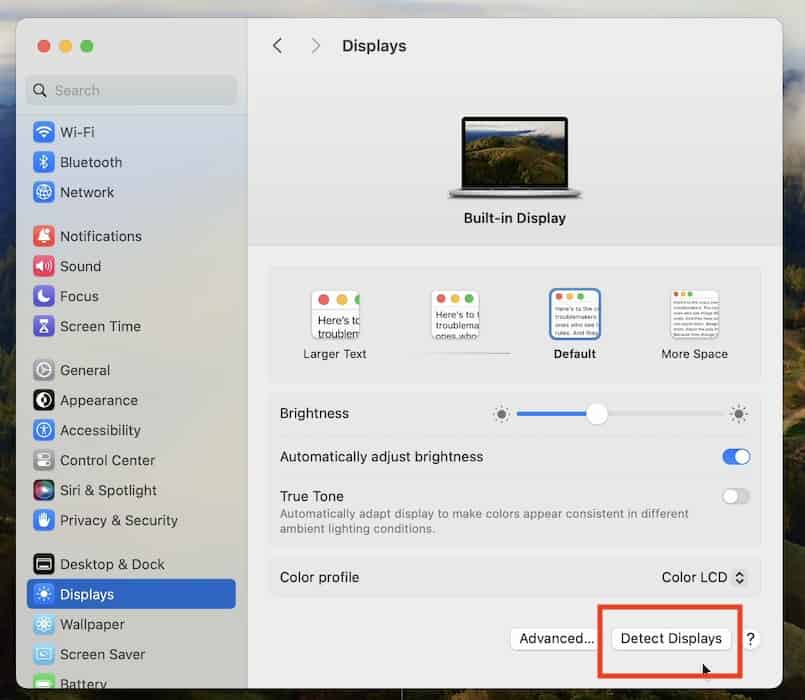
- Select Detect Displays.
- Wait a few seconds for your external monitor to appear.
3. Disable Display Mirroring and Arrange Monitors
If macOS defaults to mirroring, the second monitor won’t extend your workspace—it just duplicates the main screen. This can make it look like the display isn’t working, even when it’s connected. Switching to extended mode and arranging the displays manually forces macOS to treat each screen as a separate output.
- Go to System Settings > Displays.
- If both screens are visible, drag them apart to enable extended mode.
- Disable Mirror Displays if it’s enabled.

- Adjust the arrangement to match your physical setup.

4. Delete Display Arrangement Files
macOS stores display layout and scaling preferences in config files. These can get corrupted after system updates or resolution changes. Removing them forces macOS to regenerate clean defaults. This fix is especially helpful when a display connects physically but shows no image or loads with the wrong resolution.
- Open Finder and press Command + Shift + G.
- Navigate to
~/Library/Preferences/ByHost/.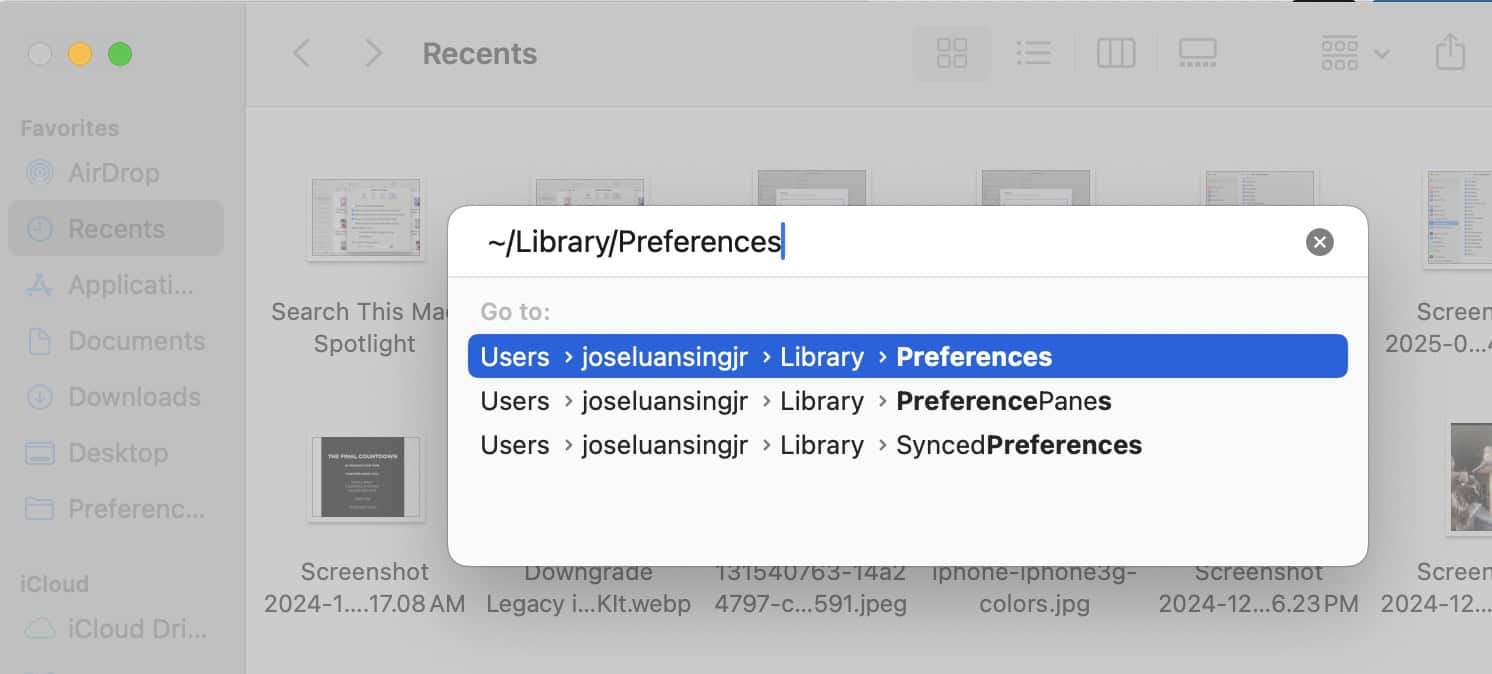
- Delete files starting with
com.apple.windowserver. - Restart your Mac and reconnect the second display.

5. Use a Different USB-C Port on Your Mac
Some USB-C ports are wired differently, especially on MacBooks with two or more ports. One may handle Thunderbolt bandwidth better or avoid conflicts with charging and peripherals. If a display fails to show on one port, switching to another can reestablish a stable video handshake and resolve detection issues.
- Disconnect your display from its current port.
- Plug it into another USB-C port on your Mac.
- Open System Settings > Displays to confirm detection.
6. Reset Display Preferences via Safe Mode
Booting into Safe Mode disables third-party extensions, clears temporary caches, and resets display-related processes. This environment is useful for isolating software conflicts that block display detection. If the second monitor works in Safe Mode, the issue likely stems from a corrupted preference file or background process interfering with normal boot behavior.
- Shut down your Mac.
- Hold the Shift key while powering on to enter Safe Mode.
- Log in and open System Settings > Displays.
- If the display appears, restart normally to exit Safe Mode.

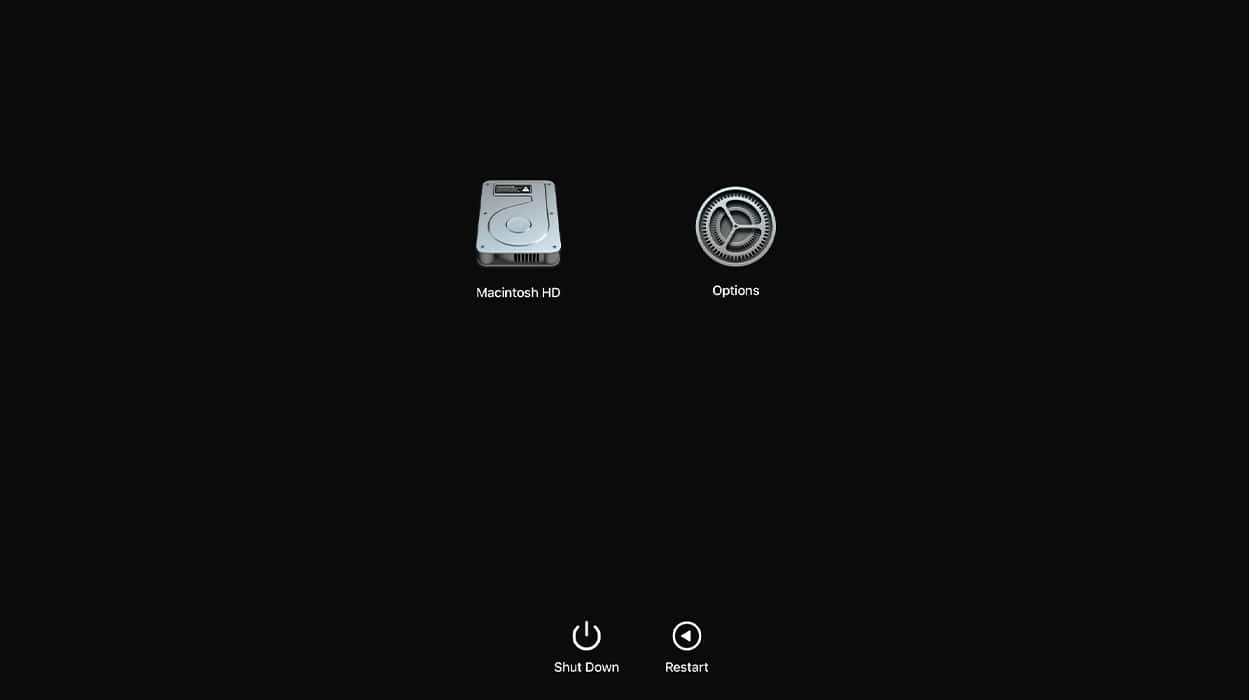
7. Factory Reset Your Mac
If none of the fixes work, a factory reset can clear deep system-level conflicts affecting display detection. This erases all settings, apps, and user data, restoring your Mac to its default state. Only take this step after confirming that the issue isn’t with your monitor, cable, or adapter.
- Back up your Mac using Time Machine or external storage.
- Open System Settings > General > Transfer or Reset > Erase All Content and Settings.
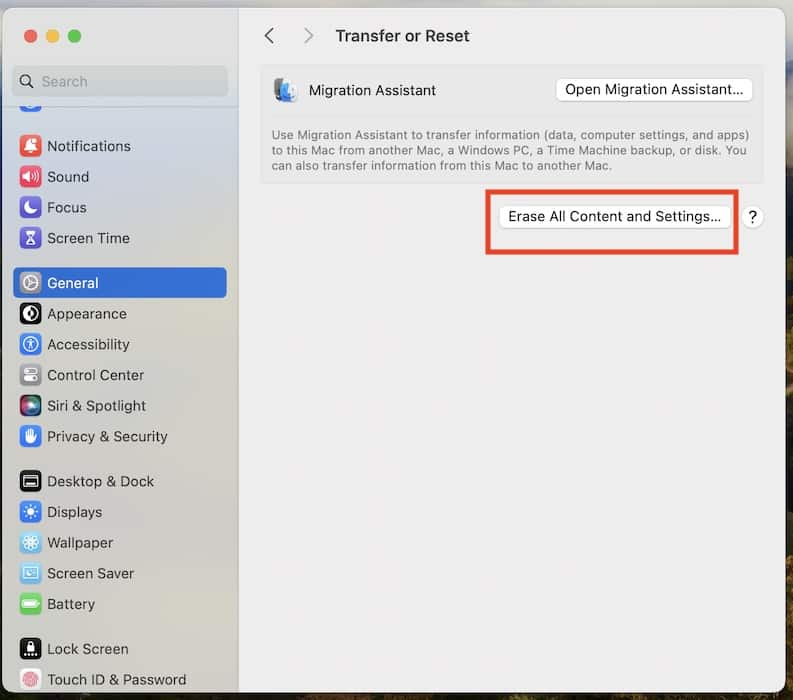
- Follow the prompts to reset your Mac and reinstall macOS.
- Reconnect the second display before restoring any backups.

Should issues persist, call Apple Support. If your Mac detects the second display but the screen flickers, goes black, or randomly disconnects, that’s a different issue. We’ve also covered the fixes to fix external display flickering or going black on Mac.


Discussion