
The 13- to 16-inch display on a MacBook is sharp and color-accurate. It’s more than enough for daily deliverables that involve design, editing, and code. Screen-heavy tasks (e.g., managing spreadsheets, comparing documents, or jumping between dashboards), however, need a second or third monitor. And while macOS supports third-party displays, performance can sometimes disappoint. Your Mac might run into flickering, black flashes, signal drops, or moments where the external display just won’t show up at all.
The tricky part is that it’s not always clear if the issue is with your Mac, your monitor, or the adapter between them. But with a systematic approach, it’s easy to narrow down the cause. Let’s start with these steps.
1. Switch to a DisplayPort Cable or Direct USB-C Connection
Time needed: 5 minutes
macOS handles DisplayPort better than HDMI. If you’re seeing black flickers or signal drops, there’s a good chance your HDMI cable is introducing handshake or bandwidth issues, especially on high-res displays. A direct USB-C to DisplayPort cable sends a cleaner signal and avoids power interference from hubs.
- Disconnect your HDMI cable and any adapters.
- Plug a USB-C to DisplayPort cable directly into your monitor.
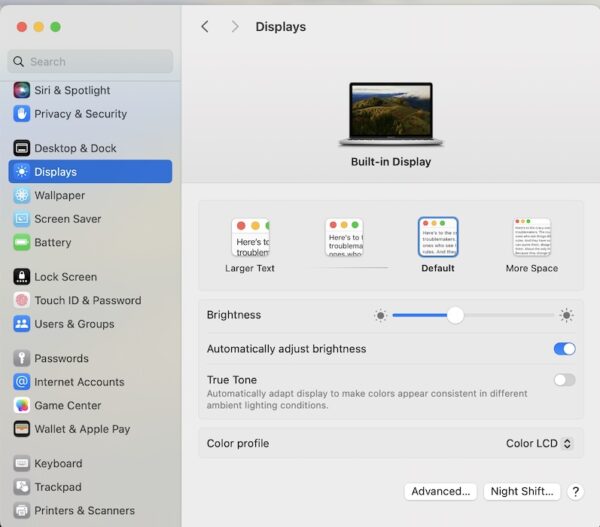
- Go to System Settings > Displays and check that the monitor runs at full native resolution.


2. Disable HDR and Lock the Refresh Rate
Your monitor might advertise HDR or variable refresh rate support, but that doesn’t mean it handles them well. If macOS toggles between modes dynamically, the screen can flash black when switching scenes or waking from sleep. Turn those off to stabilize output.
- Go to System Settings > Displays.
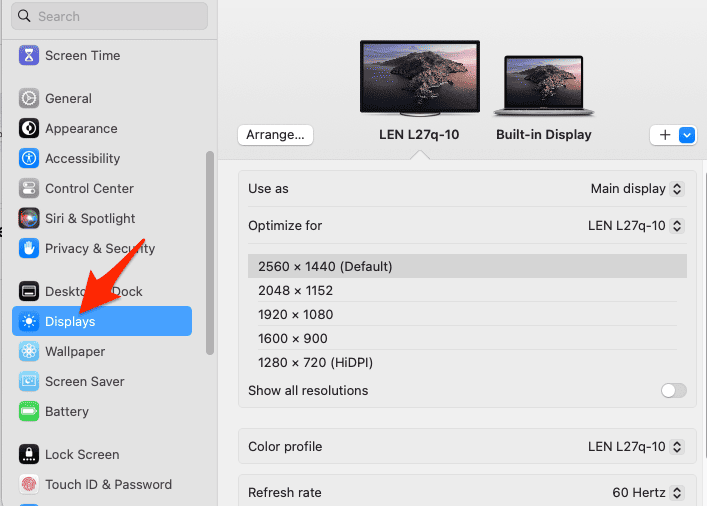
- Select your external monitor.
- Turn HDR off and choose a fixed refresh rate like 60Hz.
- If refresh rate options are missing, replug the monitor or switch to a better cable.

3. Avoid Hubs With Video Passthrough
Although multiport USB-C hubs are convenient, they’re not reliable for video. Many introduce power noise or can’t sustain full 4K60 bandwidth. If your display glitches while plugged into a hub, that’s likely the problem. Skip passthrough entirely and connect directly.
- Unplug your hub or dock.
- Use a dedicated USB-C to HDMI 2.0 or DisplayPort cable instead.
- Test the display again from a direct Mac port, no intermediaries.
4. Reset Display Preferences in Safe Mode
If macOS keeps applying broken scaling profiles or wrong refresh rates, booting in Safe Mode wipes cached display settings and resets them clean. This forces macOS to re-detect your monitor’s capabilities without inherited glitches.
- Shut down your Mac.
- Turn it on and immediately press and hold the Shift key to boot into Safe Mode.
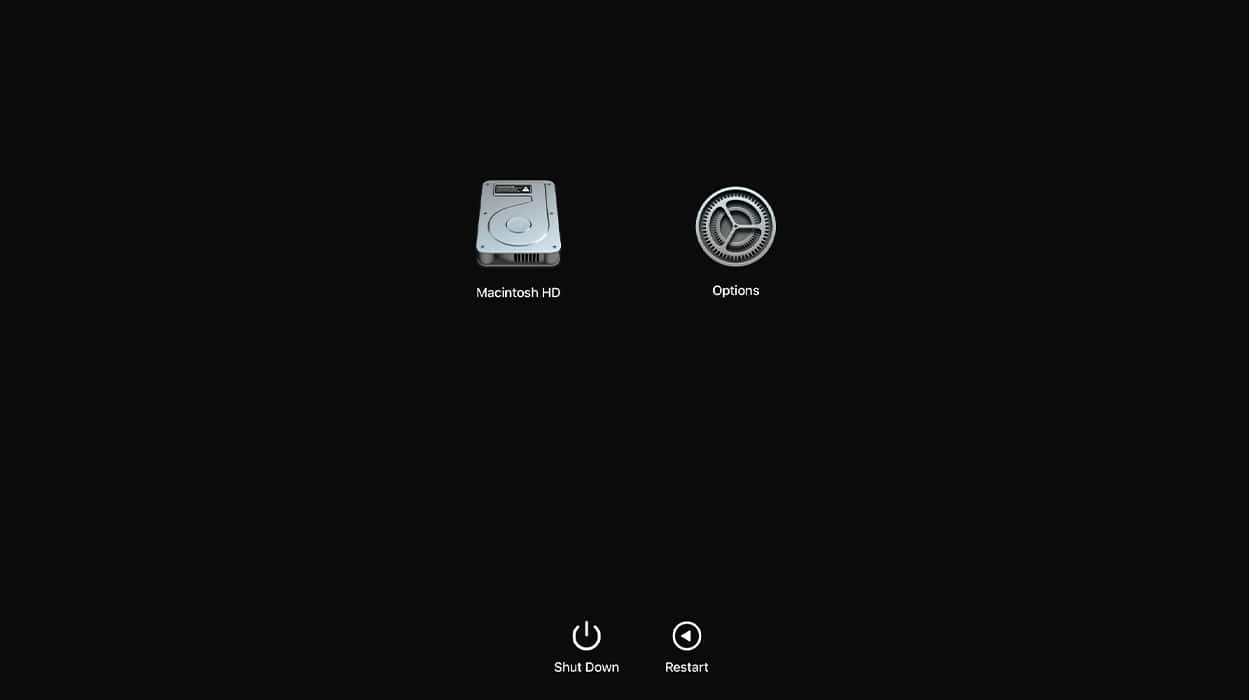
- Log in, then go to System Settings > Displays and check your external display.
- Restart normally, macOS will now use the fresh configuration.

5. Use BetterDisplay or SwitchResX to Override Defaults
macOS doesn’t always expose your monitor’s full capabilities. With third-party tools, you can set exact refresh rates, resolutions, or even disable dithering. You’ll find it useful when the default profile causes instability, which often happens with ultra-wide or high-refresh monitors.
- Download BetterDisplay or SwitchResX.
- Create a custom resolution profile (e.g., 2560×1440 @ 60Hz).
- Disable adaptive sync or extended color modes if available.
- Apply and test. If the issue persists, revert to system defaults.
6. Reset macOS With a Clean Install
If nothing works, there’s a chance your macOS install has corrupted display drivers or lingering configuration conflicts. A clean reset is the most extreme fix, but it’s also the most thorough. Just remember to back up your data.
- Back up your Mac with Time Machine or an external drive.
- Open System Settings > General > Transfer or Reset > Erase All Content and Settings.
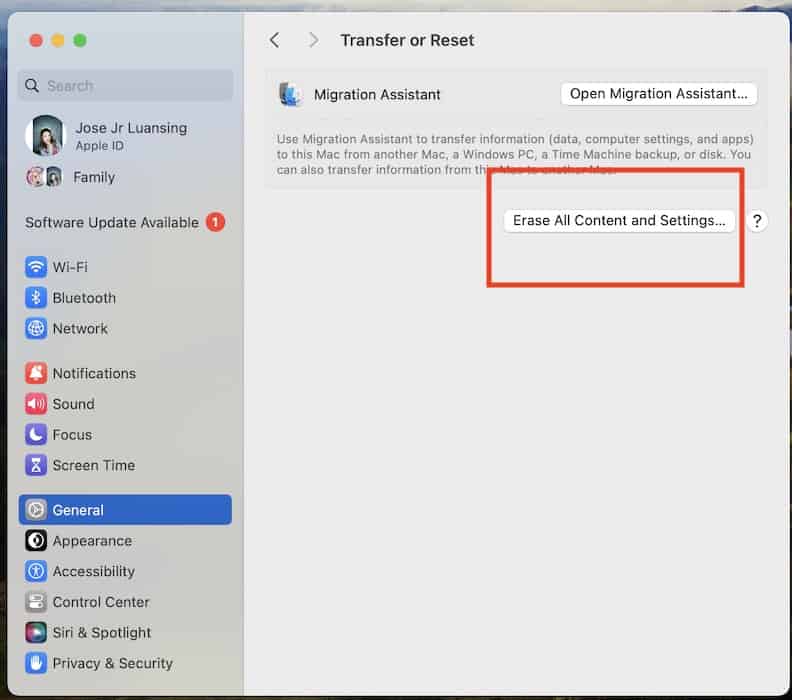
- After macOS reinstalls, test the external display before restoring any backups or third-party tools.

If your display still flickers or refuses to stay connected after trying all of these, it’s time to escalate. Call Apple Support to check for logic board issues, faulty USB-C ports, or hardware-level incompatibilities. And for external monitor issues on iPad, we also have a separate guide for that.


Since updating to Mac OS 15.7.1 my 2nd display connected by HDMI was not receiving a signal. Thanks to your article I booted in safe mode and hey presto it came back to life.
Many thanks