
For those who want to repair their Apple iPhone or Mac by themselves, Apple is now offering an online diagnostics tool for Self Service Repair. This tool is great for helping identify specific hardware or software issues for your device. Let’s take a look.
How Do I Use Apple Diagnostics for Self Service Repair?
Apple Diagnostics for Self Service Repair is a means to help identify issues with your Apple device. This online tool is different from the Apple Diagnostics you can typically run on a Mac. It not only expands to iPhone and more specific hardware issues on Mac, but it’s the same diagnostic tools used at an Authorized Apple Service Provider.
Don’t miss the best of The Mac Observer
Set us as a preferred source and our Apple reporting ranks higher in your Google Search results and Discover feed — one tap, no account changes.
Once you are able to determine what is wrong with your device through the use of these tools, you can then move forward with the Apple Self Repair process.
1. Use Apple Service Diagnostics for Self Service Repair on iPhone
 NOTE
NOTE
Before beginning, ensure the following:
- Make sure your iPhone is up to date via Settings > General > Software Update. If the device you are testing is running a beta, you will need to switch to a public release of iOS 17 or later.
- You must identify the model of your iPhone.
- You will need a secondary device for this task. This includes either an iPhone or iPad running iOS 13 or later, a Mac running macOS Catalina 10.15 or later, or a PC with Chrome 55, Firefox 59, or Microsoft Edge 12 or later. For Mac, iPad, and iPhone, you will need the Safari browser.
- A proper Wi-Fi connection will be necessary for both devices. The secondary device may use cellular, but the iPhone undergoing diagnostics must use Wi-Fi.
Time needed: 30 minutes
Follow the steps below to diagnose your iPhone using Apple’s online tools:
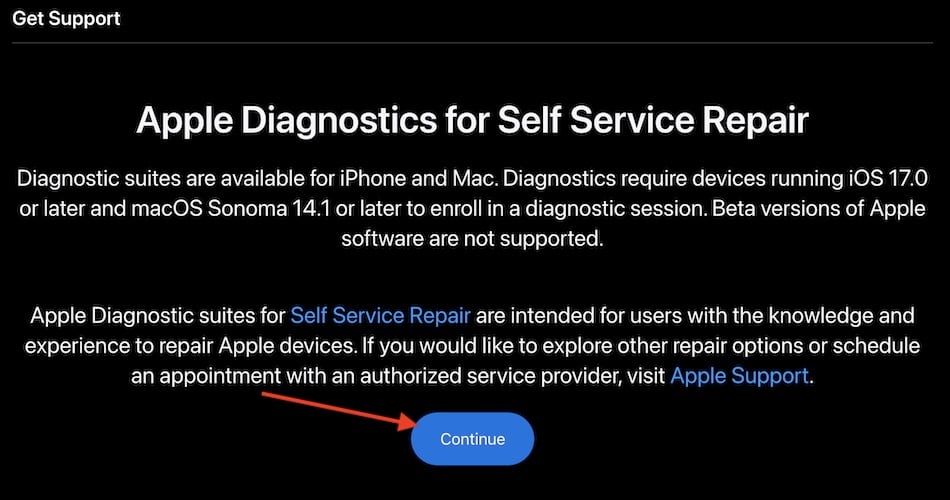
- From the secondary device, visit this official Apple Diagnostics website.
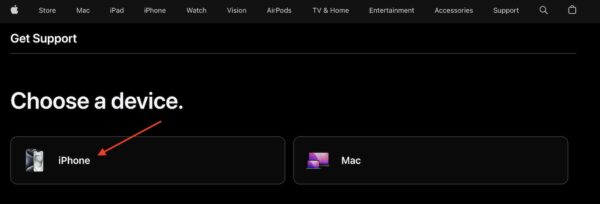
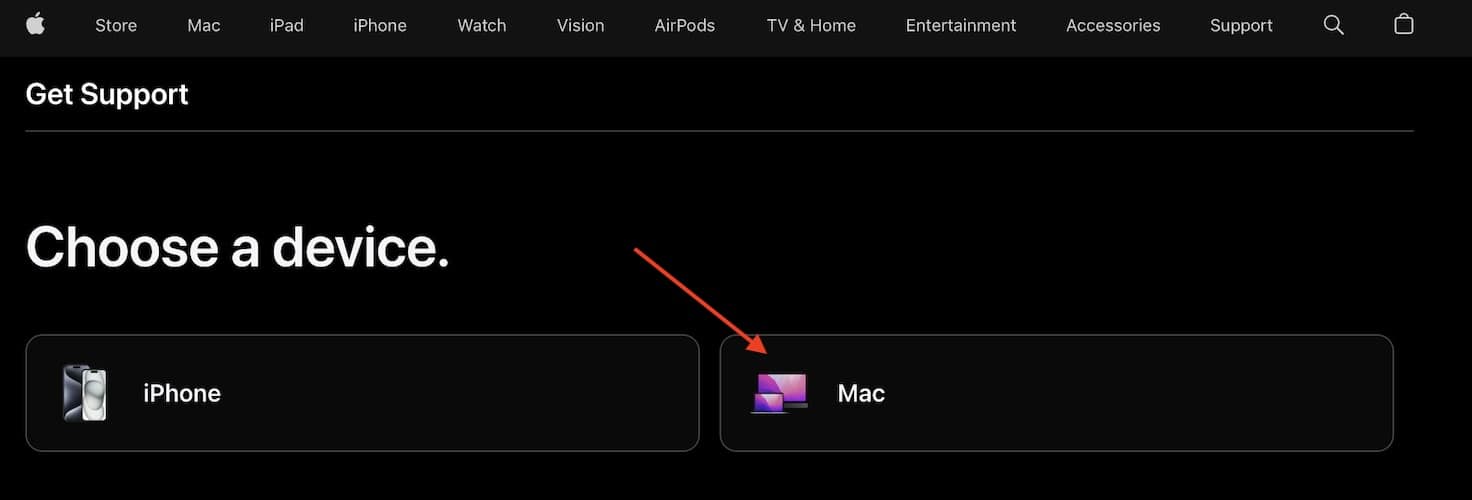
- Click Continue on the website and select iPhone.
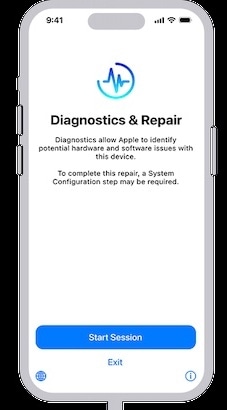
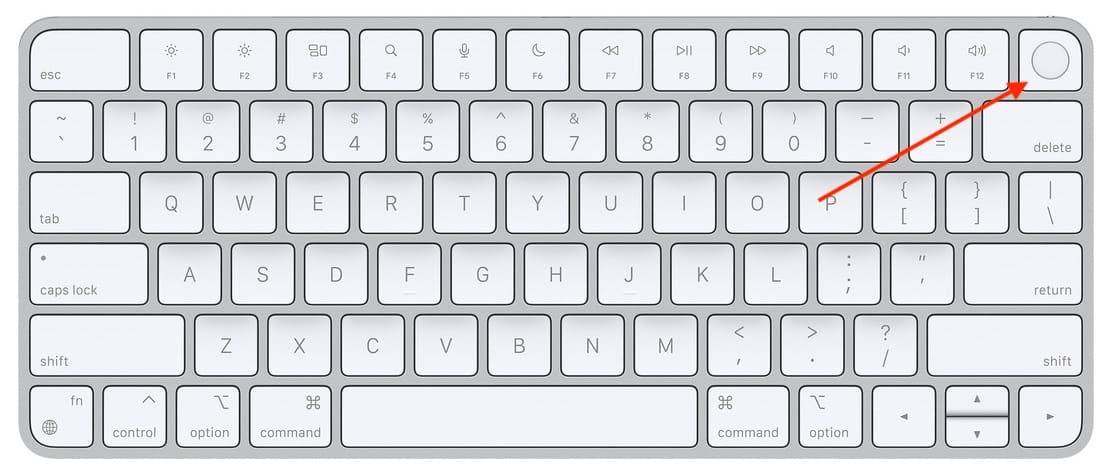
- You will now have your iPhone enter Diagnostic Mode. While the iPhone is turned off, press and hold both volume buttons. While holding both buttons, connect your iPhone to a 20W charger or higher or a computer that is powered on and connected to an outlet.

- Release the buttons when you see the Apple logo. You have entered Diagnostic Mode when you see the Diagnostics & Repair screen.
- You will now go back to the Apple Diagnostics page on your secondary device. From here you can begin a diagnostic session.
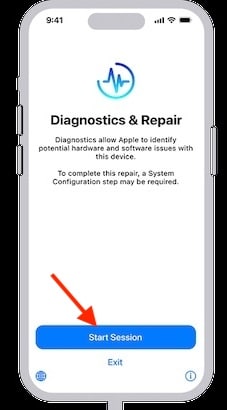
- From your secondary device, enter the serial number of your iPhone into the diagnostic page. You will then tap Start Session. Note that you can easily find your serial number in the lower-right corner of the diagnostics screen on your iPhone by clicking the ‘I’ icon.

- Tap Start Session on your iPhone. If you do not receive this prompt, click Try Again on the secondary device page.
- You can now use Apple’s diagnostic tools to check your device. This includes Mobile Resource Inspector, Display Pixel Anomalies, Multi-Touch, Camera Image Quality, Face ID and Audio Output. You will use these tools and view the results on your secondary device.


2. Use Apple Service Diagnostics for Self Service Repair on Mac
NOTE
Before beginning, ensure the following:
- You cannot run a beta version of macOS. You must be running macOS Sonoma 14.1 or later on the Mac you are testing.
- You will need a secondary device. Just like the iPhone diagnostics, Mac also requires a secondary device. Check above for the full specifics.
- You will need an internet connection on the Mac you are diagnosing and the secondary device. The Mac can use a wired or wireless connection. The secondary device may use a cellular, wireless, or wired connection.
- You will need to know the model of your Mac.
Performing Your Test
- First, prepare the Mac you are testing. Shut down the Mac via Apple > Shut Down and disconnect all external devices except for your mouse, keyboard, and display. Ensure the power connector is attached to your device.
- On your secondary device, visit this official Apple Diagnostics website. Tap Continue.
- Select Mac.
- You will now enter Diagnostic Mode on the Mac you are testing. If you are using an ethernet connection, connect it to your Mac now. If using Wi-Fi, you will connect at a later step.
- Boot up the Mac you are testing by pressing and holding the Power button. If your Mac has Touch ID, use that to power on your device.
- Hold the Power button until you see “Loading Startup Options”. Let go of the key when you see this message.
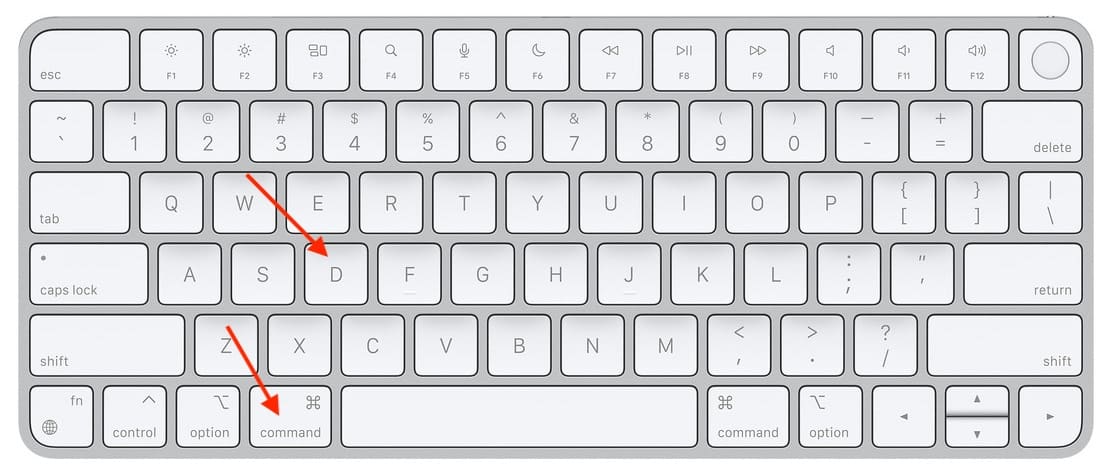
- Press and hold Command + D on your keyboard when the startup screen appears. This enters Diagnostic Mode. You can connect to Wi-Fi at this time from the top-right corner of your screen.
- From the Diagnostic Mode screen on the Mac you are testing, select a language and click OK.
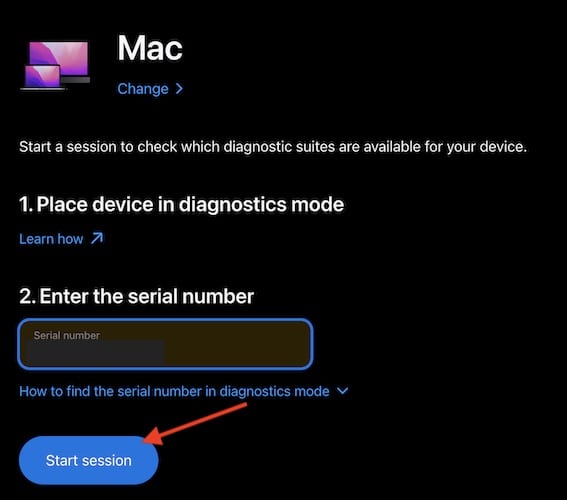
- Now, go back to your secondary device. Enter the serial number of your Mac on the Diagnostic page. You can find your serial number via the lower left screen on the Mac you are testing.
- From the secondary device, select Start Session. If you get no response, tap Try Again.
- From the Mac you are testing, select I agree. You will then be able to use Apple’s tool to diagnose your problem. This includes tools for MRI, Display Anomalies, Keyboard, Trackpad, Touch ID and Audio.


Does Apple Allow Self Repair?
Yes. Apple does allow self repair. In fact, Apple provides repair manuals, parts and tools to help you service your devices on your own. While this can be more of a challenge than visiting an Authorized Apple Service Provider, many can find repairing their own devices to be rewarding. Keep in mind that Apple Diagnostics is just the first step toward discovering what is wrong with your device.
While this may be the first step toward repairing your Mac or iPhone on your own, remember that Apple Support is also available.


Discussion