
You might rush to install the macOS 26 Tahoe Developer Beta for its new features, only to regret it soon after. Beta versions often come with bugs, performance issues, and missing features. If you need to roll back to macOS Sequoia, you’ll have to disable beta updates and create a full backup. From there, you can reinstall macOS Sequoia using either Time Machine or macOS Recovery. Here’s how both methods work.
Things to Do Before Uninstalling macOS 26 Tahoe Beta
Turn Off Beta Updates
The first thing you need to do is disable beta updates on your Mac. This will reverse your Apple Developer Program enrollment, so your Mac will only receive stable updates in the future. Here’s how to remove beta profile from your Mac:
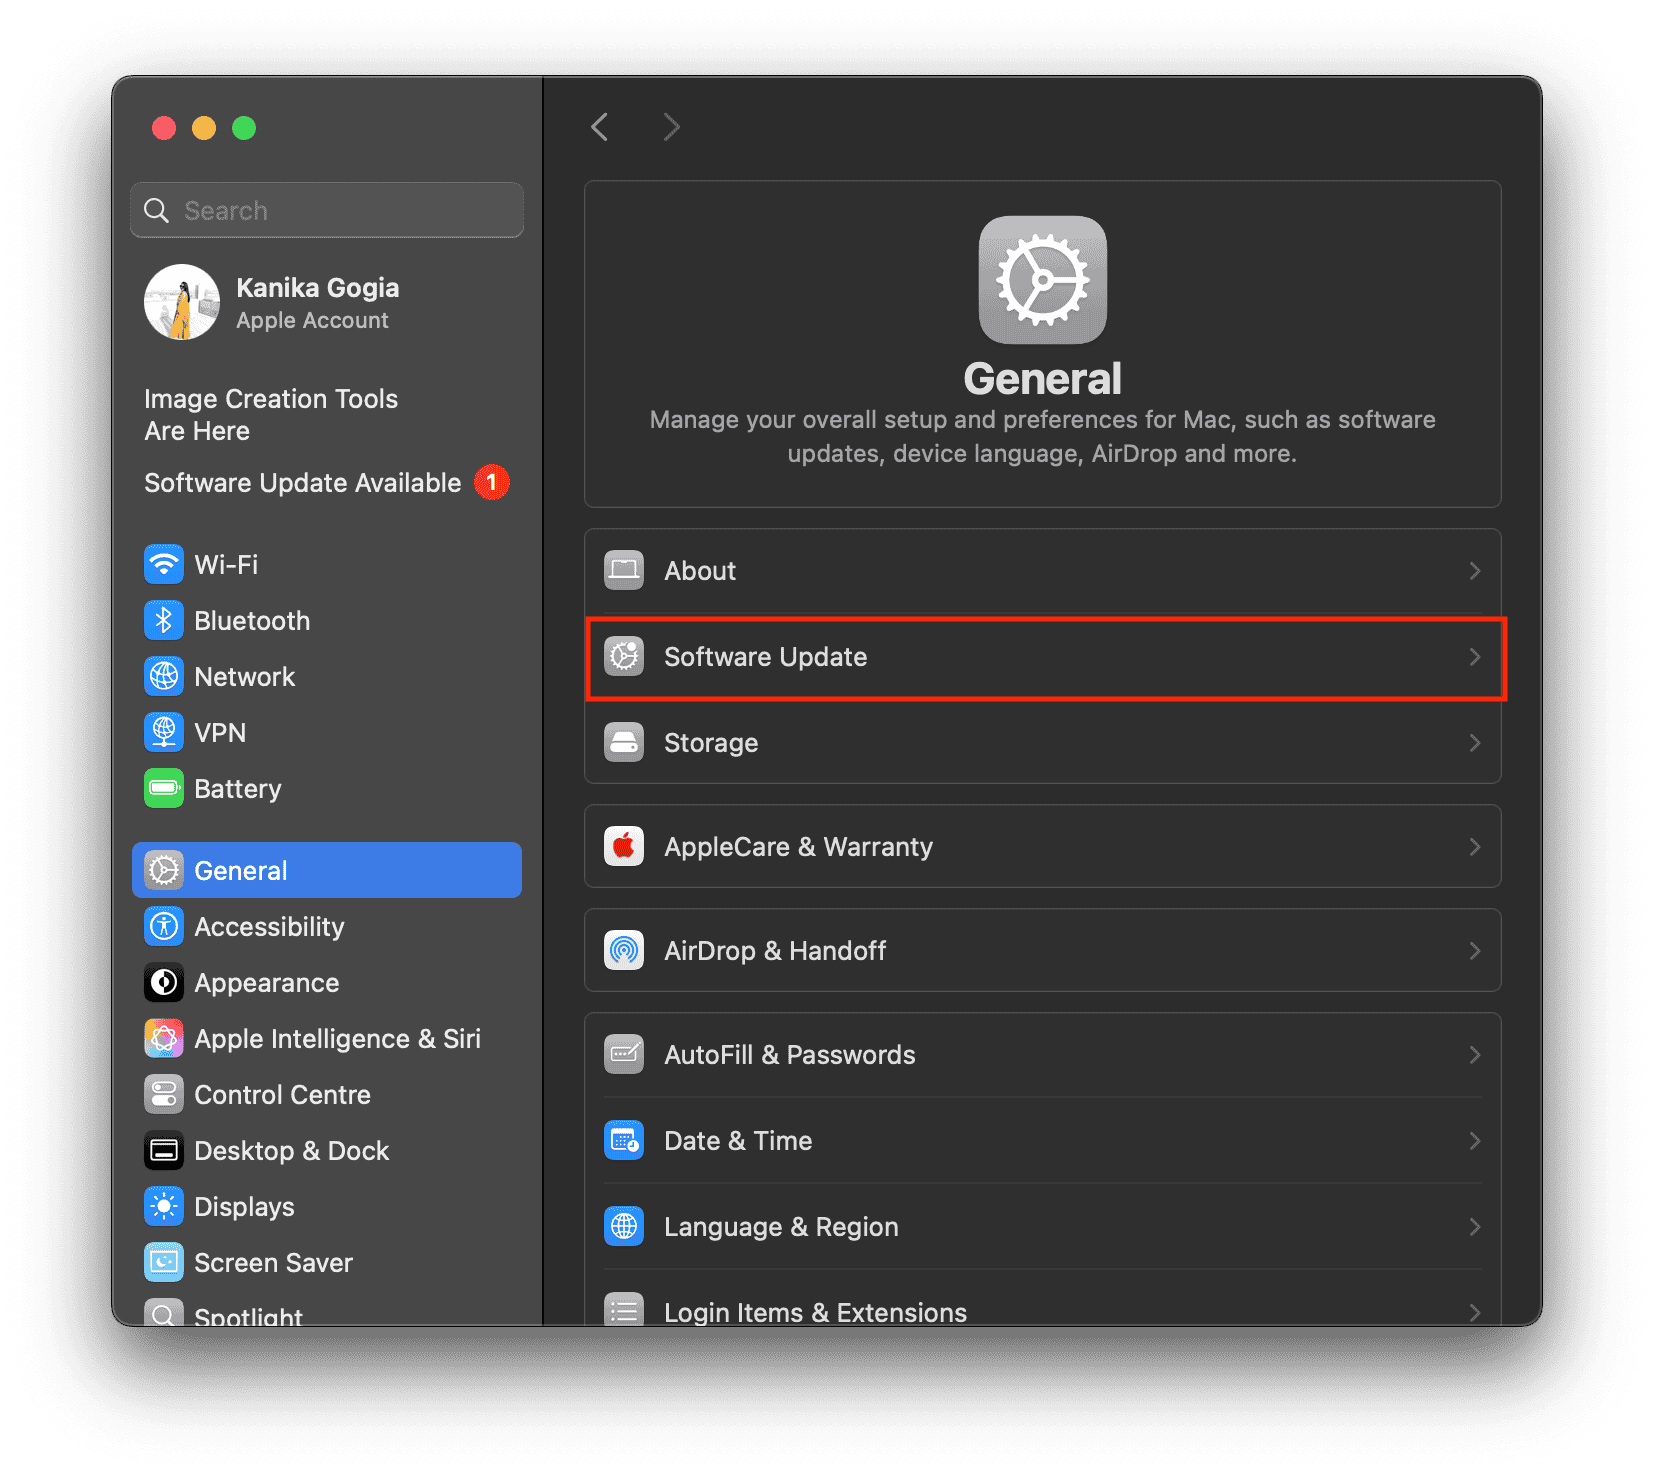
- Open the System Settings app on your Mac.
- From the left sidebar, choose General > Software Update.
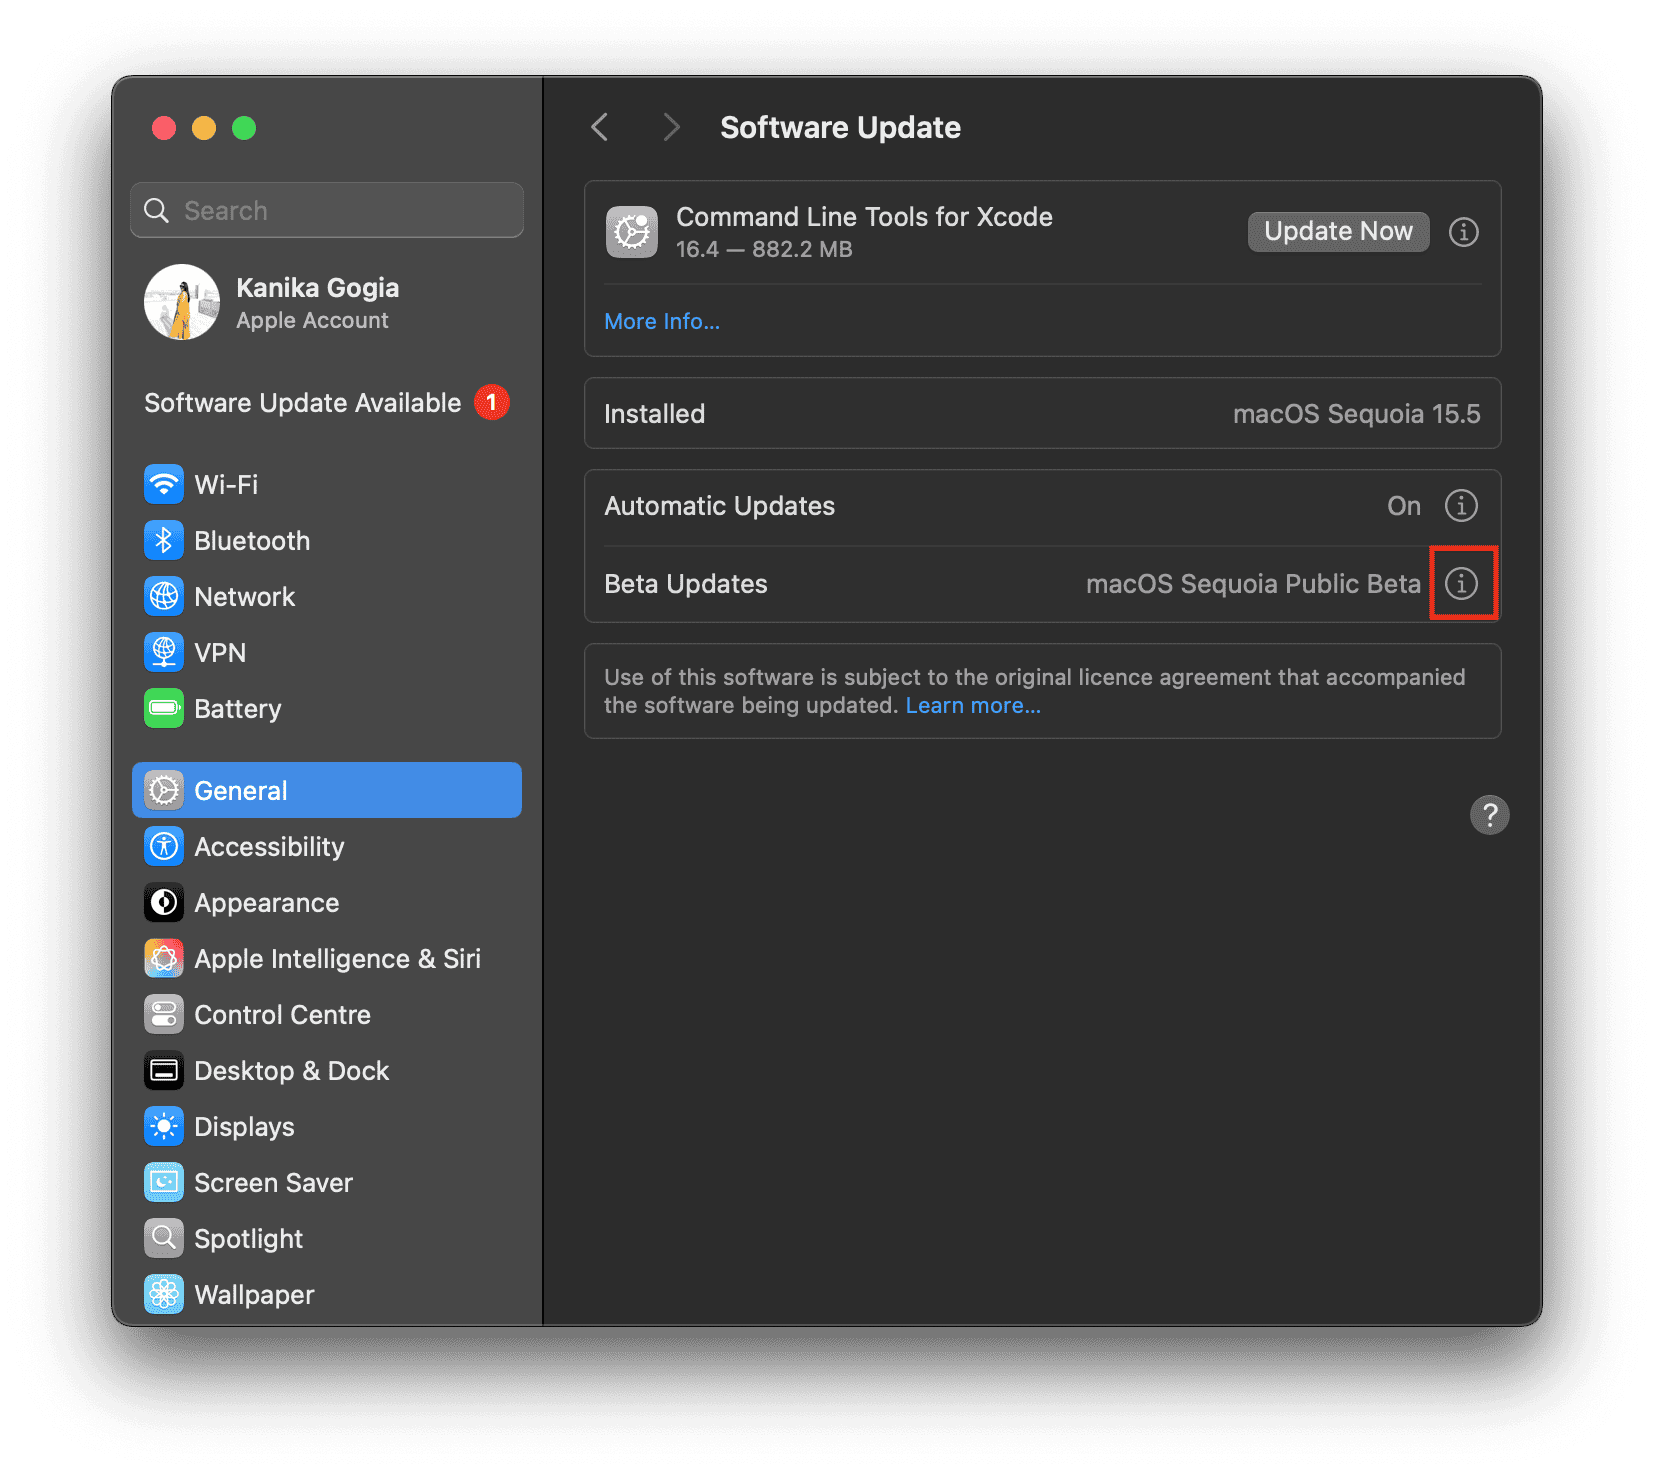
- Click on the small information icon i next to the Beta updates option.
- From the list of options, select Off.
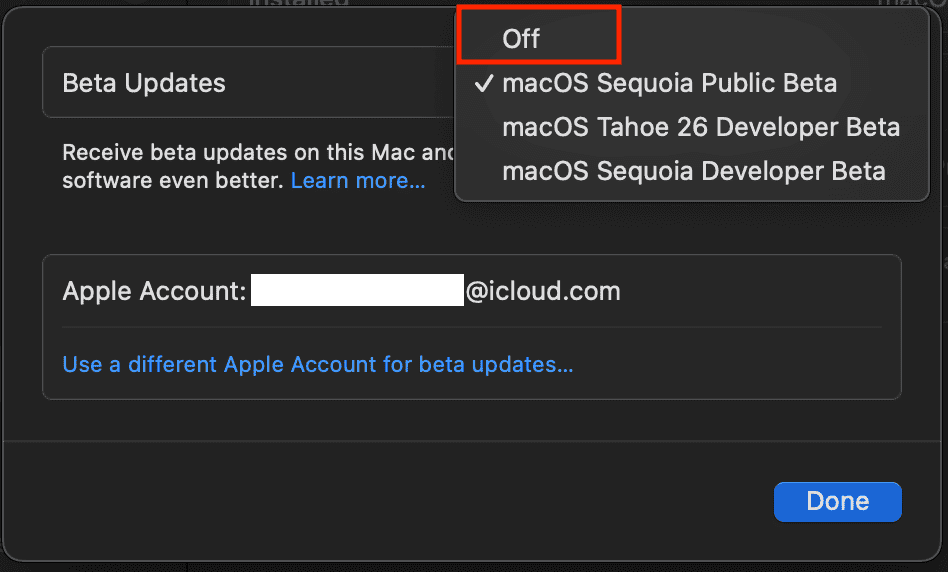
- Click Done to save the changes.


Create a Full Backup
Another thing is to back up your Mac before you revert to the stable macOS Sequoia version. That’s because uninstalling macOS 26 beta will erase the entire Startup Disk. To avoid losing your data, the best way to back up your MacBook is using Time Machine, Apple’s built-in backup software. This allows you to create a full backup of your data, and you can easily restore your Mac to the previous date without any issues. Here’s how to do it:
- Connect an external SSD or HDD that’s twice the storage capacity of your MacBook. Also, double check the drive has no other files.
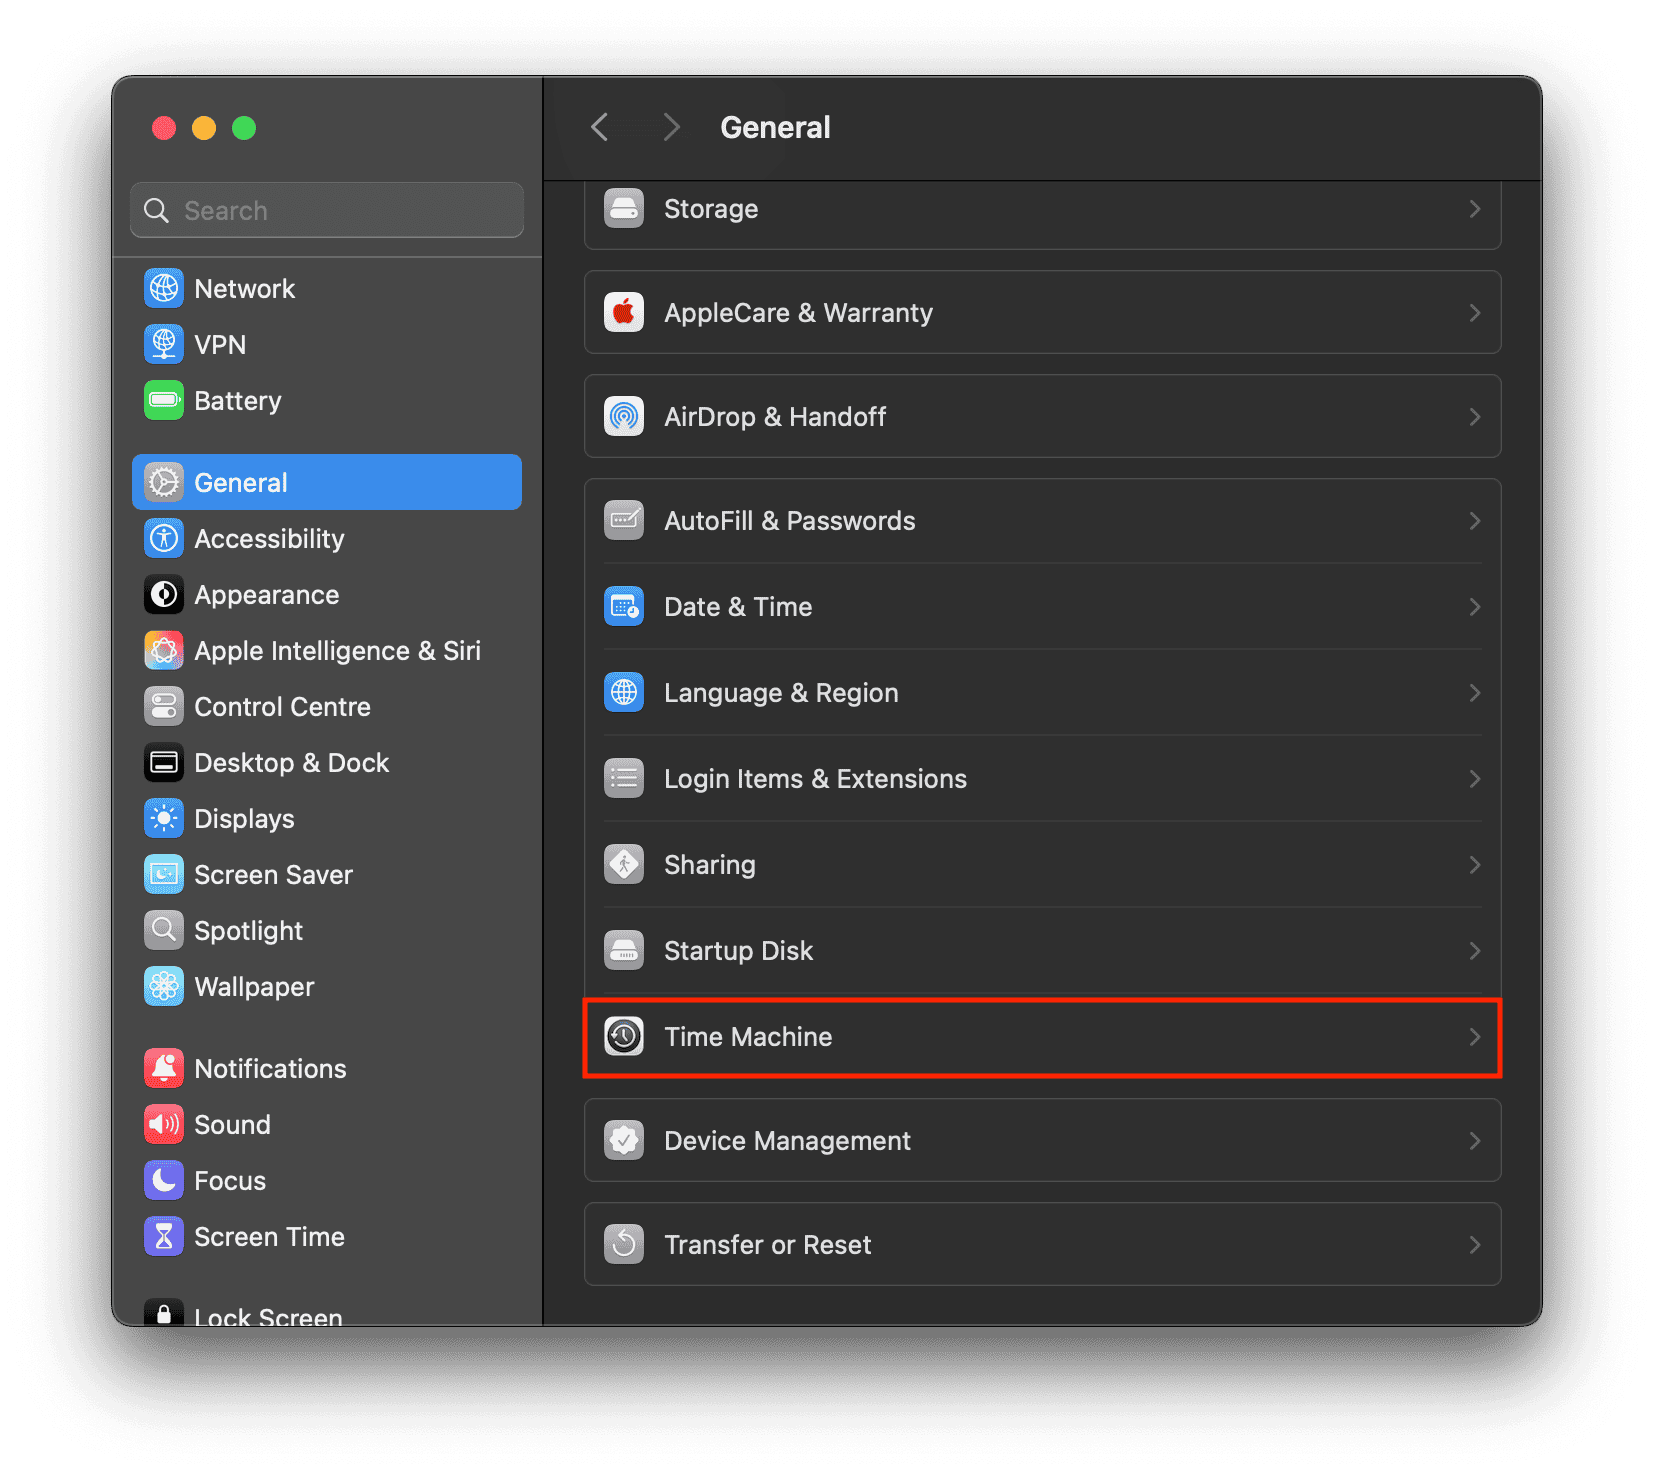
- Open System Settings > General > Time Machine.
- Here, click the Add Backup Disk option or the Add button (+).
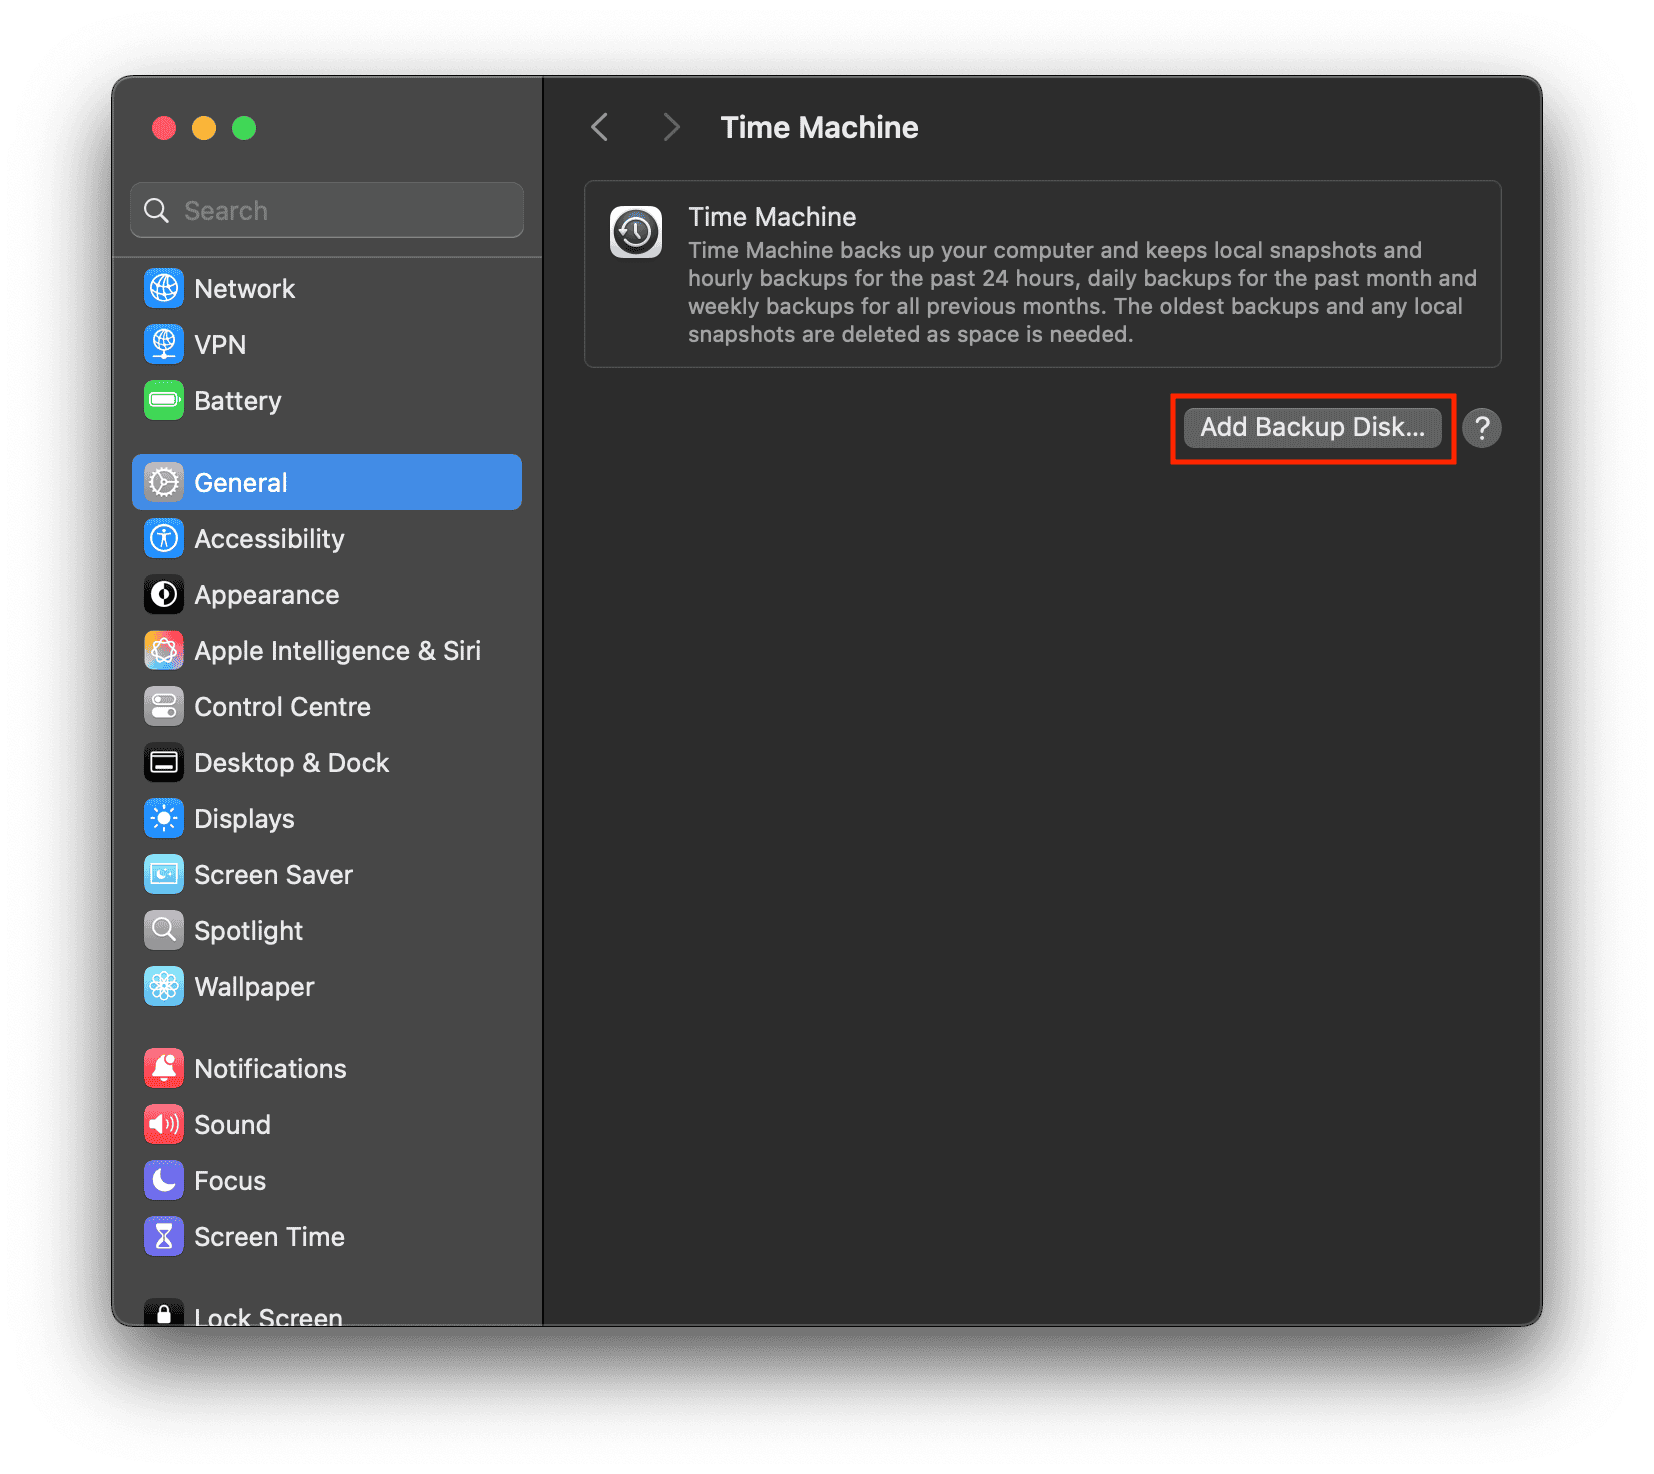
- Next up, select the external drive you’ve connected.
- Select the Set up Disk option and follow the on-screen instructions.
- When you’re done with the set up, your Mac will automatically start using the connected drive to make the backups. To create a manual backup, hit the Back Up Now button.
- Once the process completes, you can eject your drive.


For more details, you can check out this Apple support page.
How to Download from macOS 26 Tahoe Beta to macOS 15 Sequoia without Losing Data
You’re now ready to install the previous stable vesrion of macOS. You can do that by using Time Machine or Recovery Mode. We’ve discussed both the methods below.
Method 1: Using Time Machine
1. Wipe your Mac
Time needed: 5 minutes
Note that you can’t install macOS Sequoia on top of macOS Tahoe. If you want to move your Mac from macOS Tahoe to macOS Sequoia, you’ll have to wipe off your Mac completely. Just like iPhone and iPad, Apple offers a quick way to reset your Mac to factory settings.
- Open Settings > General > Transfer or Reset.
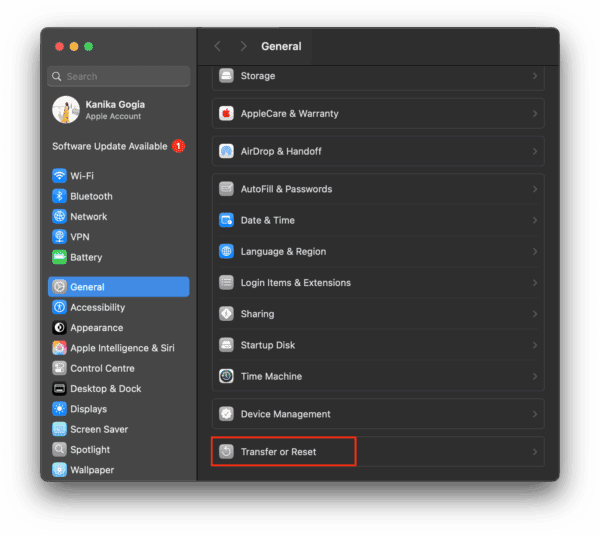
- Here, click Erase All Content and Settings.
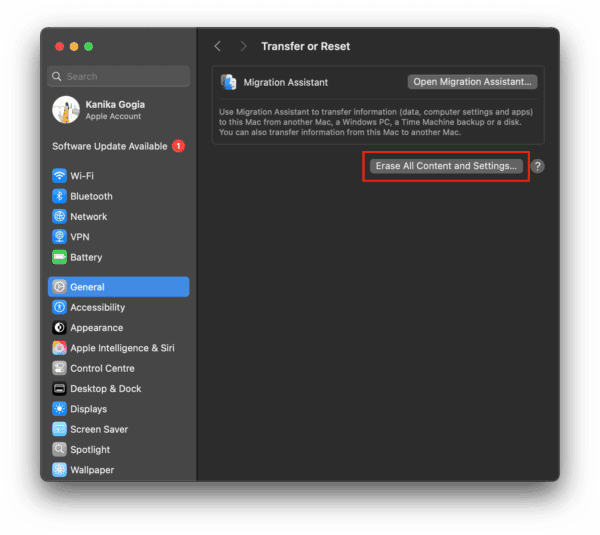
- Follow the on-screen instructions.


 NOTE
NOTE
Once the factory reset is done, your Mac should restart running the latest stable version of macOS. When you see an Activate Mac screen, click on Restart and it will guide you through the set up process.
2. Recover your Mac using Time Machine
After you removed all content and settings, you can set it up as new or restore it from a previous back up. If backed up, your Mac with Time Machine before upgrading to macOS 26 Tahoe, data recovery would be pretty simple. If you backed up afterward, however, you’ll just reinstall beta.
You can recover your data during the setup process or even afterwards. Here’s how to recover your Mac’s data via Time Machine:
- While setting up your machine, you’ll be asked if you have a Time Machine backup. Select yes.
- Plug in your backup drive and allow your Mac to recover data from the Time Machine backup.
If you wish to recover yoru Time Machine backup afterwards, you can do it using macOS Recovery.
- Connect your hard drive that has your Time Machine backup.
- Restart your Mac.
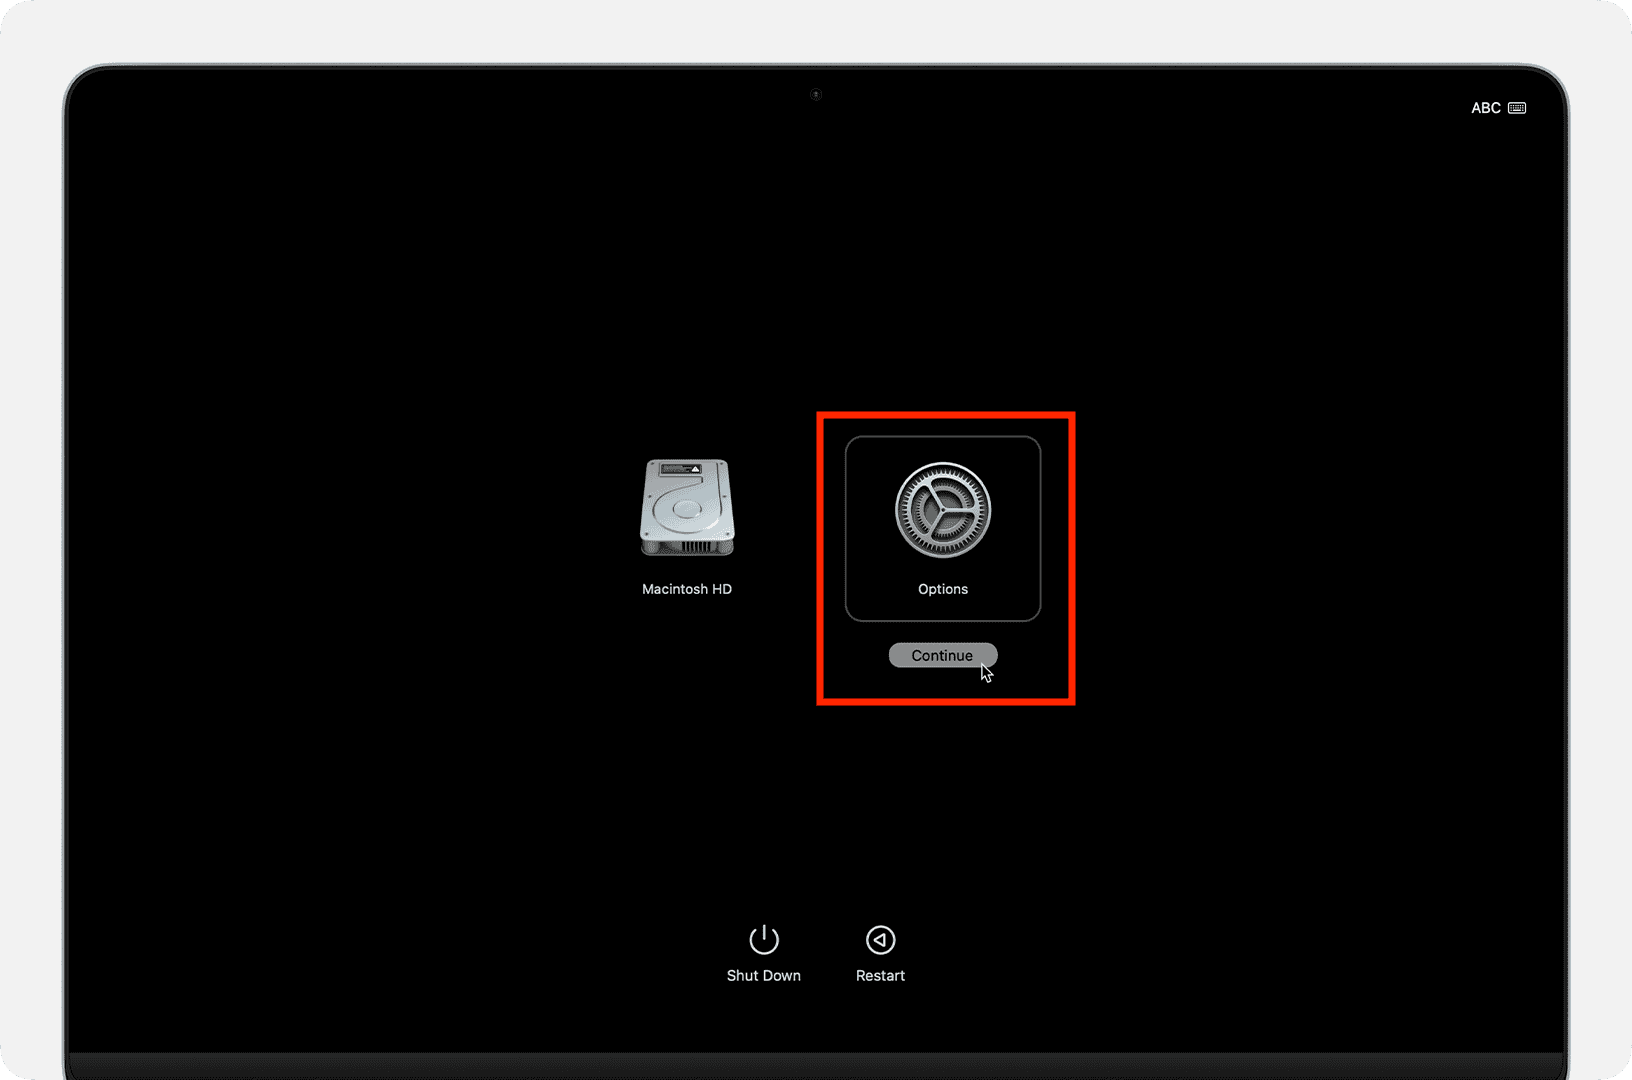
- On Apple Silicon Macs, hold the Power Key until you see Loading Options. Then select Options > Continue. On the screen that appears, choose Options and click the Continue button.
- If you have an Intel Mac, press Command + R until Apple logo appears.
- Once you’re in macOS Recovery, you’ll see an option to Restore from your Time Machine Backup. Select it and click Continue.
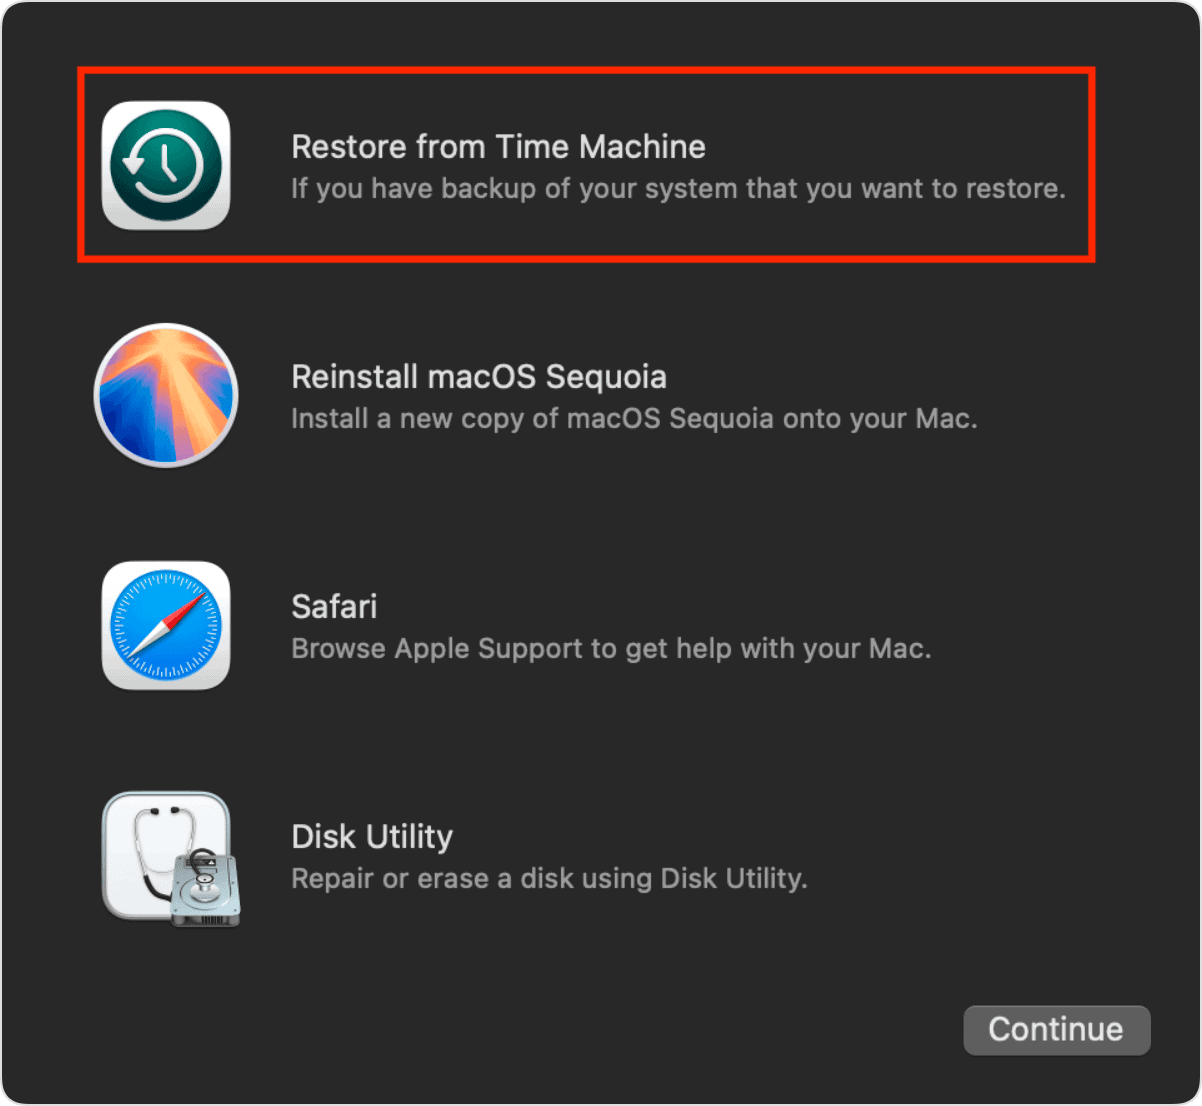
- Next up, choose your Backup source and hit the Continue button again.


Method 2: Using macOS Recovery
For better understanding, we divided the process into three major steps.
1. Enter Recovery Mode
- First and foremost, shut down your Mac.
- Restart your MacBook by pressing the Power Key. Keep holding the key until you see system volume and Options.
- If you’ve got an Intel Mac, press the Power key and then press Command + R until Apple logo appears.
- On the screen that appears, choose Options and click the Continue button.
- Enter your Apple Account password.
- DO NOT CHOOSE reinstall the macOS option here.
2. Erase Disk with Beta Software
- When you see Disk Utility, select it and then click Continue.
- Choose the startup disk and click Erase on the toolbar.
- Now, enter your drive’s name, choose a file system, and hit the Erase button.
- Click Erase again to confirm your decision.
- From the menu bar, click Disk Utility > Quit Disk Utility.
3. Reinstall macOS Sequoia
- Now, you’re all set to install macOS Sequoia.
- When prompted, connect to a available Wi-Fi network.
- Your Mac will activate now and you can click the Exit to Recovery option.
- Finally, choose Reinstall macOS Sequoia from the list of available options.
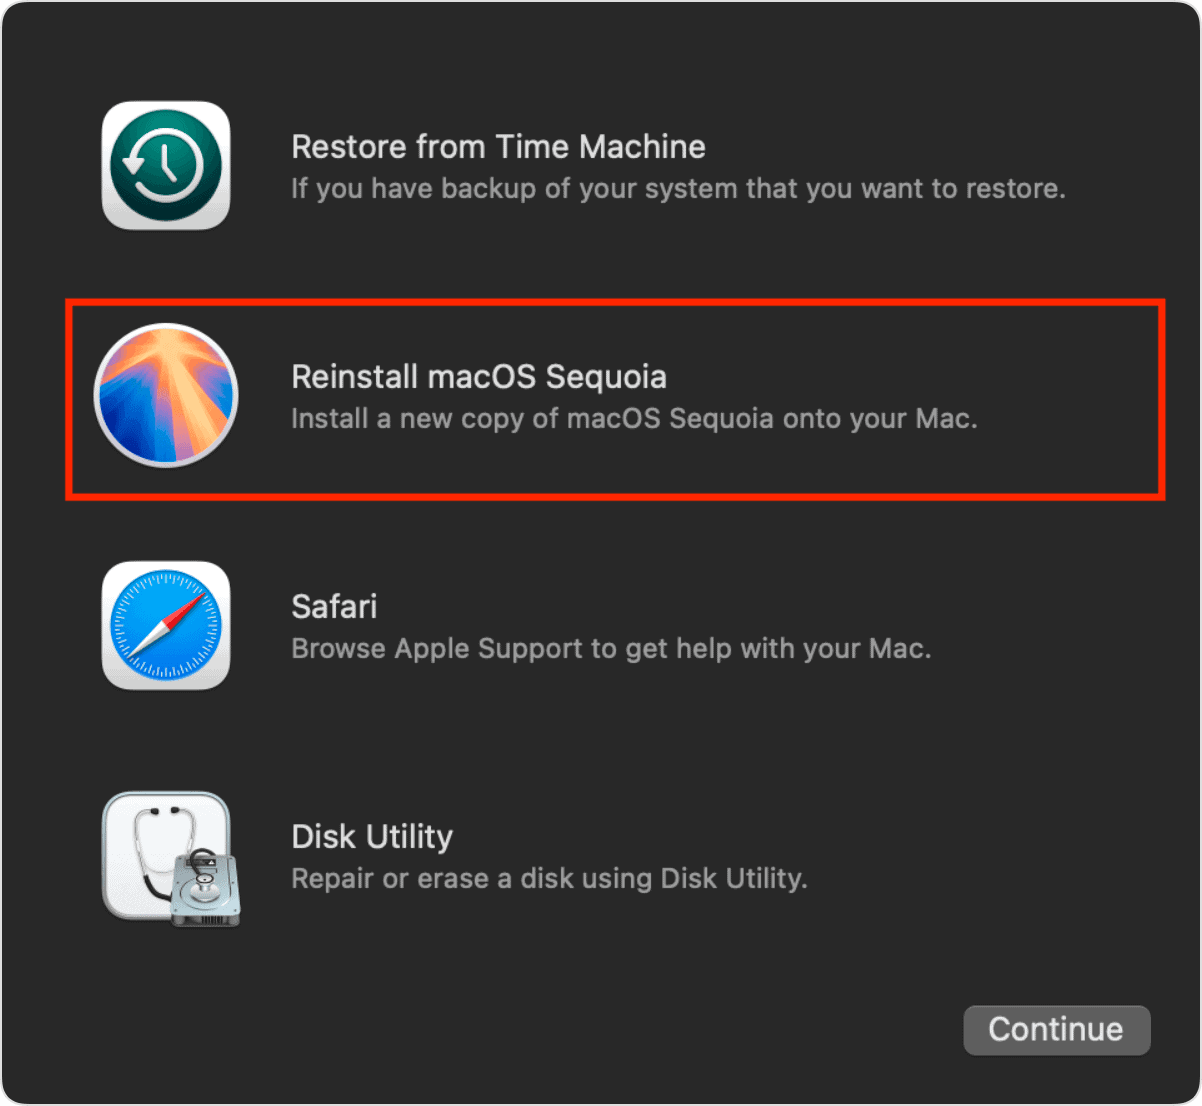

Your Mac will now download and install macOS Sequoia. This process may take anywhere from a few minutes to a couple of hours, depending on your internet speed. If you wish to downgrade from iOS 26 beta to iOS 18, here’s how to do it without any data loss.


Correct me if I’m wrong but you’ll only be able to revert to Sequoia if you have a backup BEFORE installing Tahoe. Or am I wrong (which I hope I’m)?