
Have you been facing the Safari can’t find the server error on your browser often? It’s frustrating, more so, even when the internet seems to be working fine. There are several reasons for this error, such as wrong DNS settings, outdated app, incorrect URL, etc.
So, I have jotted down everything you need to know to help you fix this issue and get you back to browsing on Safari.
How To Fix Safari Can’t Find The Server on Your macOS
Safari is by far the best browser I have used, but there are times such as these that might make you rethink some alternatives. Opera One, for example, is a great option because it has one of the highest speed scores that help the websites load faster, making your browser experience as seamless as possible. Nonetheless, we can still fix this. Let’s check out some methods you can try.
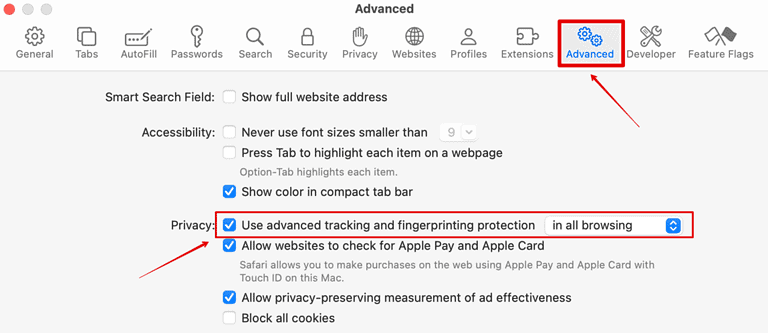
1. Disable Advanced Tracking and Fingerprinting Protections
Apple introduced a new privacy and security feature for all Safari users to protect against trackers while browsing different websites. However, this might interfere with certain websites and prevent them from loading, so you have been getting the Safari can’t find the server error.
Time needed: 4 minutes
Let’s look at the steps to disable this.
- Open Safari browser on your system.
- Click on Safari at the top menu options and open Settings.

- Go to Advanced.
- Beside the Privacy section, uncheck the box that says Use advanced tracking and fingerprinting protection.


2. Check Your Internet Connection
Before jumping over to trying some difficult methods, you must start by checking your Internet connection. Here are some of the steps you can follow to check Internet connection on your Mac.
- Open another tab on Safari, try Google.com, and see if it works.
- Check with another browser, such as Google Chrome.
- Reconnect your Wi-Fi on your Mac.
- Restart your Router to be on the safe side.
Once you have tried all of this, open the Safari browser again and see if it works.
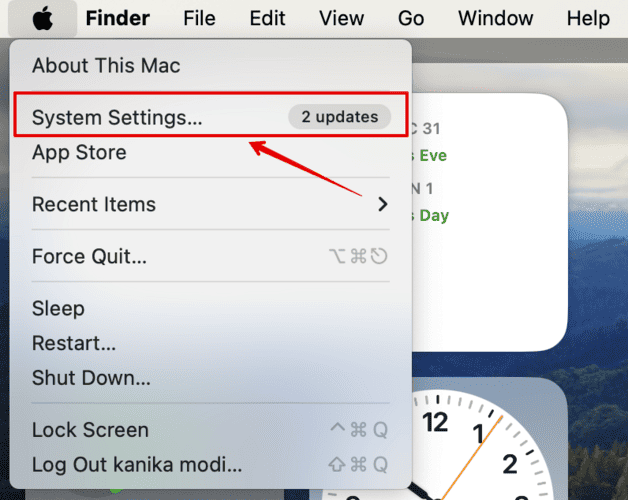
3. Change DNS Settings
If your internet connection works perfectly fine, you should check your DNS settings and make the necessary changes to it.
Here is what you can do.
- Go to the Apple menu on the top-left corner of your desktop.
- Open System Settings.
- Click on Network on the left sidebar and choose Wi-Fi on the right.
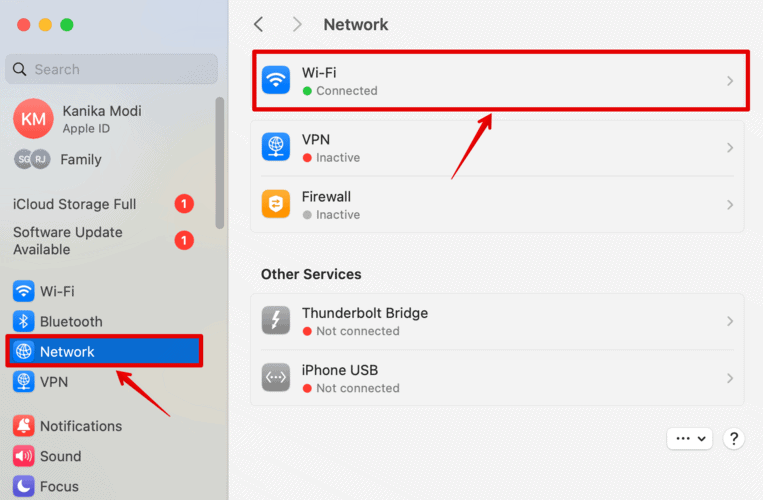
- If connected to a network, click on the Details option.
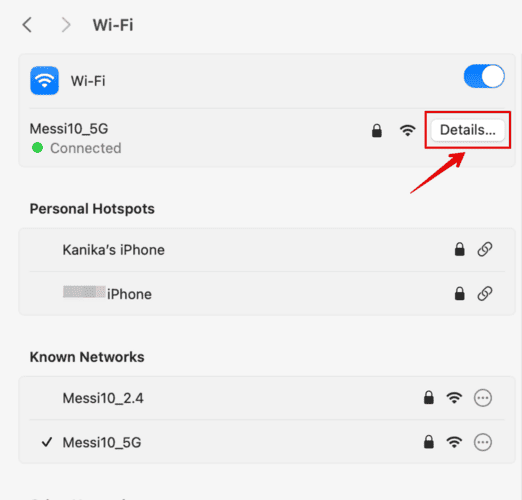
- Click on DNS on the left.
- Under DNS servers, click on the + symbol to add Google’s public DNS, i.e., 8.8.8.8 and 8.8.4.4.
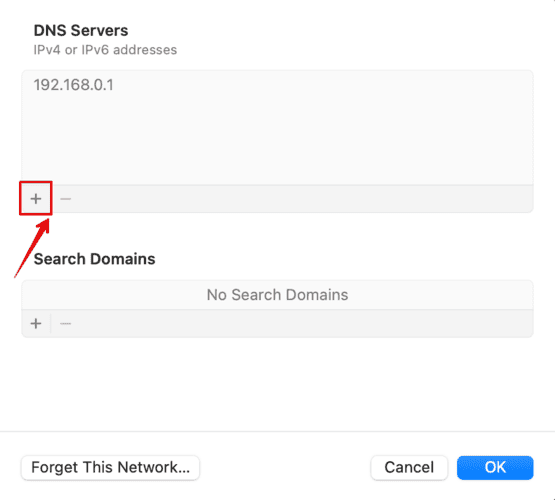
- Click on OK to confirm.


Wait for the signal to refresh and check if Safari is working again.
4. Disable VPN
Have you been using any VPN on your system? Well, VPNs route the traffic through their servers, which can occasionally cause connectivity issues. Hence, disabling the VPN if you are currently using it is best. Once done, reconnect the Wi-Fi and start using Safari again.
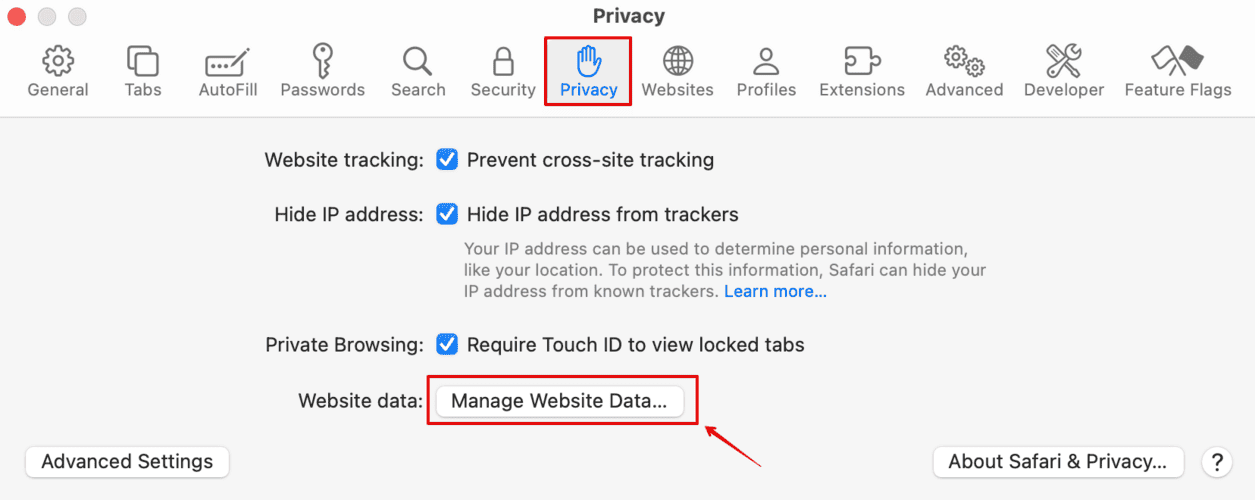
5. Remove Cache and Cookies
If none of the above methods has worked for you, you must clear the cache and cookies saved on your Safari browser. The saved data is sometimes outdated or even corrupted, which might cause Safari server errors. Let’s check out the steps to remove the cache and cookies.
- Click on the Safari menu at the top and open Settings.
- Open Privacy settings and click on Manage Website Data.
- Select Remove All.
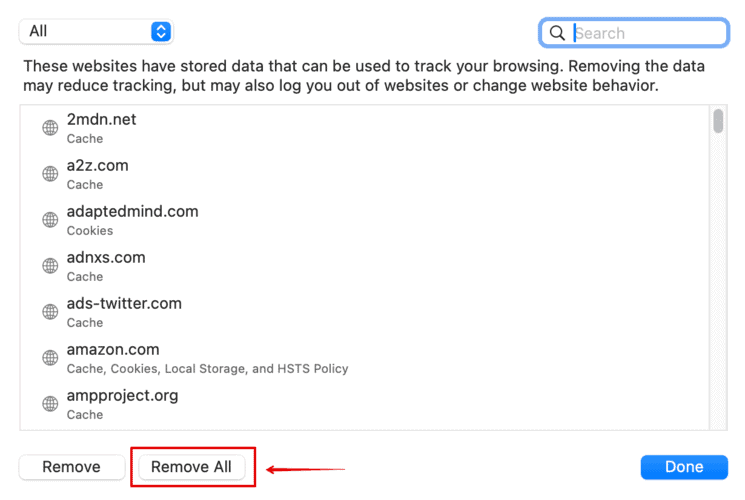
- Click on Remove Now on the dialog box on your screen to confirm.


To save the changes, click on done.
6. Renew DHCP Lease
This method worked for me like a charm. If your device is still facing any network-related issues, you must renew the DHCP lease. It will help resolve any communication issues with the server.
- Click on the Safari menu at the top and open Settings.
- Open Network on the left sidebar and click on Wi-Fi.
- While being connected to a network, click on Details.
- Go to TCP/IP on the left sidebar.
- Then, click on Renew DHCP Lease.
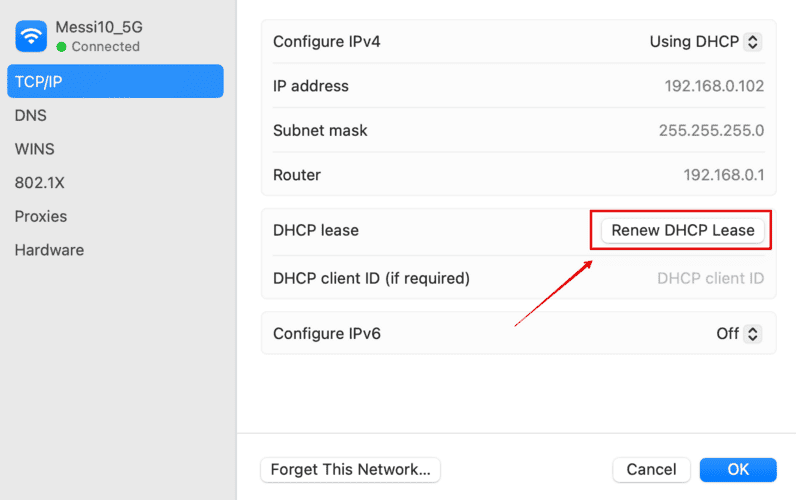
- On the dialog box, select Apply.

Wait for the network settings to process in the background. Once done, try reconnecting to your Wi-Fi and check if the Safari error has been resolved.
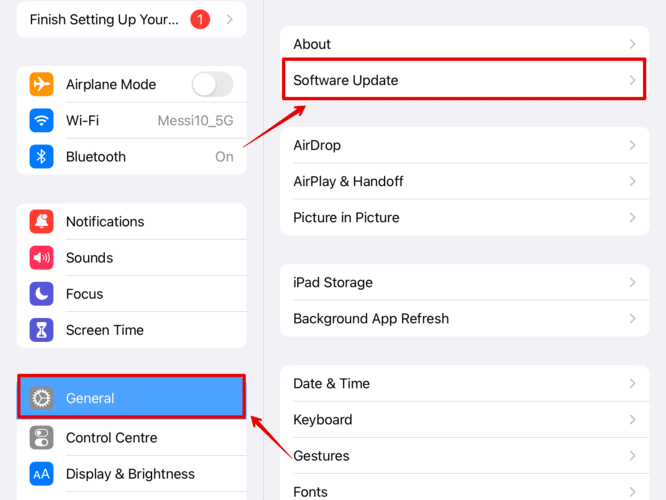
7. Update Your macOS
Did any of the methods above work for you? If not, then you should try updating your macOS with the latest version that might contain bug fixes.
- Open System Settings from the Apple menu.
- Go to General and click on Software Update.

Wait for the system to check for updates, then install the latest version. The system will then restart to save the changes.
Furthermore, go to the App Store from the Dock below and check for any Safari updates that might be available. All the above methods have been tried and tested since I have had the same issue multiple times with Safari. Simply restarting your Mac might work, or you might have to change the DNS settings.


