
If you aren’t happy using the default DNS servers your ISP or local coffee shop provides with your Mac, you can change them. It’s pretty easy to do. Follow along to learn how.
What is DNS
DNS, or domain name service, is what your Web browser uses to translate the URL you enter (like macobserver.com) into the numeric addresses, or IP address, computers use. Typing apple.com in your browser, for example, is a lot easier than remembering 17.142.160.59.
Don’t miss the best of The Mac Observer
Set us as a preferred source and our Apple reporting ranks higher in your Google Search results and Discover feed — one tap, no account changes.
Your ISP has its own DNS servers and automatically provides those when you connect to the Internet. The same thing happens when you connect to public networks in places like coffee shops, libraries, and hotels.
That isn’t necessarily a problem, but if you’re concerned your ISP is tracking and selling your website requests, changing your DNS entries is the way to go. It also ensures the public networks you connect to don’t get to collect the URLs you enter.
Changing Your Mac’s DNS Server Address
You aren’t limited to the DNS servers your ISP or local coffee shop assigns. Adding the servers you want takes only a few steps.
Here’s how to add DNS servers to your Mac’s network settings:
-
- Go to Apple menu > System Preferences
- Choose Network
- Select the network connection you want to modify. I started with my WiFi connection, then changed my Ethernet adapter connection, too.
- If you use your passcode to lock down settings don’t forget to click the Padlock and authenticate
- Click Advanced
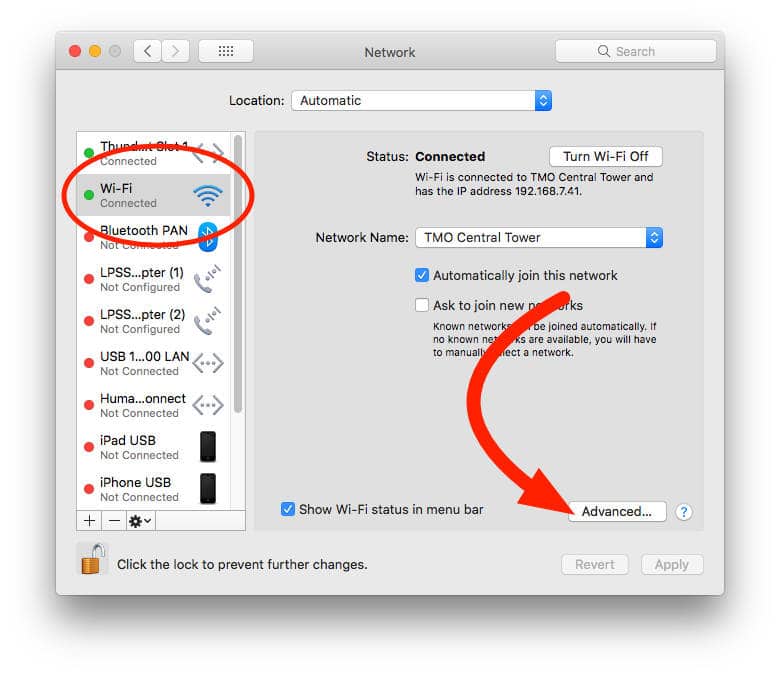
The Advanced button gets you to your Mac’s DNS settings - Choose the DNS tab
- Click the Plus symbol below the DNS Servers column
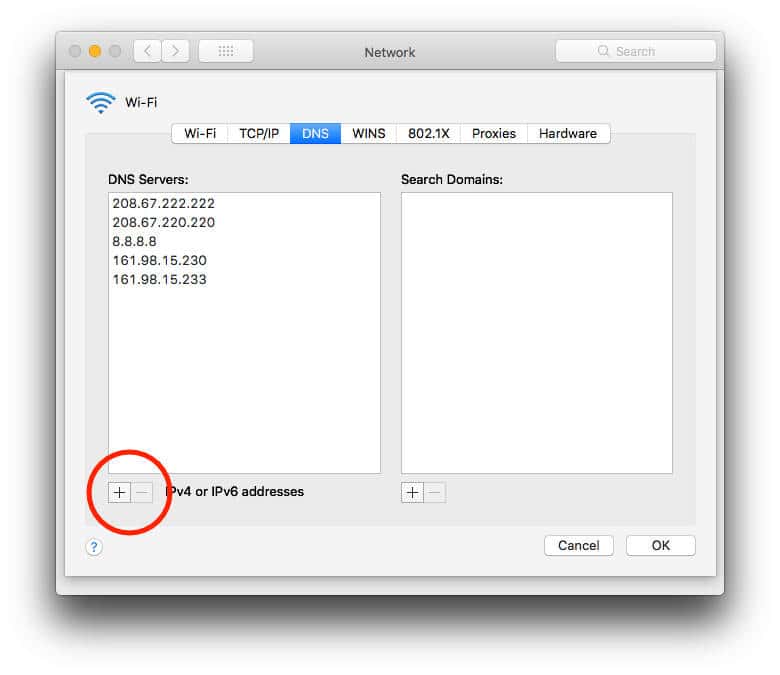
Click the Plus to add new DNS server addresses - Enter the DNS server address you want to use. Your Mac supports both IPv4 and IPv6 addresses.
- Press Return, or Plus to add another DNS entry
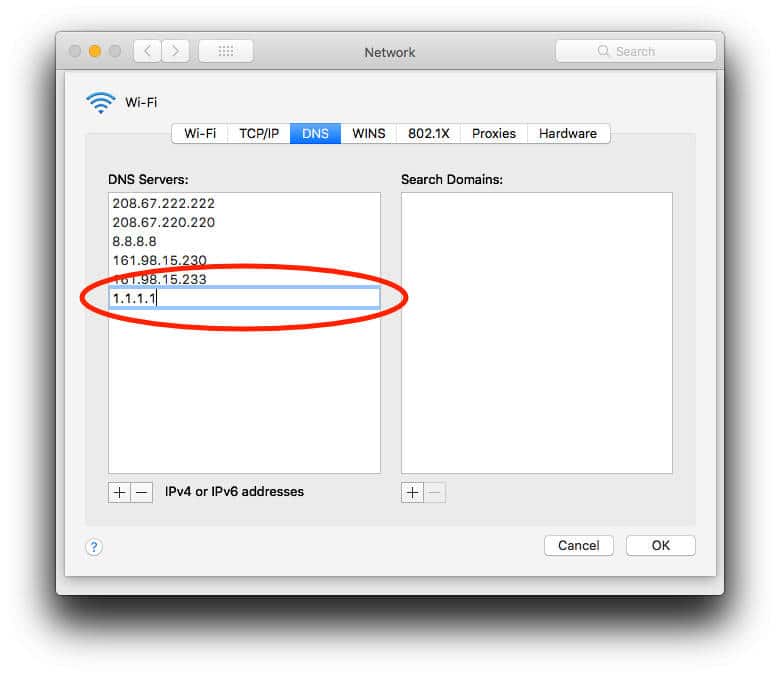
New DNS server addresses show up at the bottom of the list, but you can drag them up higher - When you’re done adding DNS addresses, click OK
- Click Apply
Your Mac starts at the top of the list to choose the DNS server it’ll use. If for some reason the first isn’t available, your Mac moves on to the next. If none of those work, your Mac will look to your router for an entry.
You can change the order of the entries in your DNS list with a quick click and drag. To remove an address, just select it and click the Minus button at the bottom of the DNS Servers list.
iPhone, iPad, and iPod touch owners can set DNS servers, too. Andrew Orr does a great job of explaining how.
DNS Server Alternatives
Now that you know how to change the DNS server entries on your Mac, here are some options to choose from, like OpenDNS and newcomer Cloudflare:
Google
- 8.8.8.8
- 8.8.4.4
OpenDNS
- 208.67.220.220
- 208.67.222.222
Quad9
- 9.9.9.9
Cloudflare
- 1.1.1.1
- 1.0.0.1


Jeff ~ I’m a little surprised you didn’t mention using ‘namebench’ to find the fastest servers.
~ Jack