
Whether you want to create a video to post on YouTube or simply share a how-to instruction with family members who aren’t as tech-savvy, the iPad’s Screen Recording function makes it easy to record your screen. Including the sound, however, isn’t quite so intuitive.
It’s definitely possible to record the sound along with the screen, though. Follow along as I show you step by step how to record your iPad’s screen along with the internal or external sound.
How Do I Record My Screen With Audio?
You will first need to add the Screen Recording option to Control Panel before you will be able to use it.
Time needed: 1 minute
Follow these simple steps to add Screen Recording to Control Panel.
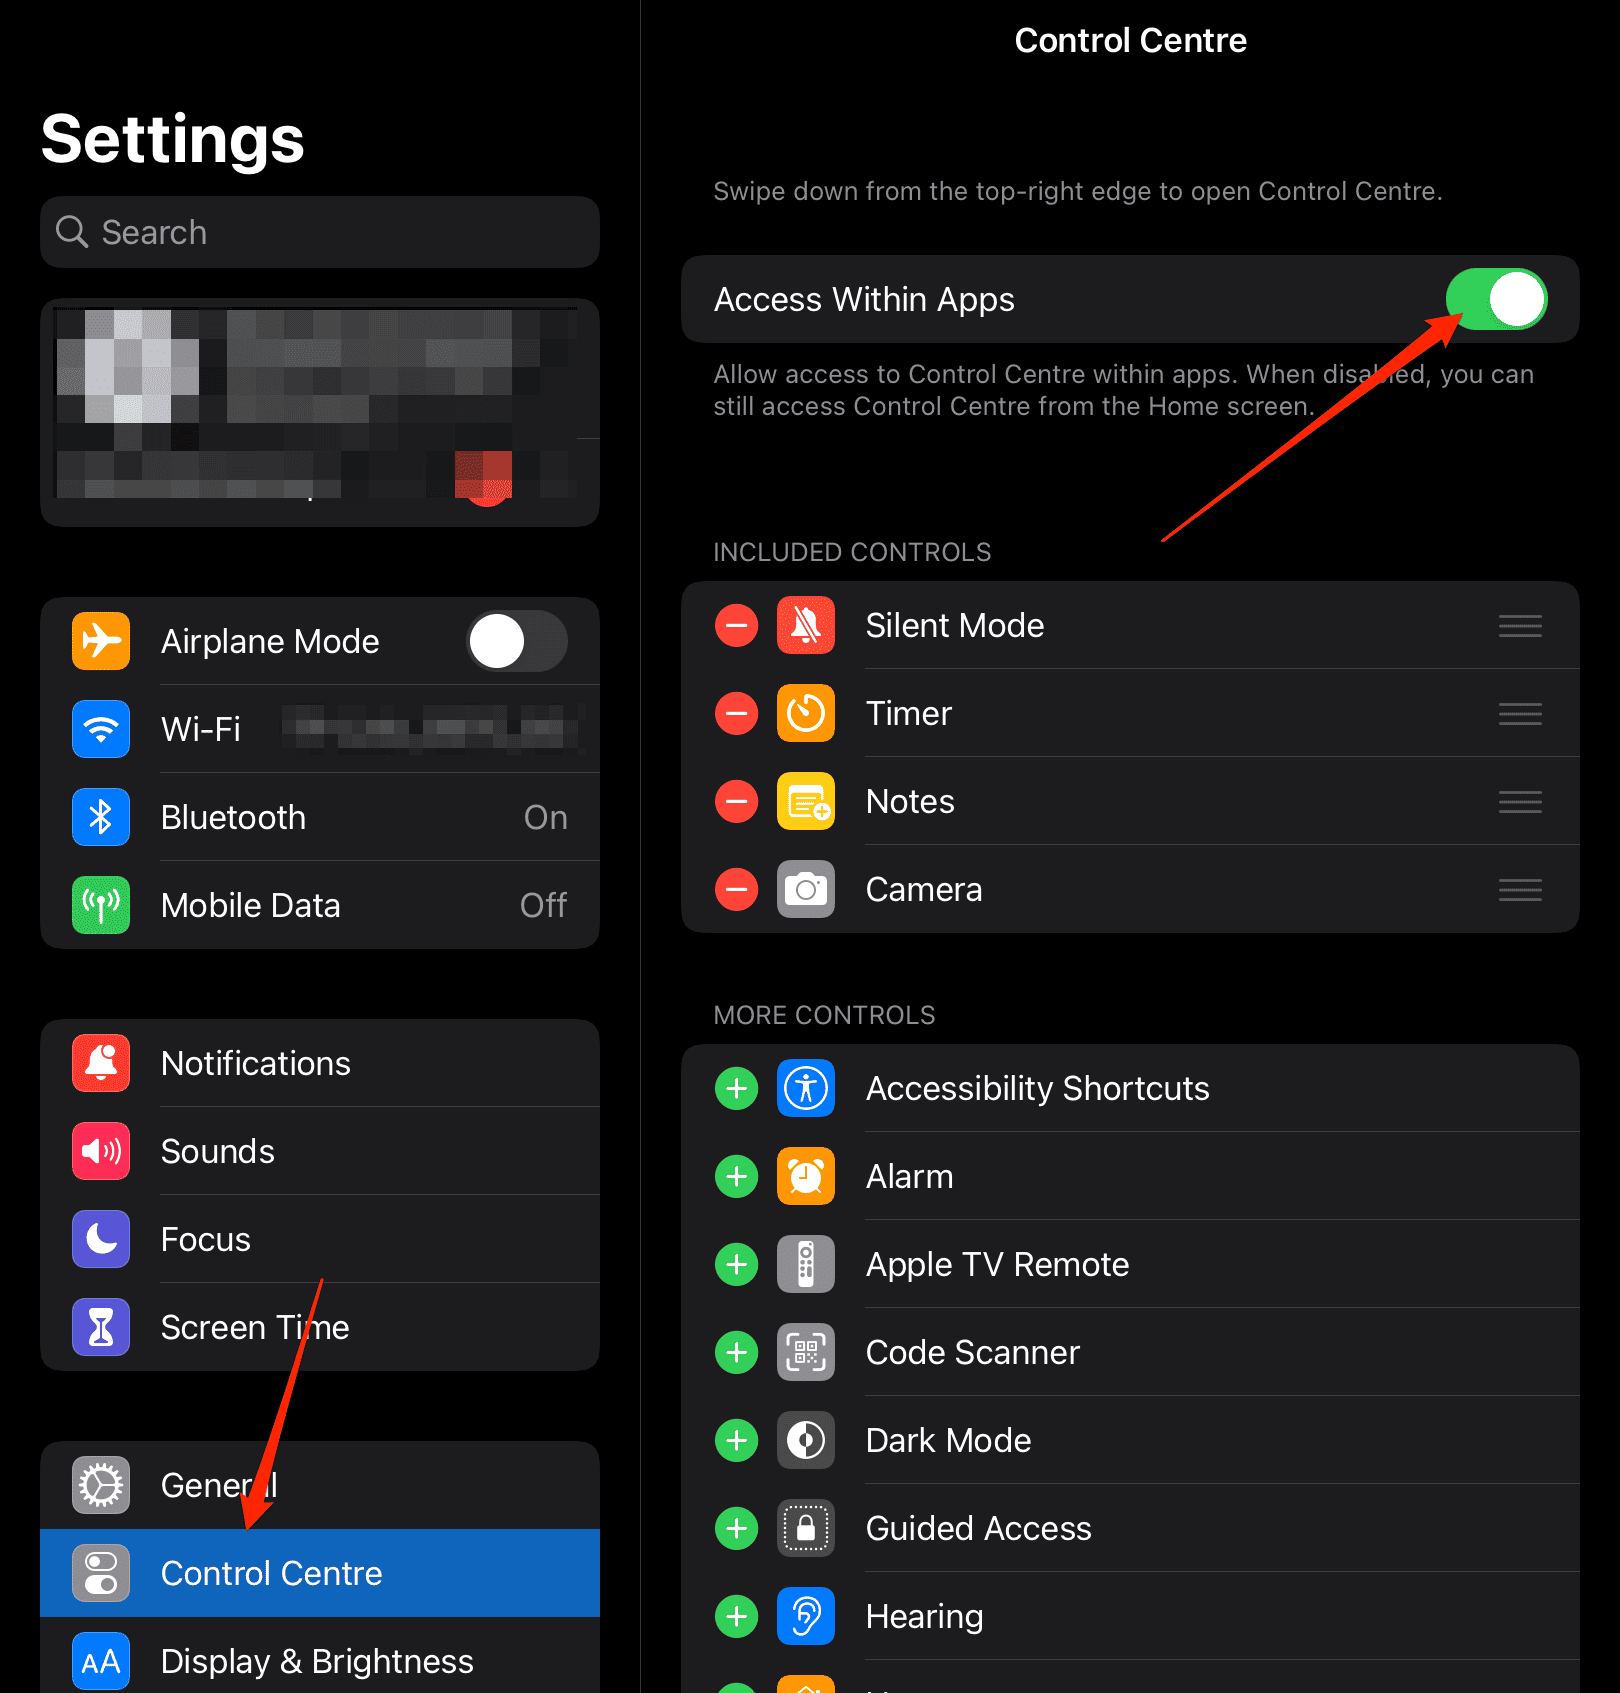
- Go to Settings > Control Center and toggle on the Access Within Apps feature.

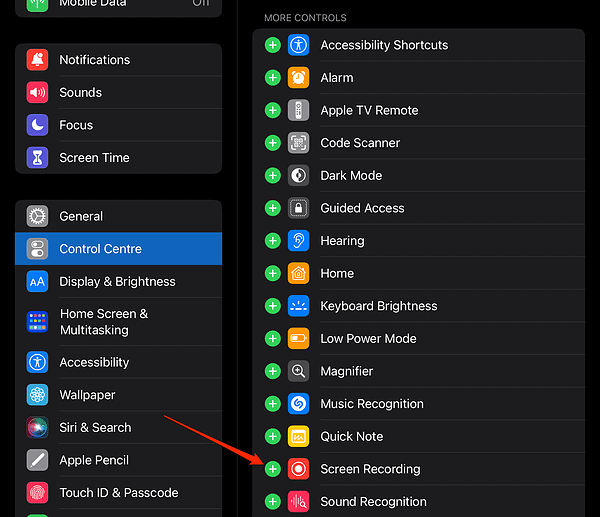
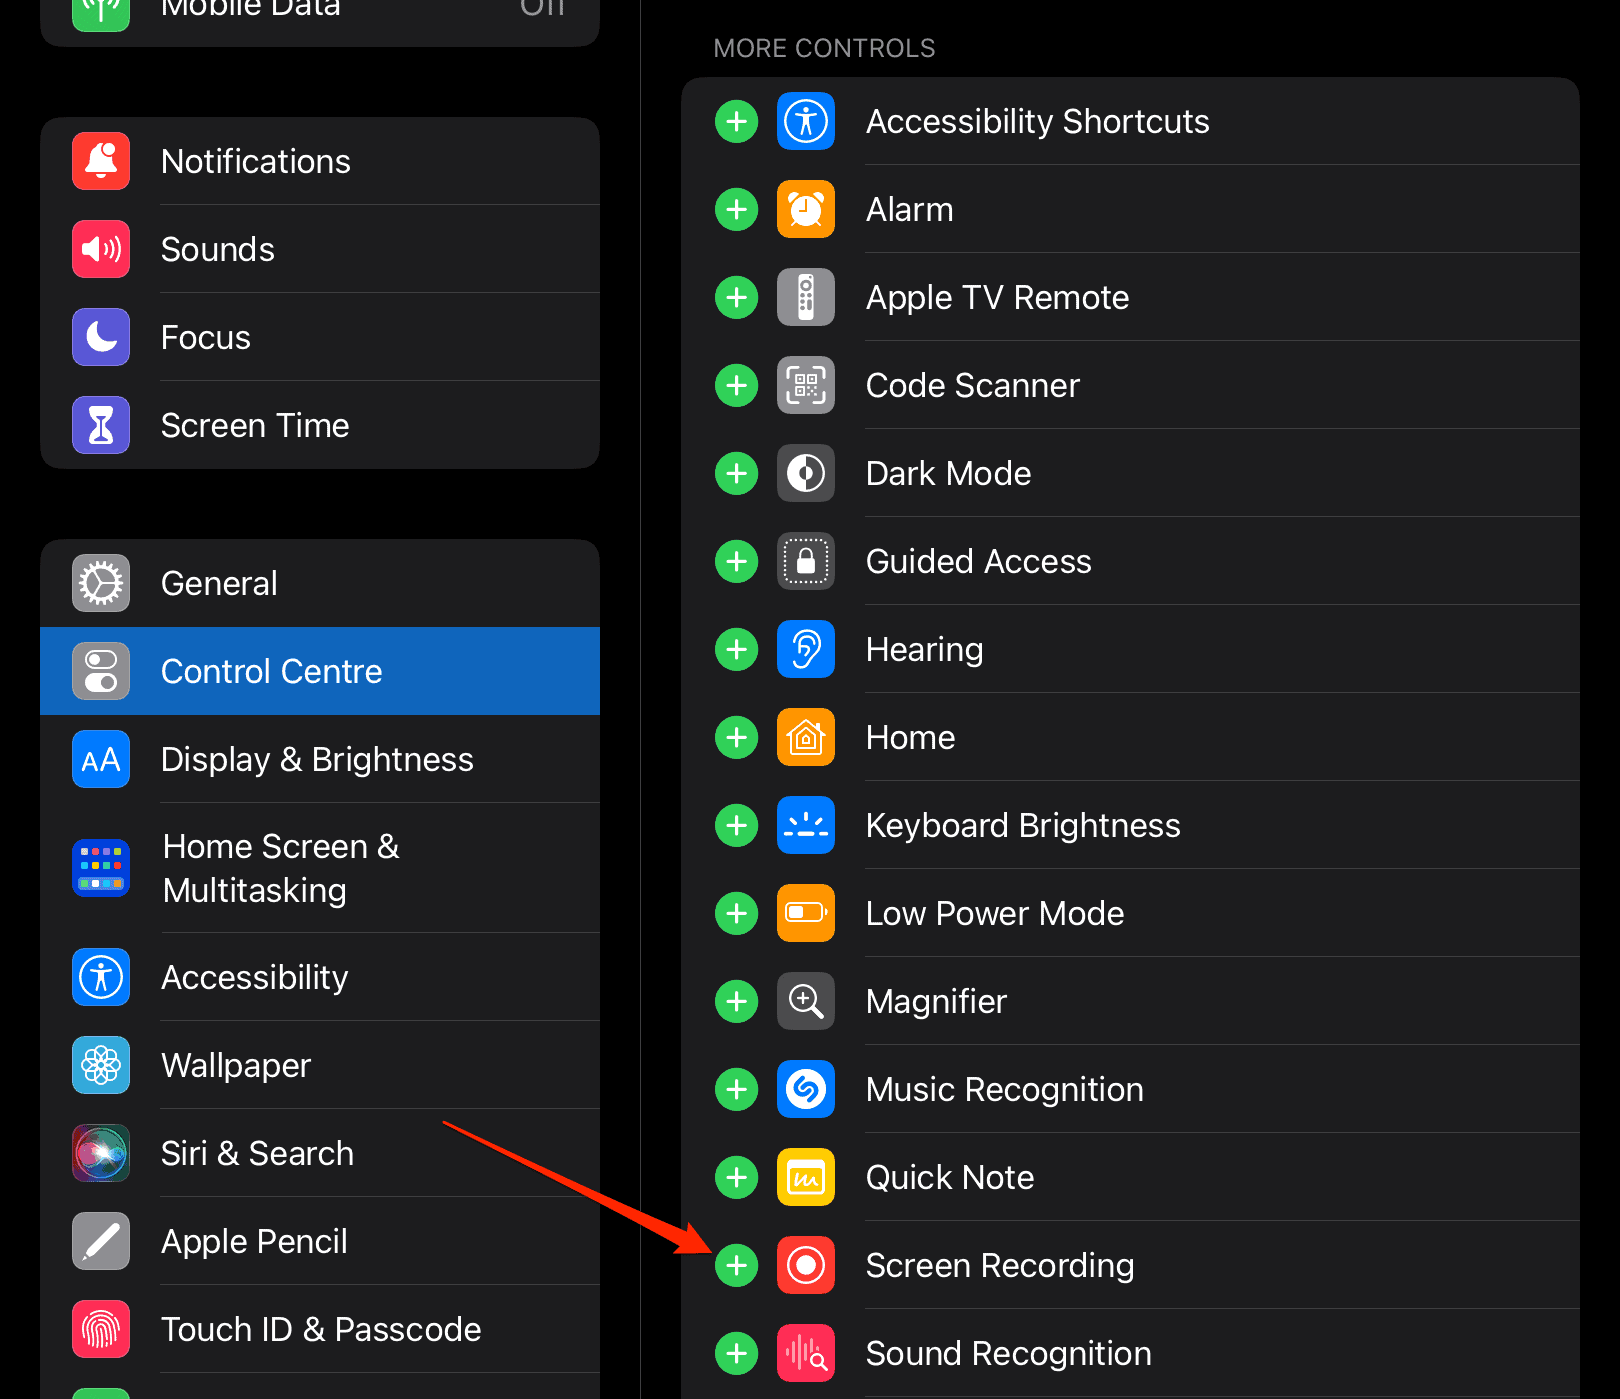
- Next, scroll down to the More Controls section and tap the plus sign next to the Screen Recording feature.
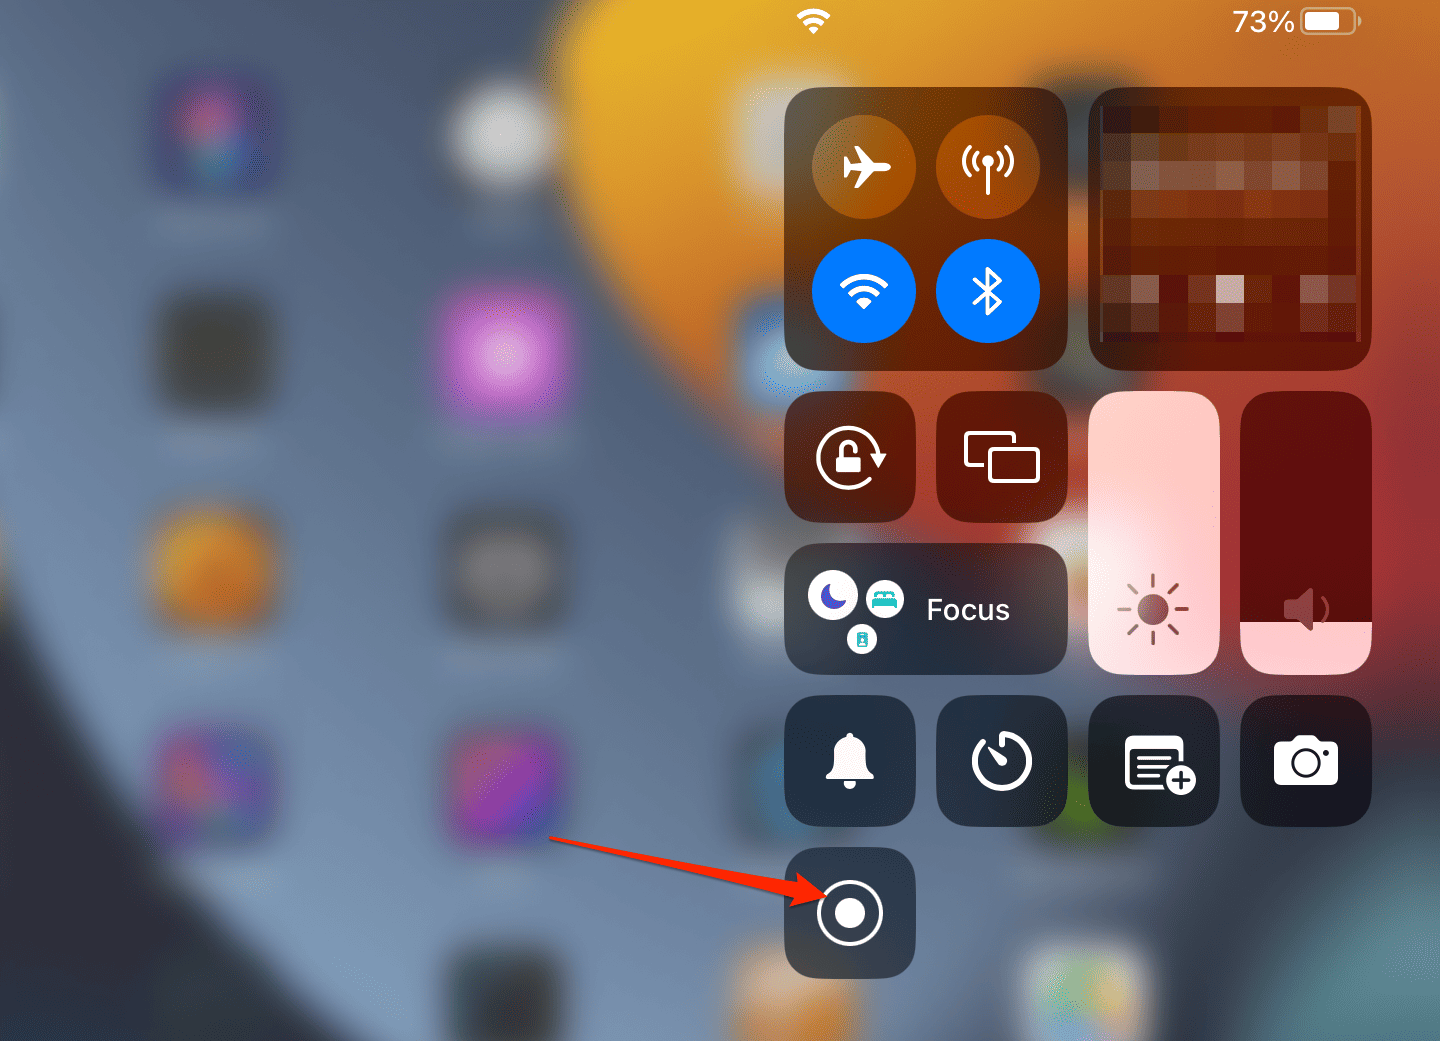
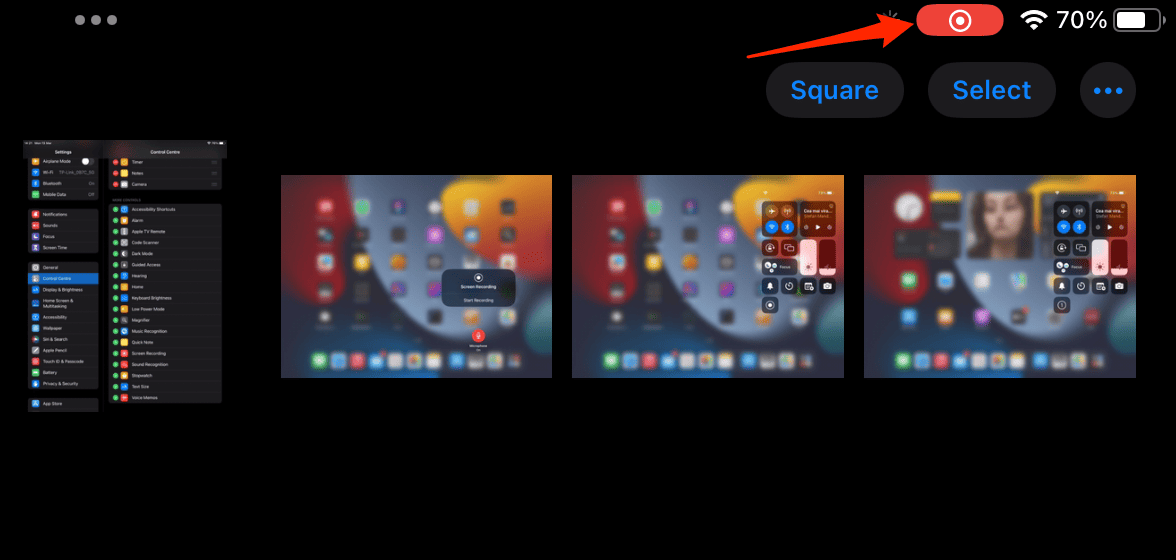
- To start recording your screen and the internal sound coming from applications, such as Zoom, access Control Center by swiping down from the top-right corner of your screen. Then tap the Screen Recording icon.

- Please take note that there will be a three-second timer that will appear just before the recording begins.
- To stop recording, simply tap the Recording icon from the toolbar and select Stop Recording.

The Control Center provides you with direct access to the features that you often use. Some of these include taking pictures, activating Wi-Fi, operating your Apple TV, and even recording the screen of your iPad. Furthermore, you might want to check out how to customize your Control Center and unlock new shortcuts.
On the other hand, if you don’t know how to take a screenshot on your iPad, you definitely should take a look at our dedicated guide.
How Do I Record My iPad Screen With Outside Sound?
You can use the Screen Recording feature to also record the sound that comes through your microphone. To do this, follow these steps:
- If you have the Screen Recording button in your Control Center, skip to the third step. Otherwise, navigate to Settings > Control Center and toggle on the Access Within Apps feature.
- Under the More controls section, tap the plus sign next to the Screen Recording option.
- To record your screen and the external sound that comes through your microphone, access Control Center by swiping down from the top-right corner of your screen, then long-press the Screen Recording icon. Tap the Microphone icon to turn it on, followed by Start Recording to begin.
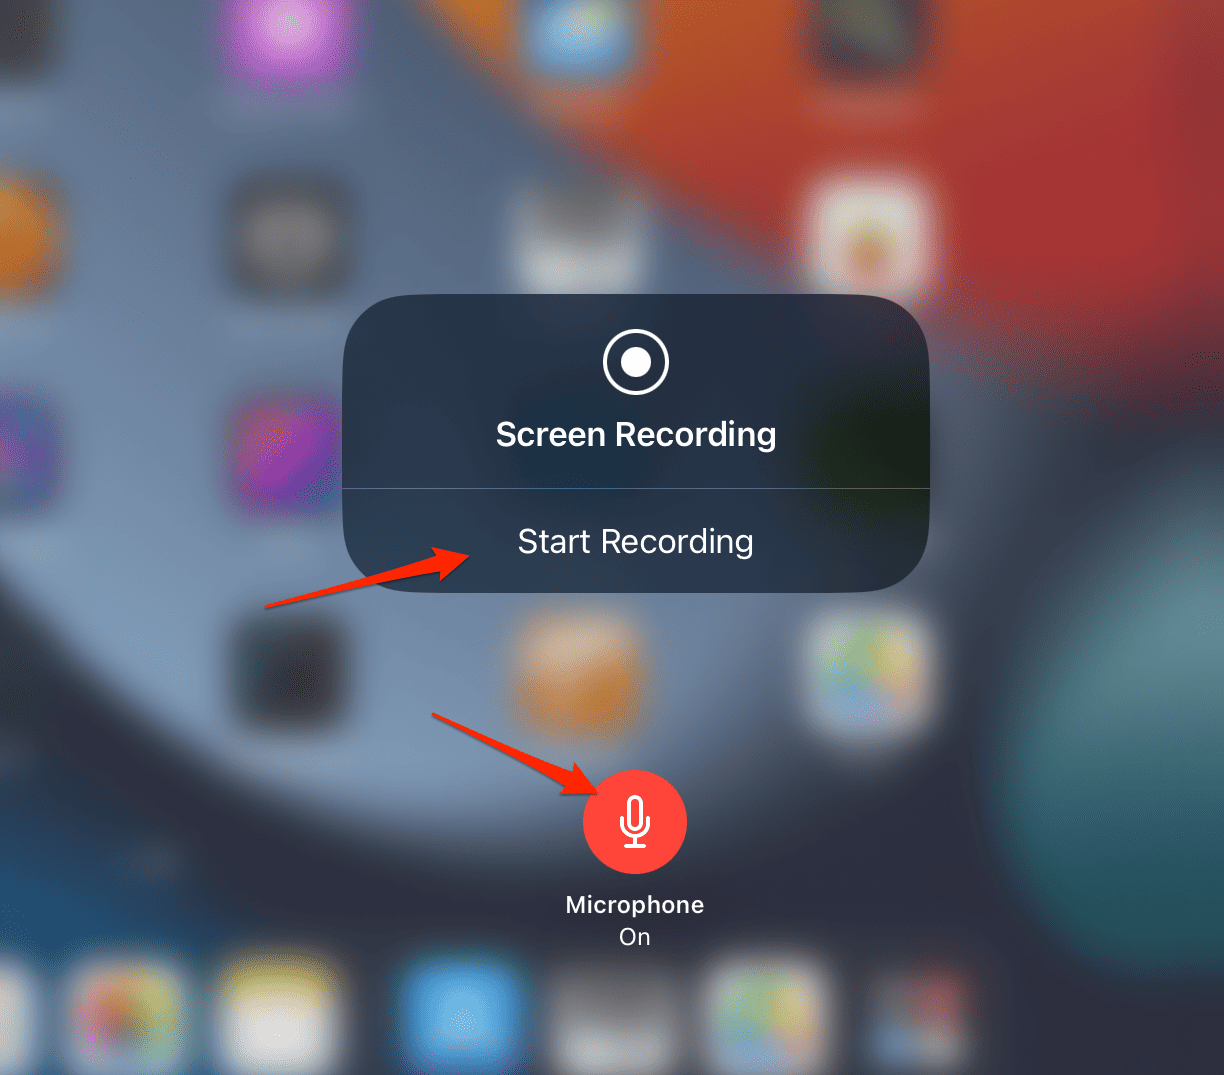
- Note that there will be a three-second timer that will appear just before the recording begins.
- To stop recording, simply tap the Recording icon from the toolbar and select Stop Recording.
There are a variety of scenarios when having screen recording software on your Mac might prove to be beneficial, too. Check out our dedicated guide on how to use QuickTime Player for screen recording on your Mac, since it is an excellent choice if your requirements are straightforward and you do not need to be able to capture system sound.
Alternatively, if your needs are a tad more complex, we recommend that you refer to our article on the best screen recording apps for your Mac. Don’t forget to leave a comment below, and tell us what you think.


