
Gamers, your time is here: the Delta emulator app is now available for iOS, and with it arrives a wealth of emulation and features. This expansive app hosts an impressive selection of classic video game consoles, providing the ability to play thousands of retro games on your iPhone. Below, I’ll show you everything you need to know to start gaming.
What to Know About the Delta Emulator
Apple finally eased restrictions on emulators, and Delta is the second Apple-approved option to be officially listed on the App Store. What I love about it is that it’s 100% free. You can play a wide variety of retro Nintendo games without having to sit through ads—note that very few free emulators offer an ad-free experience. You can learn more about the Delta emulator here.
 NOTE
NOTE
What Emulators Are Available on the Delta App?
The following emulators (game systems) are available through the Delta app:
- Nintendo Entertainment System (NES)
- Super Nintendo Entertain System (SNES)
- Nintendo 64
- Game Boy and Game Boy Color
- Game Boy Advance
- Nintendo DS
How To Get Nintendo DS Games on Delta Game Emulator?
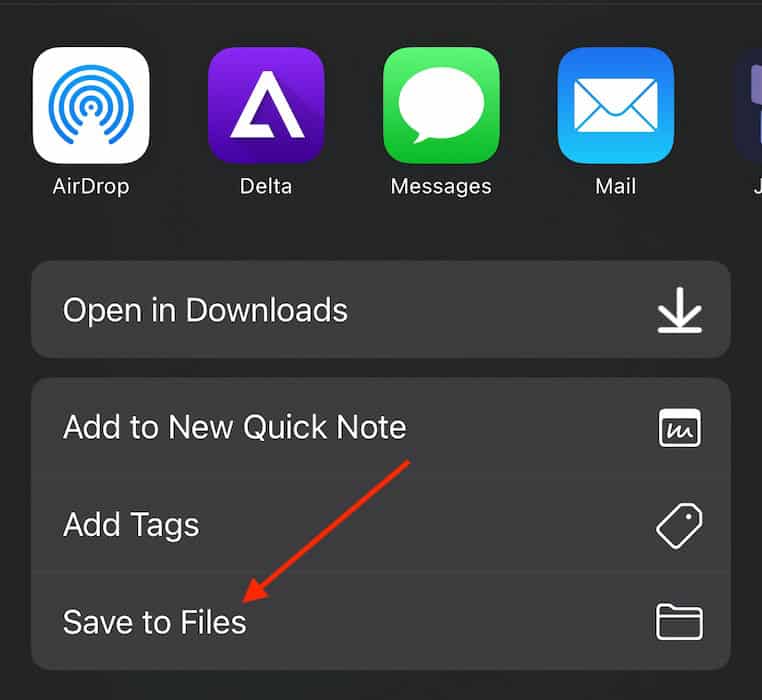
While every emulator available within the app works as is, there are specific BIOS files that you’ll need for the Nintendo DS emulator. I can’t link to them for copyright reasons, but you can easily find them on any search engine. After you download the necessary files, remember to select Save to Files from the Share menu.
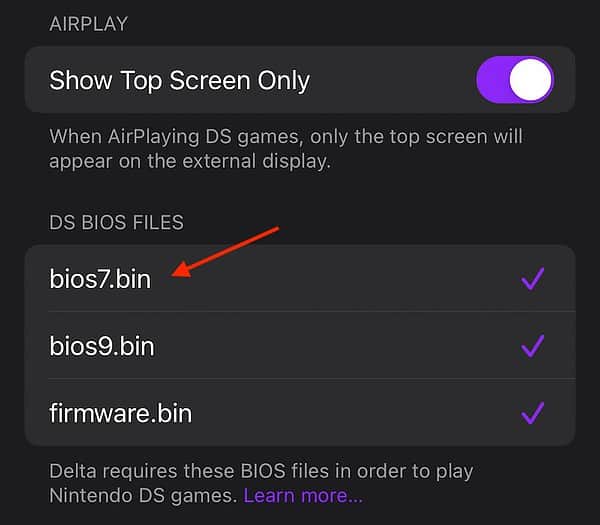
The BIOS files needed for the Nintendo DS emulator are as follows:
- bios7.bin
- bios9.bin
- firmware.bin
Time needed: 2 minutes
Once you’ve downloaded these files, adding them to the Delta emulator is easy—here’s how:
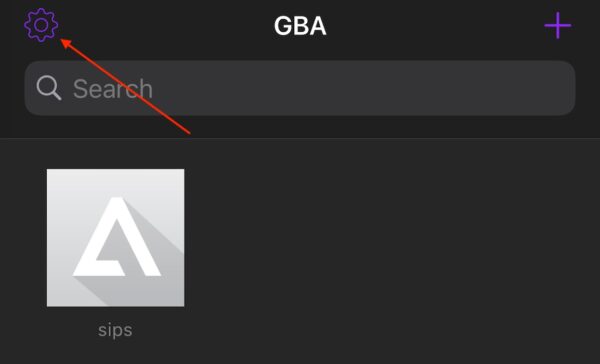
- Open the Delta app and tap the gear icon (Settings) in the top-right corner.
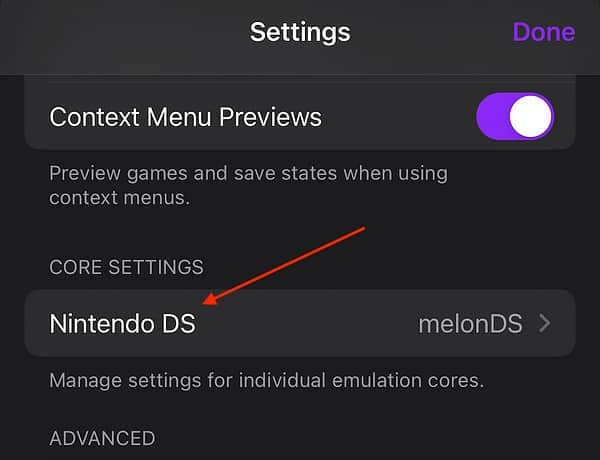
- Scroll all the way down to Core Settings and select Nintendo DS.
- At the bottom, select each file from the list and find the location of said file within your Files browser.


From here, the Nintendo DS emulator will be fully operational. However, note that you may need to use iTunes File Transfer to add games—DS ROMs are typically several gigabytes large. Downloading them through your iPhone may be a hassle, so I’ll cover this more below.
How to Download ROMs for the Delta Emulator
Again, pirating officially licensed games breaks copyright laws, so I won’t be linking to them. However, homebrew games, and even some ROM hacks, are typically okay to share. Places like Homebrew Hub can have a library of legal, independently created games to play.
ROMs will either be in a compressed file (such as .ZIP) or a rather obvious file extension (.GBA for a Game Boy Advanced game, for example). I’ve had no problems importing both, but mileage may vary on compressed files. Should one give you issues, try extracting the file.
With that in mind, there are two primary ways to add ROMs to the Delta app: either through iTunes/Folder or the iOS Files app. Let’s take a look at both, as one can be easier than the other.
1. Adding ROMs Via the iOS Files App
Personally, this is the easiest way to add ROMs since it doesn’t require a computer. However, guiding your ROM downloads to the right place can be tricky.
For this how-to guide, I’ll download the game Sips from Homebrew Hub.
- First, navigate to the Homebrew Hub page for Sips.
- Scroll down and click Download Rom.
- Depending on what browser you’re using, the download may begin immediately. Since I used Google Chrome, the Download ROM button showed up at the bottom of the screen.
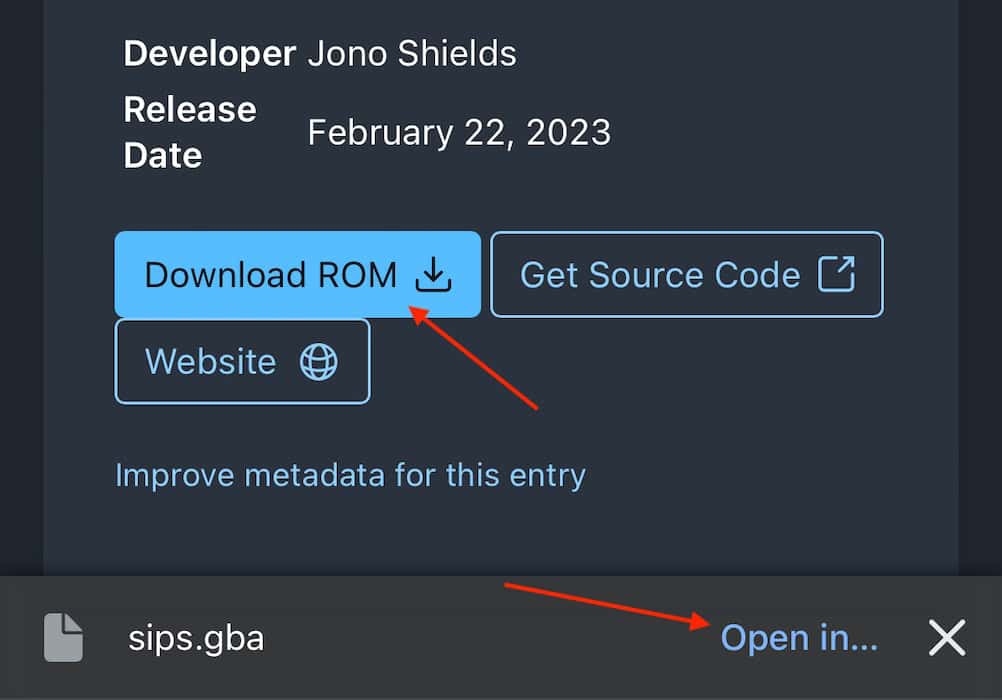
- After downloading, click Open In and select Save to Files.
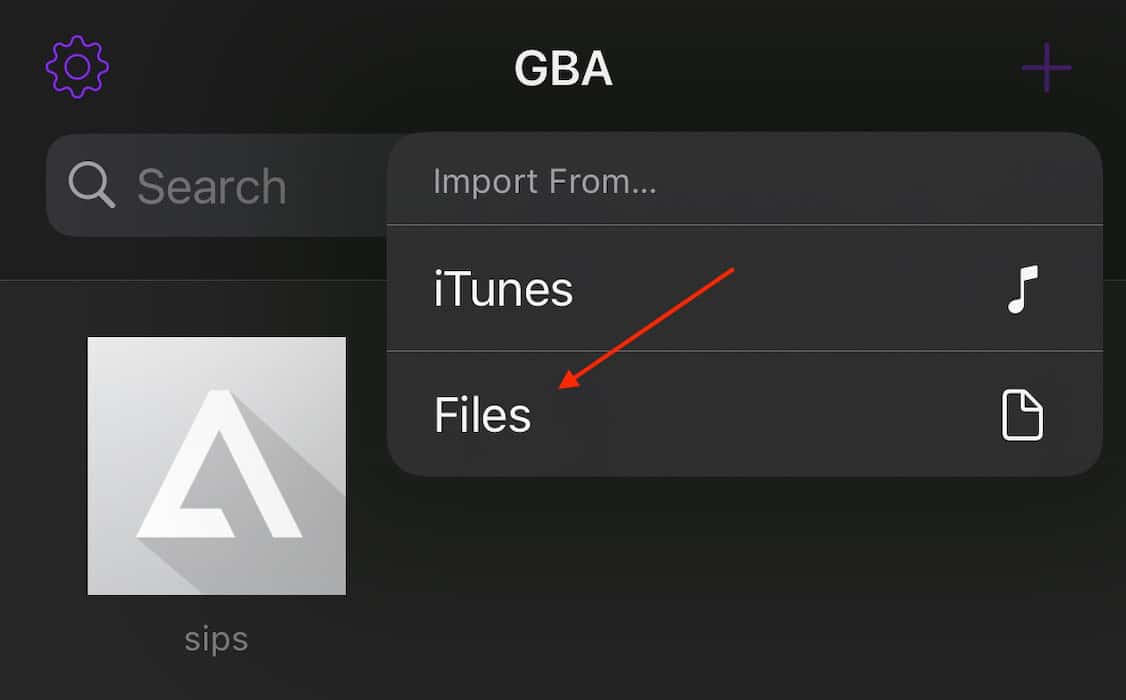
- Now, navigate back to the Delta app. Tap the plus button (+) in the top-right corner.
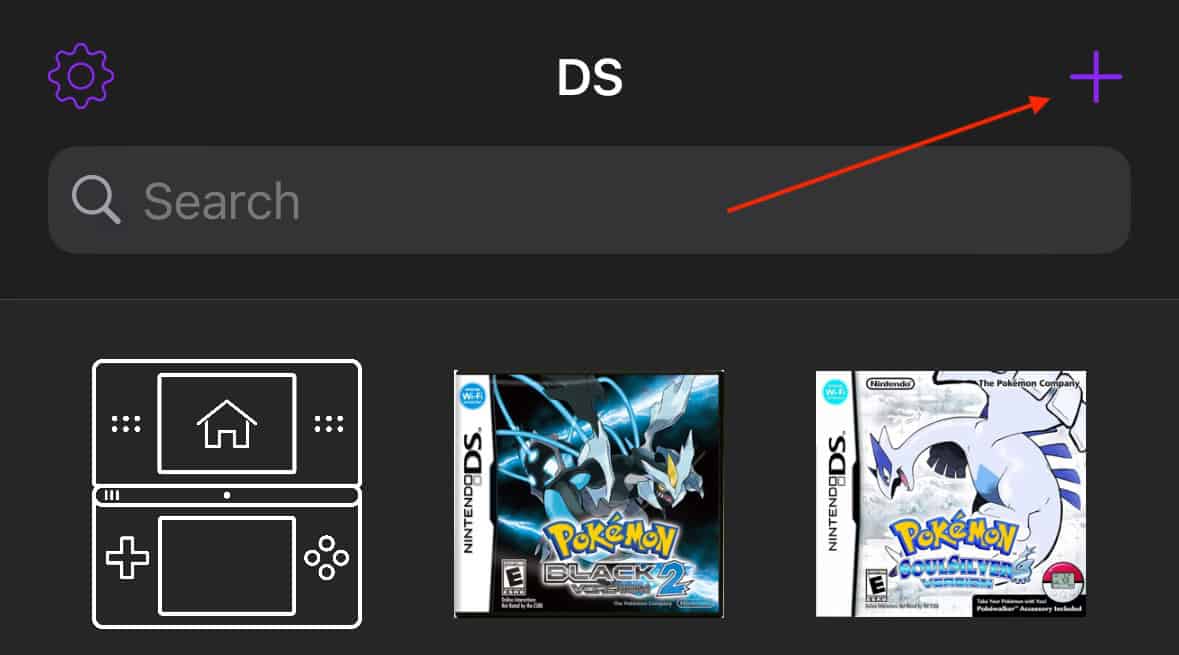
- Choose Files.
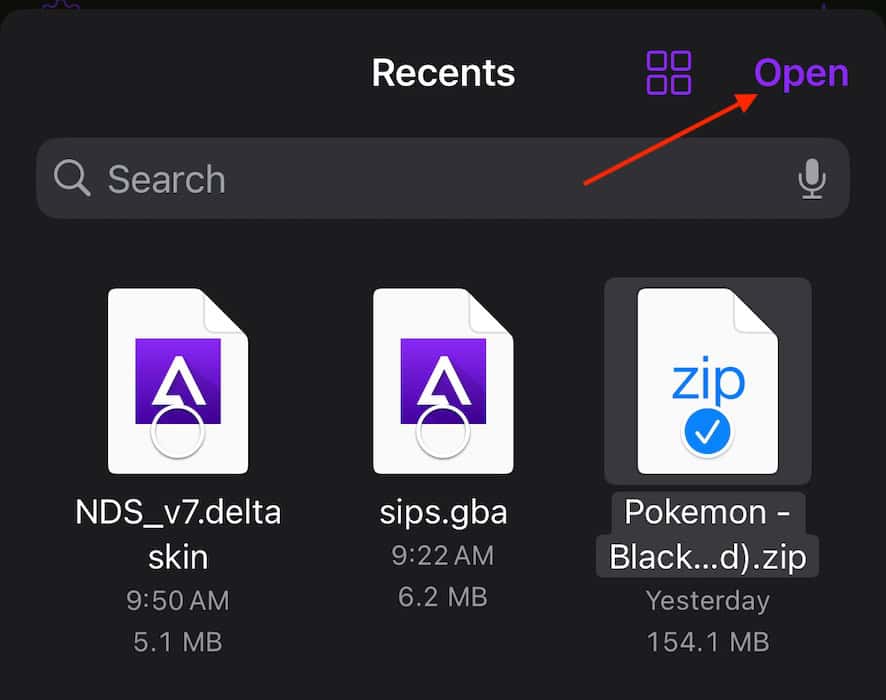
- Tap the name of the ROM you want to import (you can select multiple files) and select Open.


This method can be spotty depending on the browser you use, so make sure the ROM file makes its way to your Files app.
2. Adding ROMs Using iTunes
This method may be easier for those who have a hard time downloading ROMs directly on their iPhone, although you’ll have to use a Mac or PC. Let’s take a look.
- First, download the ROM.
- Next open iTunes.
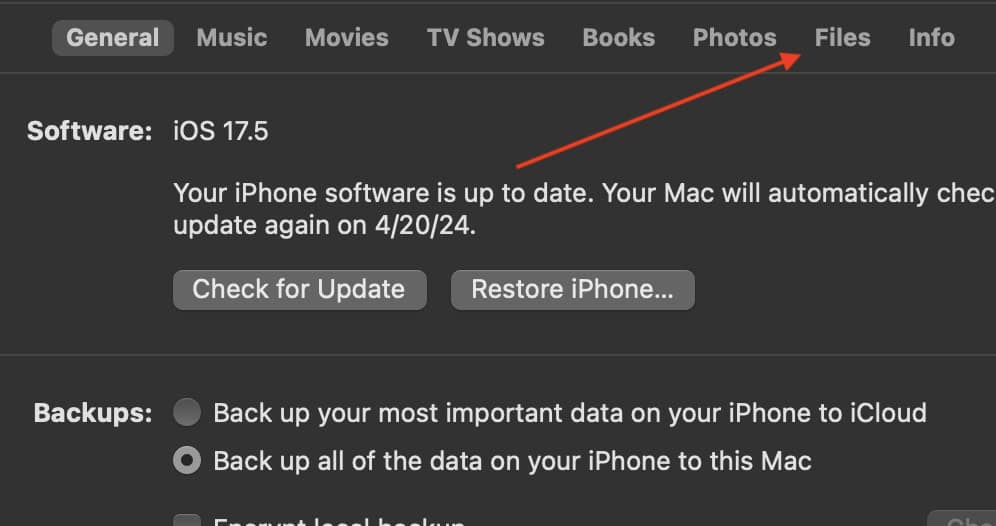
- Navigate to the iPhone icon.
- Select File Sharing from the left-hand column.
- Click the Delta app and then Drag and Drop the ROMs you want into this section.
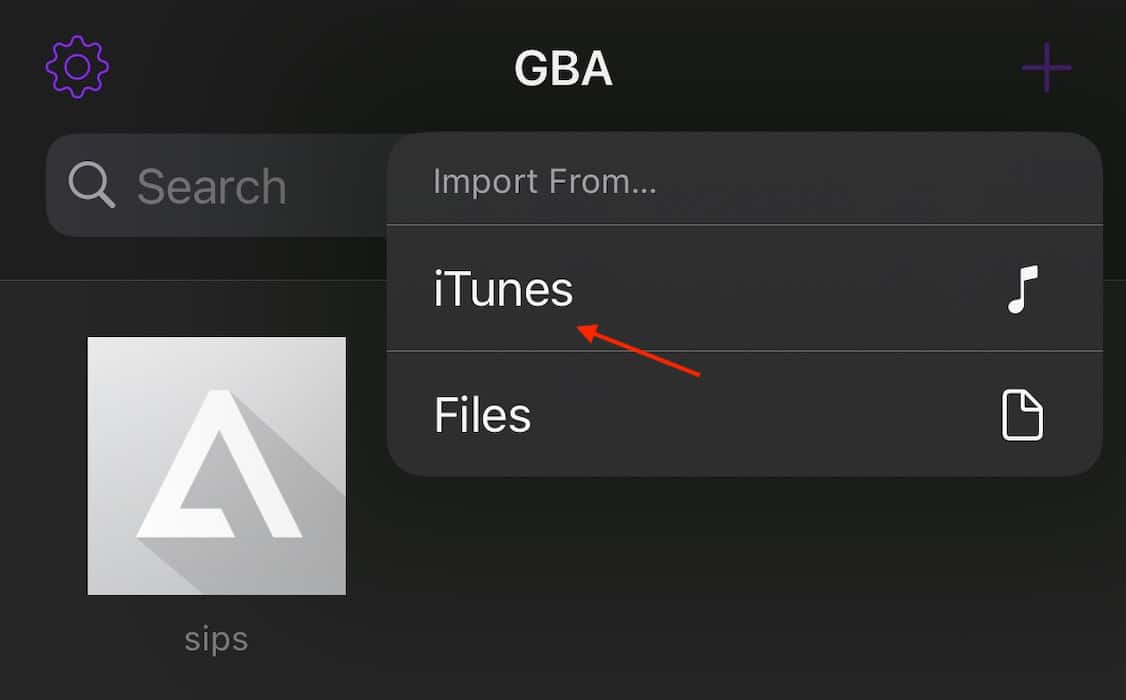
- Now, go to the Delta app on your iPhone and select the Plus button (+) in the top-right corner.
- Select iTunes and answer the prompt that appears on-screen.
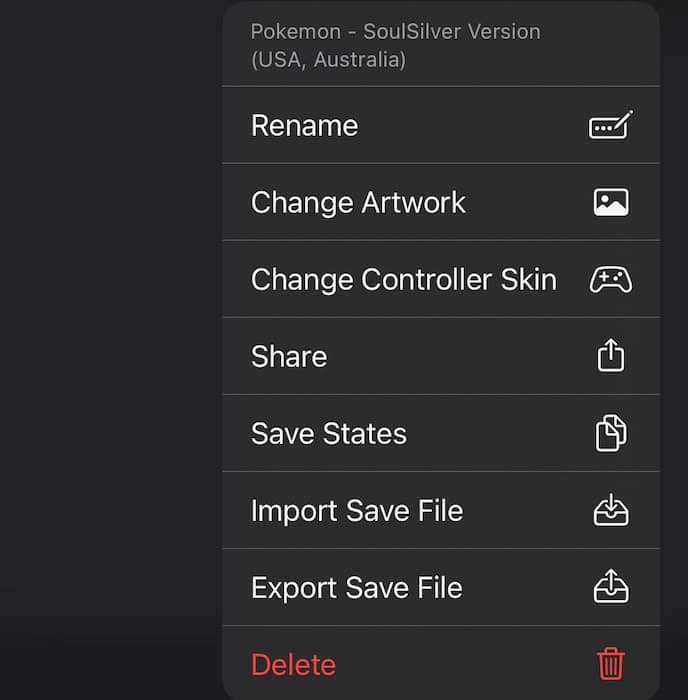
- Long-pressing on a game will bring up options, including changing the cover art. Delta allows you to copy an image from the web and paste the art.


3. Adding ROMs Using Finder
If your Mac is running macOS Catalina or later, you’ll need to use Finder.
- Connect your iPhone to your Mac, then select your iPhone from a Finder window.
- From the main screen, select Files.
- Drag and drop the files directly into the Delta app.
- Go to the Delta app and select the Plus button. Add the files via iTunes.


As you can probably tell, it’s pretty easy to add ROMs to the Delta app once you have the files in the correct location. The hardest part is probably getting them there.
How to Add Emulator Skins
One of the cooler features of Delta is it lets you change emulator skins. This is really easy to do, plus you can find tons of skins on sites like Delta GitHub. Adding skins is similar to adding ROMs, so again, ensure the skins are in your Files folder.
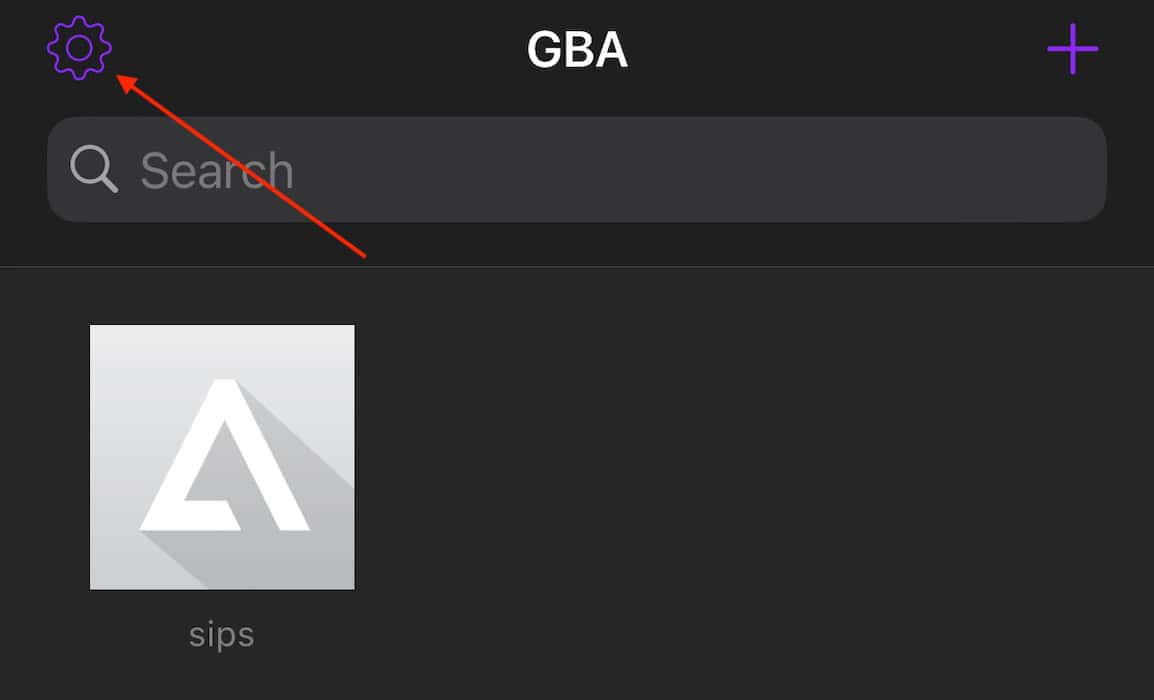
- After downloading the skin of your choice, navigate to the Delta app and click the gear icon.
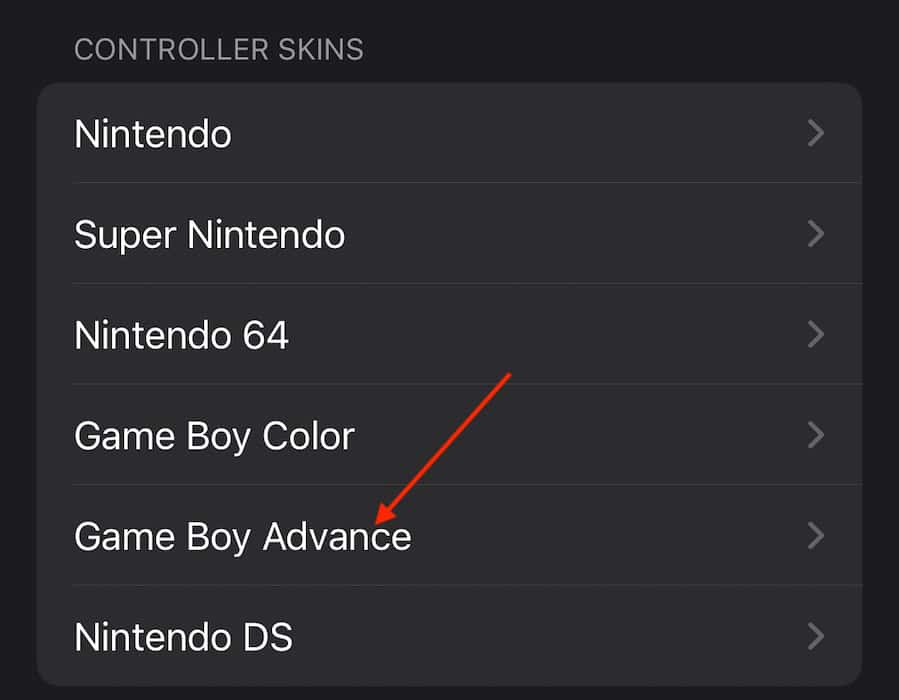
- Click the emulator that corresponds with the chosen skin.
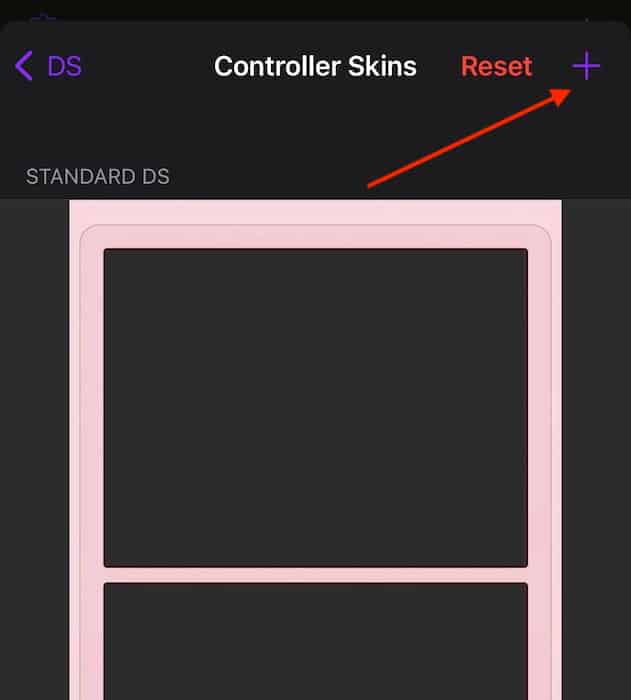
- Click the skin, then click the plus button (+) on the next screen.
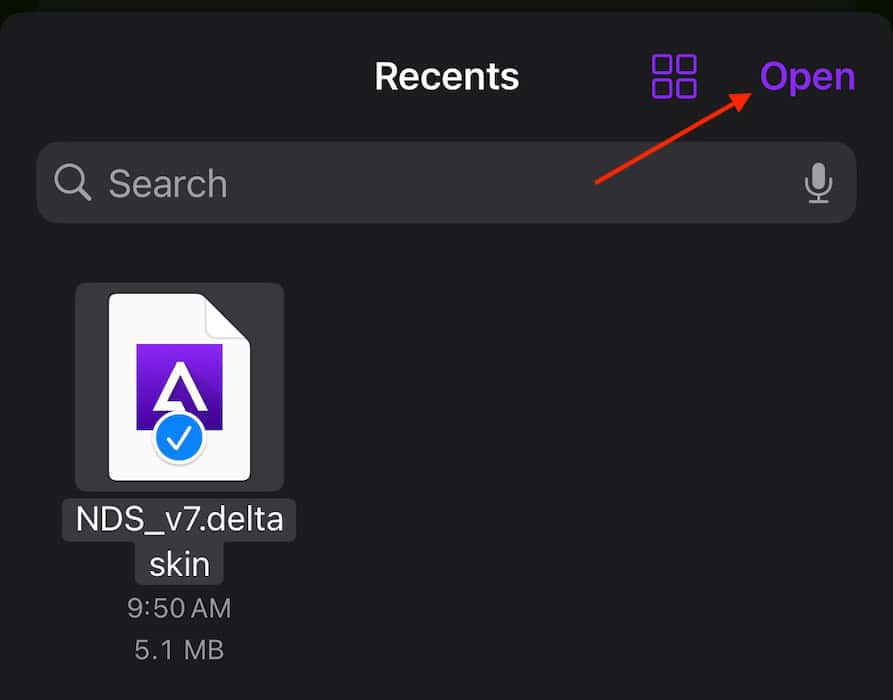
- Choose your preferred skin from the list (you can select multiple options) and tap Open.
- You can now select the imported skin/s on Delta.


How to Remap Controllers in Delta
If you need to remap a controller, simply follow these steps:
- Open Settings in the Delta app.
- Straight from the top, select the Player to which you’re assigning a controller.

- Select NES to open the drop-down menu and choose the controller you want to edit.
- Now, tap the button you want to change and press a button on the physical controller to remap it.

Controllers Supported By Delta App
The Delta app will support any third-party controller that works with iOS. However, here are some popular examples:
- Nintendo Switch Online Controller
- Nintendo Switch Joy-Cons
- Nintendo Switch Pro Controller
- Xbox Wireless Controller (Series X and S)
- Xbox Adapter Controller
- Xbox Elite Wireless Controller Series 2
- Xbox Wireless Controller with Bluetooth Model 1708
- Playstation 4 and 5 Wireless Controllers
Adding a controller is usually as simple as navigating to Settings > Bluetooth on your iPhone, checking if the controller is discoverable, and then selecting it from the Other Devices list.
Additional Controls and Options
Once a game is running, you can open an additional menu that lets you fast-forward through scenes, hold down buttons, and even enable cheats. You’ll see this menu on the main screen while playing. It’s also where you’ll find your options to save and load games. You can save games within emulators, although I suggest using the Delta app’s Save function—it’s more reliable and accurate. Take a look around this section to see what you find.

How to Use Delta Emulator on iPad
You’re in luck if you’ve always wanted to play retro games on a larger screen! Delta’s 1.6 update, released last July, now includes iPad support. The recent patch also eliminates the need to download BIOS files to emulate Nintendo DS games. All you need to do now is add ROMs to your Delta emulator iPad app, and you’re all set.
Setting up Delta on the iPad is pretty easy. Here’s a guide to get you started.
1. Download the Delta Emulator
Delta is available for free on the App Store. If you’re from the European Union (EU), you can sideload Delta from AltStore. You can also download the app directly from its official website. Note that you need to use Safari to add the emulator to your iPad.
2. Add Your Games to Delta
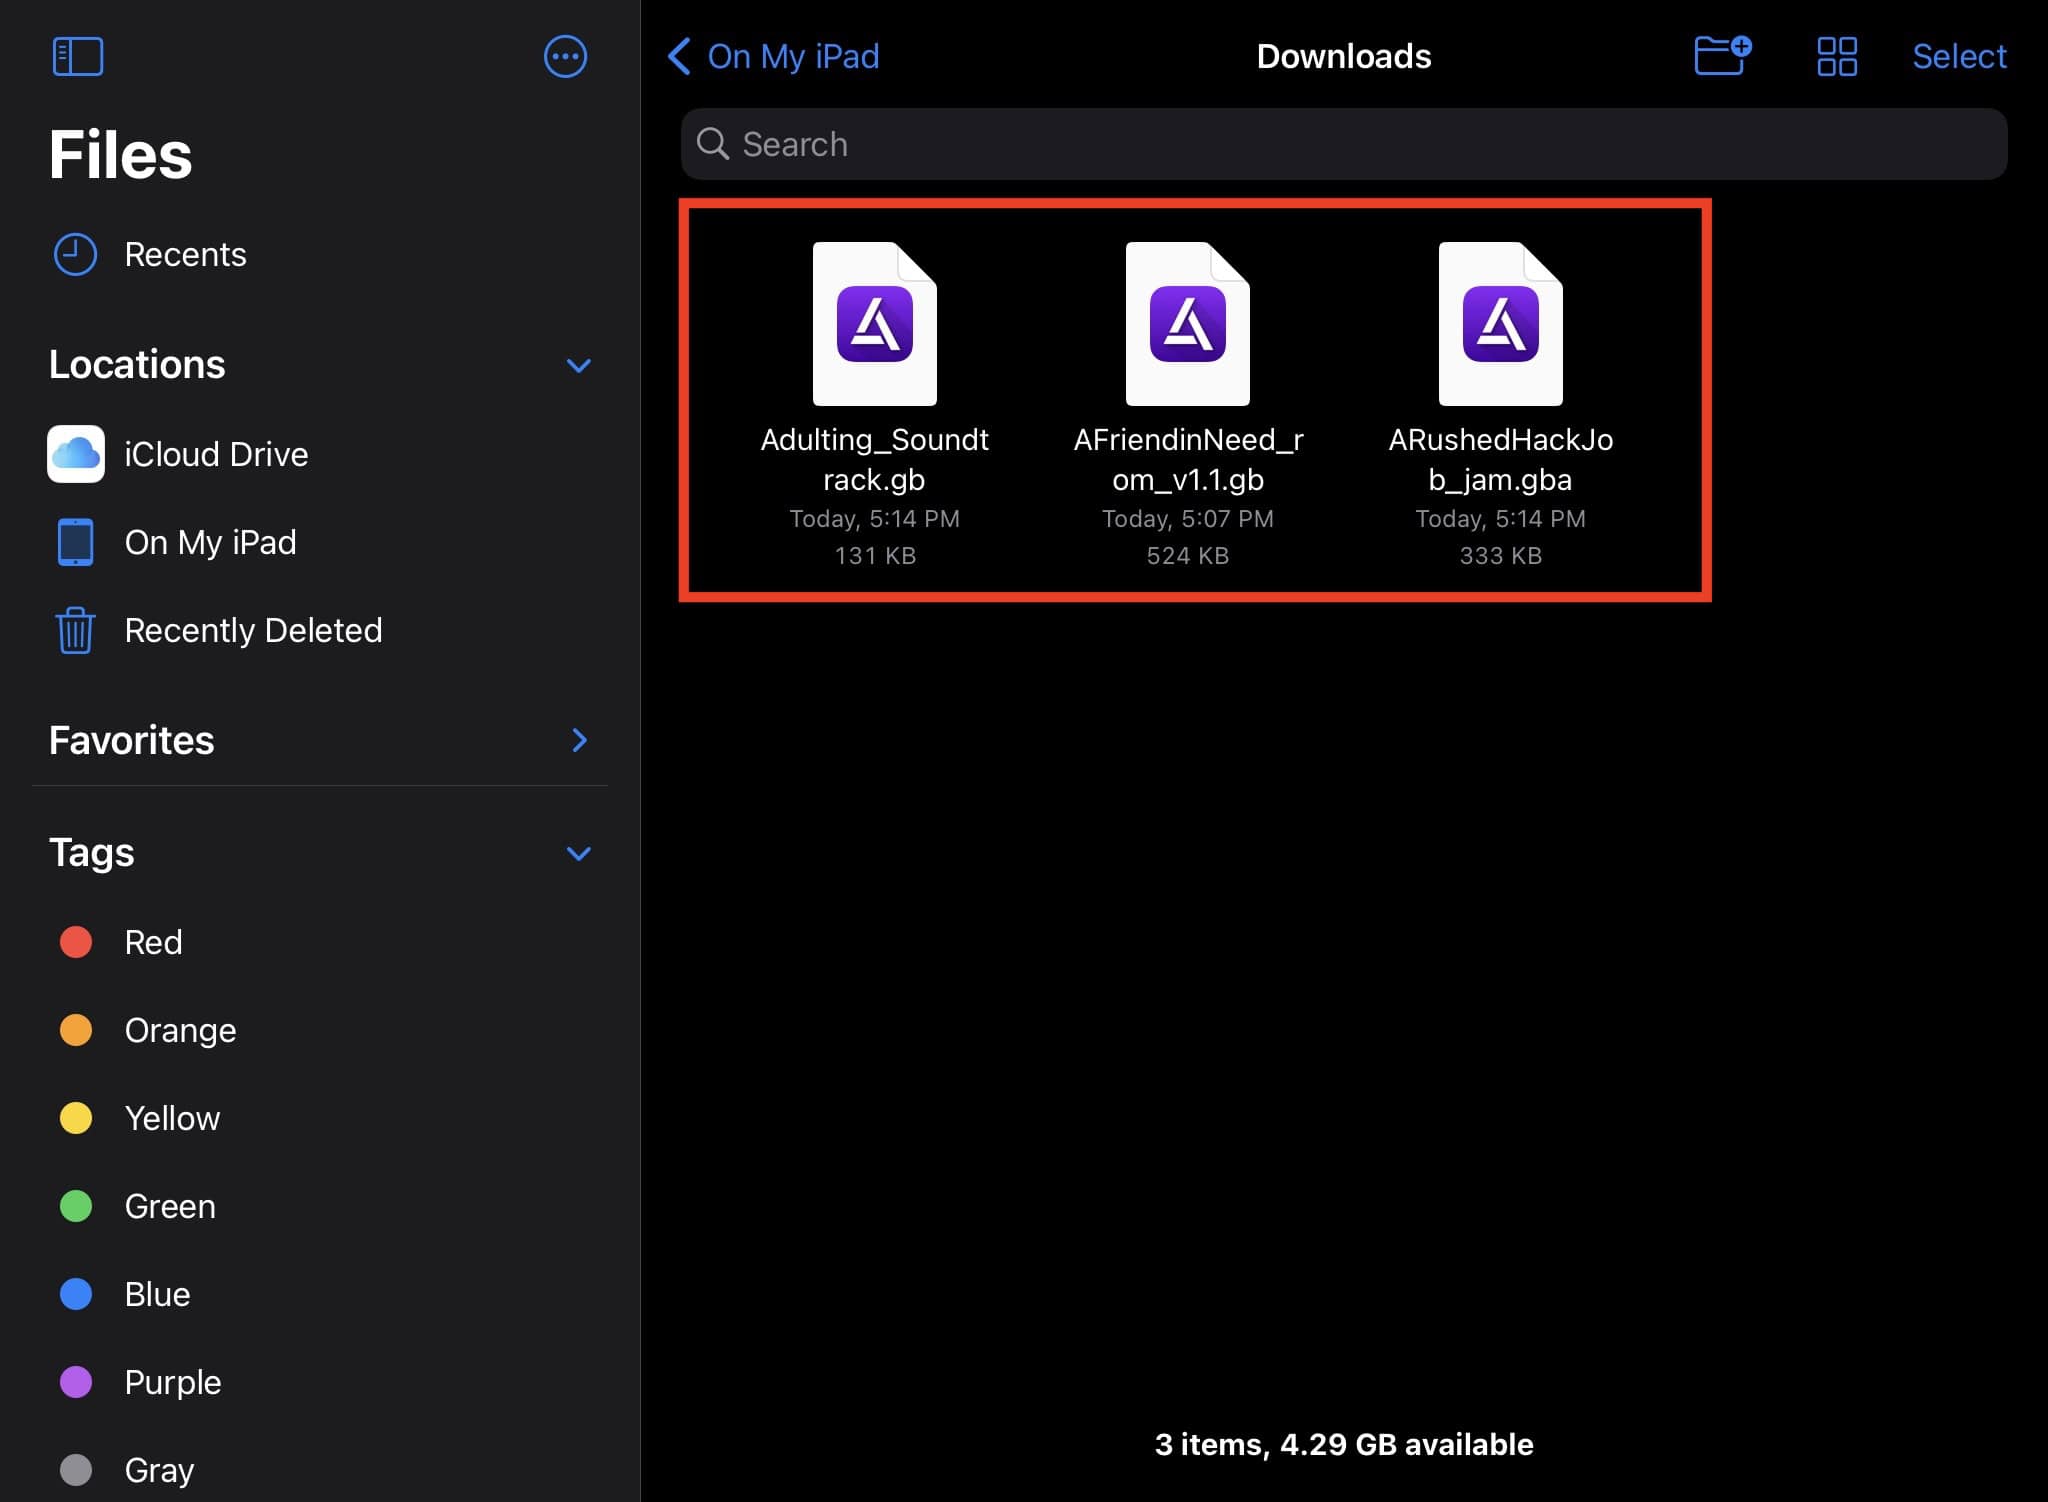
As mentioned above, game ROMs usually come in compressed files or specified file extensions. The good news is that you can download ROMs directly to your iPad. Depending on your preferred browser, your ROMs will usually appear in Files > On My iPad > Downloads or in a specific folder on On My iPad.
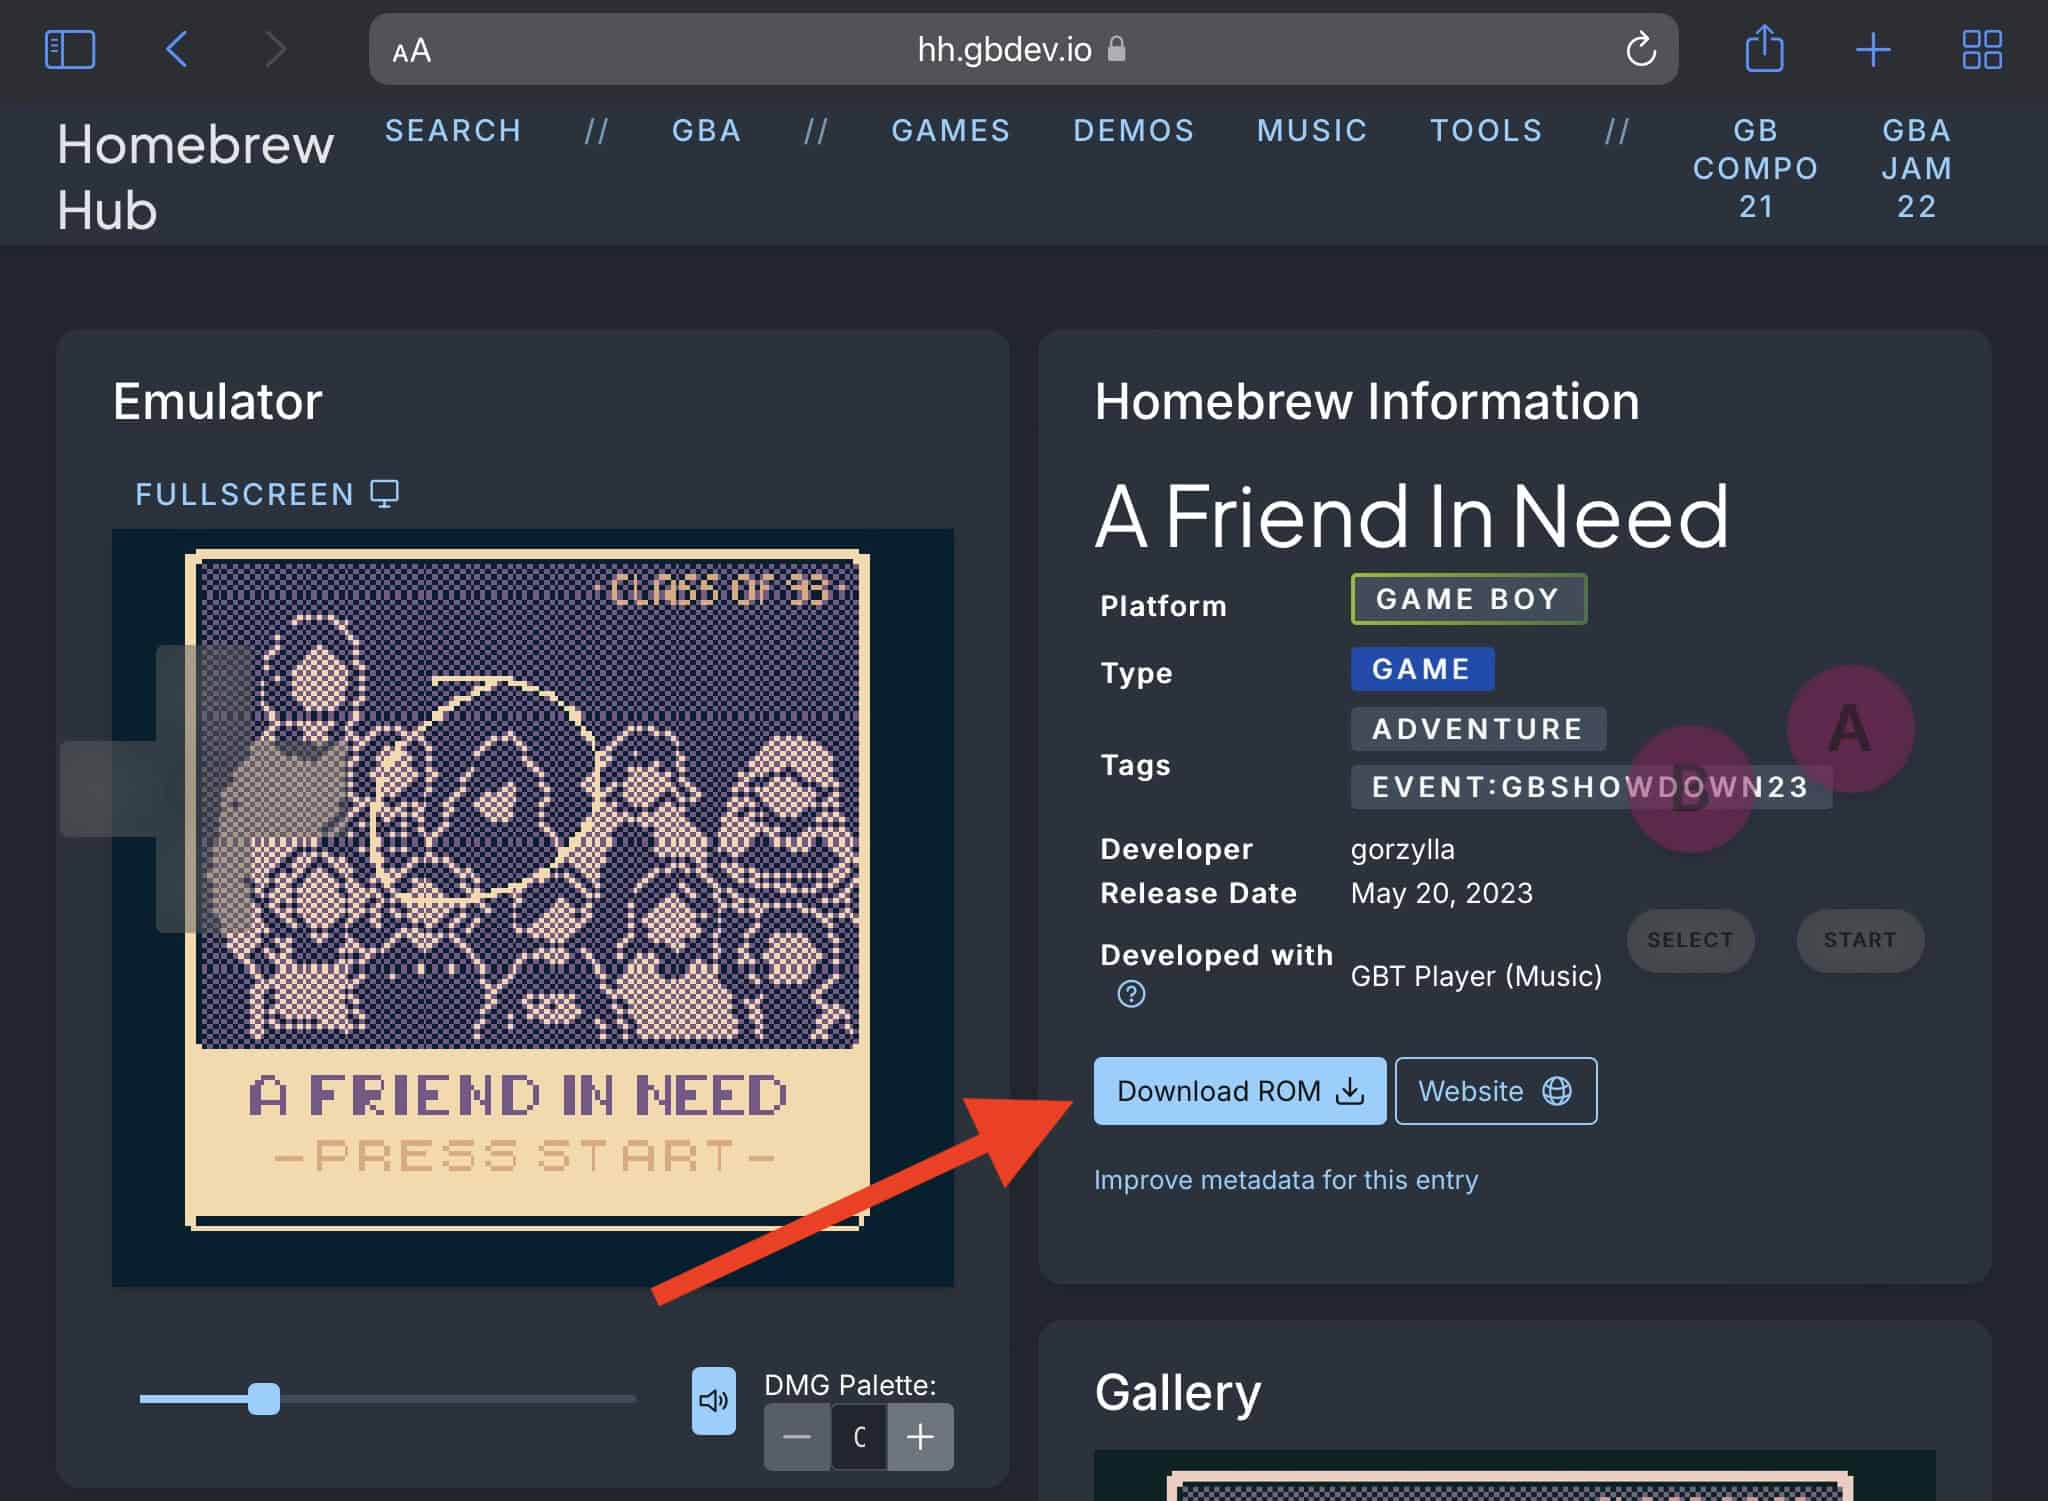
For this how-to guide, I’ve downloaded A Friend in Need from Homebrew Hub using Safari. Here’s how to save ROMs on your iPad:
- Navigate to the Homebrew Hub page for A Friend in Need.
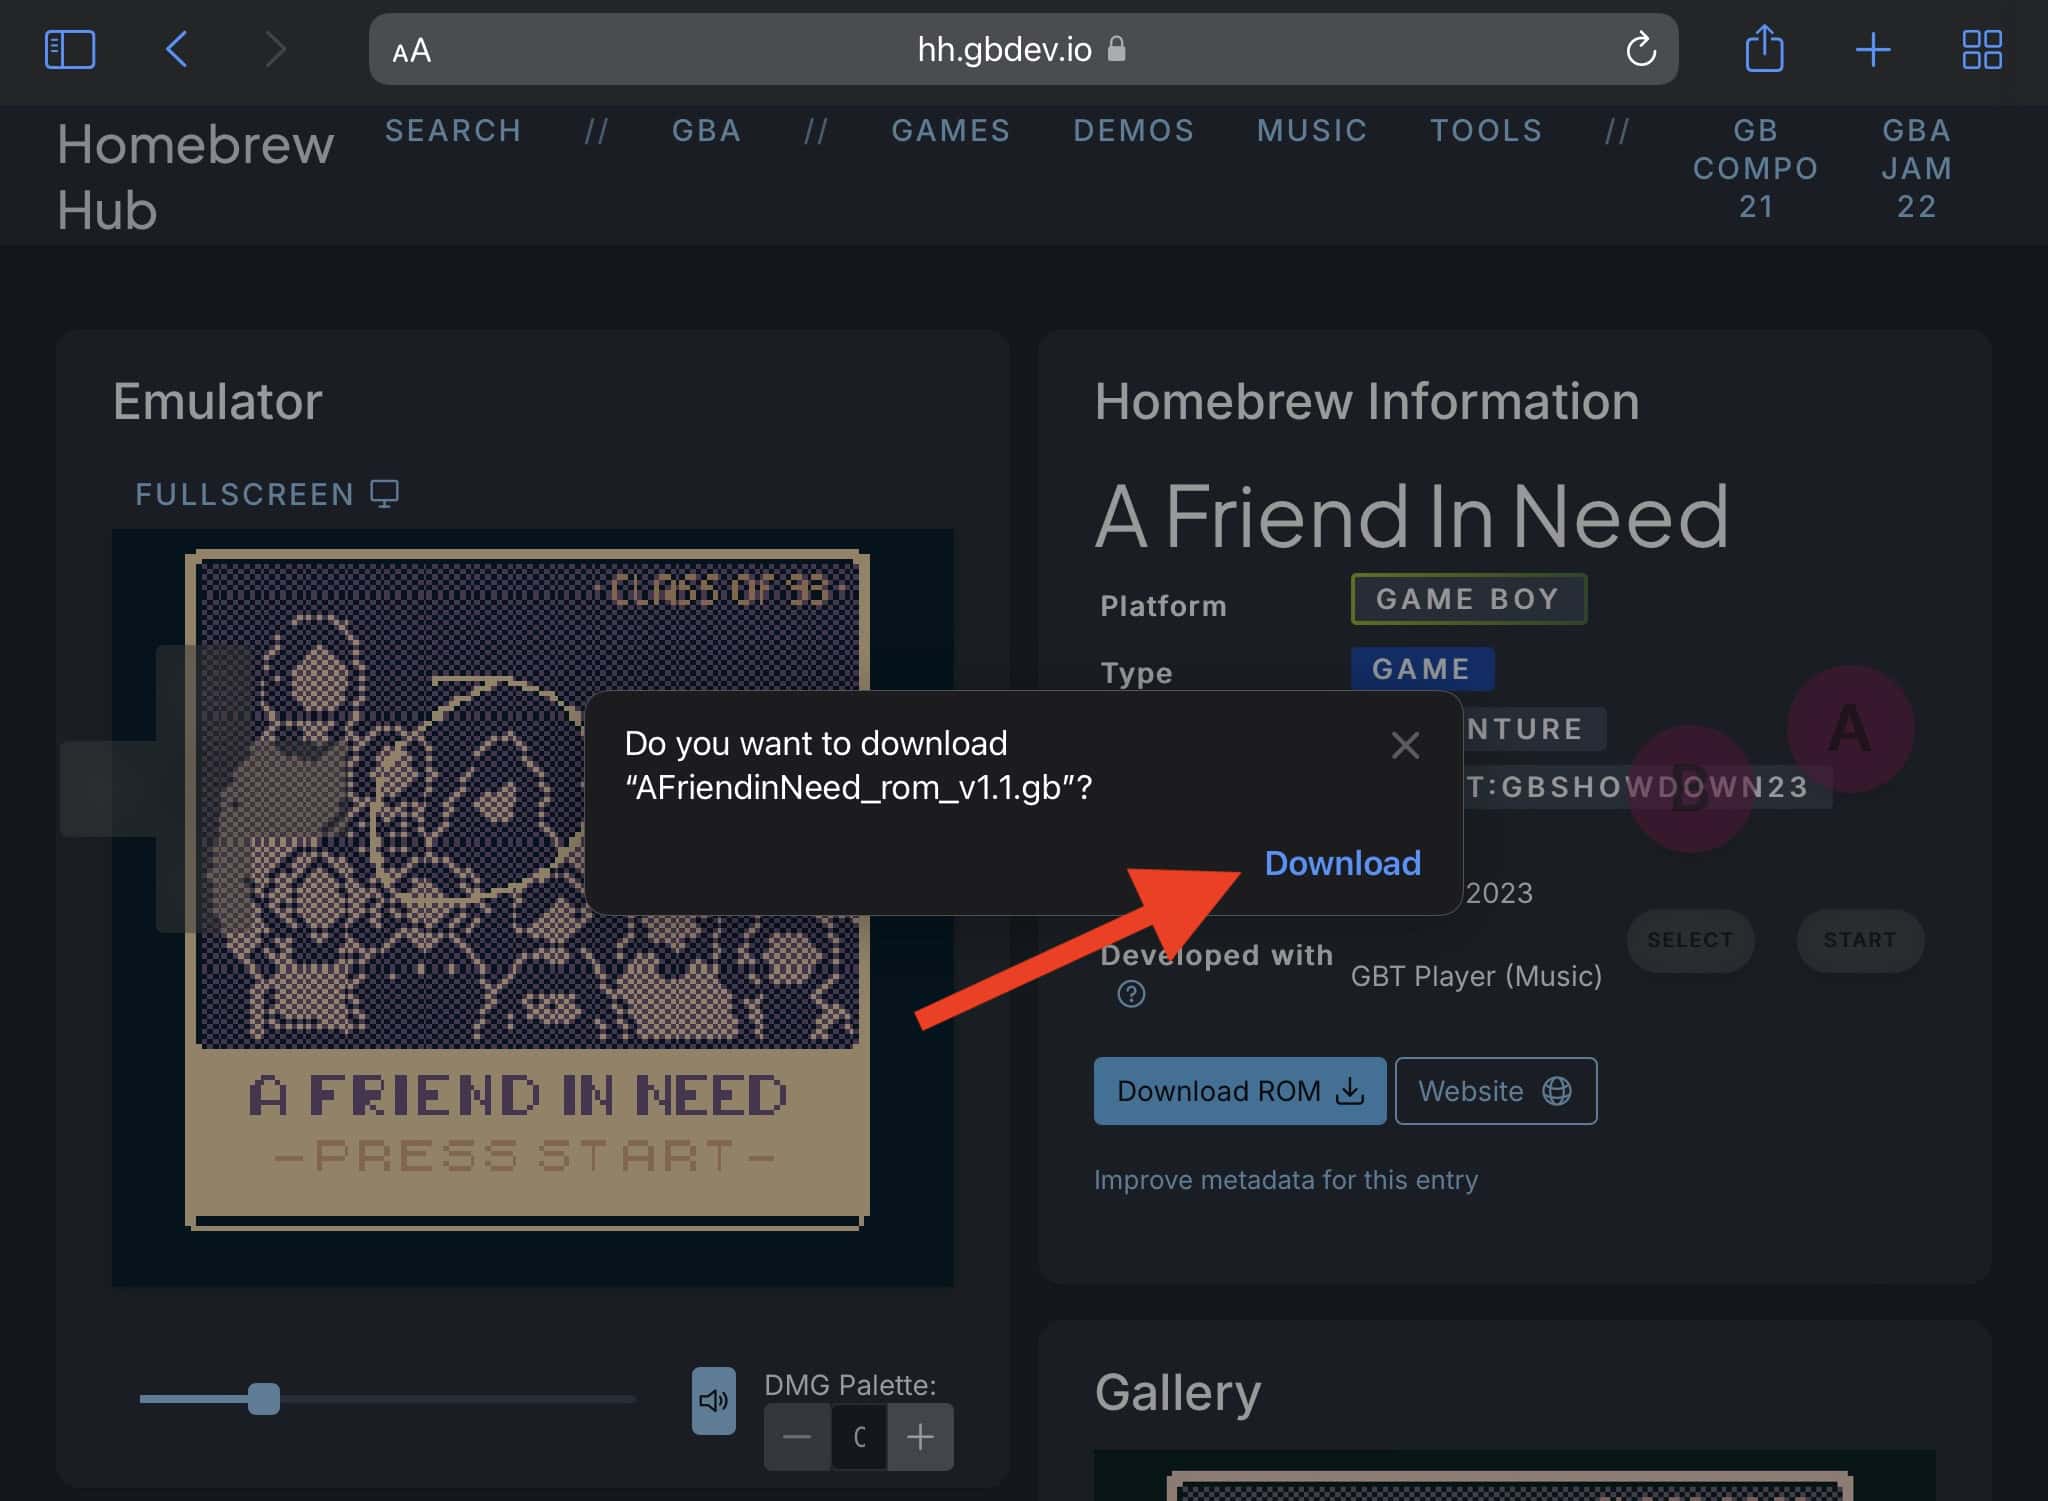
- Tap Download ROM.
- Tap Download.
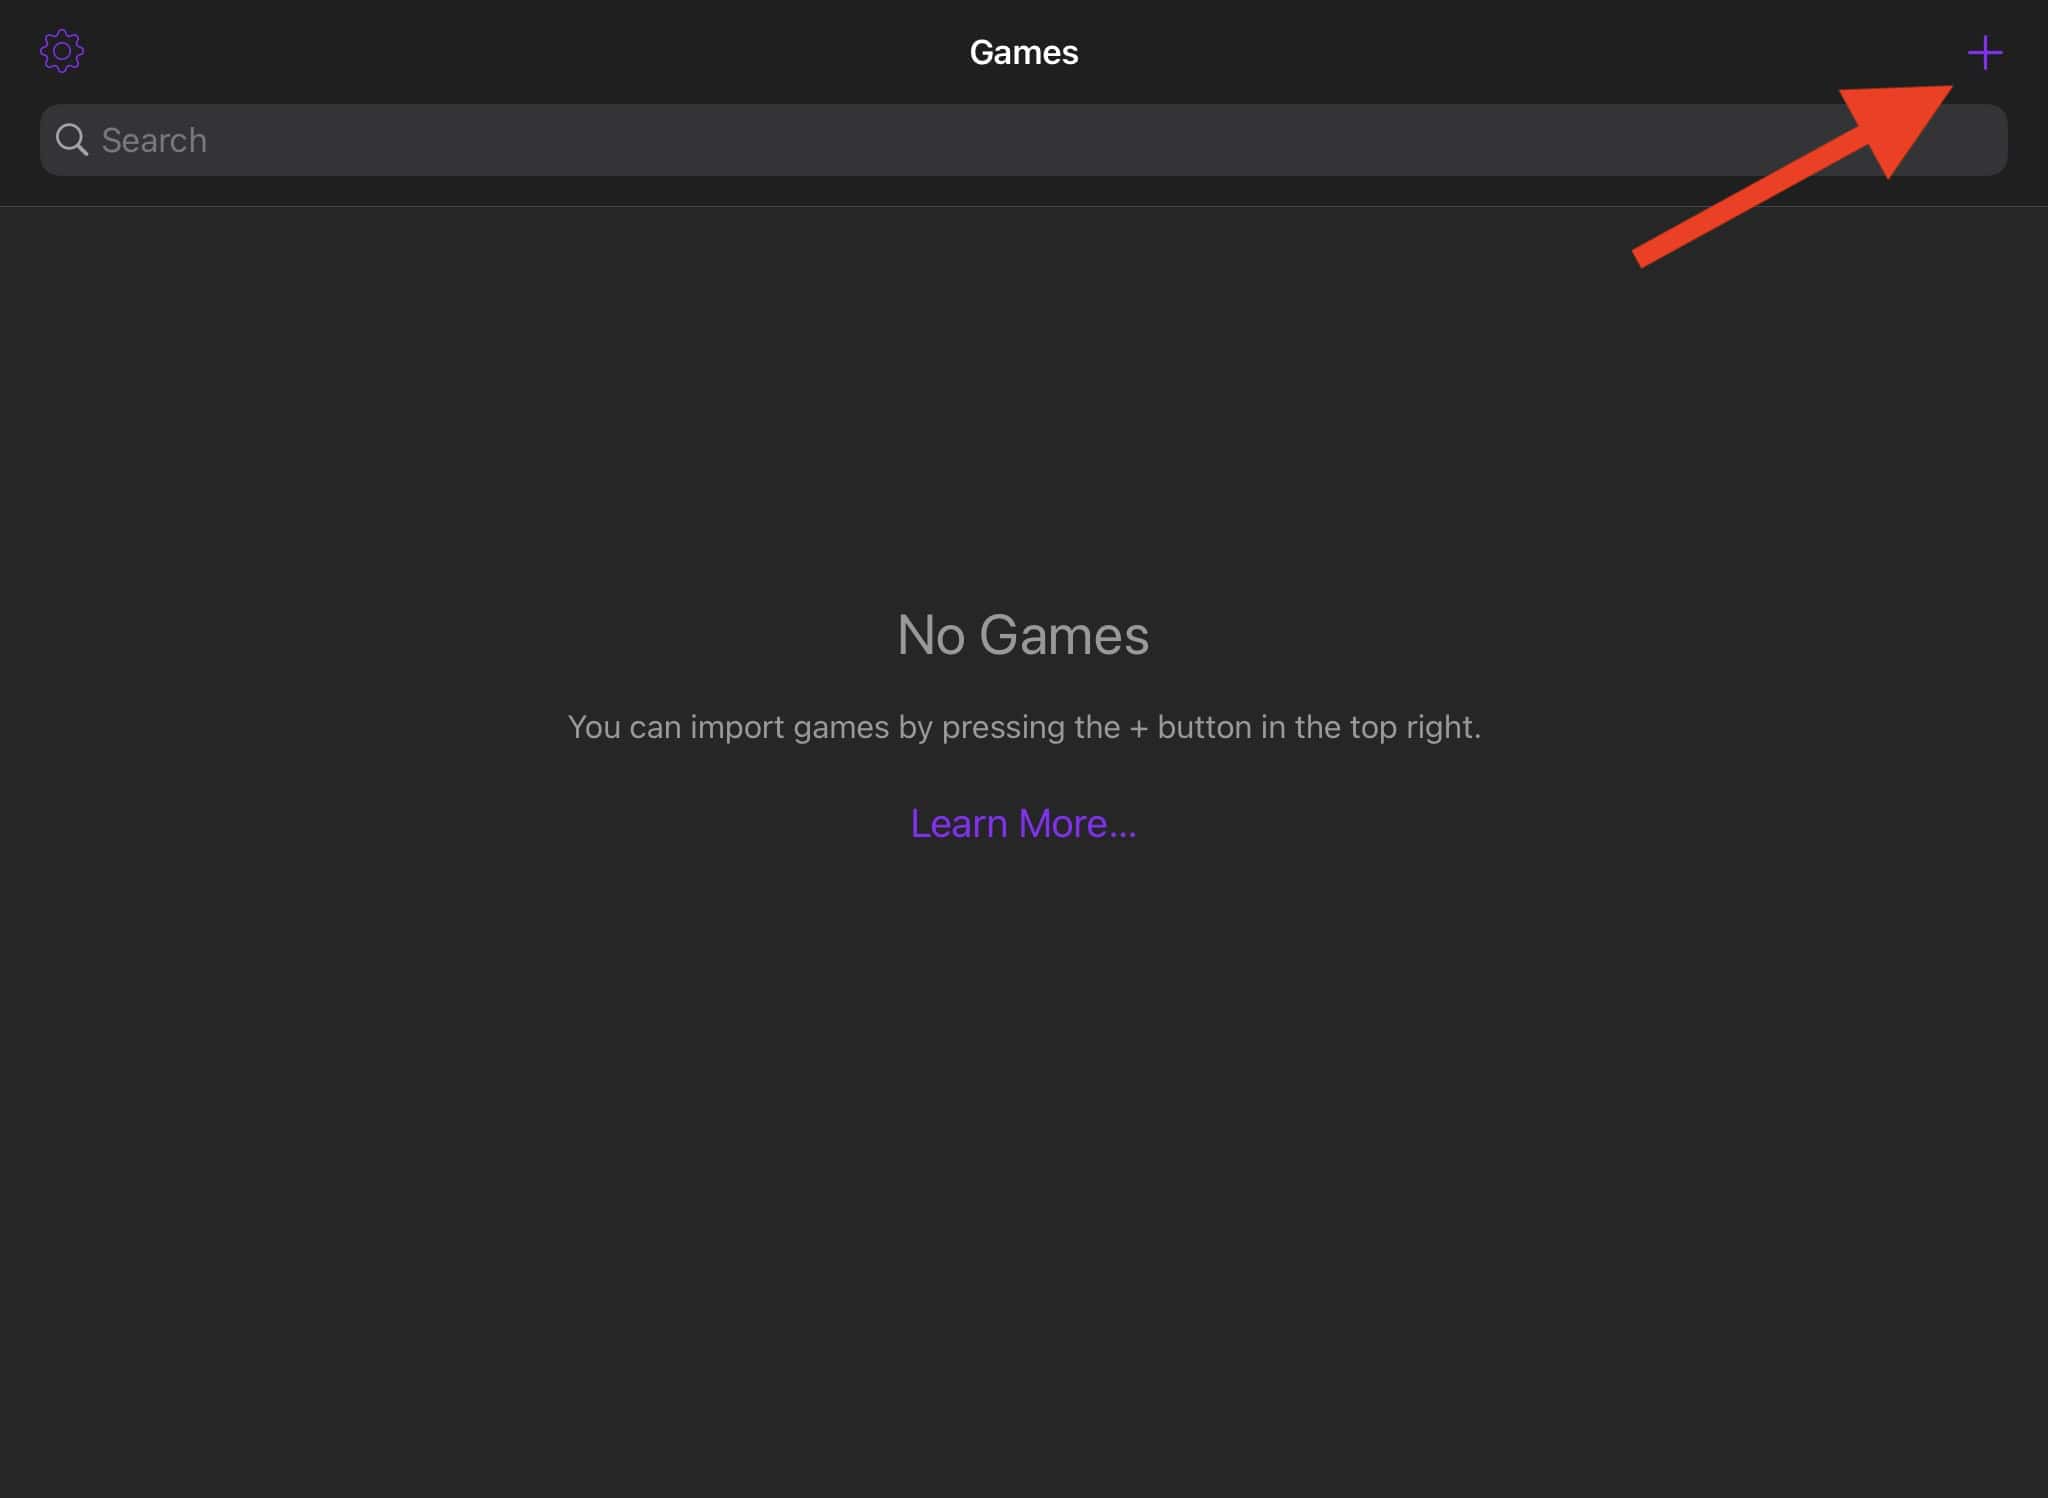
- Open the Delta app on your iPad, then tap on the plus sign button (+) in the top-right corner.
- Select Files.
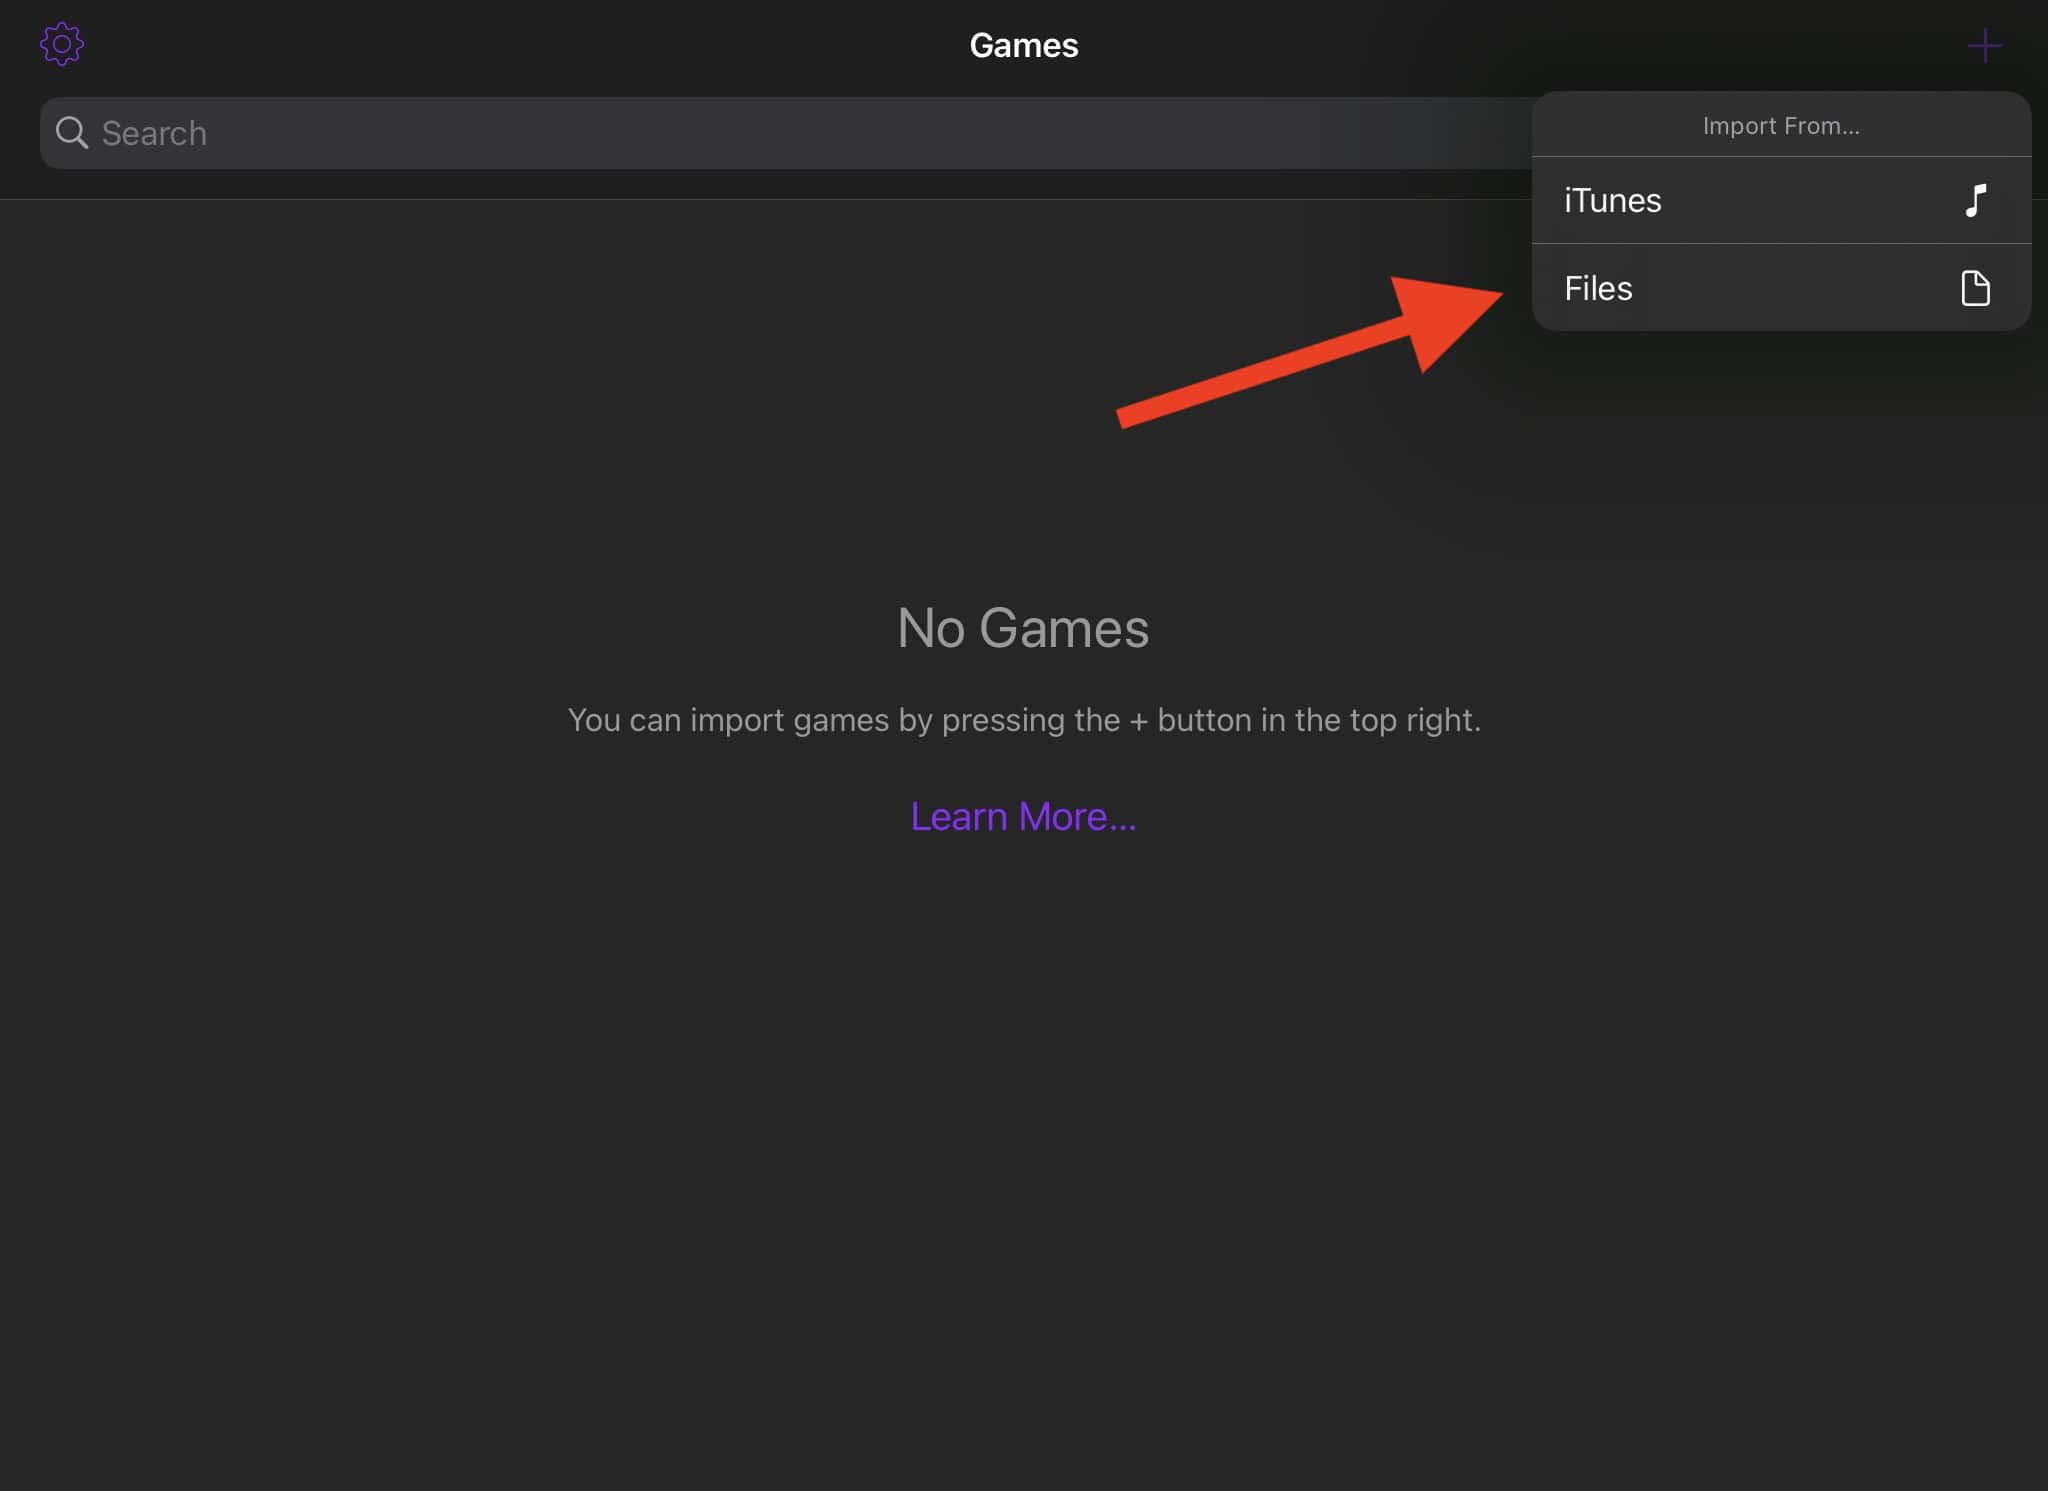
- Tap on the games you’d like to add to Delta. All your ROMs will be automatically added from there.


 NOTE
NOTE
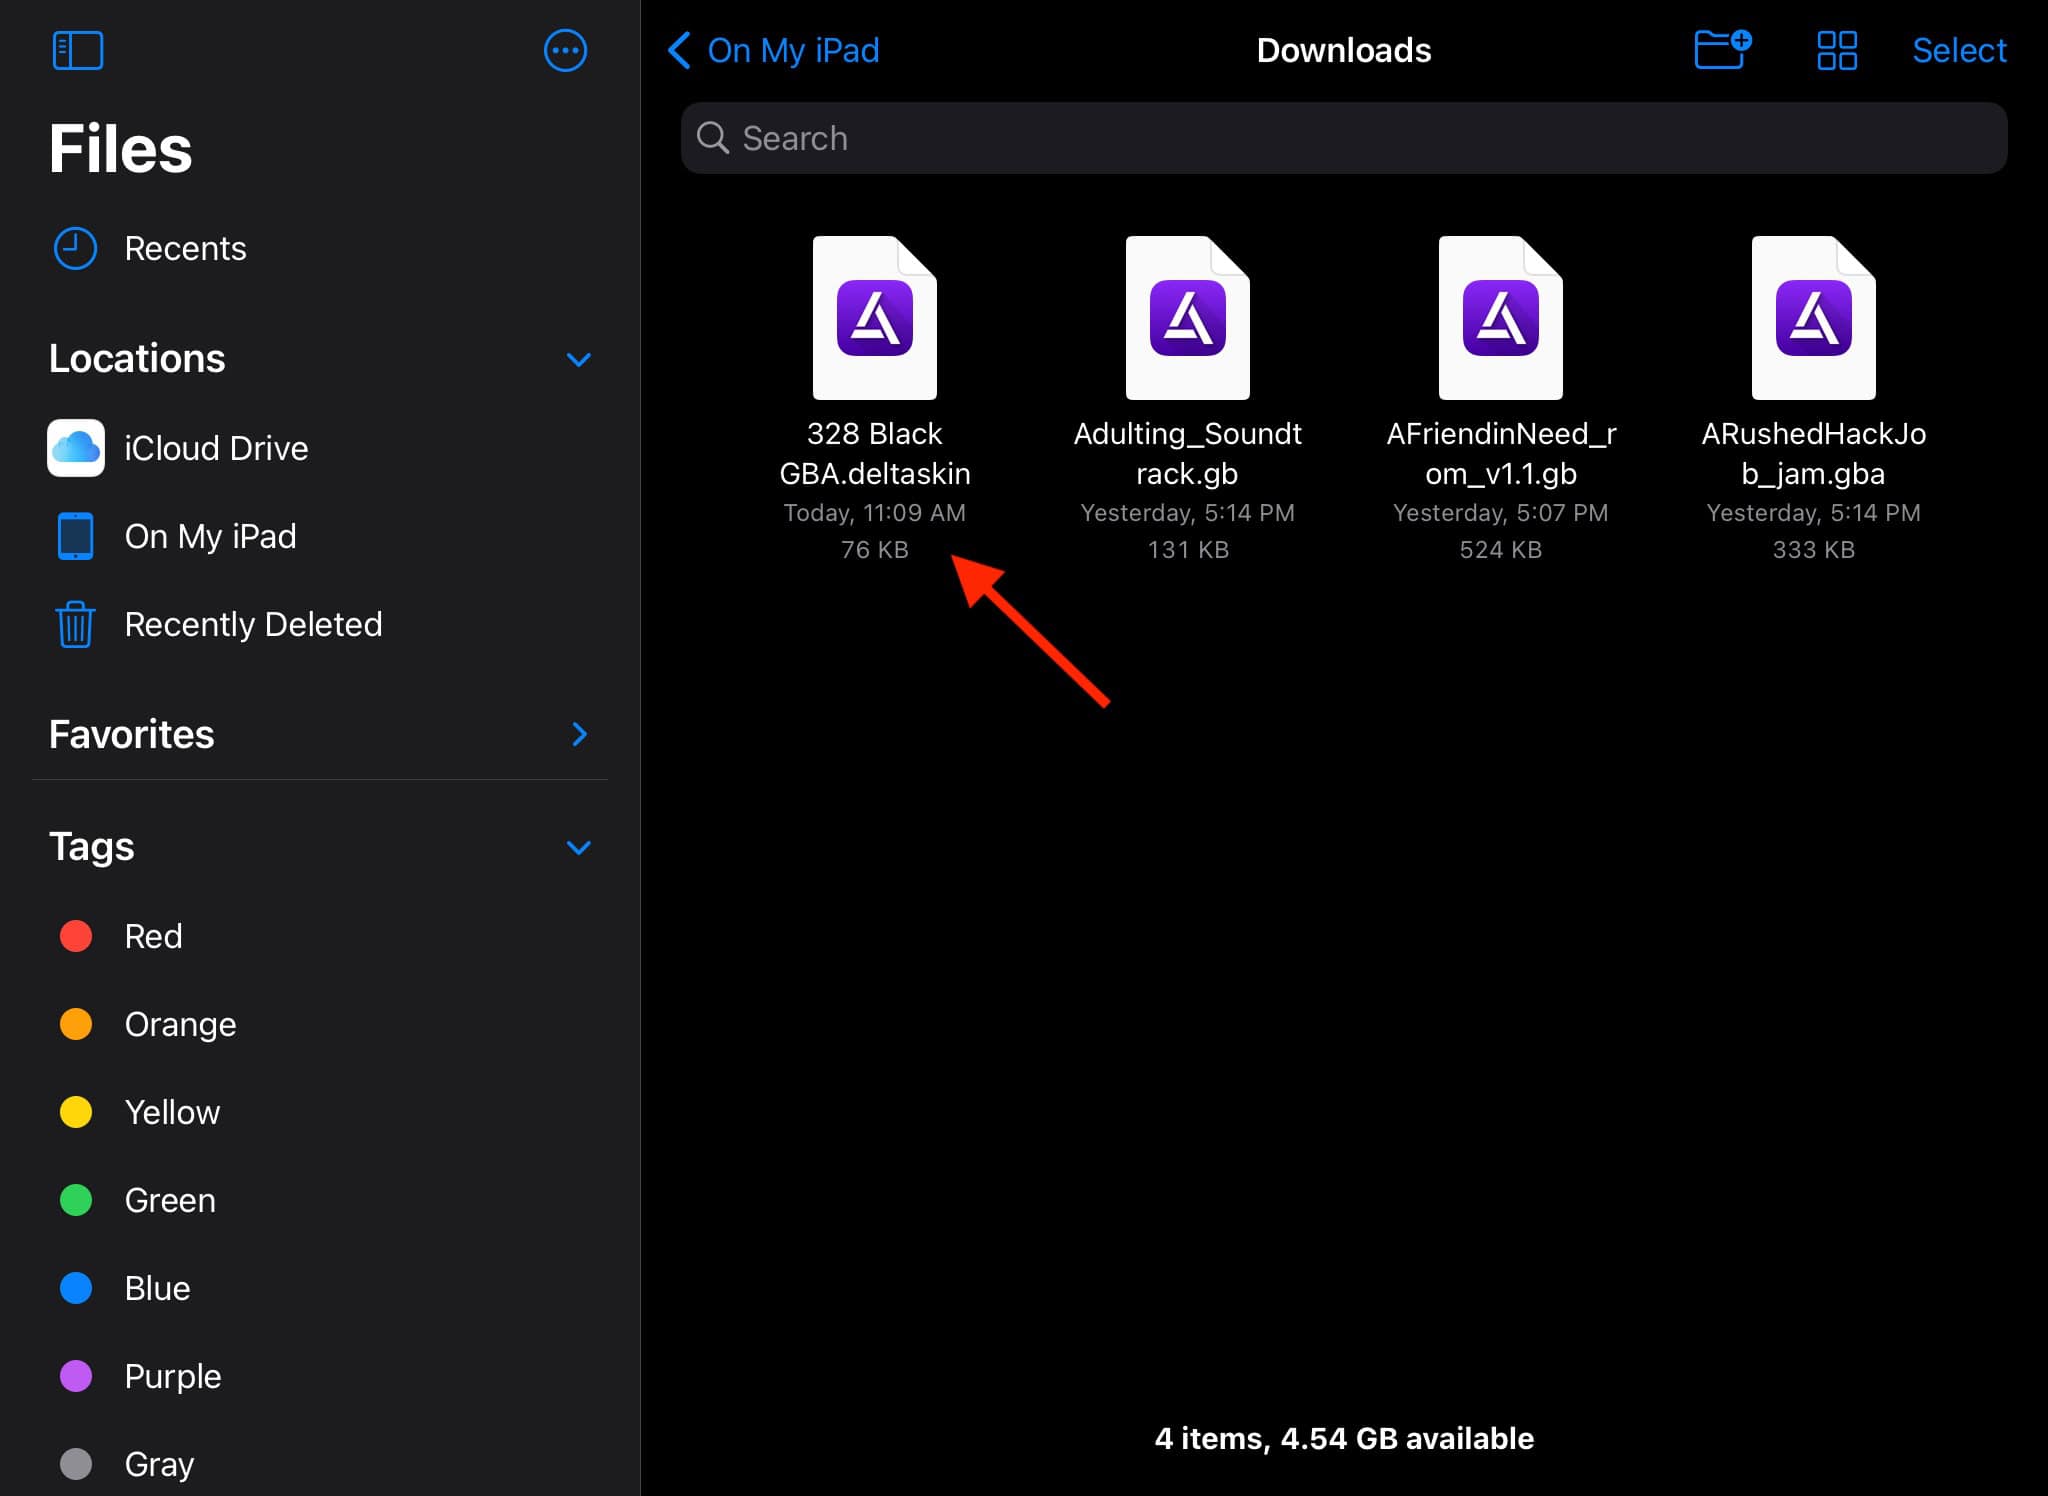
3. Add Emulator Skins to Delta on iPad
Delta’s most recent update optimizes skins for the iPad. What’s more, you can download them directly from your browser. Most skins available on the Delta Skins GitHub are optimized for the iPhone and therefore are only available on Portrait Mode. And while Delta Styles has several emulator skins for the iPad, some will only have Landscape Mode available.
Here’s how you can customize your emulator skin for a more customized experience:
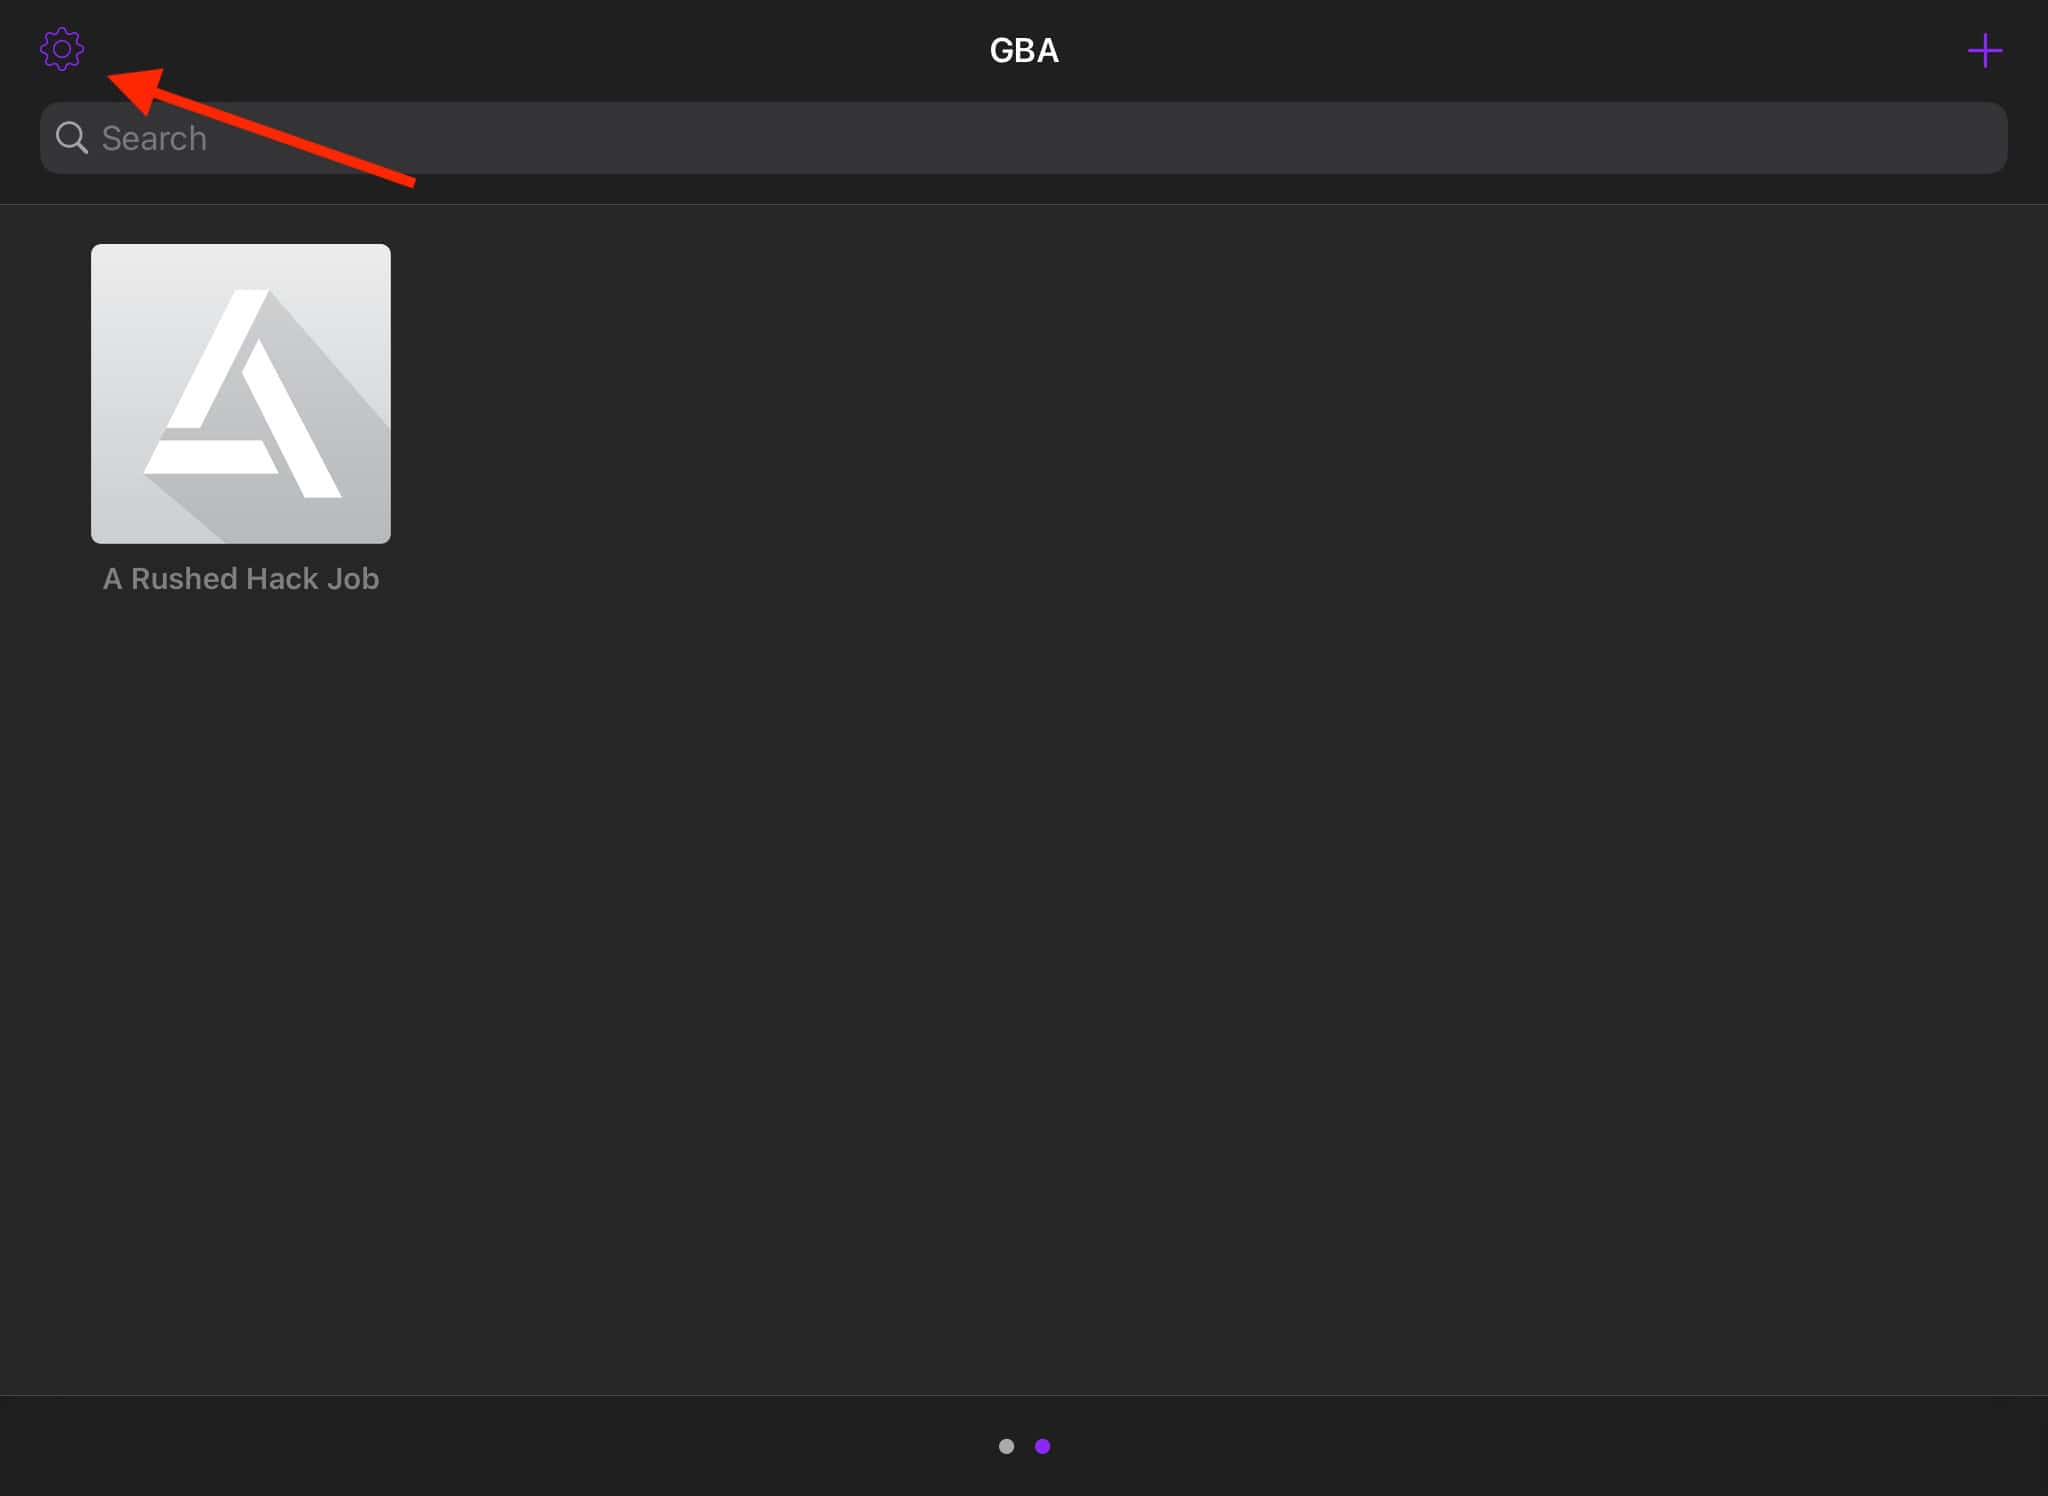
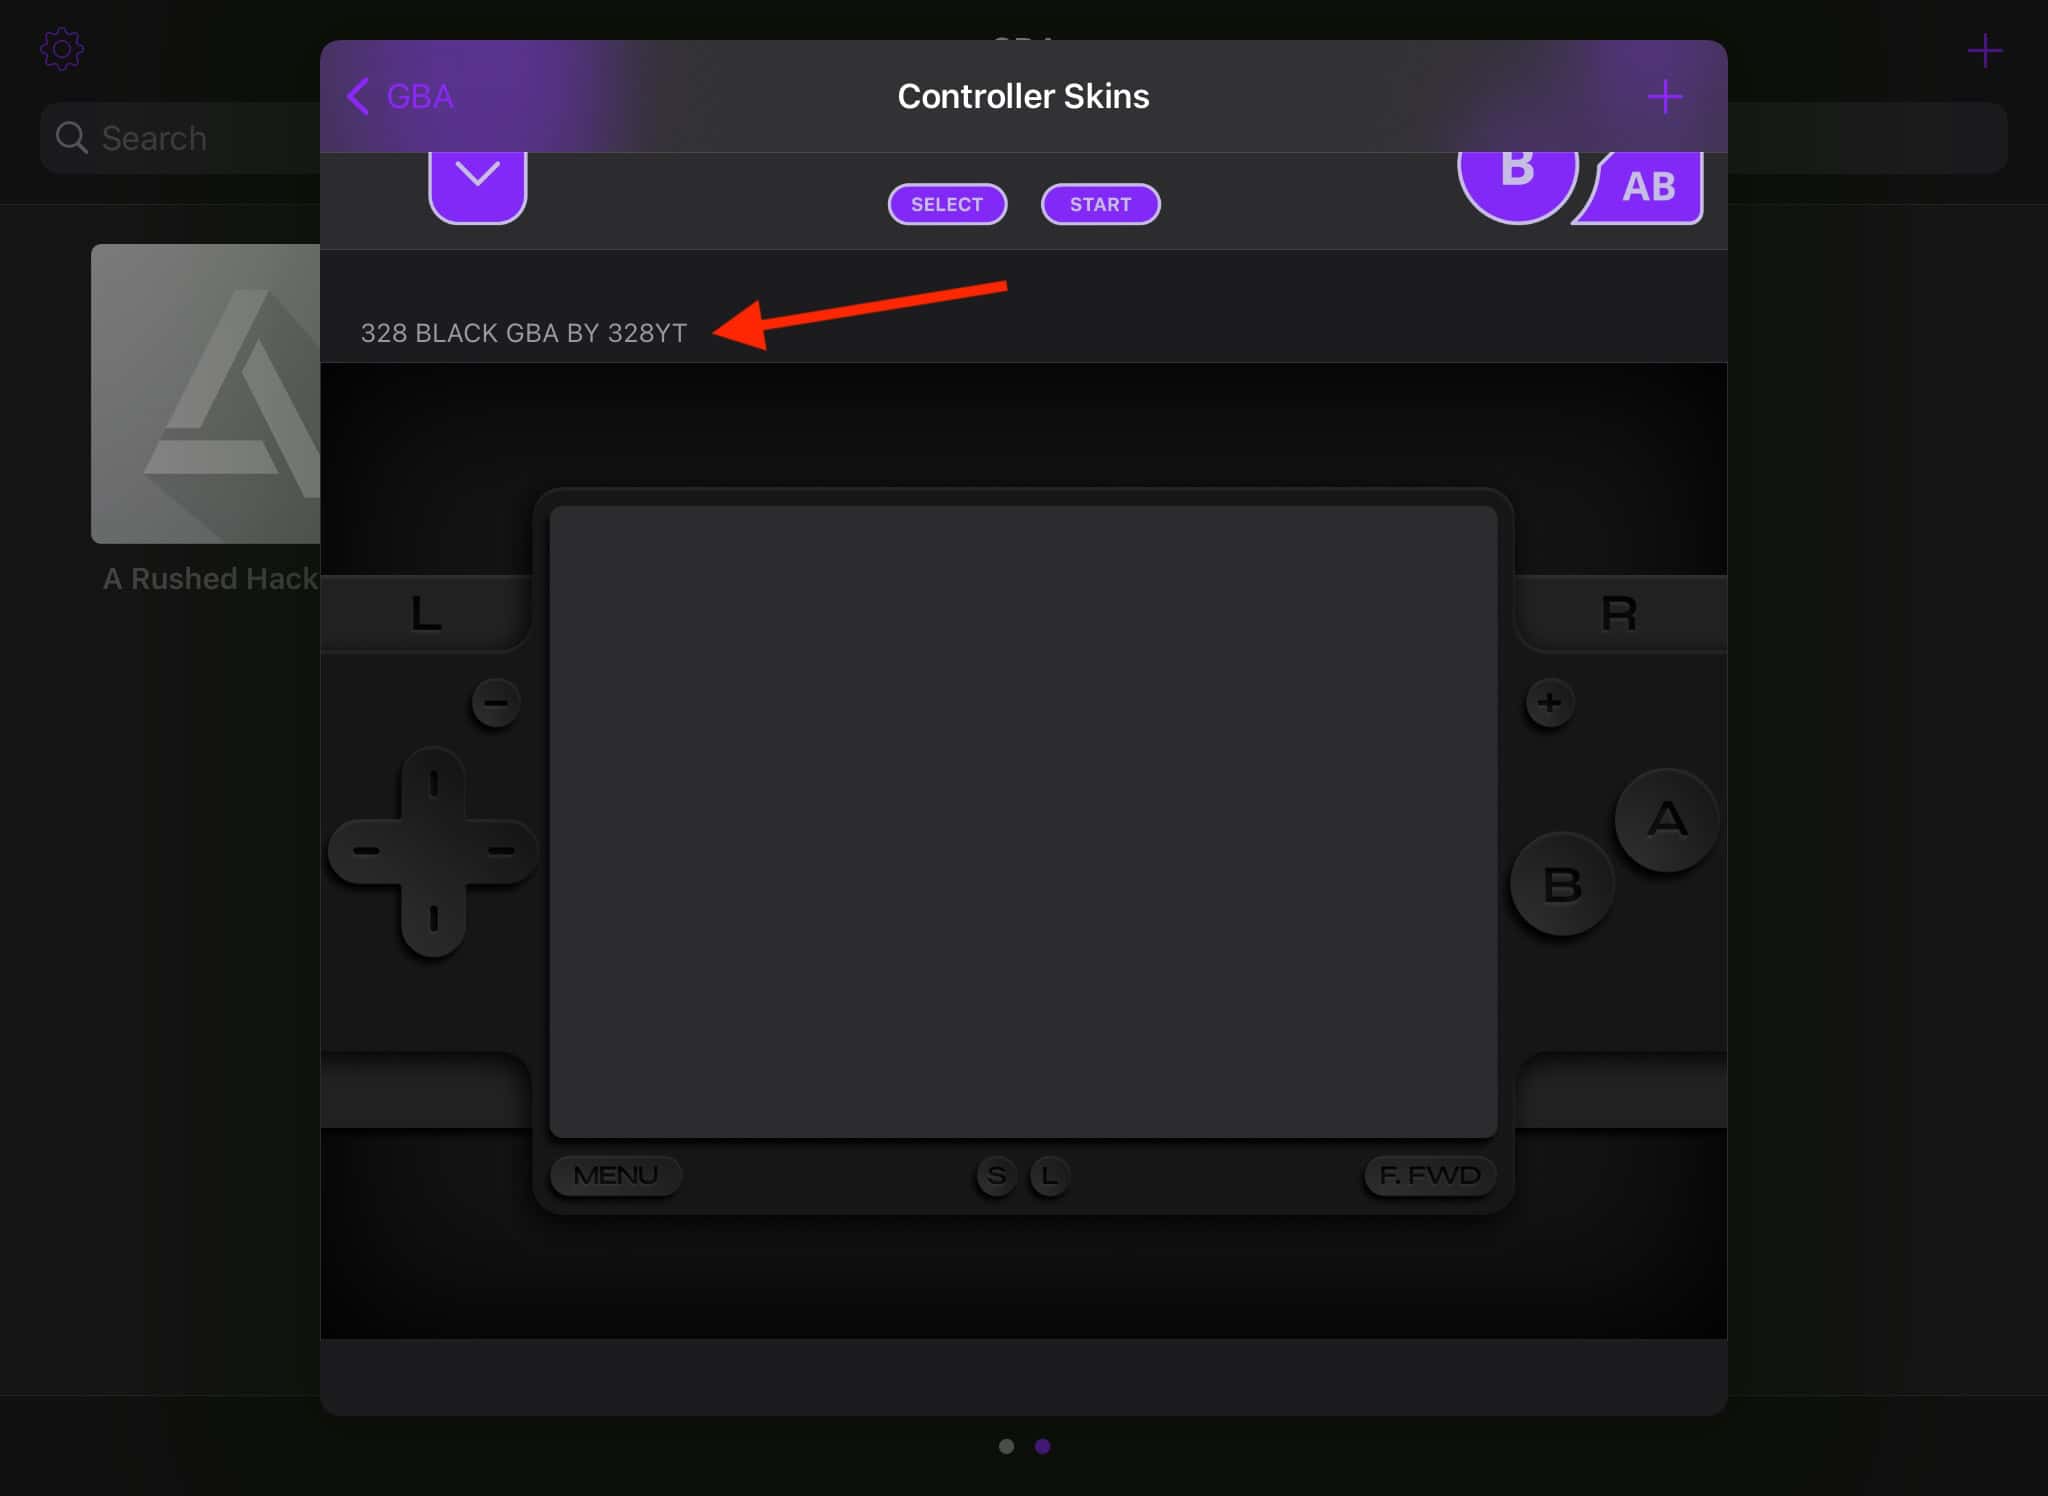
- Look for your newly downloaded emulator skin on Files > On my iPad. Tap on your selected skin. This automatically adds your new skin to Delta’s database.
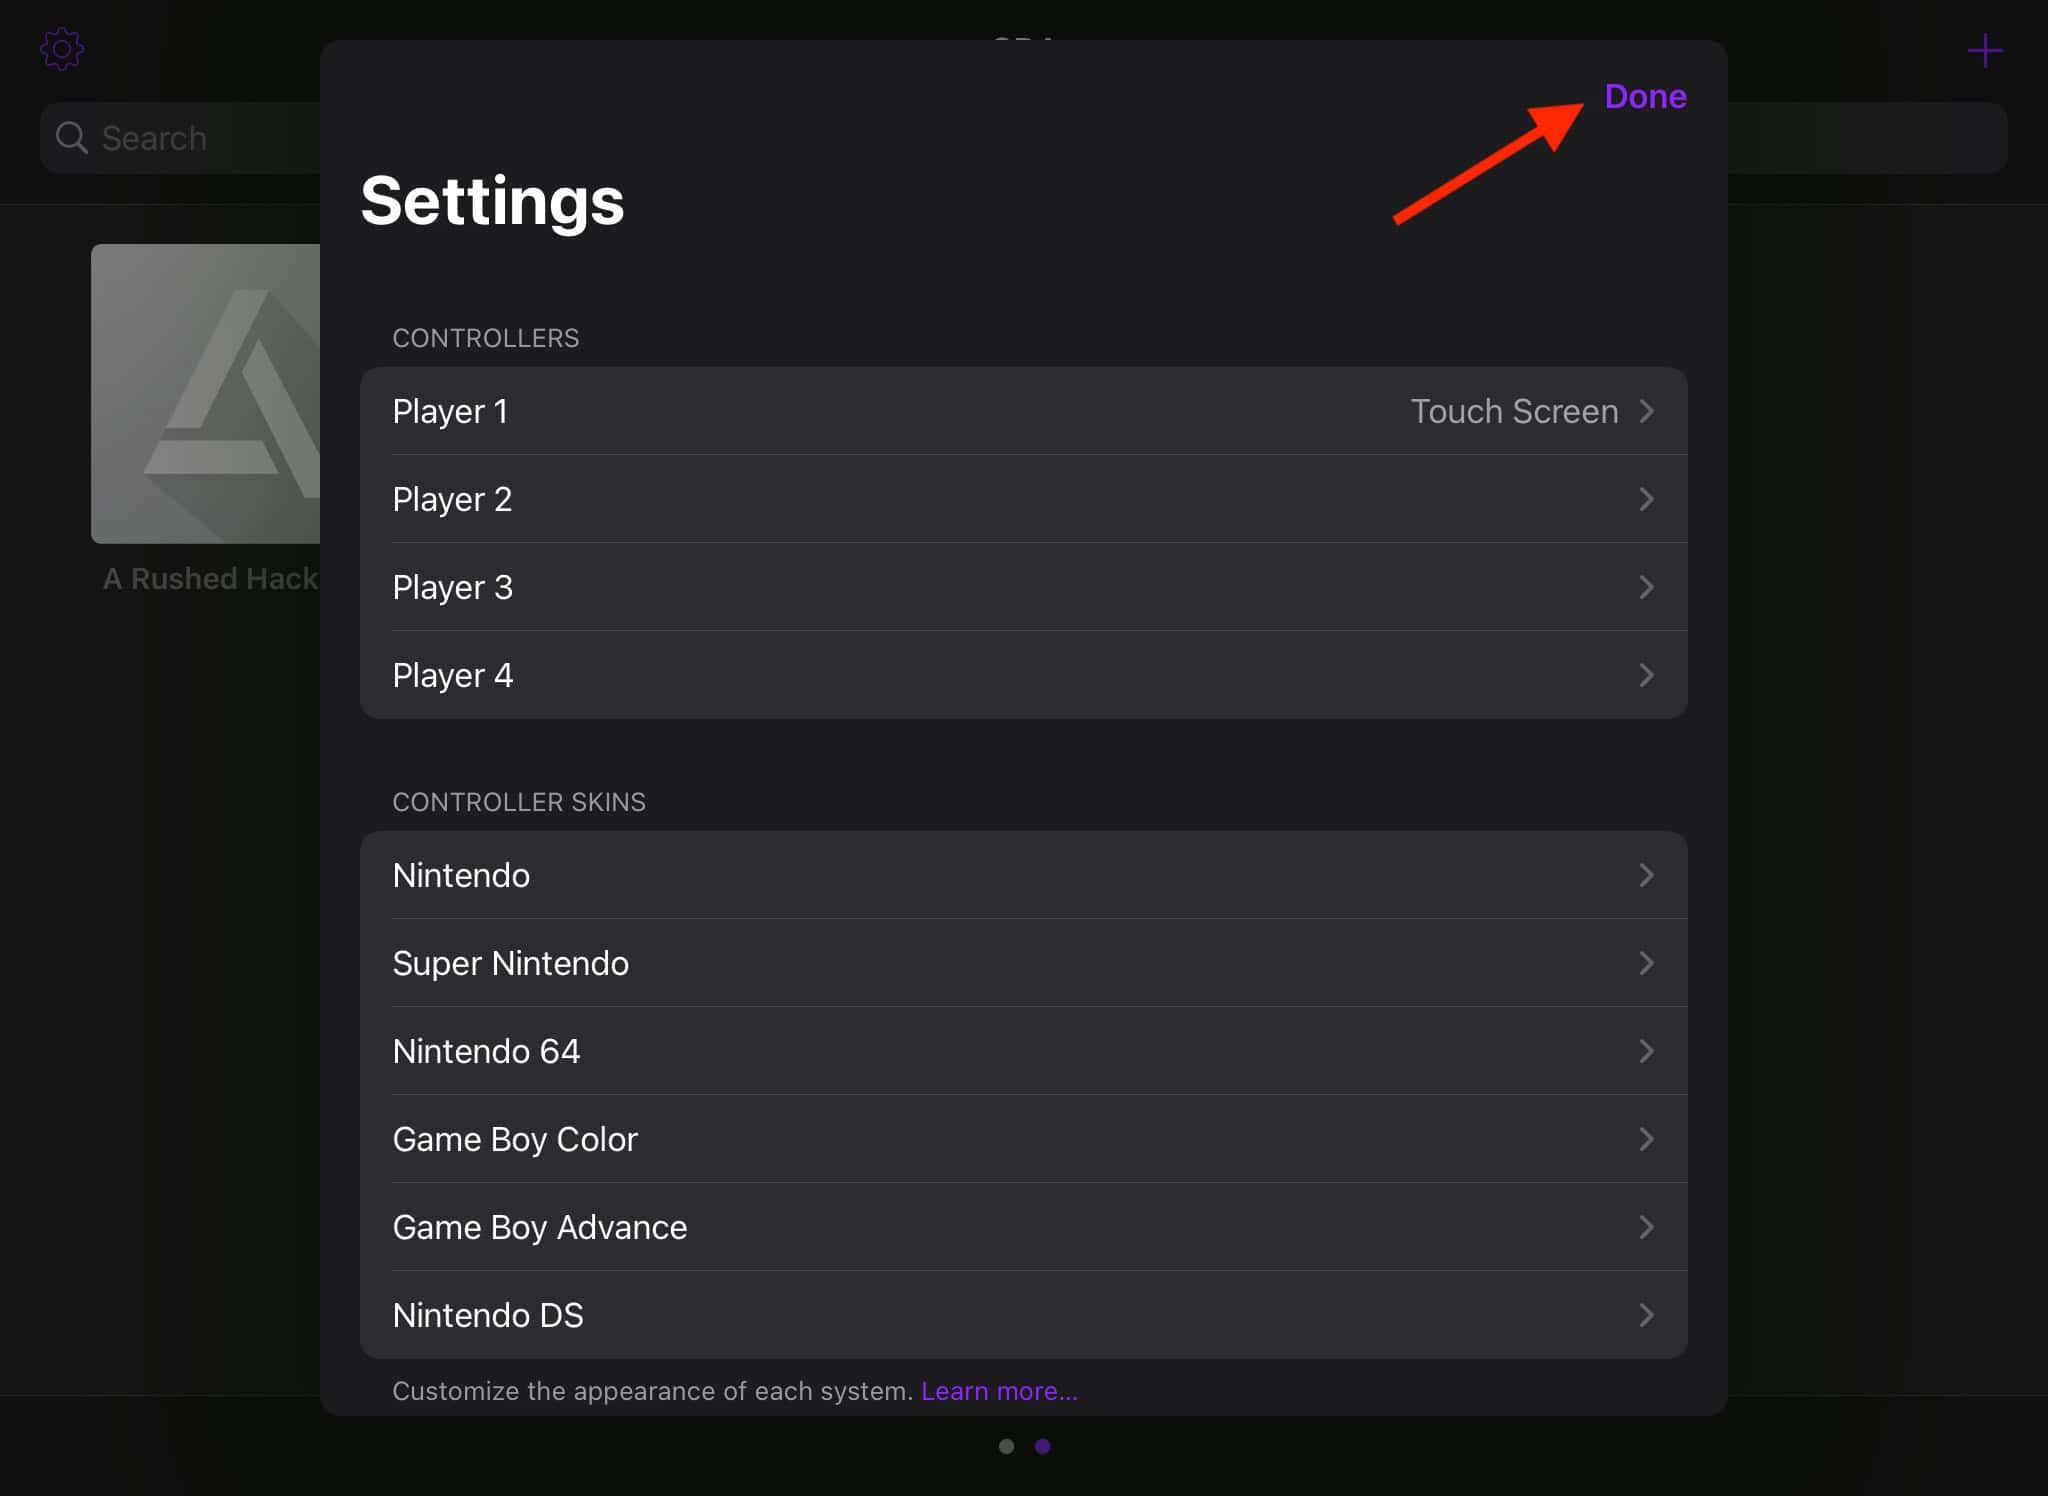
- Navigate to the Delta app, then tap the gear icon.
- Choose the emulator that you’d like to customize.
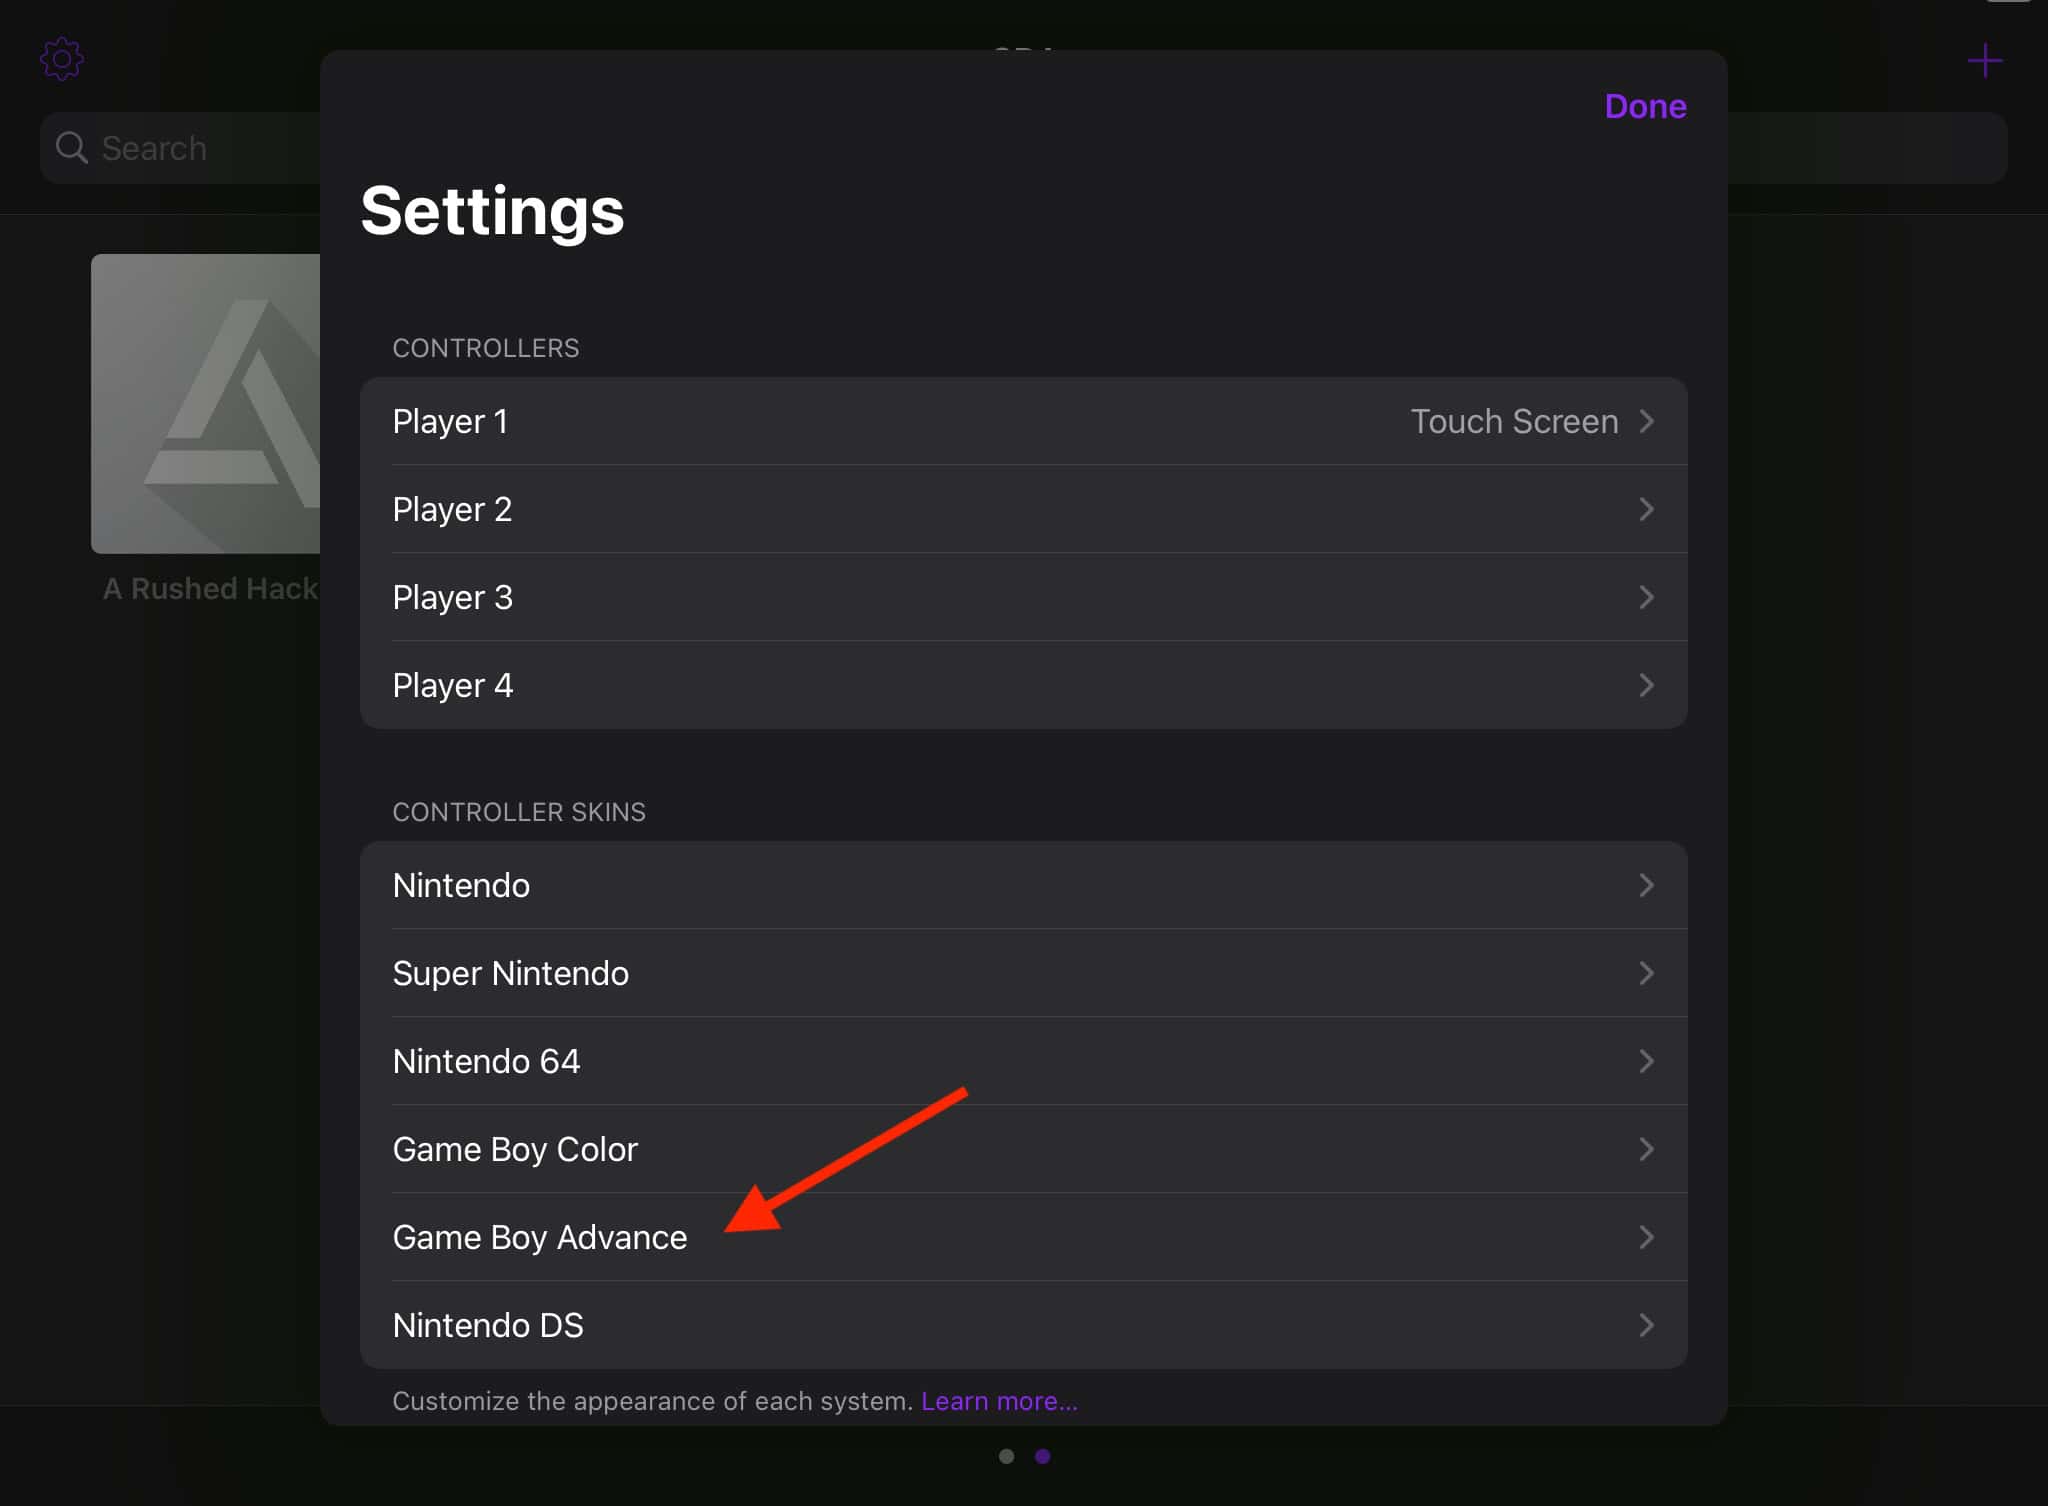
- Tap on Landscape.
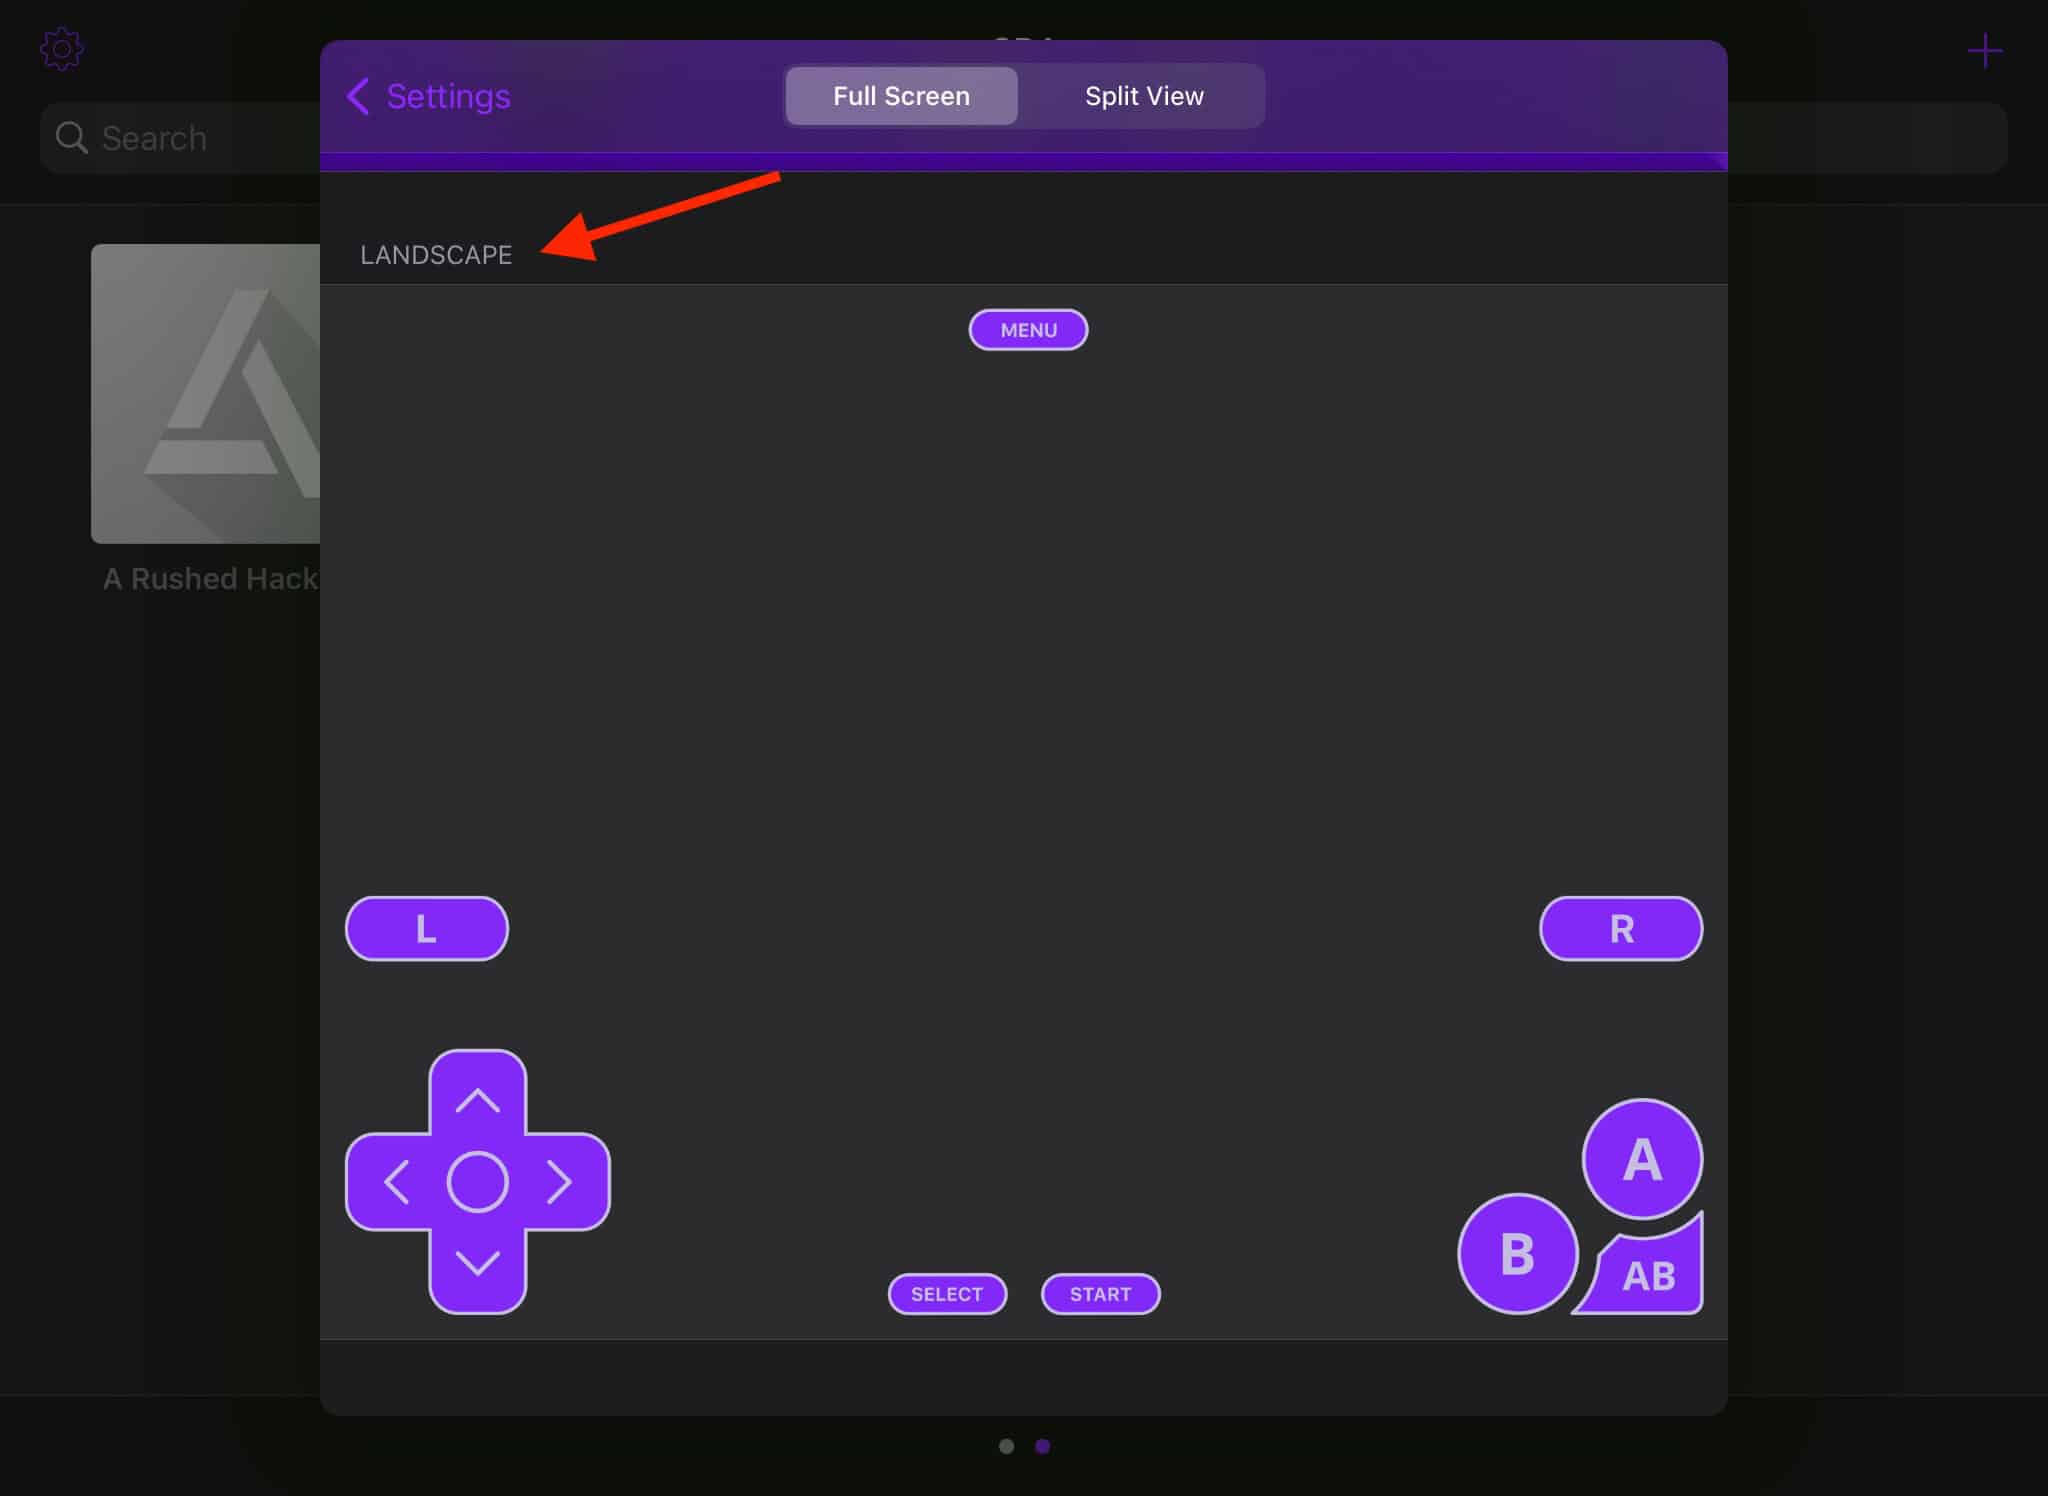
- Scroll through to find your chosen skin. Tap it again to select it.
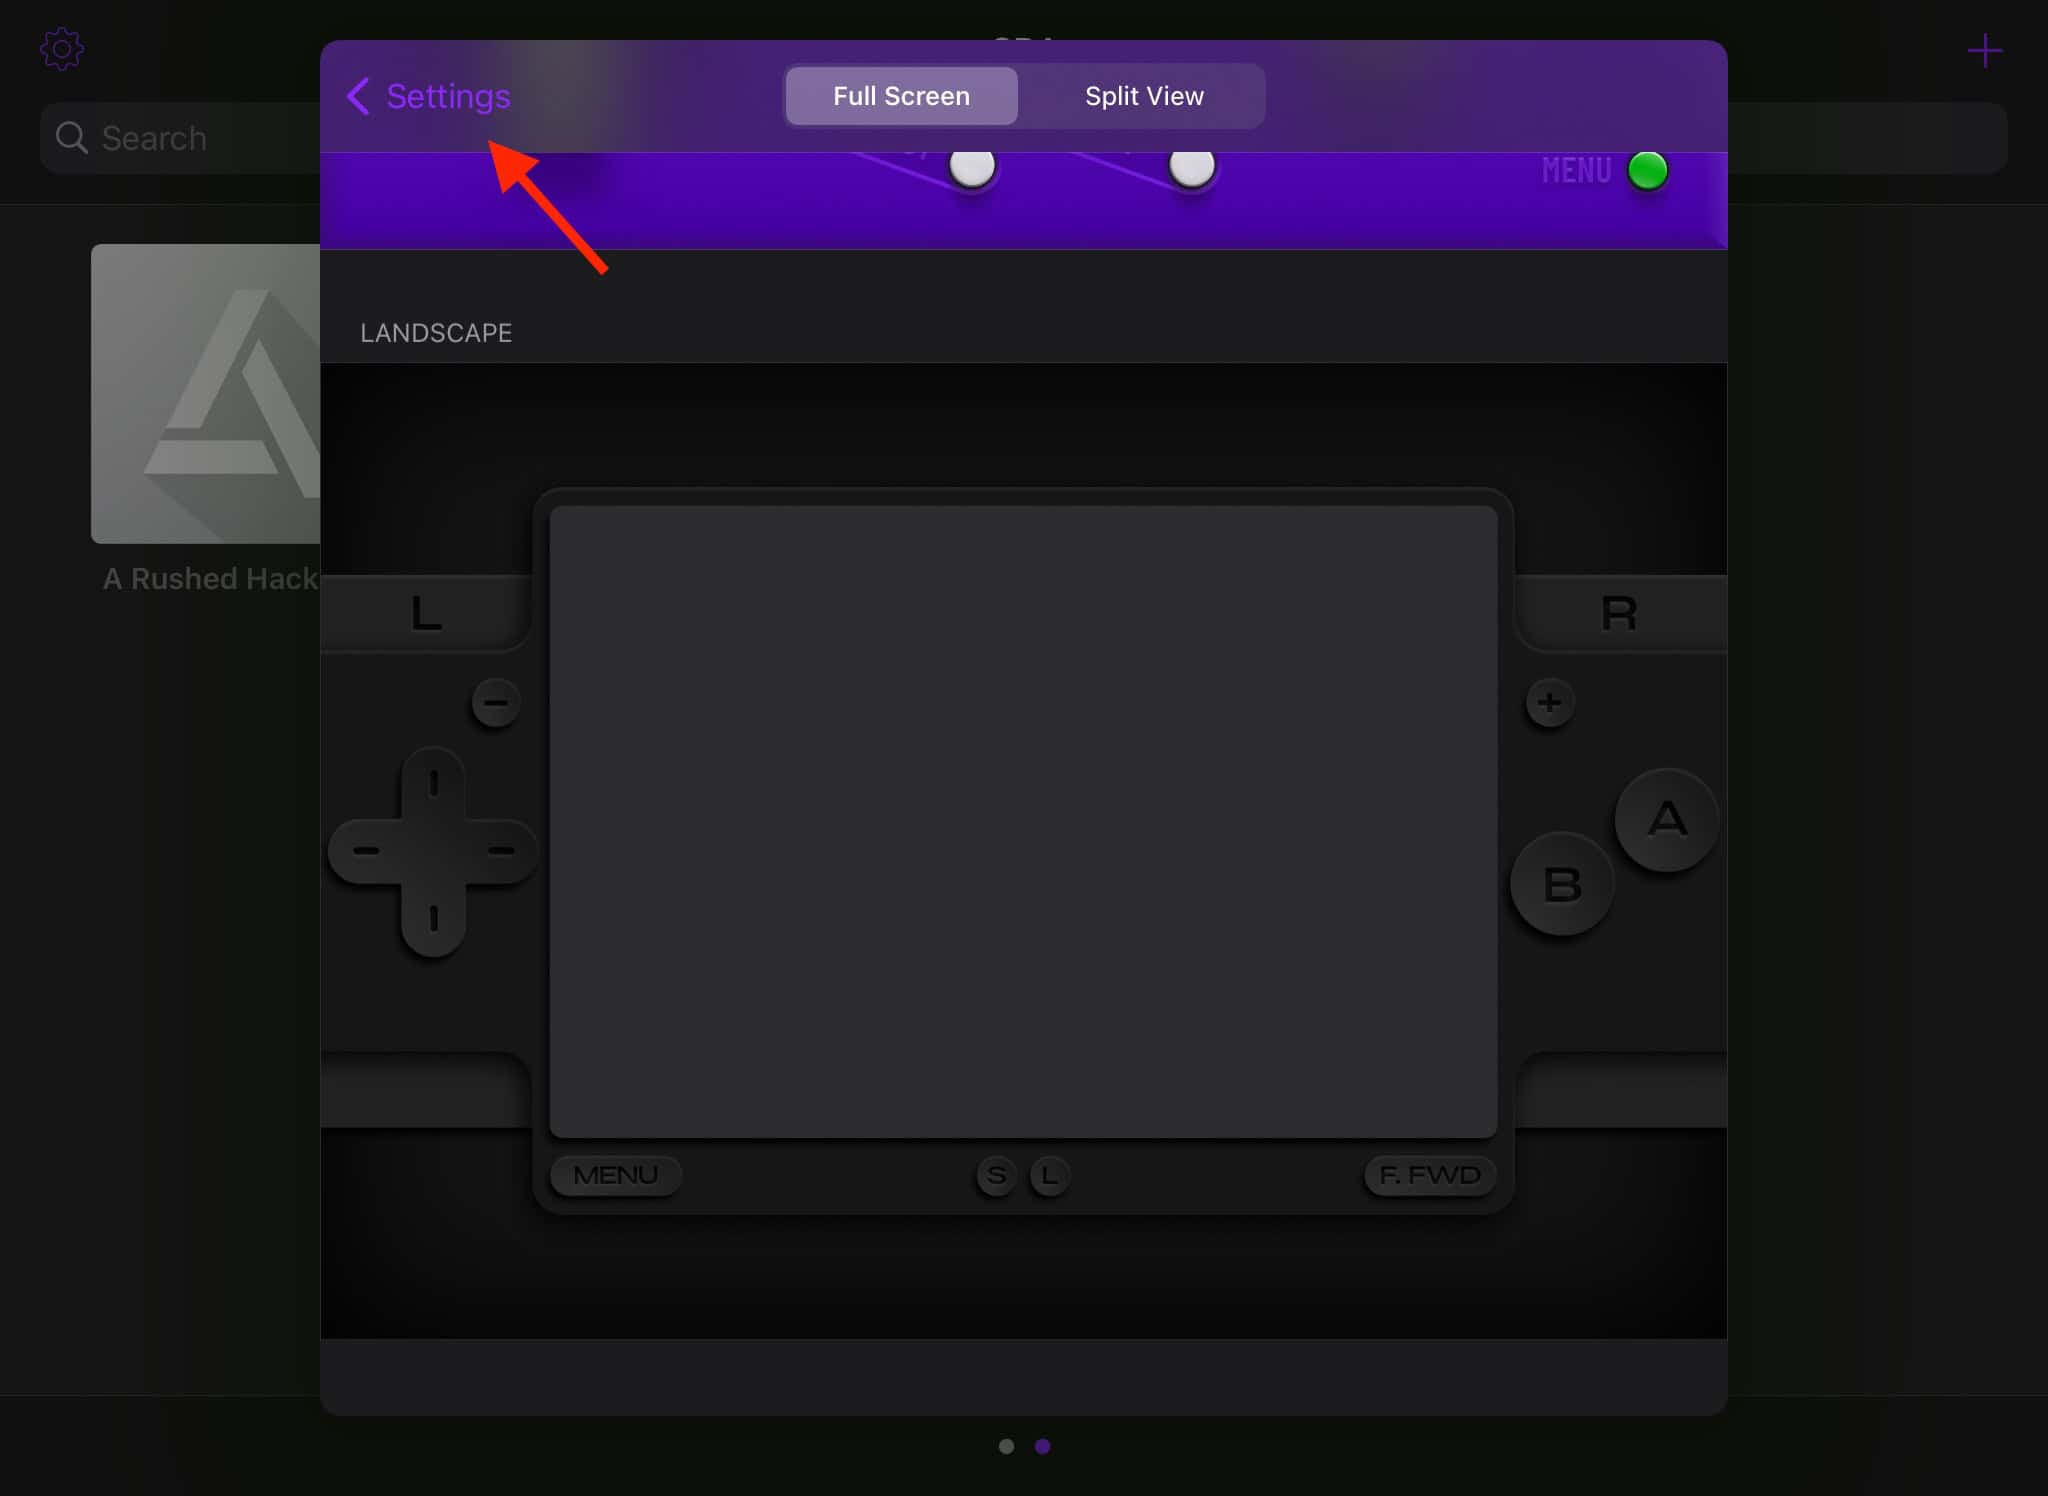
- Tap on Settings, then Done.
- Tap on your selected game to check if your downloaded skin appears.


While Android users may laugh over Apple slowly entering the world of emulation, the fact is it’s never too late to start. You may also want to know about the best Playstation 2 emulators for iOS.


