
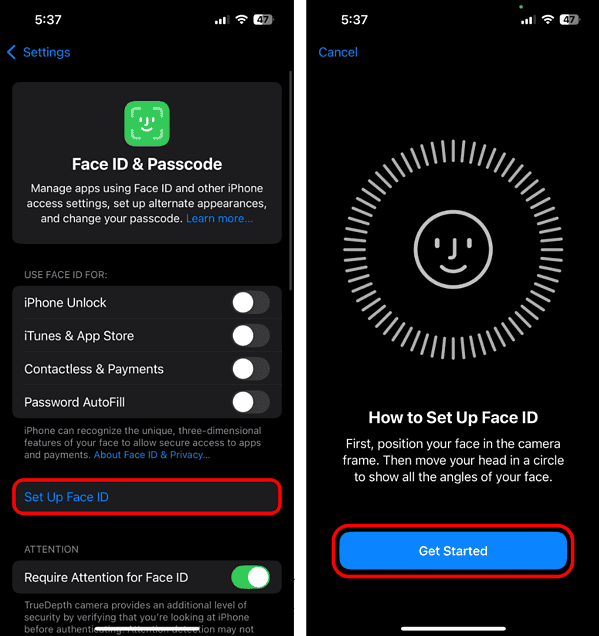
Stolen Device Protection is one of Apple’s most critical security features. It blocks unauthorized access by requiring Face ID or Touch ID for sensitive actions, like changing your Apple ID password or turning off Find My. Even if someone who knows your passcode steals your iPhone, they won’t get far without your biometrics. You can enable it by going to Settings > Face ID & Passcode > Stolen Device Protection.
That said, it’s not always straightforward. Like any security layer, it can be tricky to manage or disable when needed. Let’s walk through how to turn it on, and what to do if you can’t turn it off.
Don’t miss the best of The Mac Observer
Set us as a preferred source and our Apple reporting ranks higher in your Google Search results and Discover feed — one tap, no account changes.
How to Turn On Stolen Device Protection on iPhone
Stolen Device Protection is available on iPhones running iOS 17.3 and later. If you can’t find the feature on your iPhone, make sure that you’ve updated it to the latest version. Also, your Apple ID must have two-factor authentication enabled and the device must be passcode-locked.
Time needed: 2 minutes
Considering your iPhone meets all the above-mentioned requirements, follow the steps below to enable Stolen Device Protection.
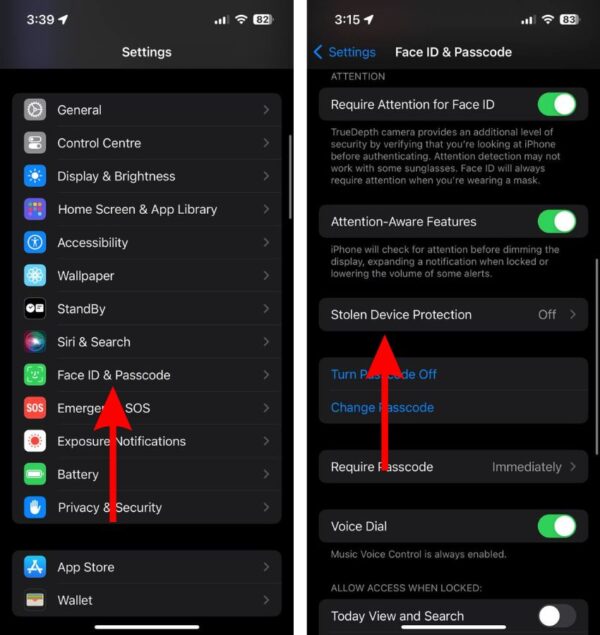
- Open the Settings app on your iPhone.
- Navigate to the Face ID & Passcode or Touch ID & Passcode option.
- Enter your iPhone’s passcode to unlock the settings page.
- Scroll down and tap the Stolen Device Protection option.
- On the next screen, turn on the Stolen Device Protection toggle.
- Then select the Away from Familiar Location or the Always option under the Require Security Delay menu.
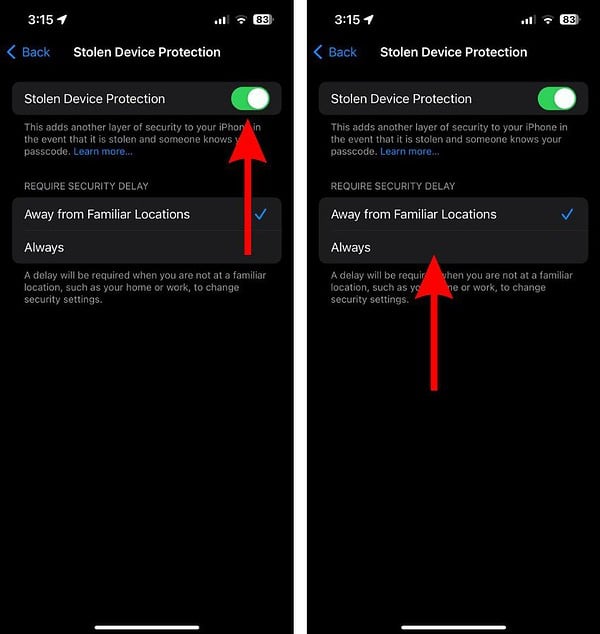


The security delay will kick in based on the location of your iPhone if you pick the Away from Familiar Locations option. However, if you choose the Always option, the one-hour security delay will start no matter where you are.
How To Turn Off Stolen Device Protection on iPhone
Here’s how to disable Stolen Device Protection on your iPhone.
- Open the Settings app on your iPhone.
- Navigate to the Face ID & Passcode or Touch ID & Passcode option.
- Enter your iPhone’s passcode to unlock the settings page.
- Scroll down and tap the Stolen Device Protection option.
- On the next screen, turn off the Stolen Device Protection toggle.
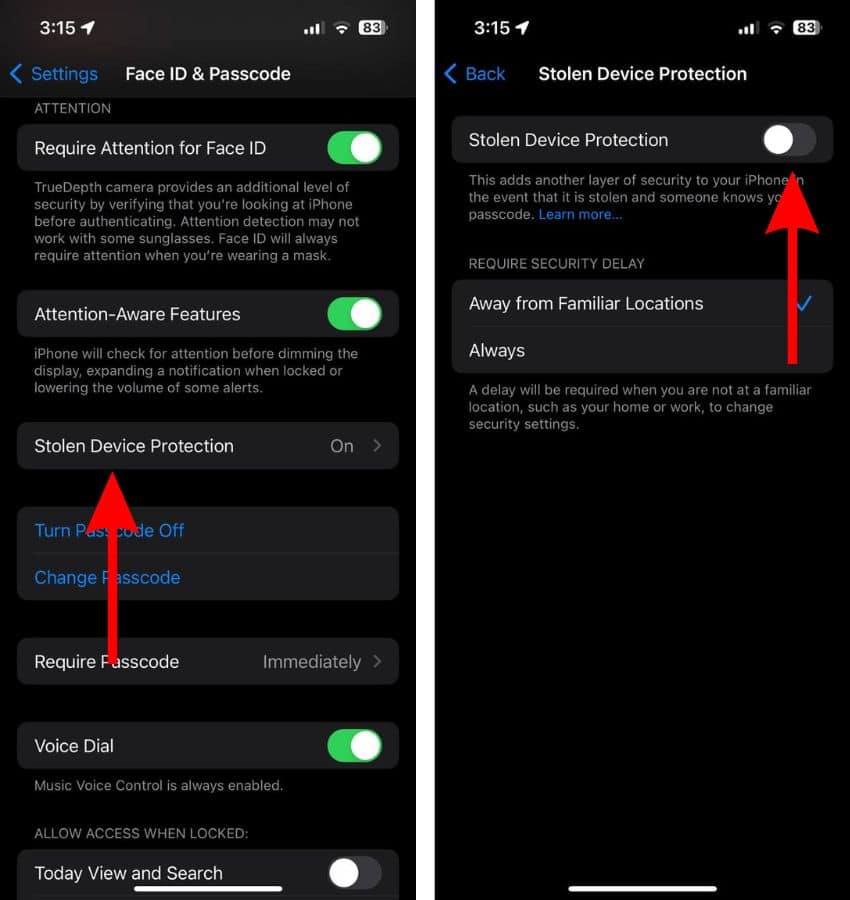
- Enter your Face ID/Touch ID or the iPhone passcode.

If you aren’t in a familiar location when you disable this toggle, a security delay will begin and the changes will not be applied immediately. You must wait for an hour, after which, you will have to repeat the entire process in order to disable the feature. This will depend on which option you choose under the Require Security Delay menu during the set up process.
Actions Locked Behind Biometric Authentication
Earlier in the article, we discussed that specific actions are locked behind biometric authentication (Face ID and Touch ID) when you enable the Stolen Device Protection feature. Here’s a list of all the actions requiring Touch ID or Face ID to view or make changes after you enable Stolen Device Protection.
- Access password saved in iCloud Keychain
- View a saved Apple Card
- Apply for a new Apple Card
- Send money through Apple Cash
- Use payment methods saved in Safari
- Disable Lost Mode
- Erasing All Content and Settings
- Set up a new device using your iPhone
Security Delay for Certain Actions
Certain actions are not only locked behind biometric authentication but have a security delay (one hour) when you enable the Stolen Device Protection feature. This delay is applicable when you are not near a familiar location (Home or Work). Since your iPhone doesn’t offer a list of all these actions, we’ve mentioned them below.
- Change your Apple ID password
- Remove trusted device, number, etc. from Apple ID
- Remove Recovery Key or Contact from Apple ID
- Change your iPhone passcode
- Add or remove Face ID or Touch ID
- Disable Find My
- Disable Stolen Device Protection
Can You Turn Off Stolen Device Protection Without Face ID?
No, not fully. Apple requires Face ID or Touch ID to turn off Stolen Device Protection—even after the 1-hour security delay. This prevents thieves from changing critical settings using only your passcode. If your Face ID sensor isn’t working, you’ll need to use a familiar location to skip the delay or repair the sensor if it’s permanently broken
You can still unlock your phone with a passcode, but you won’t be able to disable Stolen Device Protection or perform sensitive actions until biometrics are restored.
What To Do if You Can’t Turn off Stolen Device Protection on iPhone
1. Be in a Familiar Location
Apple uses on-device machine learning to determine if you’re in a familiar place, like your home or office. If you enabled Stolen Device Protection with the “Away from Familiar Locations” setting, your iPhone will delay the toggle unless it verifies you’re in a trusted environment. It’s part of the feature’s design to prevent unauthorized changes when stolen.
- Go to a previously used, frequently visited location (e.g., your home).
- Make sure Location Services is on: Settings > Privacy & Security > Location Services.

- Try turning off Stolen Device Protection again under:
- Settings > Face ID & Passcode > Stolen Device Protection.

2. Wait for the One-Hour Security Delay
Turning off Stolen Device Protection will trigger a mandatory one-hour delay. This timer is hardware-enforced and designed to give you time to recover the phone in case of theft. After the delay, you must authenticate again with Face ID or Touch ID.
- Attempt to turn off Stolen Device Protection.
- Wait for one full hour after the security delay starts.
- Reopen Settings > Face ID & Passcode > Stolen Device Protection.
- Authenticate with biometrics and disable the setting again.
3. Recalibrate Face ID or Touch ID
You won’t be able to disable Stolen Device Protection if biometrics aren’t working. Apple doesn’t allow fallback to passcode alone for this feature. Make sure your Face ID or Touch ID is functioning normally because it needs to verify identity at every step.
- Test biometric auth by trying to unlock your phone or use AutoFill.
- If it fails, go to Settings > Face ID & Passcode.
- Tap Reset Face ID (or Touch ID) and set it up again.
- Once working, return to the Stolen Device Protection screen and try again.

4. Erase iPhone to Regain Face ID Setup Access
At this point, a full reset may be your only option. Erasing the device removes local configurations, letting you reconfigure biometric settings from scratch. You’ll need access to the Apple ID linked to the device since this process won’t bypass iCloud Lock.
 NOTE
NOTE
- On the lock screen, enter the wrong passcode repeatedly until you see iPhone Unavailable.
- Tap the lower-right option to Erase iPhone or Forgot Passcode.
- Sign in with your Apple ID and password when prompted.
- Choose whether to delete the eSIM or keep it during reset.
- Wait for the device to wipe itself and restart.
- After reset, log back in with your Apple ID to unlock the device.
- Set up your iPhone as new and re-enroll Face ID under Settings > Face ID & Passcode.
Should issues persist, call Apple Support. Certified technicians can guide you through the official ways to recover device control if your biometrics settings are glitching. Stay away from unverified service centers at all costs. Granting unauthorized access compromises your sensitive data and will leave your device in even worse shape.


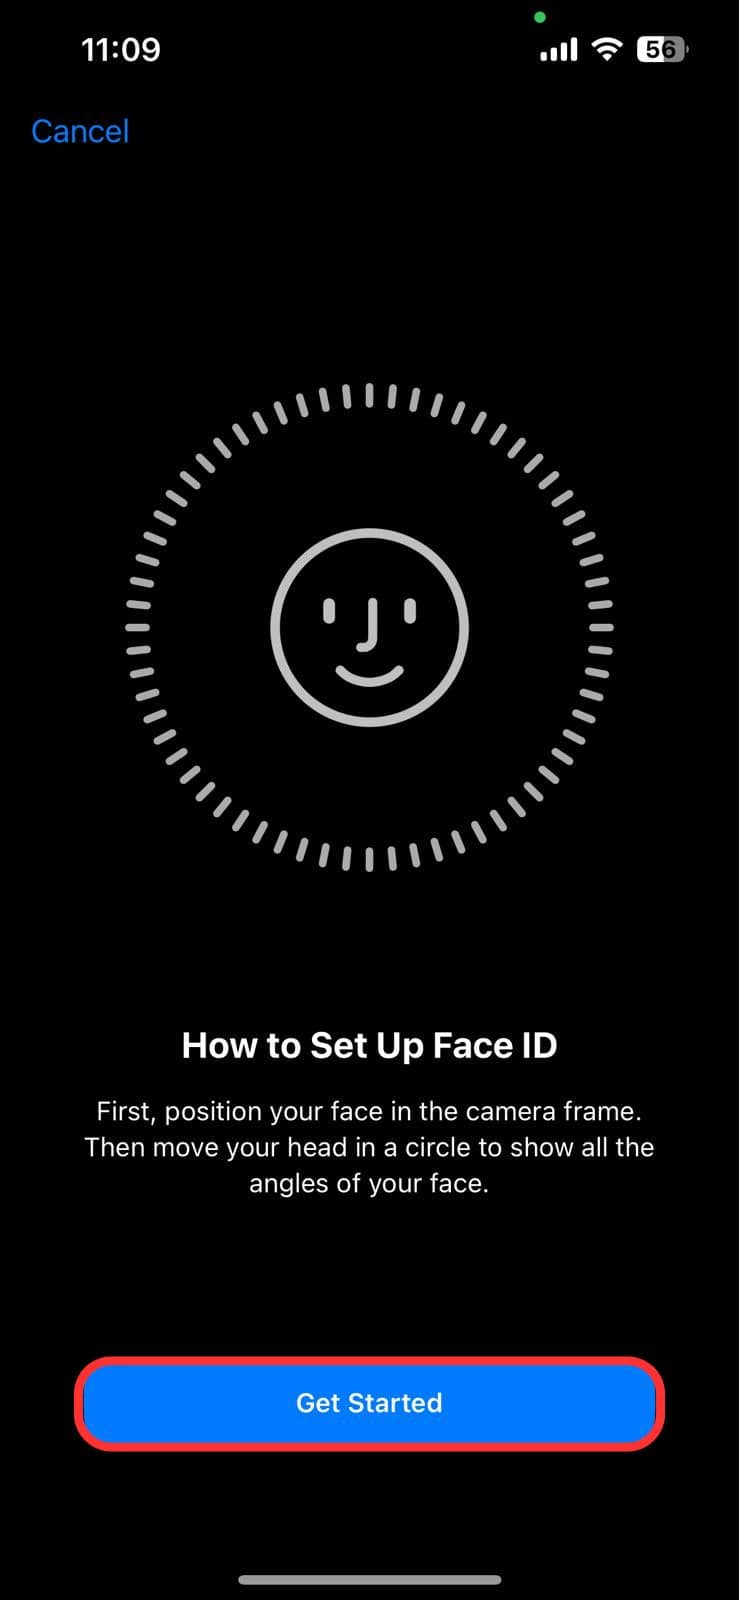
Since I turned on Face ID my phone screen is frozen and I got it hard to free it it froze a couple of times and apps that I was able to use with my PIN code will not only work with Face ID I am using iPhone XS PLs Tony
If your iPhone XS started freezing after you enabled Face ID, and apps that used to unlock with your passcode now only respond to Face ID, it’s likely a software glitch tied to the Face ID setup or authentication settings. Start by force restarting your iPhone (quickly press and release the Volume Up, then Volume Down, then hold the Side button until you see the Apple logo). Once it restarts, go to Settings > Face ID & Passcode, and try turning Face ID off for apps or resetting Face ID entirely. If the freezing continues, update iOS to the latest version under Settings > General > Software Update, since many Face ID bugs have been fixed in updates. If that doesn’t help, back up your data and perform a factory reset, as system corruption might be causing the issue.
Under “Erase iPhone to regains FaceId setup Access” after steps 1 thru 5 are completed, is it possible for someone with a Genuine & Real AppleId (not the appleId of the phones owner) to lgoin and take ove the phone.
Alternatively, does iPhone have a Factory reset which will wipe out everything and so the phone can be sold to another person ?
No, if the iPhone was previously linked to an Apple ID (the owner’s), no one else can log in and take it over after an erase unless that Activation Lock is removed by the original owner. Even if you use “Erase iPhone,” Apple’s security system still requires the Apple ID and password that were last used to set up the device.
In other words, there’s no factory reset that bypasses Activation Lock. You can fully wipe the phone only if:
The original owner removes it from Find My iPhone (via iCloud.com → Find Devices → Remove from Account), or you know the Apple ID credentials currently linked to the device.
Once that’s done, the iPhone can be safely set up or sold as new.