How to Use Mail Rules in Apple's iCloud.com Mail

A great way to automate your email organization is to configure and use Mail Rules – sometimes called “mail filters” – in your email client application or in browser-based web mail. In this article, we’ll discuss the use of mail rules in Apple’s iCloud.com web mail service.

But first, if you didn't catch my article from last week, How to Set Up and Use Apple's New iCloud.com, be sure to take a look.

If you’ve ever worked with the full-featured and powerful mail rules in Apple’s Mail application for OS X, you already know what a big time saver this activity can be. It’s a very sophisticated system that allows for the creation of simple to fairly complex rules. These look at every piece of incoming email and perform some action if the rules’ conditions are met.

In the iCloud.com Mail web app – one of a suite of several web-based apps – you can also set up rules. However, as you are about to discover, the choices you get for rule conditions and actions in iCloud.com are pretty meager compared to what’s available in the OS X Mail client.

Nevertheless, you can find a certain degree of utility in setting up mail rules in the iCloud.com’s Mail web app if you are not a Mail user in OS X.  Let’s examine this a bit closer.

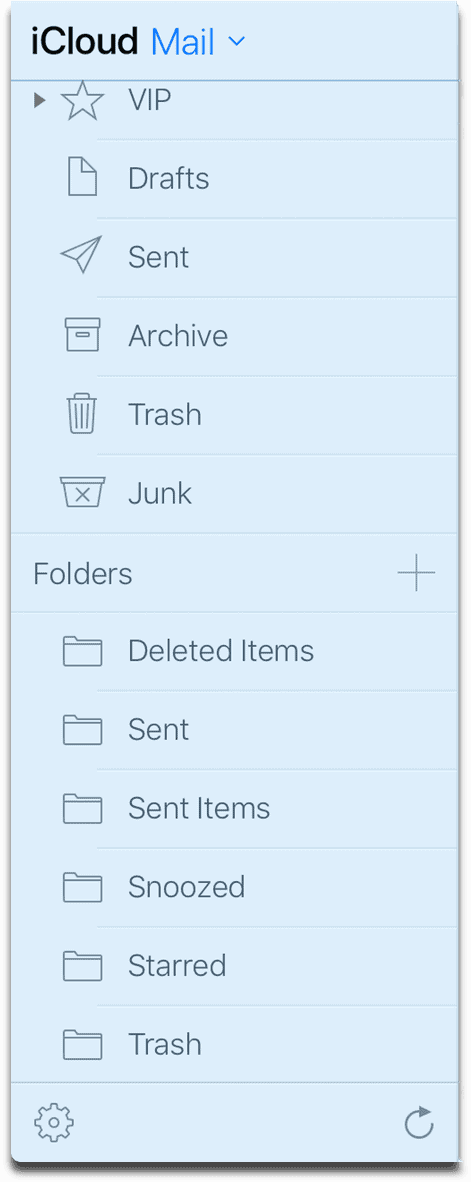
Once you log onto your iCloud.com account and into your Mail app, you need to access the app’s settings. In your new iOS 7-esque iCloud.com Mail interface, look for the familiar-looking, but often hard to see, “gear” icon at the bottom-left corner. It’s there, just beneath the column of mailboxes and folders.

The main window of iCloud.com�s Mail web app.

The little gear at the bottom-left gets you to Mail Rules and other settings.

Clicking on the gear icon will produce a pop-up menu; click Rules. Incidentally, choosing Preferences will also get you to the Rules panel.

A menu of options pops-up when clicking on the gear icon.

Mail Rules, mail preferences, and other options are available by clicking on the gear icon.

The Rules panel and procedure for creating and managing your mail inbox rules is pretty straightforward and intuitive. Any existing rules you’ve enabled will be listed here. You can sort them manually by grabbing the “handle” at the right edge of the rule entry and dragging up or down. Since the rules are evaluated sequentially every time an email arrives into your account, the rule placement order can be critical.

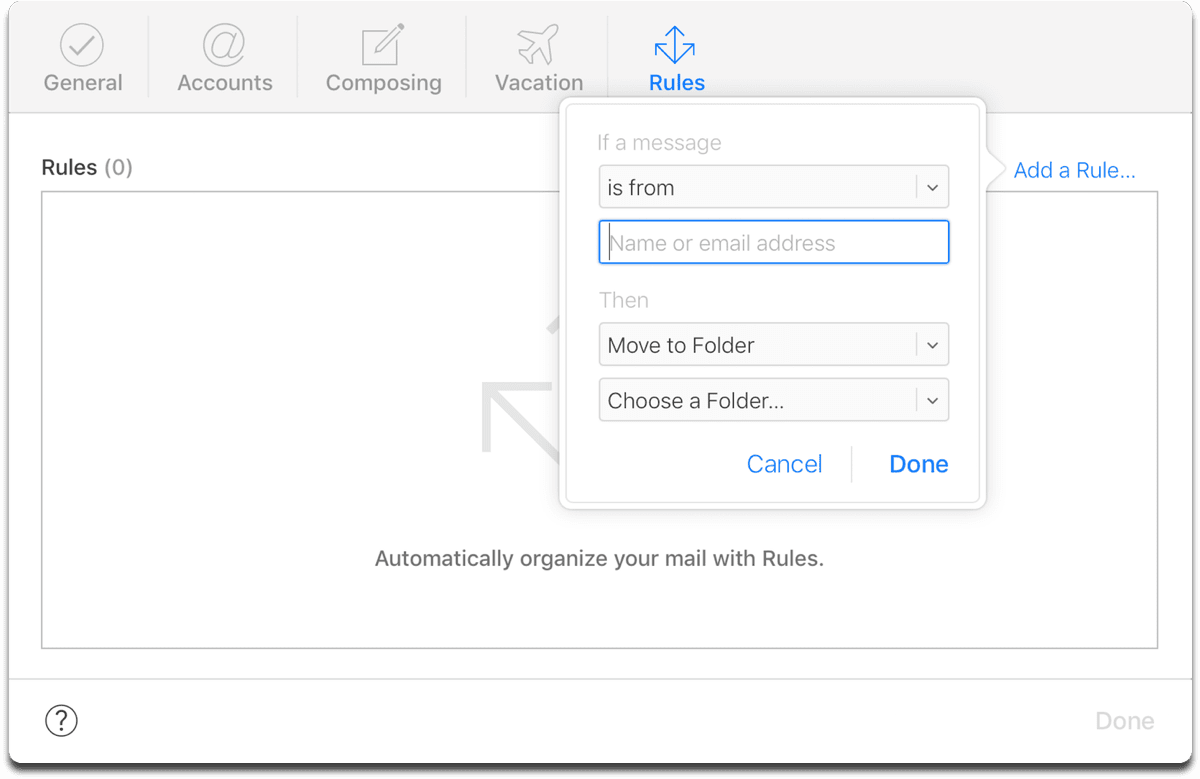
Referring to the illustration below, you can see that to create a new rule, you first click on Add a Rule (1) at the top-right. A pop-up appears giving you the opportunity to set a condition (2) which triggers the action (3) that the rule carries out based on the condition met.

The Mail Rules panel with the Mail Rule definition pop-up menu open.

By opening the pop-up menus, you will find several conditions and actions to choose from.

For example, I have created a rule that says, “if the incoming email is from [email protected], then move it immediately to the trash.” I don’t want to see it; I don’t even want to know that I received it. Out-of-site, out-of-mind.

The Mail Rules panel with two example rules listed.

Once you have one or more Mail Rules, you can always rearrange, edit or delete them and create new rules.

This type of rule works very well for all those unwanted emails that spam filters might not catch, or the ones from people you don’t wish to hear from anymore – like ex-girlfriends, barristers from Zimbabwe, evil step mothers, the repo-man, and the like.

You can have a rule that files and archives an incoming email for you into a designated folder. For example, in the illustration above, let’s examine the rule listed in the first position.

Since my Apple ID is tied to my iCloud.com account. All of my Apple.com online Apple Store purchases are invoiced to my iCloud.com account. This rule intercepts incoming email addressed from anyone in the @orders.apple.com domain, and immediately and neatly files it away in my pre-existing Apple Orders folder.

The Mail Rule definition pop-up menu.

One option is to move an incoming email into an existing or new mail folder.

OK, I can’t fool my smart readers… you know the real reason I do all this rules stuff. I admit it, I like to be notified immediately when Apple emails me a shipment notification for my new gold iPhone 5s. I want to know the nanosecond that the email drops into my iCloud Mail mailbox. Only then can I prepare to track it’s progress across the Pacific from China using my other utilities that monitor Fedex status updates!

And so, since I don’t follow my iCloud.com mail account closely, I use another rule that forwards emails specifically from [email protected] to my main email account that I monitor continuously on my iPhone.

Using other sophisticated iOS apps and online services that monitor incoming emails on my ever-present iPhone, when I get that iCloud.com shipping notice for my new gold bauble, I am guaranteed to have klaxons sounding, lights flashing, fireworks firing, music playing, and dancers dancing.

It’s a wonderful thing… all thanks to Mail Rules.