

FaceTime is one of the best ways to stay connected with friends and family. Sometimes you just want to freeze a moment in time, whether it is a funny face, a pet jumping into the frame, or a special announcement. Capturing these memories is essential! While you can always take a standard screenshot, enabling FaceTime Live Photos allows you to snap high-quality, motion-filled images without the interface clutter.
If you are new to the Apple ecosystem, you might want to check out a FaceTime guide for beginners to get comfortable with the basics first. Ready to start snapping? Let’s dive in!
Table of contents
What You Need to Enable FaceTime Photos
Before we get to the settings, let’s make sure you have the basics covered. To take a FaceTime Live Photo, both you and the person you are talking to need to be on compatible software.
Don’t miss the best of The Mac Observer
Set us as a preferred source and our Apple reporting ranks higher in your Google Search results and Discover feed — one tap, no account changes.
Here is a quick checklist:
- An iPhone or iPad: Running iOS 12.1.1 or later.
- A Mac: Running macOS High Sierra (10.13.6) or later.
- FaceTime Enabled: Obviously, you need the app active! If you ever need a break, you can learn how to turn off FaceTime on iPhone temporarily.
- Live Photos Setting: This specific toggle must be turned on in your Settings app.
If you meet these requirements but things still seem glitchy, you might need to troubleshoot why FaceTime is not working properly before proceeding.
Here’s How to Enable on iPhone & iPad
Enabling this feature is super quick. Once you do this, you will be able to capture those crystal-clear Live Photos during your calls.
1. Enable FaceTime Live Photos
To get started, you need to toggle on the setting that allows Live Photos to be captured during a call.
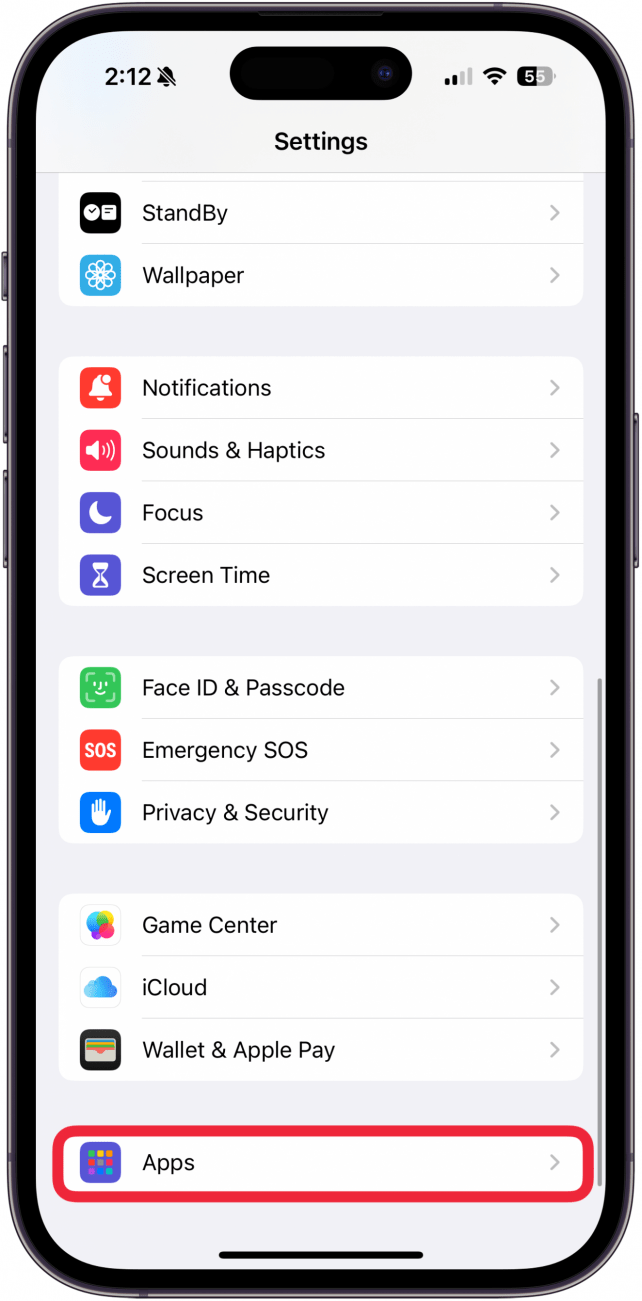
- Open Settings.
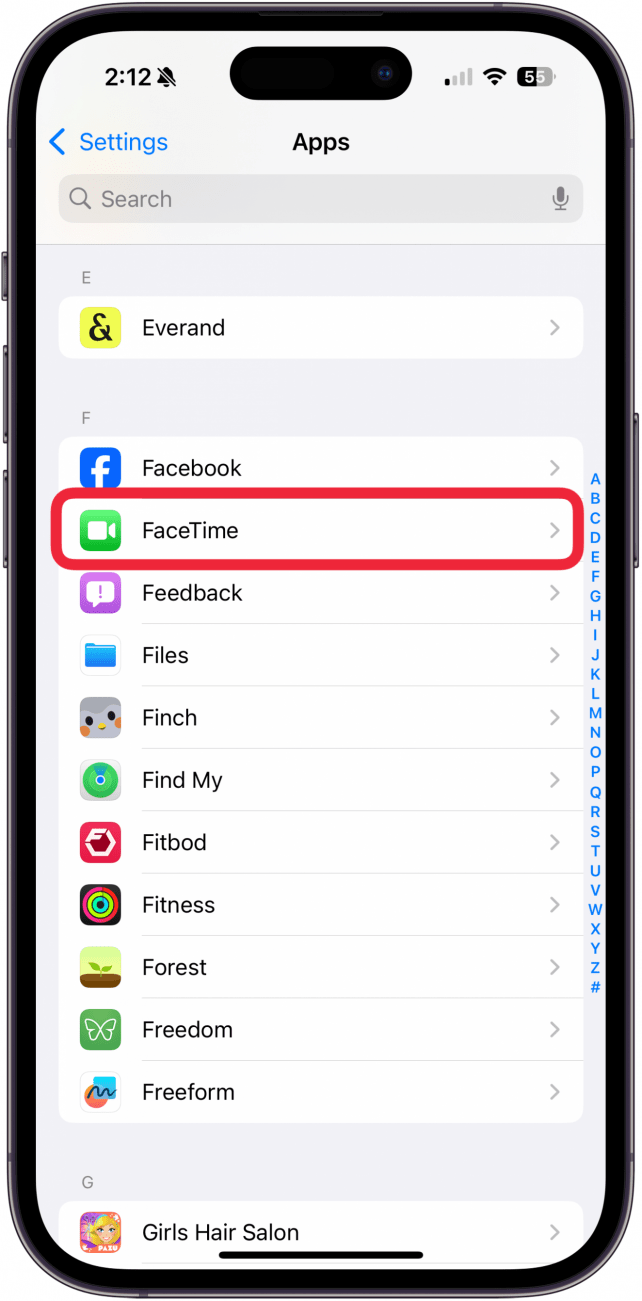
- Tap Apps (on iOS 18+) or scroll down to find FaceTime.
- Tap FaceTime.
- Scroll down to the FaceTime Live Photos option.
- Toggle the switch to On (green).
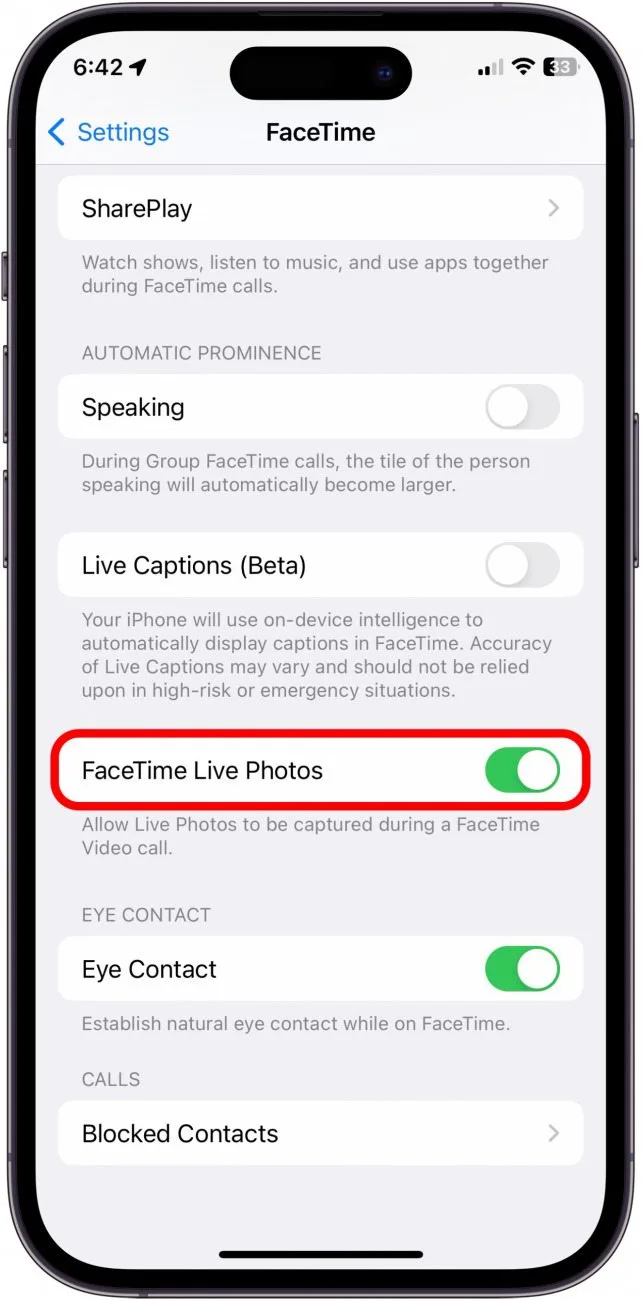
Note: Both participants on the call must have this setting enabled for it to work!
2. Check Content Restrictions
If the option is greyed out or missing, you might have restrictions enabled. Here is how to fix that:
- Open Settings.
- Go to Screen Time.
- Tap Content & Privacy Restrictions.
- Select Content Restrictions.
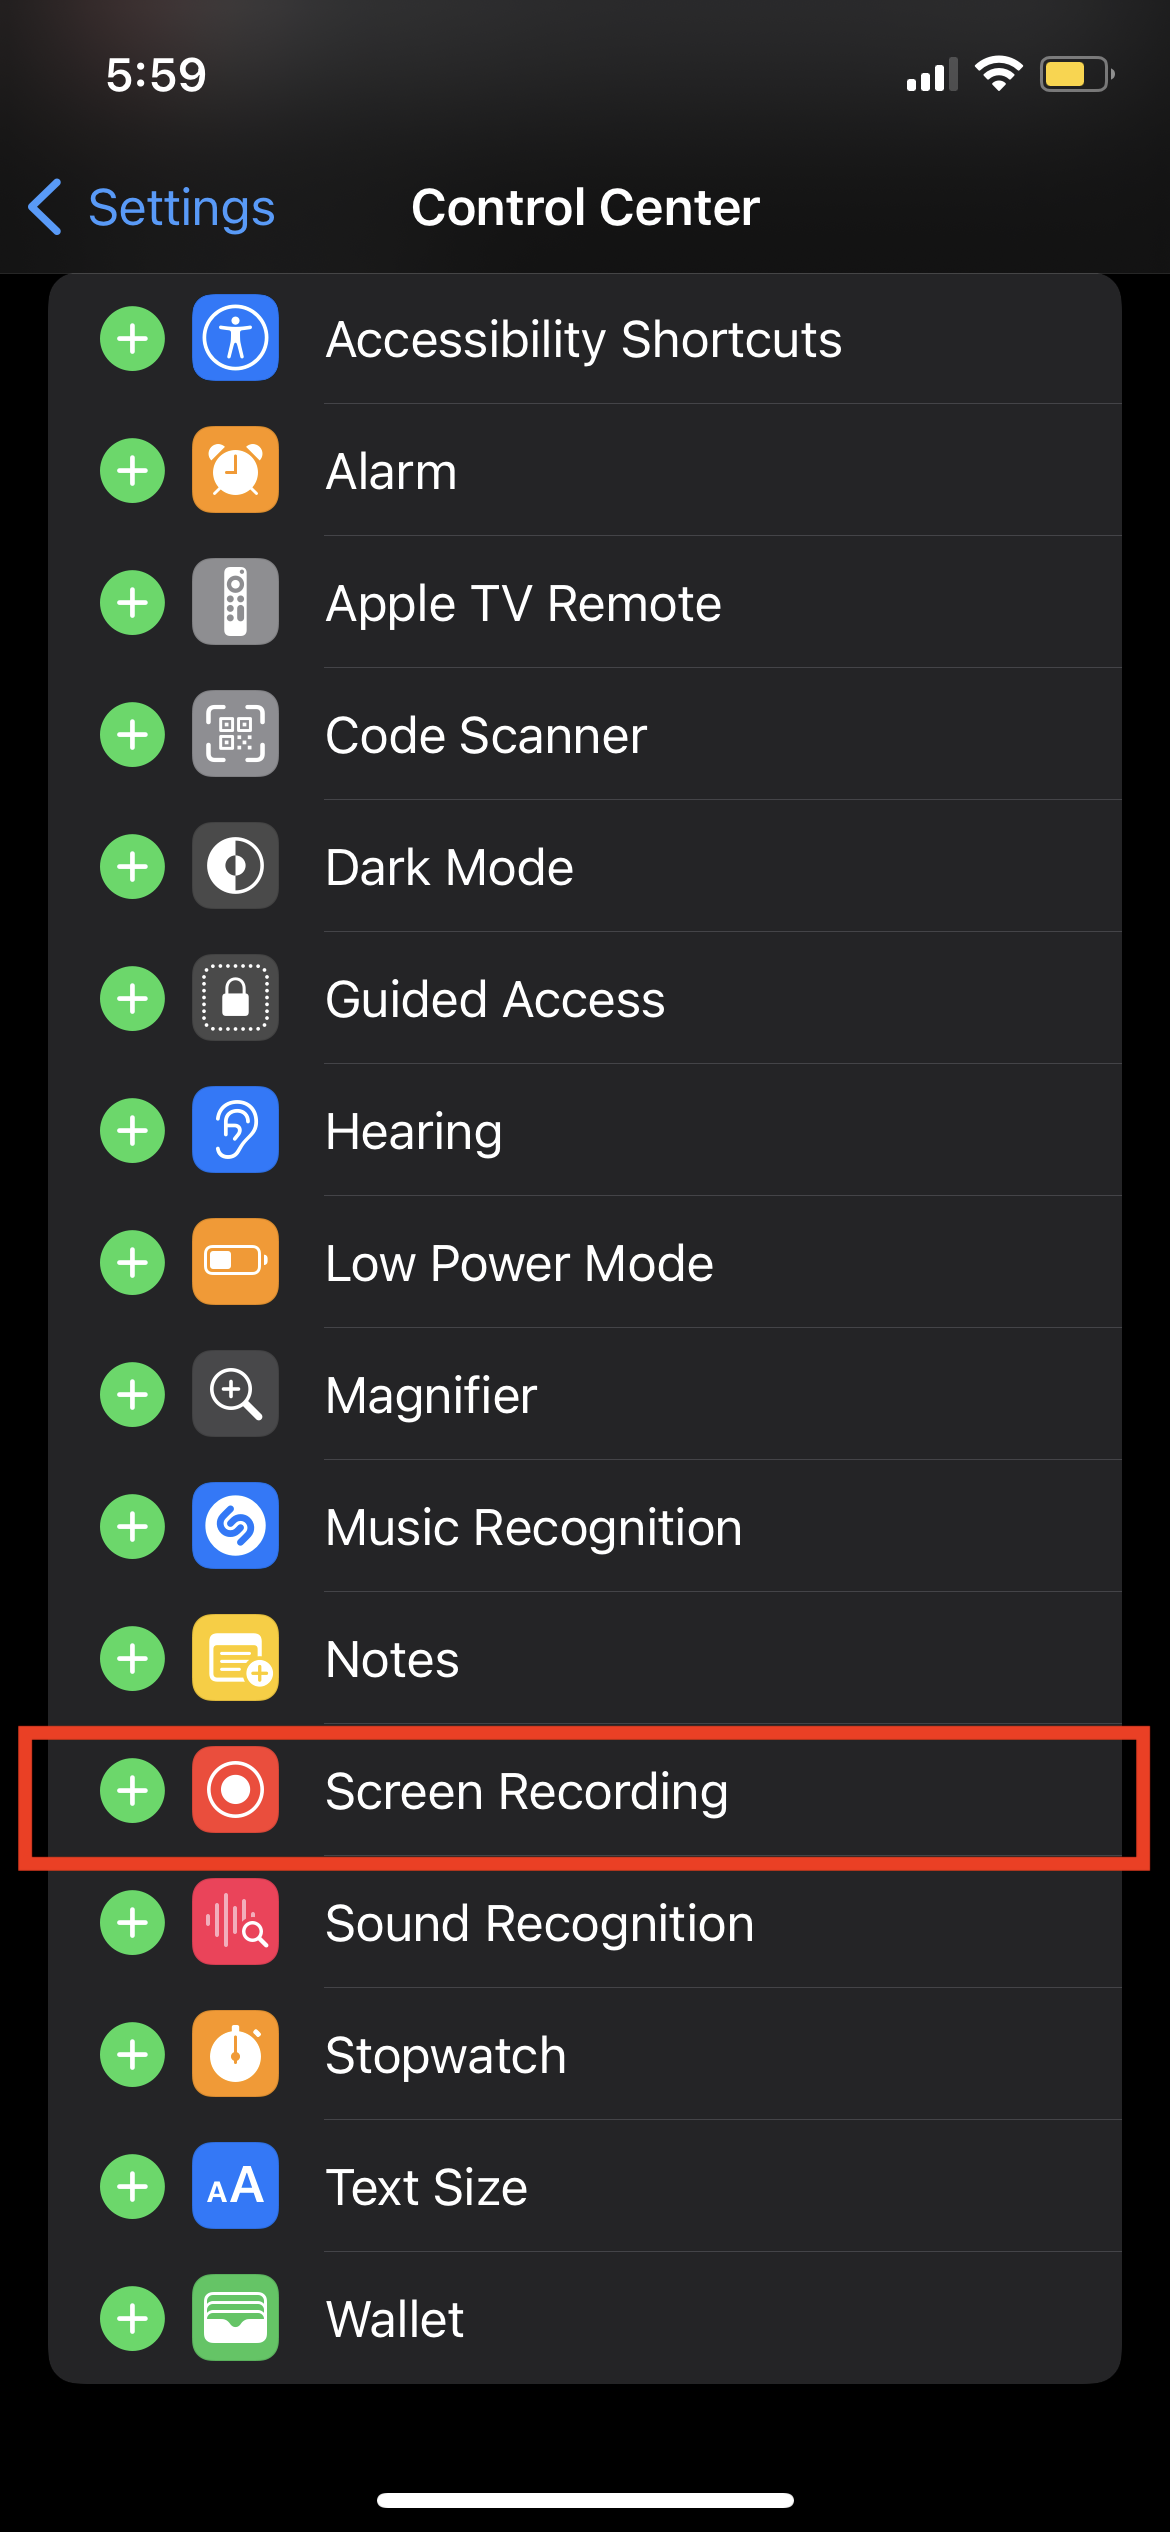
- Tap Screen Recording and ensure it is set to Allow.
3. Start a Call and Snap Away
Now, hop on a call. When you want to take a photo, look for the Shutter button (a white circle) on your screen.
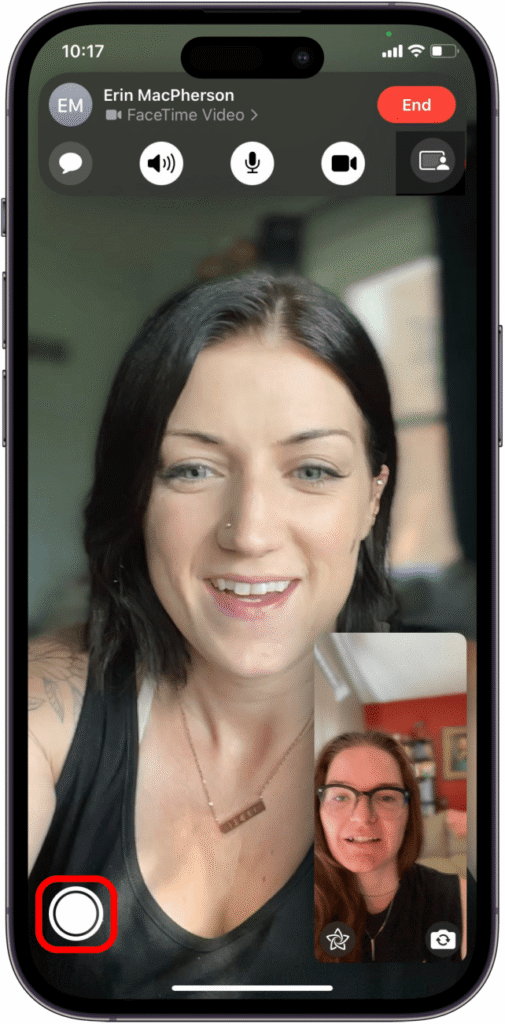
Tap it, and you will capture a Live Photo. This is just one of many cooliOS FaceTime features that make the experience better than a standard phone call.
Here’s How to Enable FaceTime Screenshots on Mac
If you are calling from a MacBook or iMac, the process is slightly different but just as easy.
1. Open FaceTime Settings
- Open the FaceTime app on your Mac.
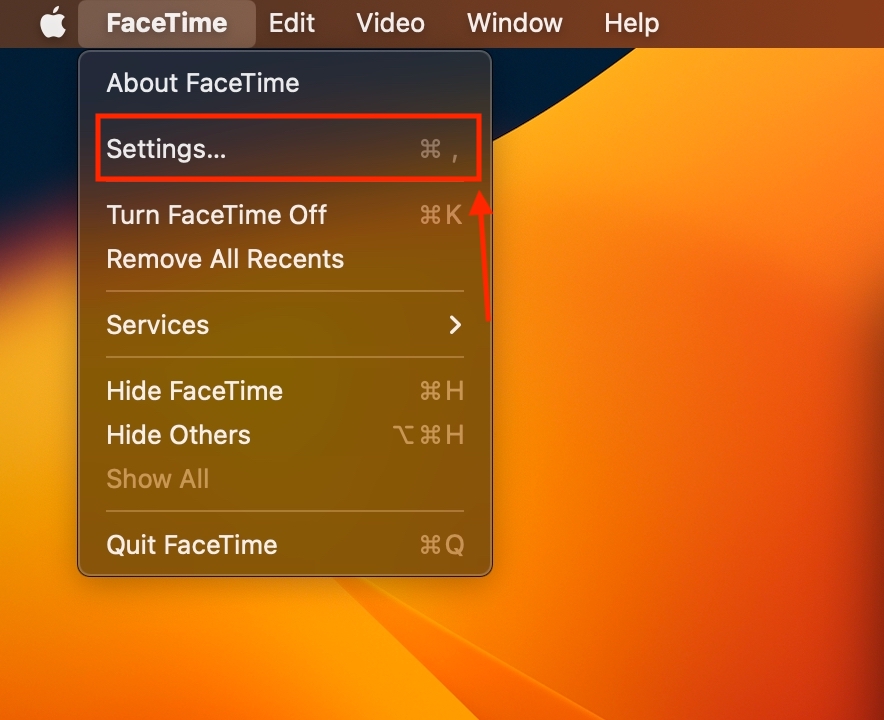
- Look at the menu bar at the top of your screen and click FaceTime.
- Select Settings (or Preferences on older macOS versions).
2. Enable the Feature
- Click the General tab if it isn’t already selected.
- Find the checkbox labeled Allow Live Photos to be captured during video calls.
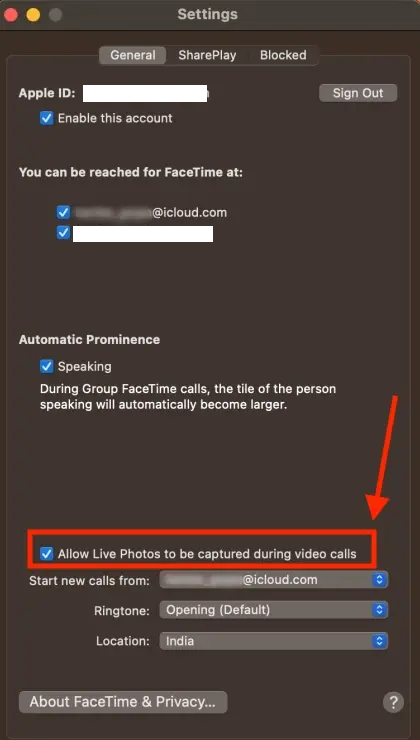
- Click the box to check it.
3. Take the Photo
During a call, you will see a Shutter button (a white circle) on the FaceTime window. Click it to snap a photo. If you are on a Group FaceTime call, double-click the tile of the person you want to photograph to see the shutter button.
Additional Tips
- Privacy Matters: When you take a FaceTime Live Photo, the other person will receive a notification on their screen saying that you took a photo. It is always polite to ask first!
- Where to Find Them: These photos save directly to your Photos app, usually in the Live Photos album.
- Standard Screenshots: If the Live Photo feature isn’t working or the other person has it disabled, you can still take a regular screenshot using physical buttons or keyboard shortcuts.
- iPhone: Power + Volume Up.
- Mac: Command + Shift + 3 (Full screen) or Command + Shift + 4 (Select area).
Final Thoughts
Enabling Live Photos on FaceTime is a game-changer for keeping memories of your digital hangouts. It effectively removes the blurriness of standard screenshots and gives you a vibrant, moving image of your loved ones. Just remember to double-check that your friends have the setting turned on too, so you never miss a shot. Happy snapping!
FAQs
This usually happens if the other person on the call does not have the FaceTime Live Photos setting enabled on their device. It can also happen if one of you is running an outdated version of iOS or macOS.
No, FaceTime does not generate a system notification if you take a standard screenshot using keyboard shortcuts or physical buttons. However, they might hear the shutter sound if your volume is up.
Yes! You can take Live Photos during Group FaceTime calls as long as the specific person you are photographing has the feature enabled.
All photos taken via the FaceTime shutter button are automatically saved to your main Photos library on your iPhone, iPad, or Mac.



Discussion