
Whether it’s a simple grocery shopping list or your child’s graduation photos, your data matters. Accidents happen. I know I’ve been in a situation where I didn’t realize I deleted something that I really wanted, only to desperately search for methods to get it back. Fortunately, data recovery can be pretty easy on Mac, so long as you know what you’re doing and using.
Let’s look at some of the best solutions and methods for restoring files from your drive, even if it’s damaged.
1. Reverse the Decision: Undo Button or Using Put Back
Many may not know this, but you can recover files from your Trash on Mac. However, this is only going to work if you have not emptied your Trash yet. Consider other options below if you have already emptied your Trash.
First, it’s important to remember that you can use the Undo Command if you immediately regret sending something to the Trash. Simply press Command + Z to undo this action, putting your files back in the folder where you found them.
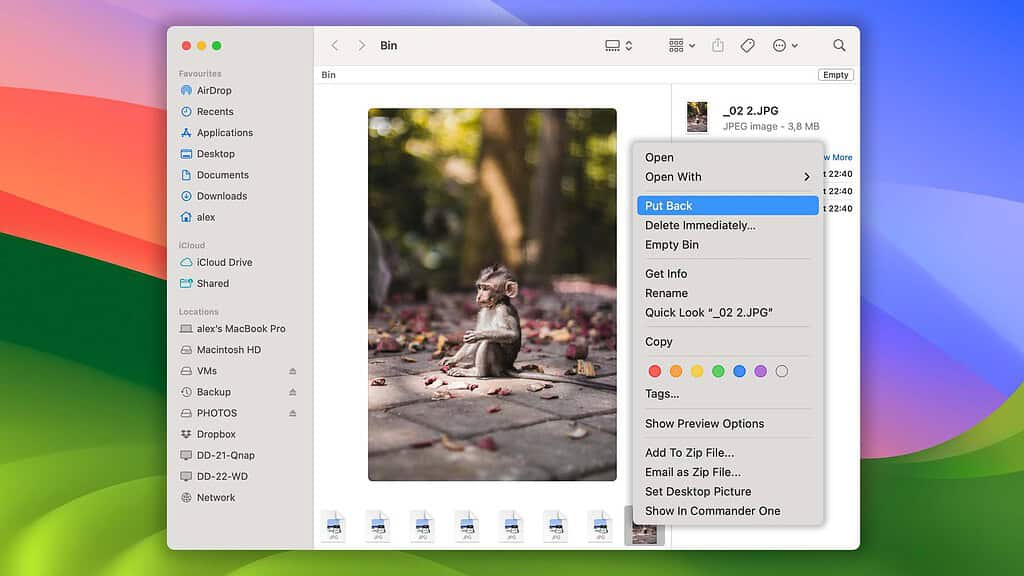
For items that have been in your Trash for a while, you can use the Put Back option. This allows you to directly recover files from the Trash, but you can only recover one file at a time. Sorry, but selecting multiple isn’t going to work.
Time needed: 1 minute
To use the Put Back option with Trash:
- First, open your Trash Folder by clicking the Trash icon in your Dock.

- Choose the file you want to recover. Right-click it or Control-click the file.
- Select Put Back from the drop-down list. The file will return to its original folder.


Of course, if you need further help, I’ve got you covered. Not everything is going to be in the Trash can, so keep reading if you need to explore further options.
2. Using Data Recovery Software for Mac
For file recovery beyond simple Mac commands, going with professional software can save you time and money in the long run. While PhotoRec can be a powerful open-source tool, I’m also a fan of Disk Drill recovery for Mac. One of the best reasons I like this software is that it keeps Apple products in mind. Not only does it support all major Apple devices (Mac, iPhone, iPad), but it also supports Intel- and Apple-based Macs, including the M3 chip.
Even the free version of Disk Drill can perform deep scans of your system to hunt for missing or recoverable files. The complete list of recoverable files by Disk Drill is virtually endless. Even better, actually using the software is incredibly simple.
- First, just open Disk Drill. Then, select your drive from the list. The side menu provides even more options as well.
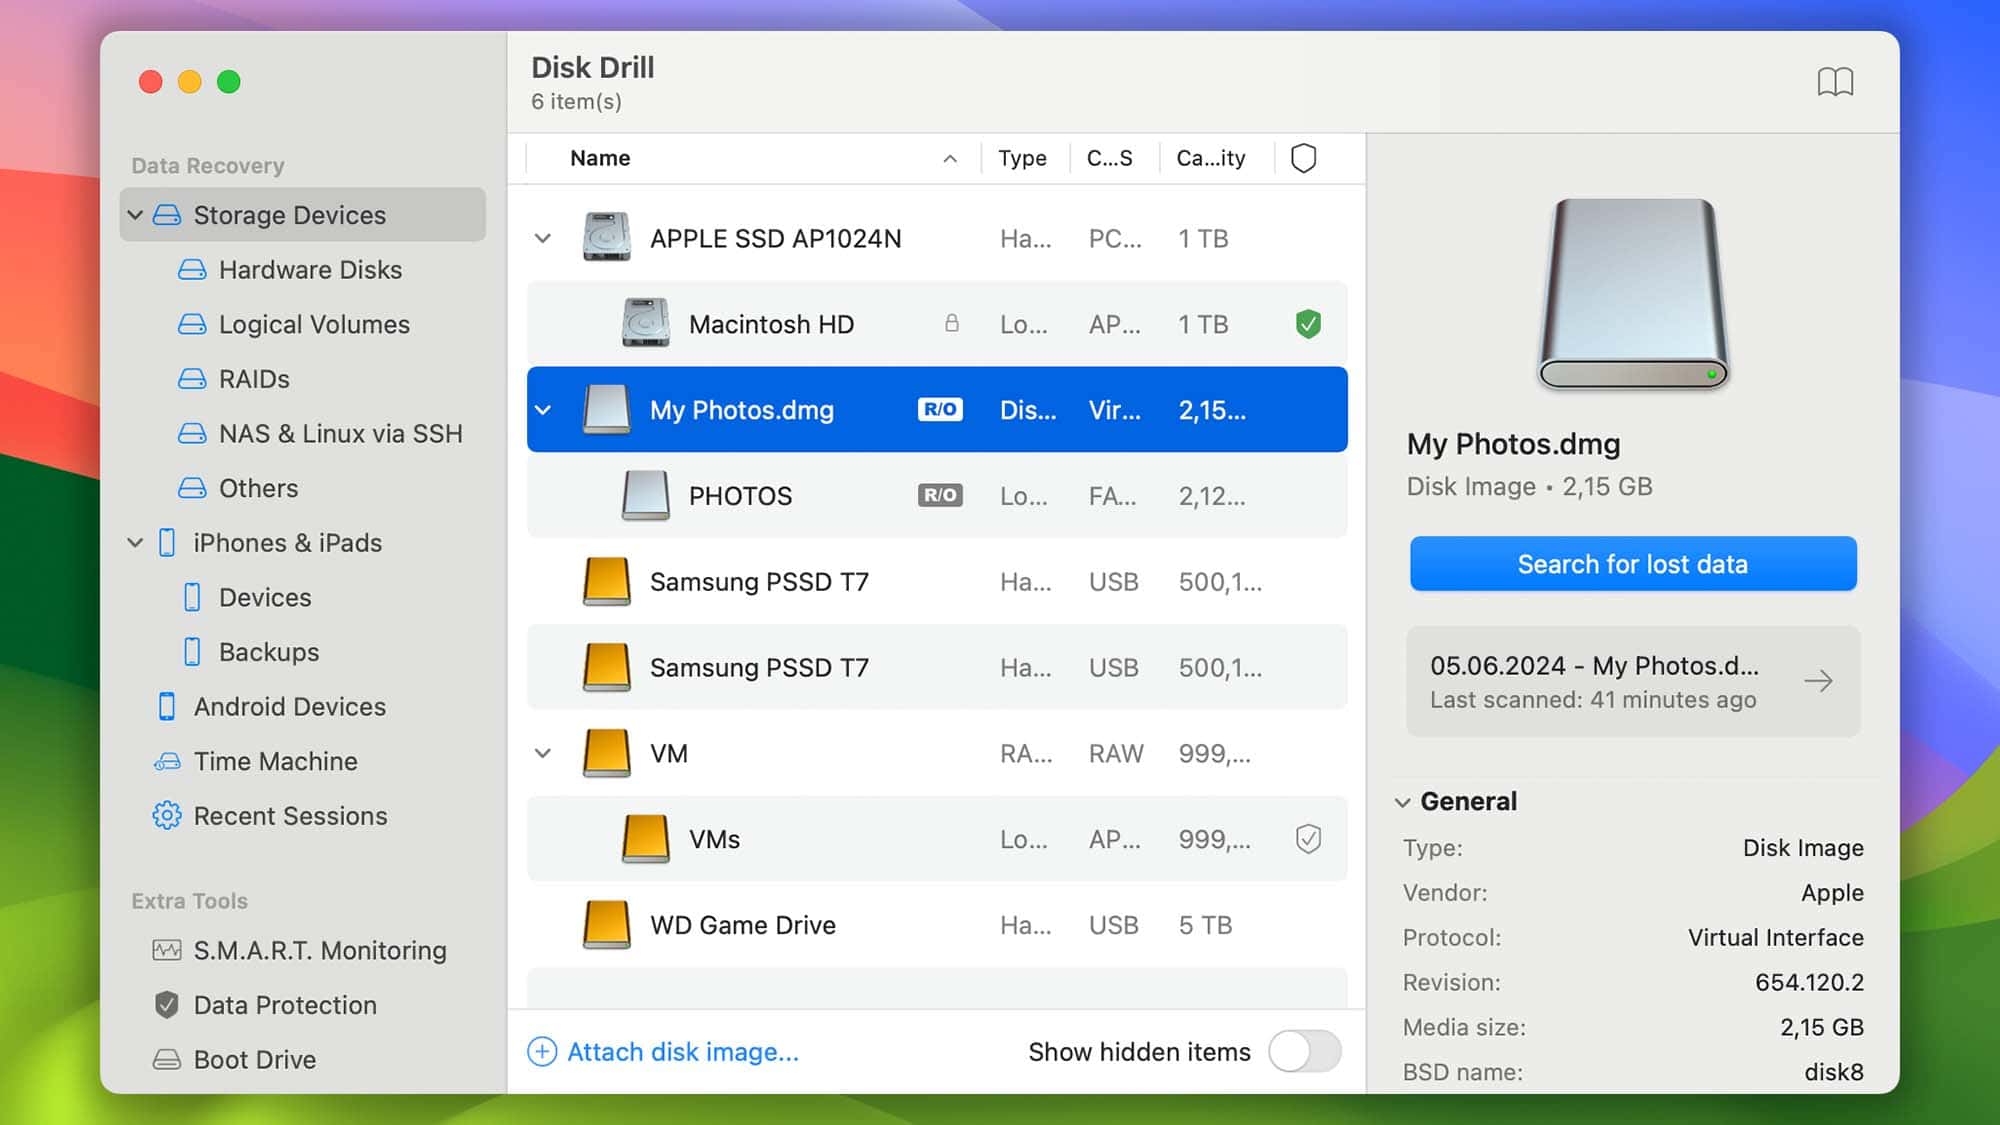
- From here, just select Search for Lost Data to begin a scan. This may take a moment.
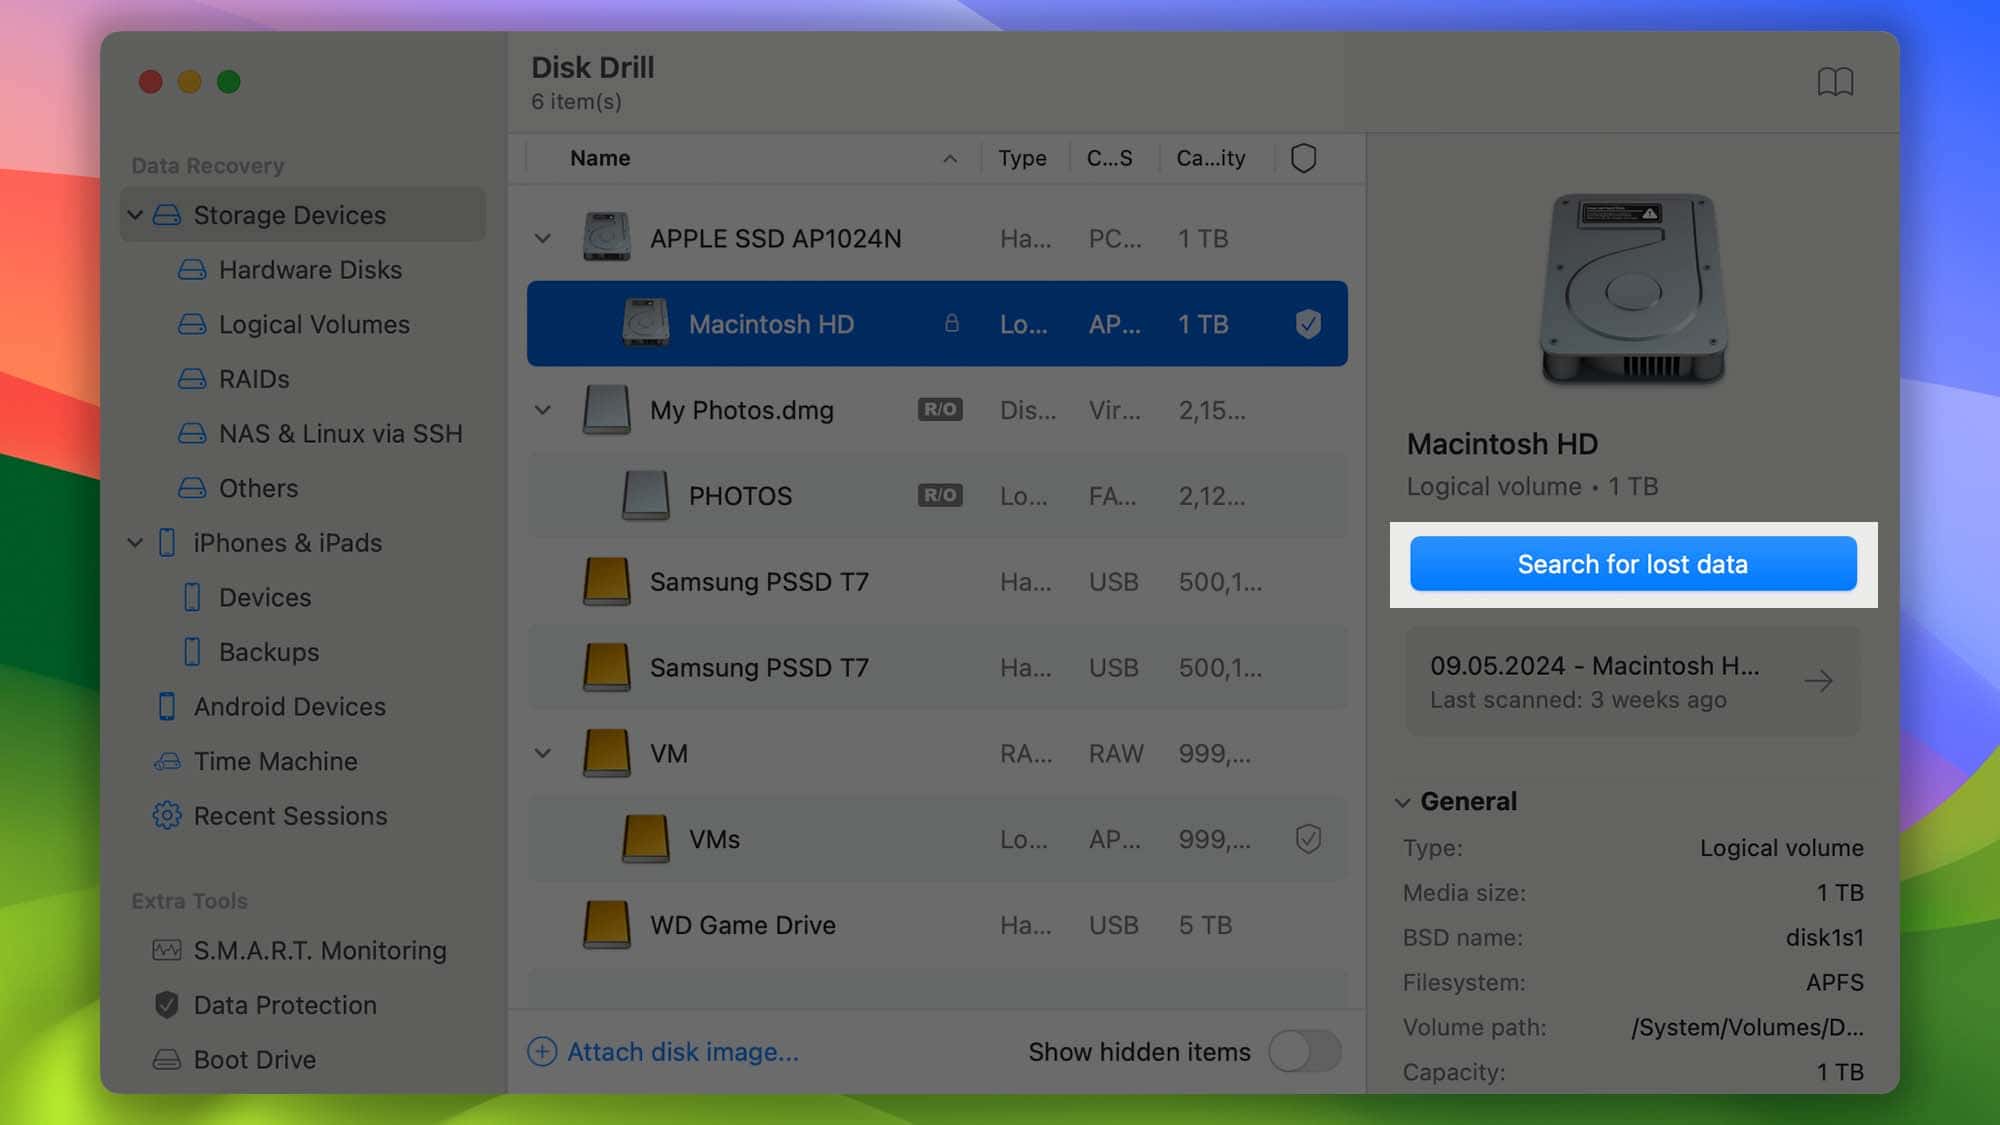
- Once the scan is complete, you can filter your results to select the files you want to recover. From here, you just need to select Recover and choose where you want the files to go.


Disk Drill can help restore permanently deleted files on Mac and even offers a Pro version packed with more features. Not only do you get everything that the free version includes, but also the Pro version includes up to three simultaneous activations and access to all of the software’s recovery options. There is also an Enterprise option for those that need recovery at the corporate level.
Considering there is a free option available, I’d recommend giving this software a try if you need complete file protection and recovery.
3. Using iCloud to Restore Files on Mac
One of the greatest things about using an Apple product is the free 5GB of iCloud storage that Apple provides. This is going to be one of the best ways to ensure that your files are protected, but it does have its downsides as well.
For starters, using iCloud with your iPad or iPhone is going to be slightly easier, as these devices will automatically send things to iCloud. On Mac, you need to remember to save your files to your iCloud Drive. It also doesn’t take much work to fill 5GB of storage. Personally, I go with the 50GB iCloud+ plan, but remember you can also bundle iCloud+ with an Apple One plan.
When it comes to restoring files using iCloud, the process is super easy. Remember that on Mac you can easily access your iCloud Drive with a Finder window. For this guide, I’m going to show how to access and download your files regardless of what device you’re using.
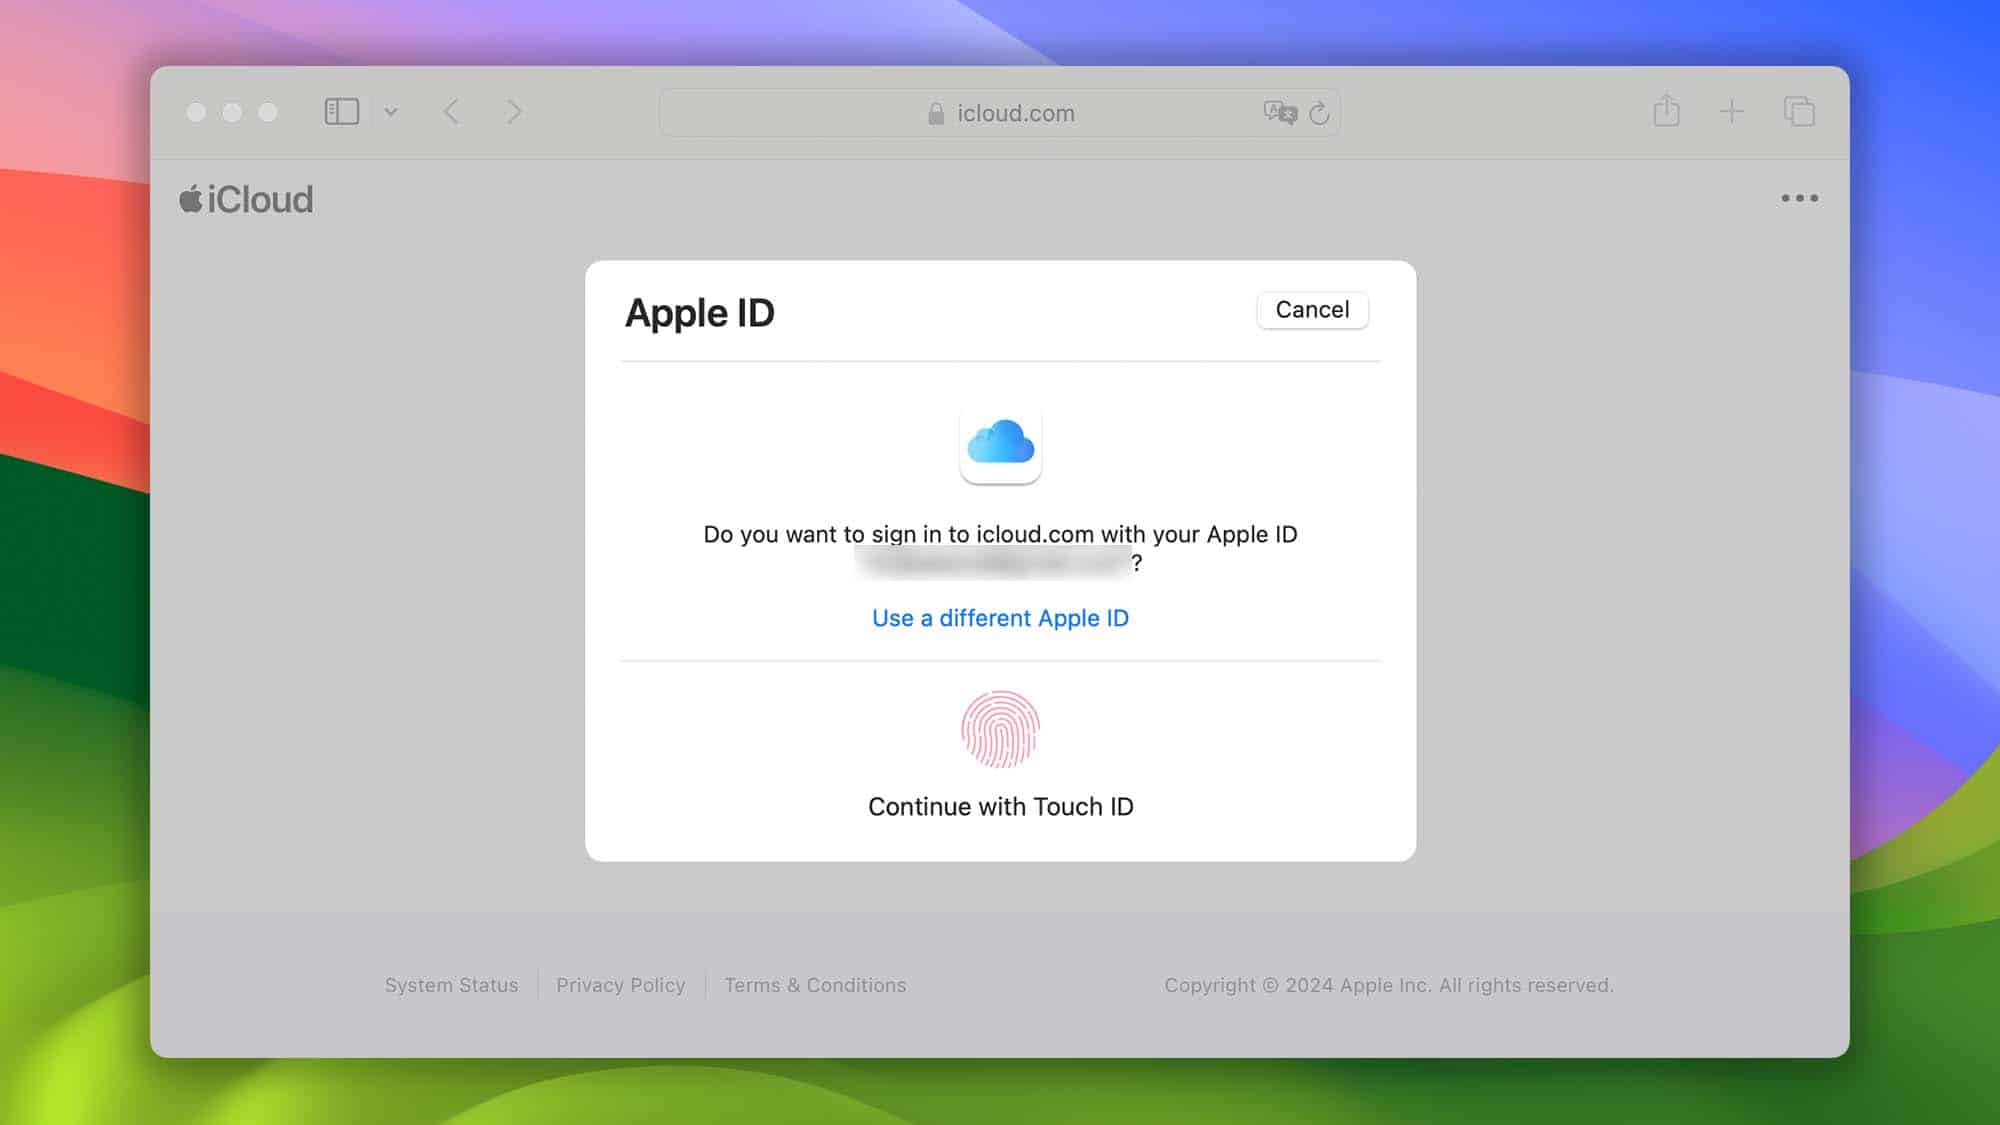
- First, visit the official iCloud website and select Sign In. Log in with your Apple ID information.
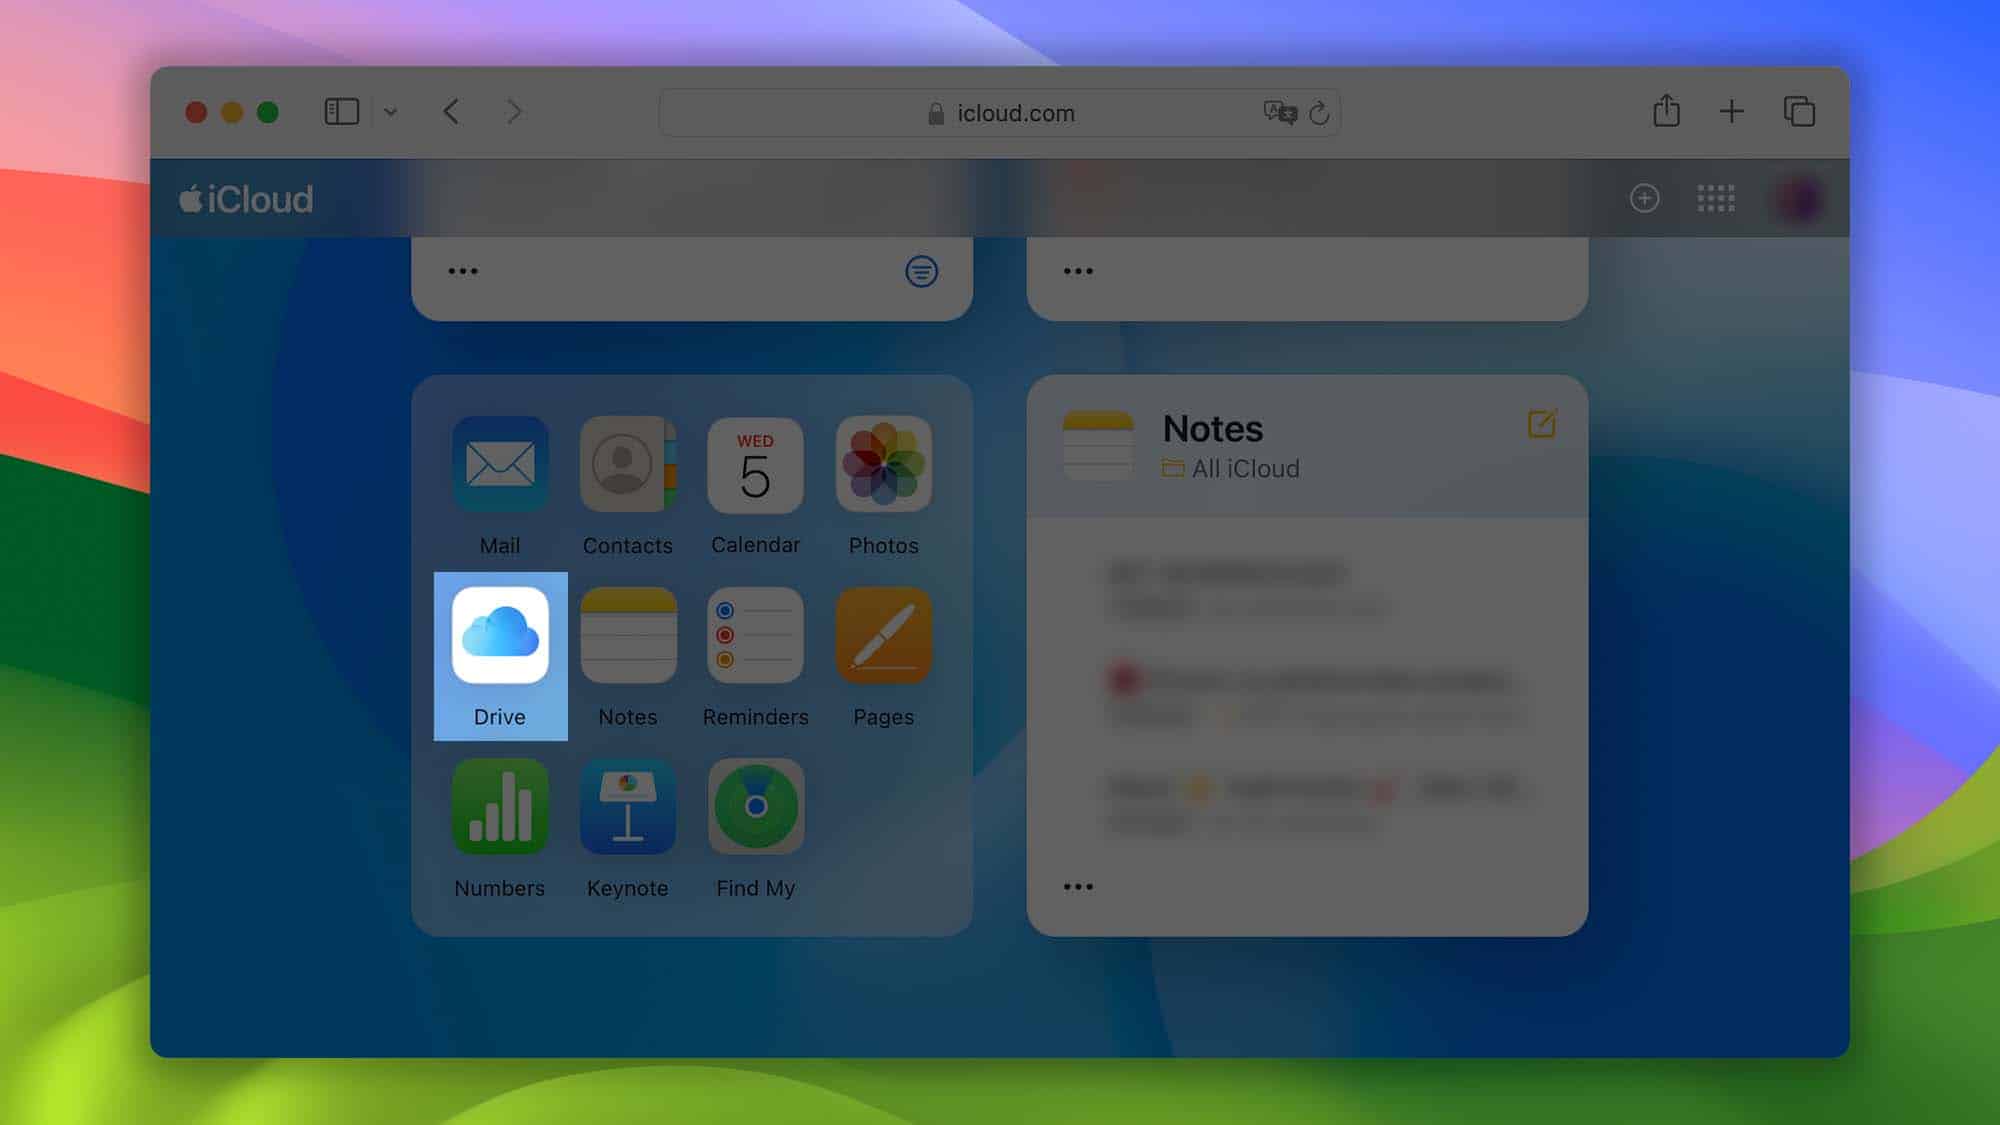
- Then, select Drive.
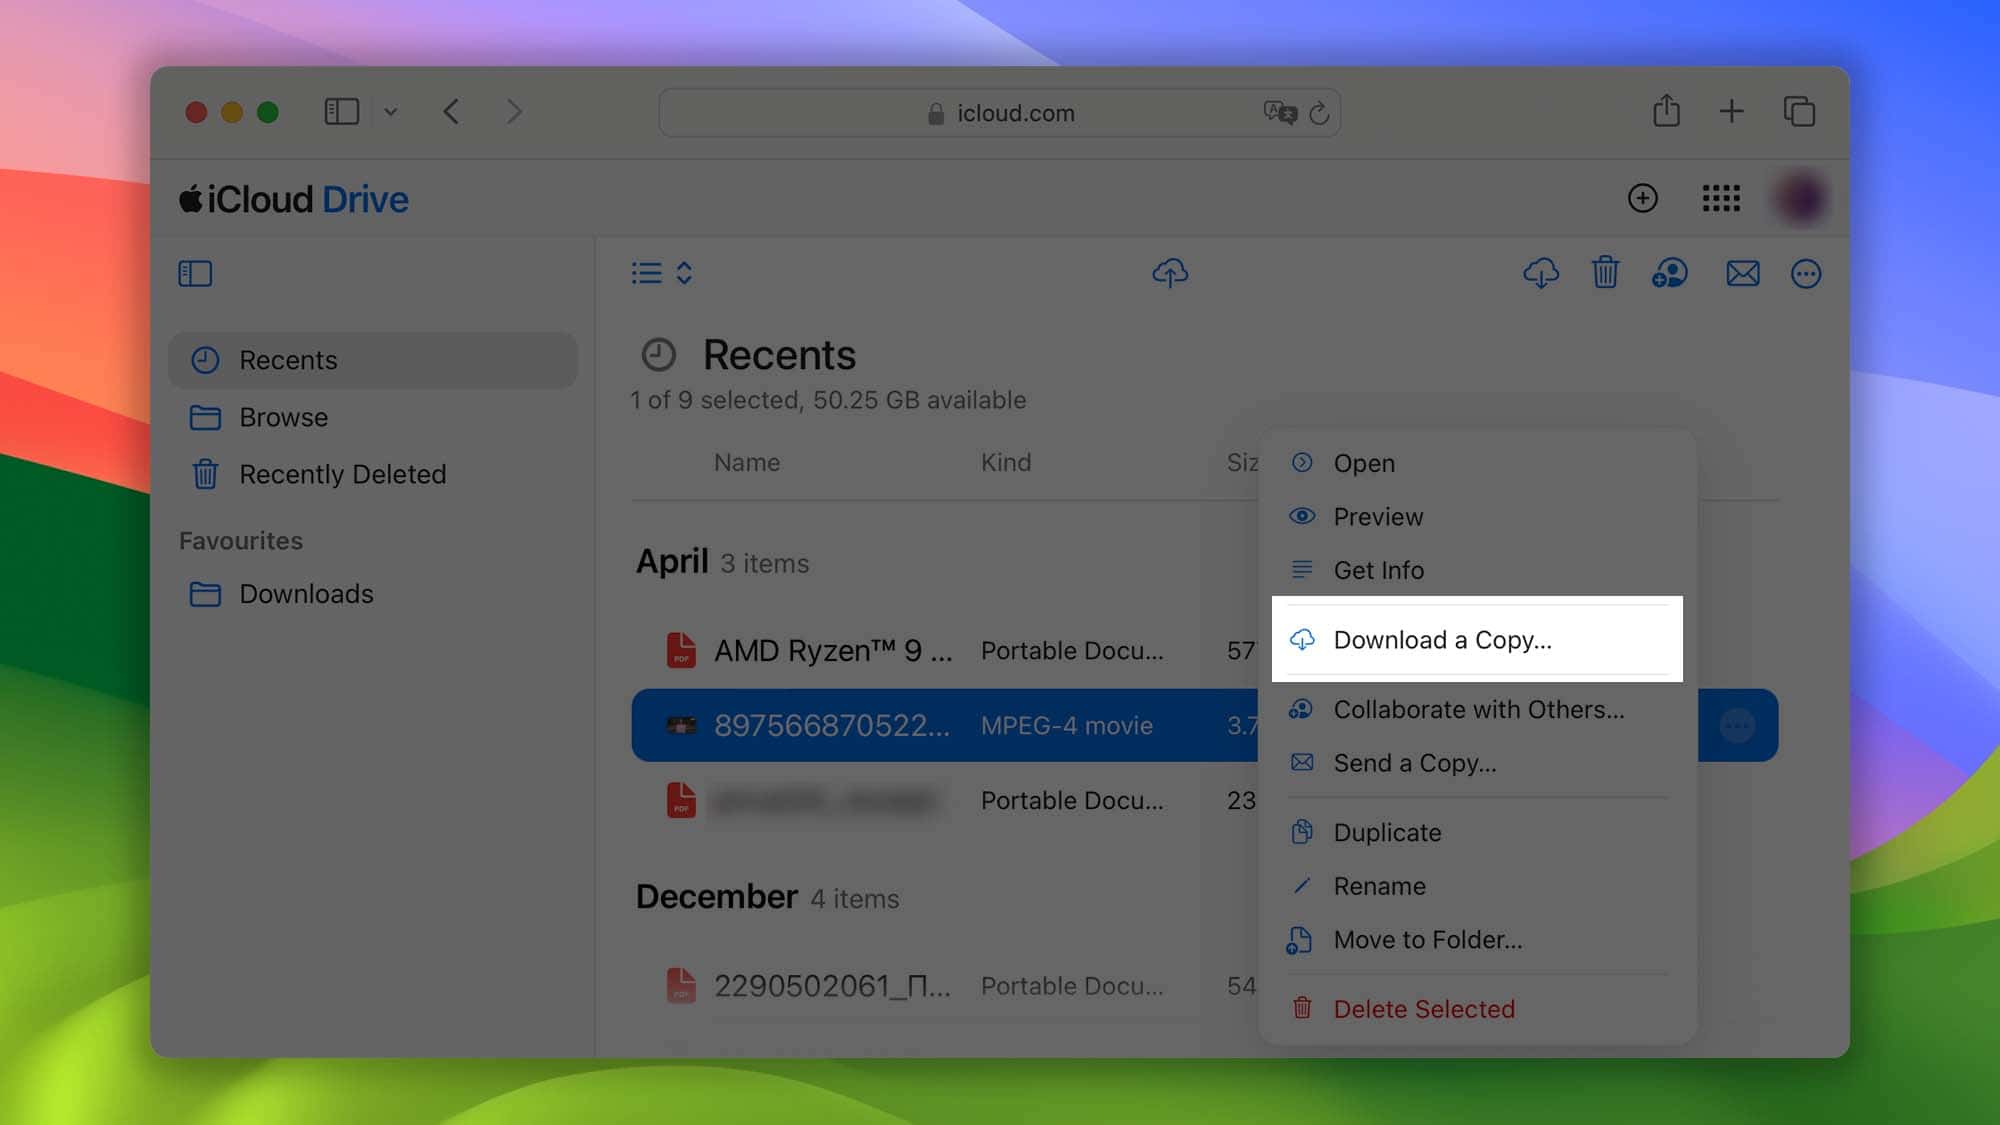
- Select the file you want to obtain, then click the three dots.
- Choose Download a Copy. Your file will begin downloading.


4. Restore Files Using Time Machine
For those already running Time Machine backups, you’re in luck. Apple’s built-in backup software can be incredibly important for ensuring that you never lose a single file. However, the major downside to Time Machine is that while it does have a lot of options for setting up a backup destination, it may not be easy for everyone to set up. There’s also the major downside that it won’t help you at all if you haven’t set it up already.

I won’t spend too much time going into this app, as our complete guide provides a great run down, including a quick guide on how to restore photos using Time Machine. While it may not be helpful in retrieving files if you haven’t set it up, knowing your options is always good for restoring files in the future.
5. Data Recovery Service: Recommended for Macs That Are Physically Damaged
For data recovery, there can always be a way for things to go further south. Within this article, we’ve looked at restoring files on a good hard drive, but what about one that’s been damaged? While it is possible, it isn’t necessarily going to be pretty. Considering all data can be boiled down to ones and zeros, completely erasing something from a hard drive can actually be a really hard task. While this isn’t so great for people trying to delete things, it’s great for those trying to restore files.
For those in the States, Best Buy does offer data recovery services. However, I would personally do some research and look for someone local in your area who is capable of providing these services. Check reviews, as you deserve to pay a fair price while still going with someone who will value your files and privacy. Note that these services can get pricey, as data recovery at this level can get complicated.
Data recovery can often be a hassle, if not an outright nightmare experience, but it doesn’t have to be. Following the methods above, you can do your best to recover your lost files. You may also want to know how to quickly find and remove large hidden files on your Mac.


