
If you have been facing issues with your macOS updates and getting the error “Available software update has changed,” you are not alone. After trying multiple methods to fix this error, I have compiled a list of all the solutions that might help you update your Mac.
How to Fix Available Software Updates Have Changed Error
Software updates, including security updates, play a major role in fixing major bugs or issues on your MacBook. However, when the update itself does not seem to be working normally and has been showing the available software updates have changed error, the reason could be anything behind this.
It could be because of network connection errors, software glitches, or other reasons we might be unaware of. Let’s look at the fixes you can try below.
1. Check for Storage Space
If you are unable to install the update, then you may not have enough storage space on your MacBook.
Time needed: 1 minute
Let’s check the used and available space on your Mac.
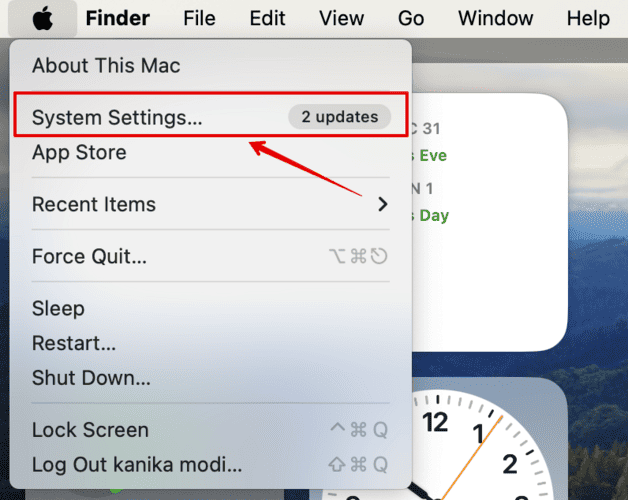
- Go to the Apple menu and open System Settings.
- Click on General on the left sidebar.
- Select Storage on the right.
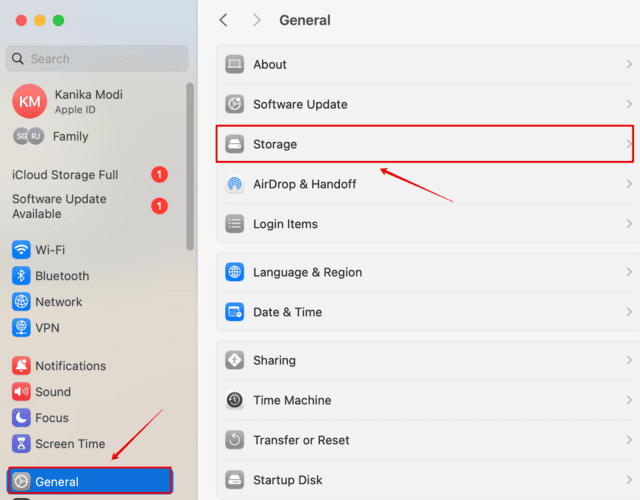
- Wait for a few seconds while the system calculates the total storage information.


You can scroll and check all the different sections of your Mac and how much storage space they have occupied. Accordingly, you can delete some large files and try updating macOS again.
If you want to save additional space on your Mac, you can use a specialized maintenance tool. Personally, I use the Intego Washing Machine app because it helps me erase all unnecessary files like caches, junk files, duplicate files, etc, and succeeds in optimizing my Mac storage space in no longer than two minutes.
2. Update in Safe Mode
If you have enough storage space, you need to try updating your system in Safe Mode. This method has worked for me every time, as well as hundreds of other Apple users. It requires a few steps to update in Safe Mode, so follow the steps below carefully.
For Apple Silicon
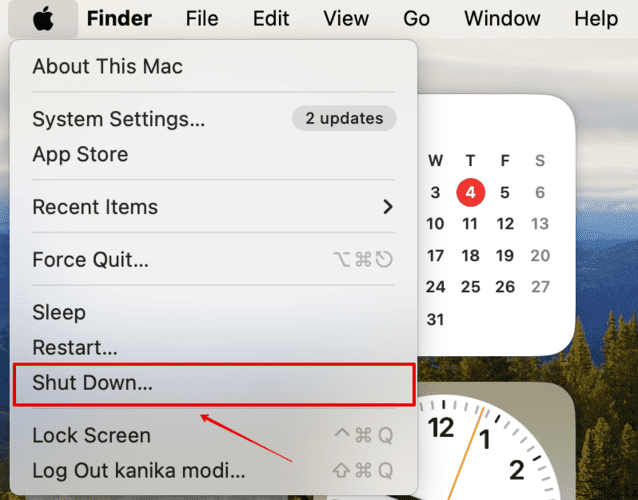
- Go to the Apple menu icon on the top left of your desktop.
- Click on Shut Down.
- Now, wait for a few seconds.
- Press and hold the power button till you see the Startup Options.
- Click and select your disk volume.
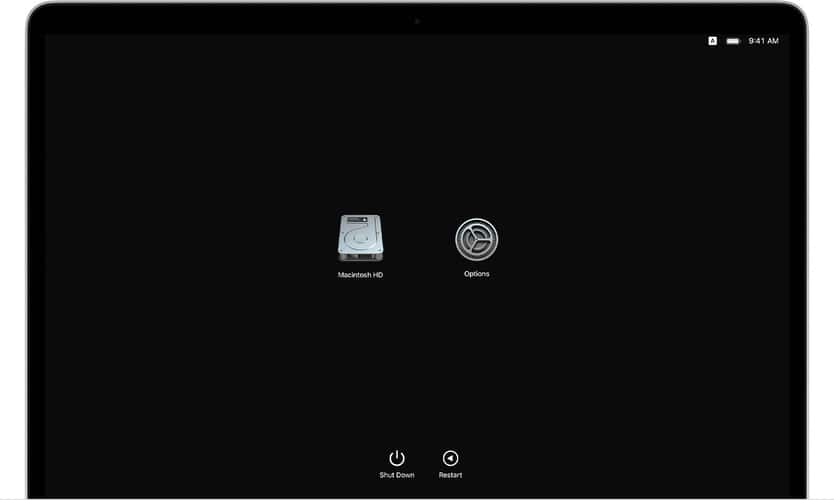
- Press the shift key for the Continue in Safe Mode option to appear on the screen.
- Click on it.
- Wait a few seconds for the system to start in Safe mode and log in.


For Intel-Based Mac
- Restart your Mac.
- Press and hold the Shift key until you see the screen’s login window.
- Now, log in to your Mac.
You can now install your update and check if it works.
3. Check Your Internet Connection
Have you checked your internet connection yet? Due to an unstable internet connection, you might get the “available software updates have changed” error when you update your macOS. Here are a few measures you can take to ensure the internet connection is working properly.
- Disconnect and then reconnect your Wi-Fi.
- Check your internet speed online.
- Try restarting your router and recheck the internet connection.
4. Set Date and Time to Automatic
An incorrect date and time on your Mac can often interfere with the update process, leading to errors. The best way to move forward is to set macOS to fetch time automatically based on your time zone. This way there is no scope for error.
Here is how you can do it.
- Click on the Apple menu icon on the top-left corner of your desktop.
- Open System Settings.
- Go to General and open Date & Time on the right sidebar.
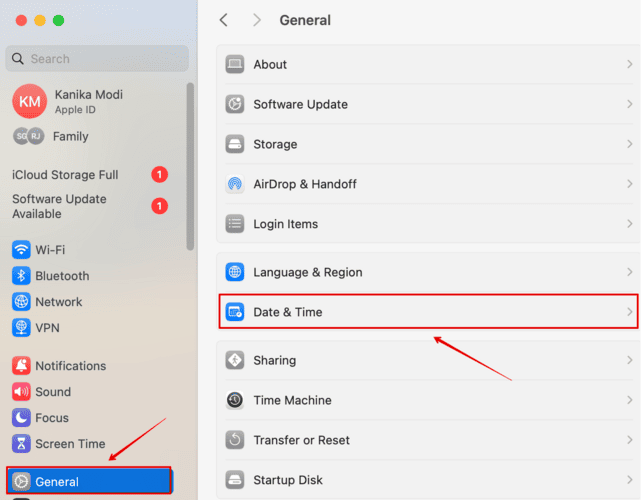
- Enable Set time and date automatically.
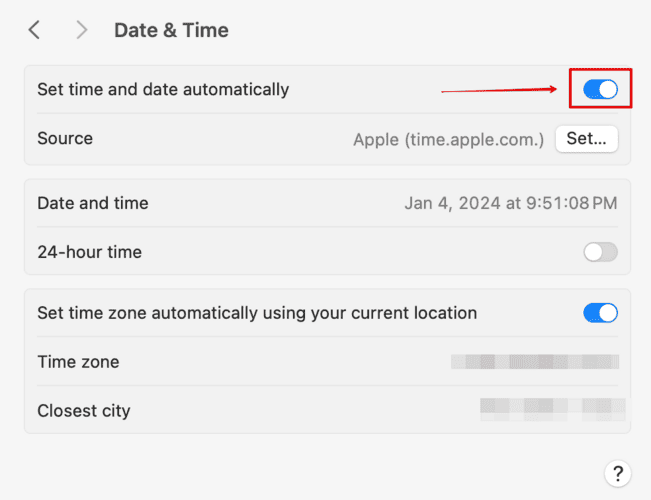


Your time will be reset now and will continue to adjust automatically based on your selected time zone.
5. Reset NVRAM
After trying everything I have mentioned above, if the error persists you might need to do an NVRAM reset on your Mac. Now, this method only works for Intel-based Macs. For Apple silicon, you can simply restart your system, and that will be enough for a reset.
Let’s look at the steps below to reset NVRAM for Intel Mac.
- Go to the Apple menu and Shut Down your Mac.

- Press the power button to turn on and press the Option + Command + P + R keys.
- Keep pressing them for 20 seconds, and then release them. You may hear a startup sound while the Mac restarts.

Make the necessary changes to your system and then check for software updates.
6. Contact Apple Support
Lastly, after trying everything, this is your last resort. Apple support has always been super helpful, no matter what issue you might face with your MacBook.
Similarly, you can contact them via live chat support and let them know about the error and all the methods you have already tried. If your error has been resolved, let us know what worked in the comment section below.


