Bitdefender is a popular antivirus software for Macs that protects against viruses and internet threats. It has a 30-day free trial, which is great for trying it out. But what if you decide Bitdefender isn’t for you and want to get rid of it? That’s where some people run into trouble. Keep reading to find out how to force remove Bitdefender.
Why Can’t I Remove Bitdefender From My Mac?
The main reason is Bitdefender’s strong protection system. When you try to delete it, it automatically puts back certain files. Also, Bitdefender creates some files that your Mac thinks are important system files, so your Mac tries to keep them safe from being deleted.
Plus, even when you try to uninstall Bitdefender, some leftover files like launch agents, login items, and system extensions might still stick around on your Mac.
How Do I Force Remove Bitdefender From My Mac?
Time needed: 2 minutes
Follow these steps to successfully delete the antivirus, as they were outlined by Bitdefender itself:
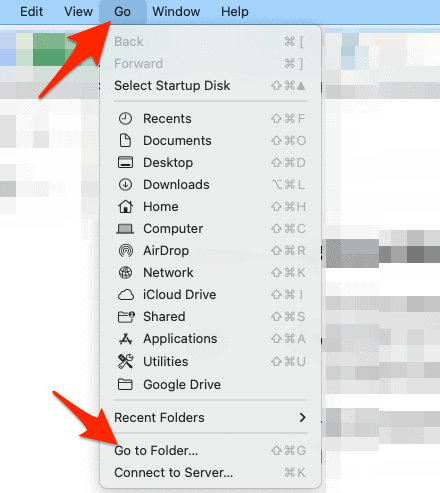
- Open Finder by clicking on its icon situated at the bottom left of the Dock then click Go from the App menus and opt for Go to Folder from the drop-down menu.

- Enter /Library and hit Go. This action will open the Library folder.

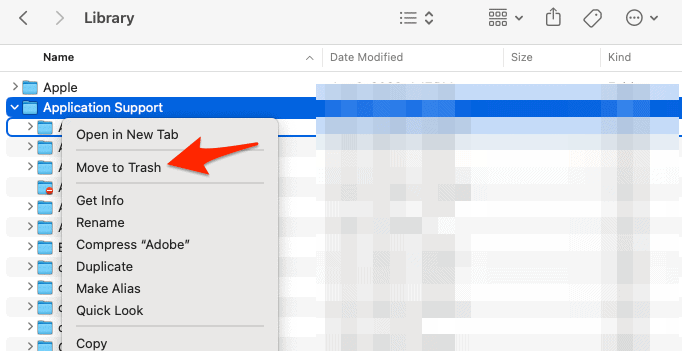
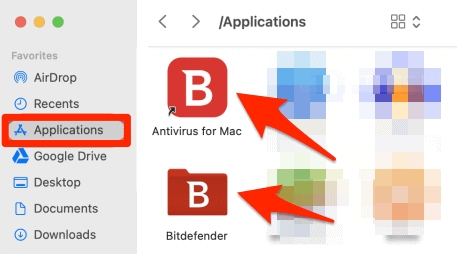
- Within the Library folder, navigate to Application Support and remove Antivirus for Mac and Bitdefender by control-clicking on them and selecting Move to Trash.

- Return to the Library folder and delete the Bitdefender folder.
- Next, access the Extensions folder inside Library and remove the following: FileProtect.kext, SelfProtect.kext, and TMProtection.kext.
- Lastly, navigate to the Applications folder and remove Antivirus for Mac and the Bitdefender folder.


In case some Bitdefender files and folders mentioned above are absent on your Mac, only delete the ones still present.
After successfully uninstalling Bitdefender from your Mac, you might be looking for a reliable alternative to ensure your system stays protected. Intego Antivirus is an excellent choice specifically tailored for Mac users. With its user-friendly interface and robust protection against malware, viruses, and other security threats, Intego Antivirus has earned acclaim within the Mac community.
Its dedicated focus on macOS ensures that it is finely tuned for the platform, making it a worthy successor to Bitdefender for safeguarding your Mac.

Intego
Ensure safety and security for your Mac at all times with the best antivirus solution.If you still face a Bitdefender uninstall error on Mac, try the second solution below.
How Do I Completely Remove Bitdefender?
The steps outlined below are only applicable to macOS Catalina 10.15 and earlier versions. To determine your macOS version, go to Apple menu > About this Mac.
- It is best to create a fresh backup on an external disk before moving forward.
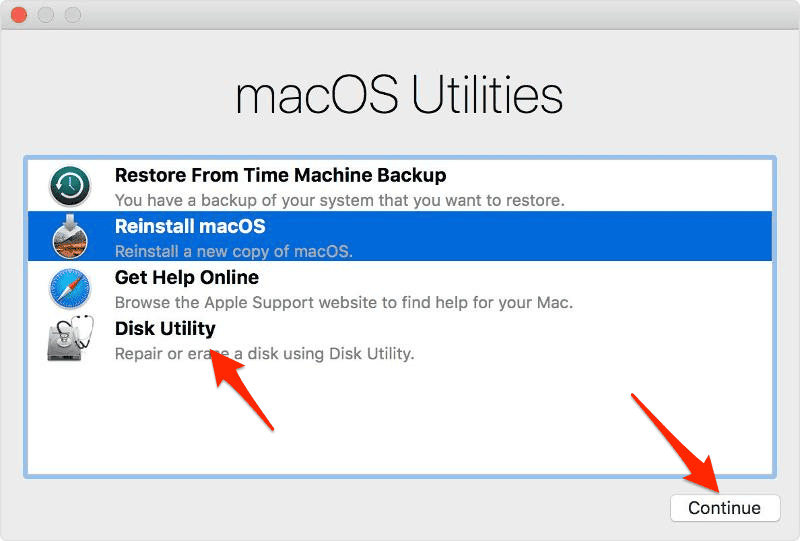
- Reboot your Mac and press Command + R during the restart until the Apple logo appears to enter Utilities. Choose your preferred language and click the arrow at the bottom to proceed.
- Choose Disk Utility, then click Continue.

- Select your startup disk (e.g. Macintosh HD) and if it’s not mounted, click Mount. If FileVault locks it, enter your admin password to unlock it. Otherwise, skip to the next step.
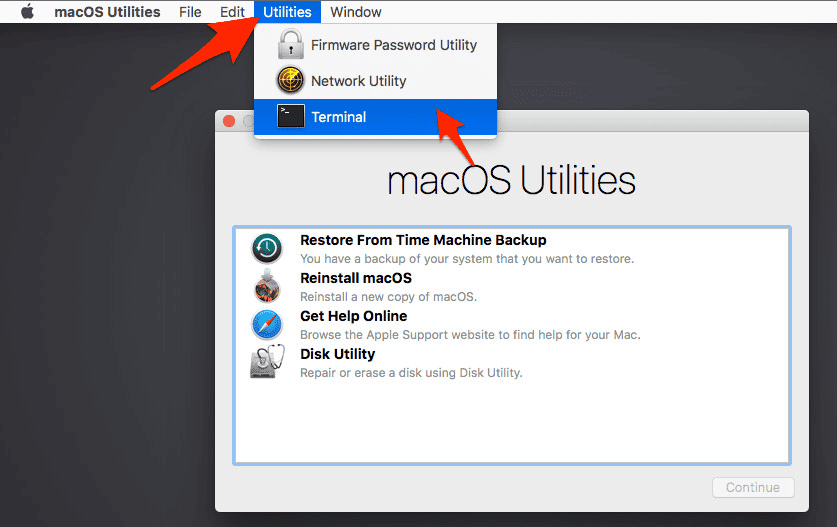
- Close the Disk Utility window to go back to the Utilities one.
- In the menu bar, click Utilities and choose Terminal.

- In the Terminal window, enter the following commands and press Return after each:
~LS /Volumes/~cd /Volumes/Macintosh\ HD/Library/Extensions/
~LS~rm –rf SelfProtect.kext
~LS~cd /Volumes/Macintosh\ HD/Library/
~LS~rm –rf Bitdefender
~LS - Having removed the Bitdefender folder, restart your Mac in normal mode by clicking Apple menu and selecting Restart.