
Maybe you’ve heard people say that one of the greatest advantages of Macs over Windows is that they can never be infected with viruses. Well, that’s a misconception. I used to believe the same thing until a few years ago when my MacBook became infected with a virus. Here’s what I did to get rid of it.
How Do I Know if My Mac Has a Virus?
Watch out for these signs of malware: slow performance, unexpected changes in your browser like a new homepage or extensions, constant pop-up ads, unexpected security alerts, spam messages being sent from your accounts, and being unable to access personal files with warning notes popping up.
Remember, these signs aren’t surefire proof of a virus, so the best way to check is to use a trusted antimalware program.
How Do I Run a Virus Scan on My Mac?
If you need to scan your Mac for viruses, you’ll find plenty of third-party software claiming to help. However, Intego ONE out by combining powerful antivirus protection with a complete suite of security and performance tools for Apple devices. I often recommend it because of its effectiveness in detecting and eliminating threats such as adware, Trojans, and ransomware, but also because it can run a virus scan on your iPhone, iPad, and any devices connected to your Mac.
After clearing your Mac of viruses, you can use Intego ONE to get rid of junk and unnecessary files. This will not only free up storage on your device but also make it run smoother and more efficiently.
How Do I Clear a Virus From My Mac Without an Antivirus?
While using an antivirus is generally the easiest and most effective method to detect malware, it is not always the most affordable option. Here are some ways to detect malware on your Mac without relying on an antivirus:
1. Check for Unwanted Applications
Sometimes malware sneaks into your system alongside legitimate software. However, it’s important to remember that if you find an app on your Mac that you didn’t download, it is likely to be malware.
- Open Finder and navigate to the Applications folder.
- Scroll through the list of apps and remove any unfamiliar or suspicious ones.
- Empty the Trash to completely remove the deleted apps.
- Additionally, check for any hidden files related to the deleted apps and remove them as well.
2. Identify Malware in Activity Monitor
In many cases, it is necessary to stop malware from running on your system before attempting to remove it. To do this:
- Navigate to Applications > Utilities > Activity Monitor.
- Scroll through the list of apps and pay attention to any applications with unusually high memory usage or CPU.
- Select the X button in the top-left corner of the window to close the selected app.
- Search for the app name in Finder and delete it.
- Empty the Trash to ensure the deleted app is completely removed.
3. Check Your Browser Settings and Remove Unknown Extensions
It is important to review your browser settings and remove any unknown extensions, as hijackers often use these extensions to divert traffic and steal your data. While the process is similar for most browsers, the following steps specifically outline how to remove unwanted Safari extensions:
Time needed: 1 minute
- Open Safari and go to Preferences or Settings.

- Click on the General tab.
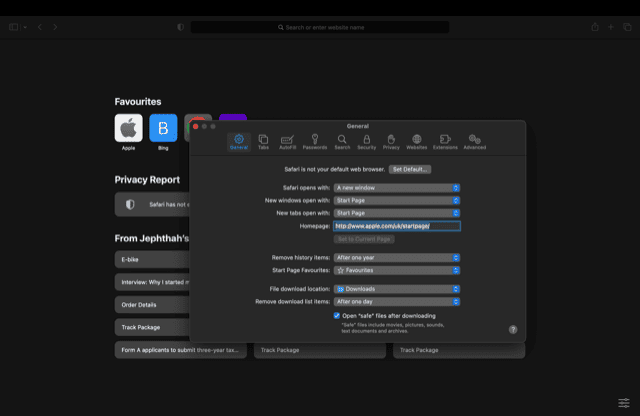
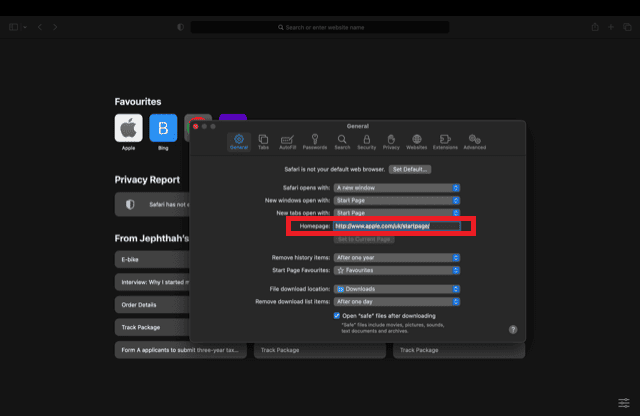
- In the Homepage section, verify the homepage address. If it is unfamiliar, change it to your preferred address.
- Go to the Extensions tab and uncheck the boxes next to any suspicious extensions.
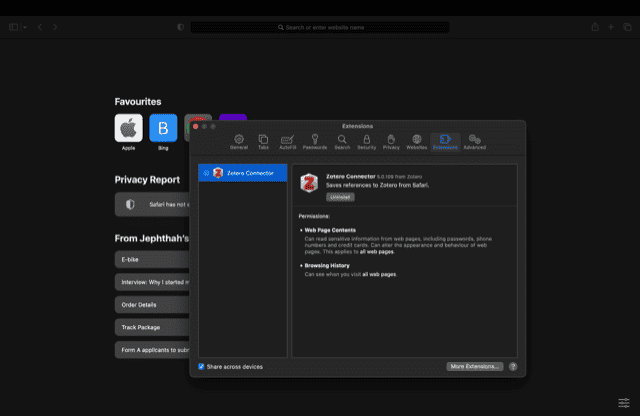
- Click on Uninstall to remove the selected extensions.


4. Remove Suspicious Login Items
In many instances, malware begins its activity silently upon logging into your Mac. Prevent this by following these steps:
- Click on the Apple icon in the top menu.
- Go to System Preferences.
- Select Users & Groups.
- Choose the Login Items tab.
- Click on the lock icon in the pop-up window’s lower-left corner.
- Check the boxes next to any suspicious login items.
- Click on the minus sign (-) to remove the selected items.
- Finally, click the lock icon again to confirm and save your new settings.
5. Clear Your Downloads Folder
There is a possibility that malware might be lurking among the files in your Downloads folder. To ensure your safety, follow these steps:
- Create a new folder and move any necessary files from your Downloads folder to the new location.
- Once you have safely transferred your files, go ahead and clear out your Downloads folder.
- Remember to empty the Trash to completely remove the files.
6. Use Time Machine
If you have been regularly backing up your Mac using Time Machine, you can take advantage of its powerful feature to restore your system to a state prior to the virus infection. Follow these steps:
- Connect your Time Machine backup drive to your Mac.
- Access the Time Machine feature through the menu bar or System Preferences.
- Navigate to the date and time before the virus infection occurred.
- Select the backup and initiate the restore process.
- Follow the on-screen instructions to complete the restoration.
Note: It is crucial to have regular backups in place for Time Machine to be effective in restoring your Mac to a previous state. Check here for more ways to avoid malware and harmful apps on Mac.
Conclusion
Checking and removing viruses on a Mac is crucial for maintaining the security and optimal performance of your device. While Macs are not immune to viruses, being aware of the signs of infection and regularly scanning your system can help detect and remove malware.
Using reliable antivirus software and practicing safe browsing habits are essential steps in safeguarding your Mac against potential threats. Stay vigilant and take proactive measures to keep your Mac virus-free.
One of Mac’s most common malware is the Redirect virus. Check here to learn how to remove the Redirect virus from your Mac.


