
Sometimes, I encounter the error message “Exchange Account Unable To Verify Information” when I try to access my email. Missing work emails is not fun for anyone, so, here are some steps I take to resolve this issue when it happens.
How to Fix Exchange Account Unable To Verify Information?
1. Delete and Reinstall Exchange Account
Time needed: 5 minutes
Follow these steps to delete and reinstall Exchange account:
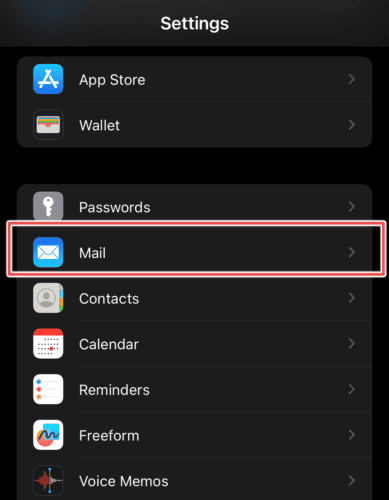
- On iPhone, open Settings > Mail.
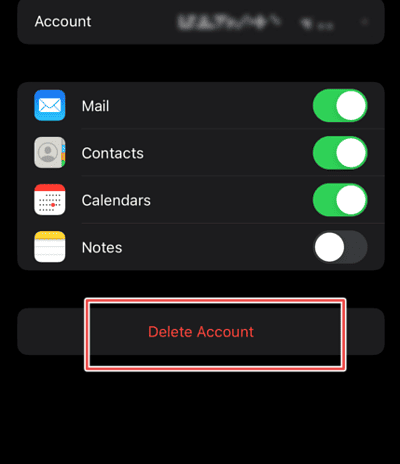
- Next, tap on Exchange Account > Delete Account.
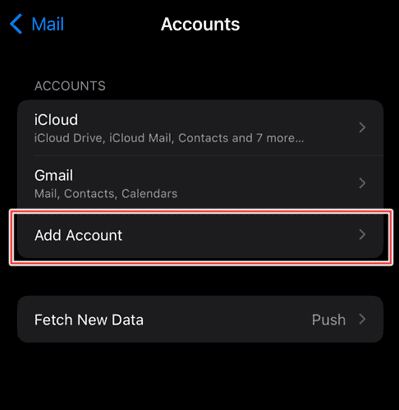
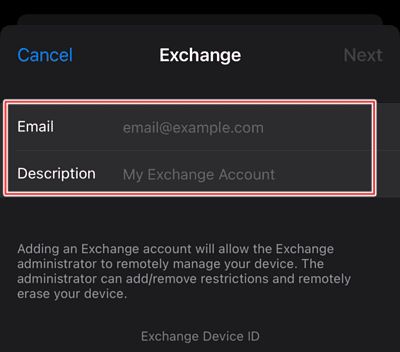
- Re-add your Exchange account by going to Settings > Mail.
- Tap Add Account.
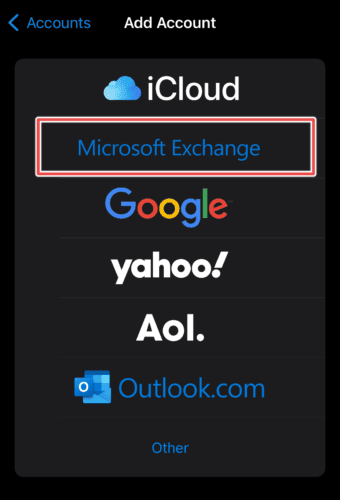
- Choose Microsoft Exchange.
- Input your Exchange email and description.
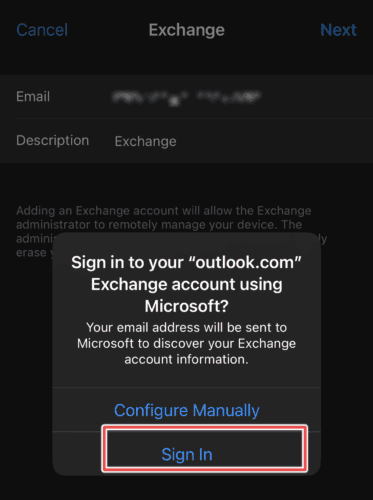
- Tap Sign in and input your email and password.
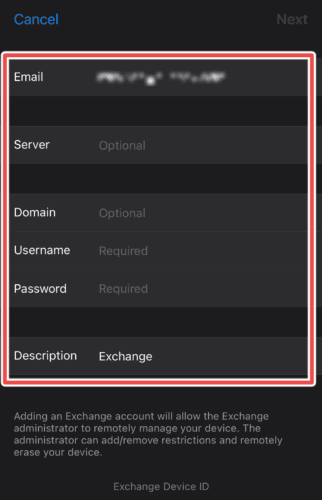
- Tap Next and input additional information as it applies to your company. You’ll be asked to fill in the Server, Domain, Username, and Password.
- Tap Next > Trust to access your emails.


For Mac users, find out how to remove Exchange account here.
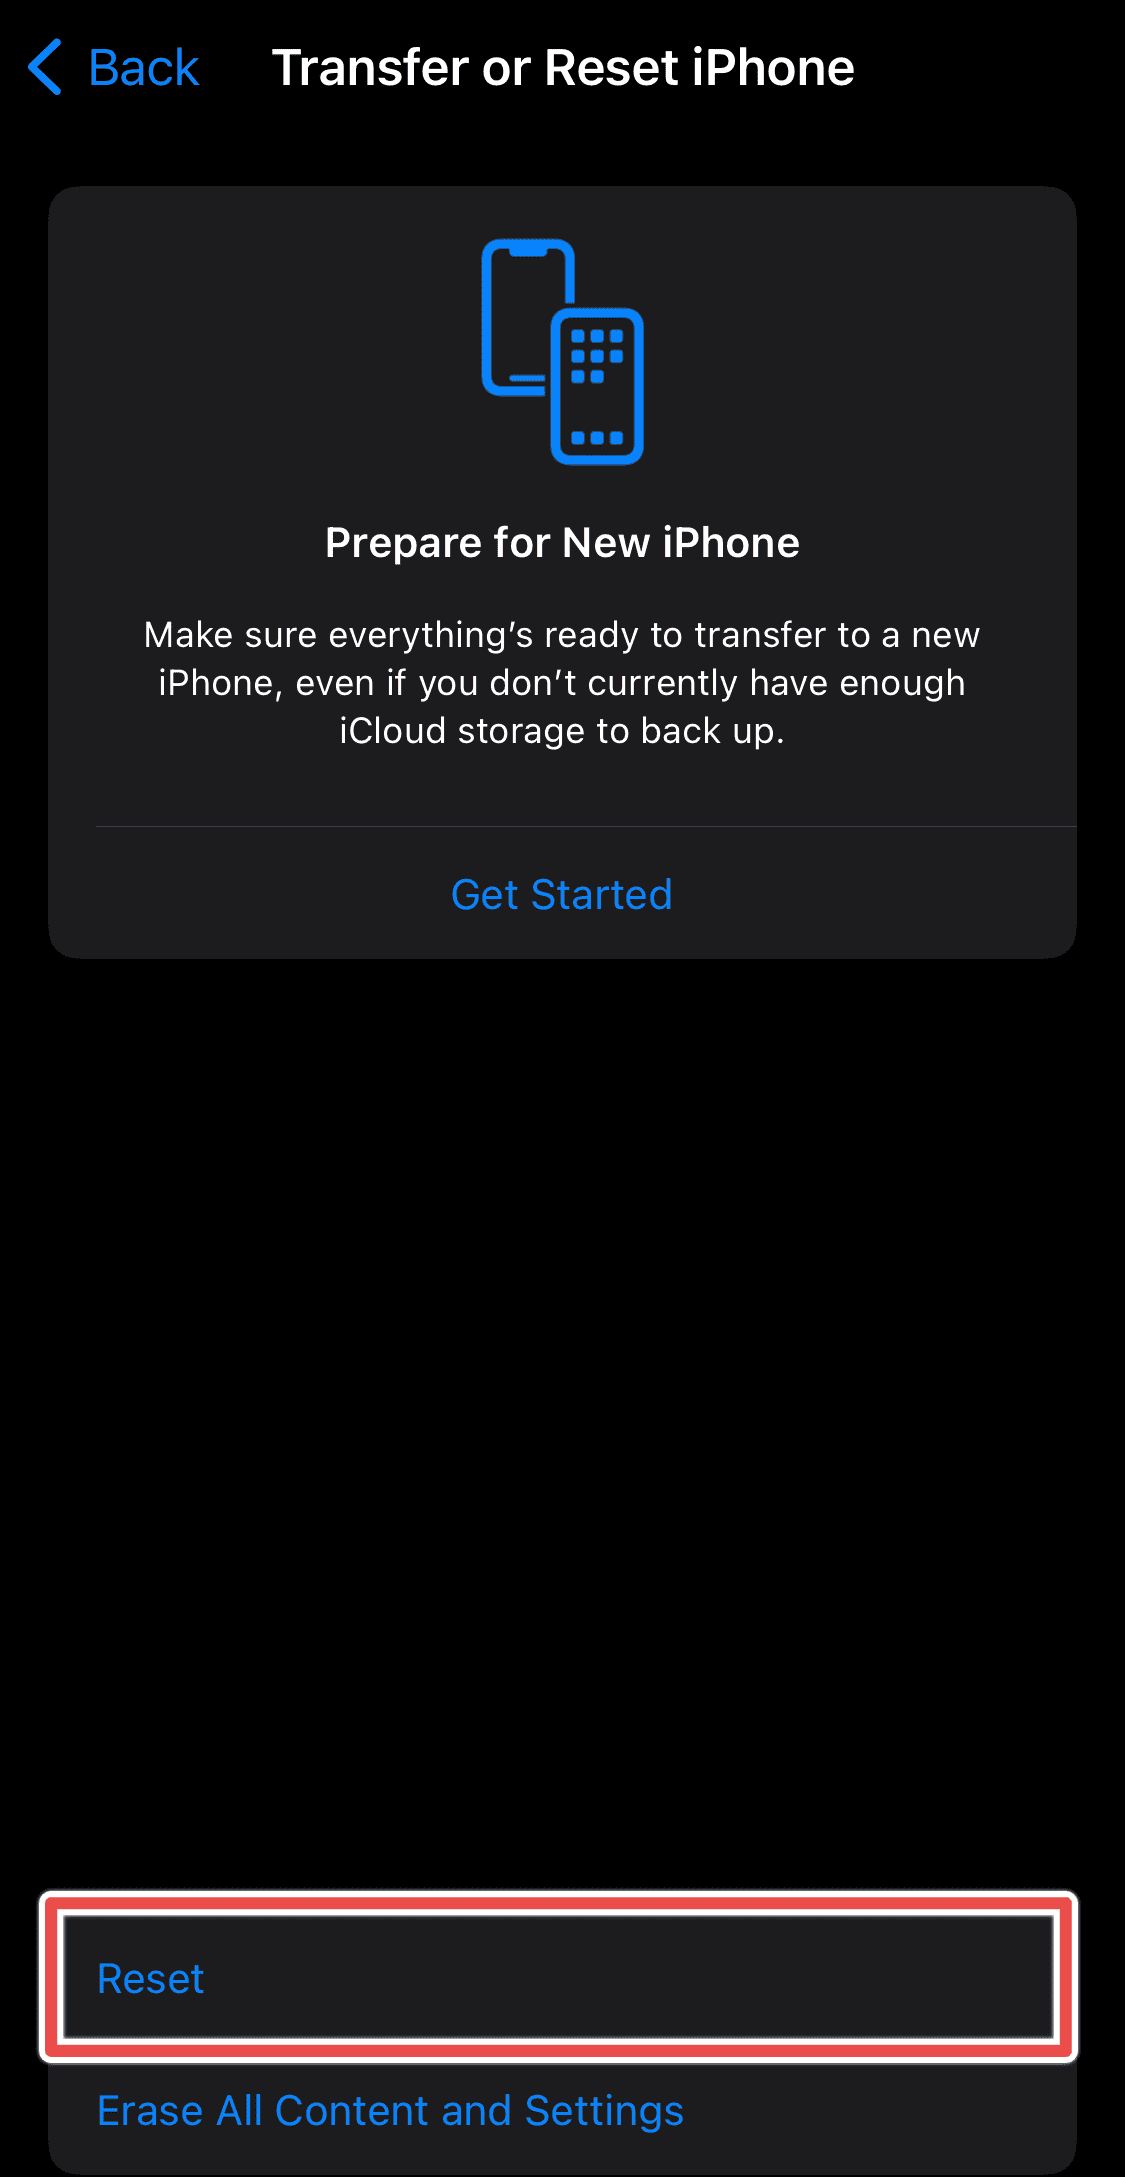
2. Reset Network Connection
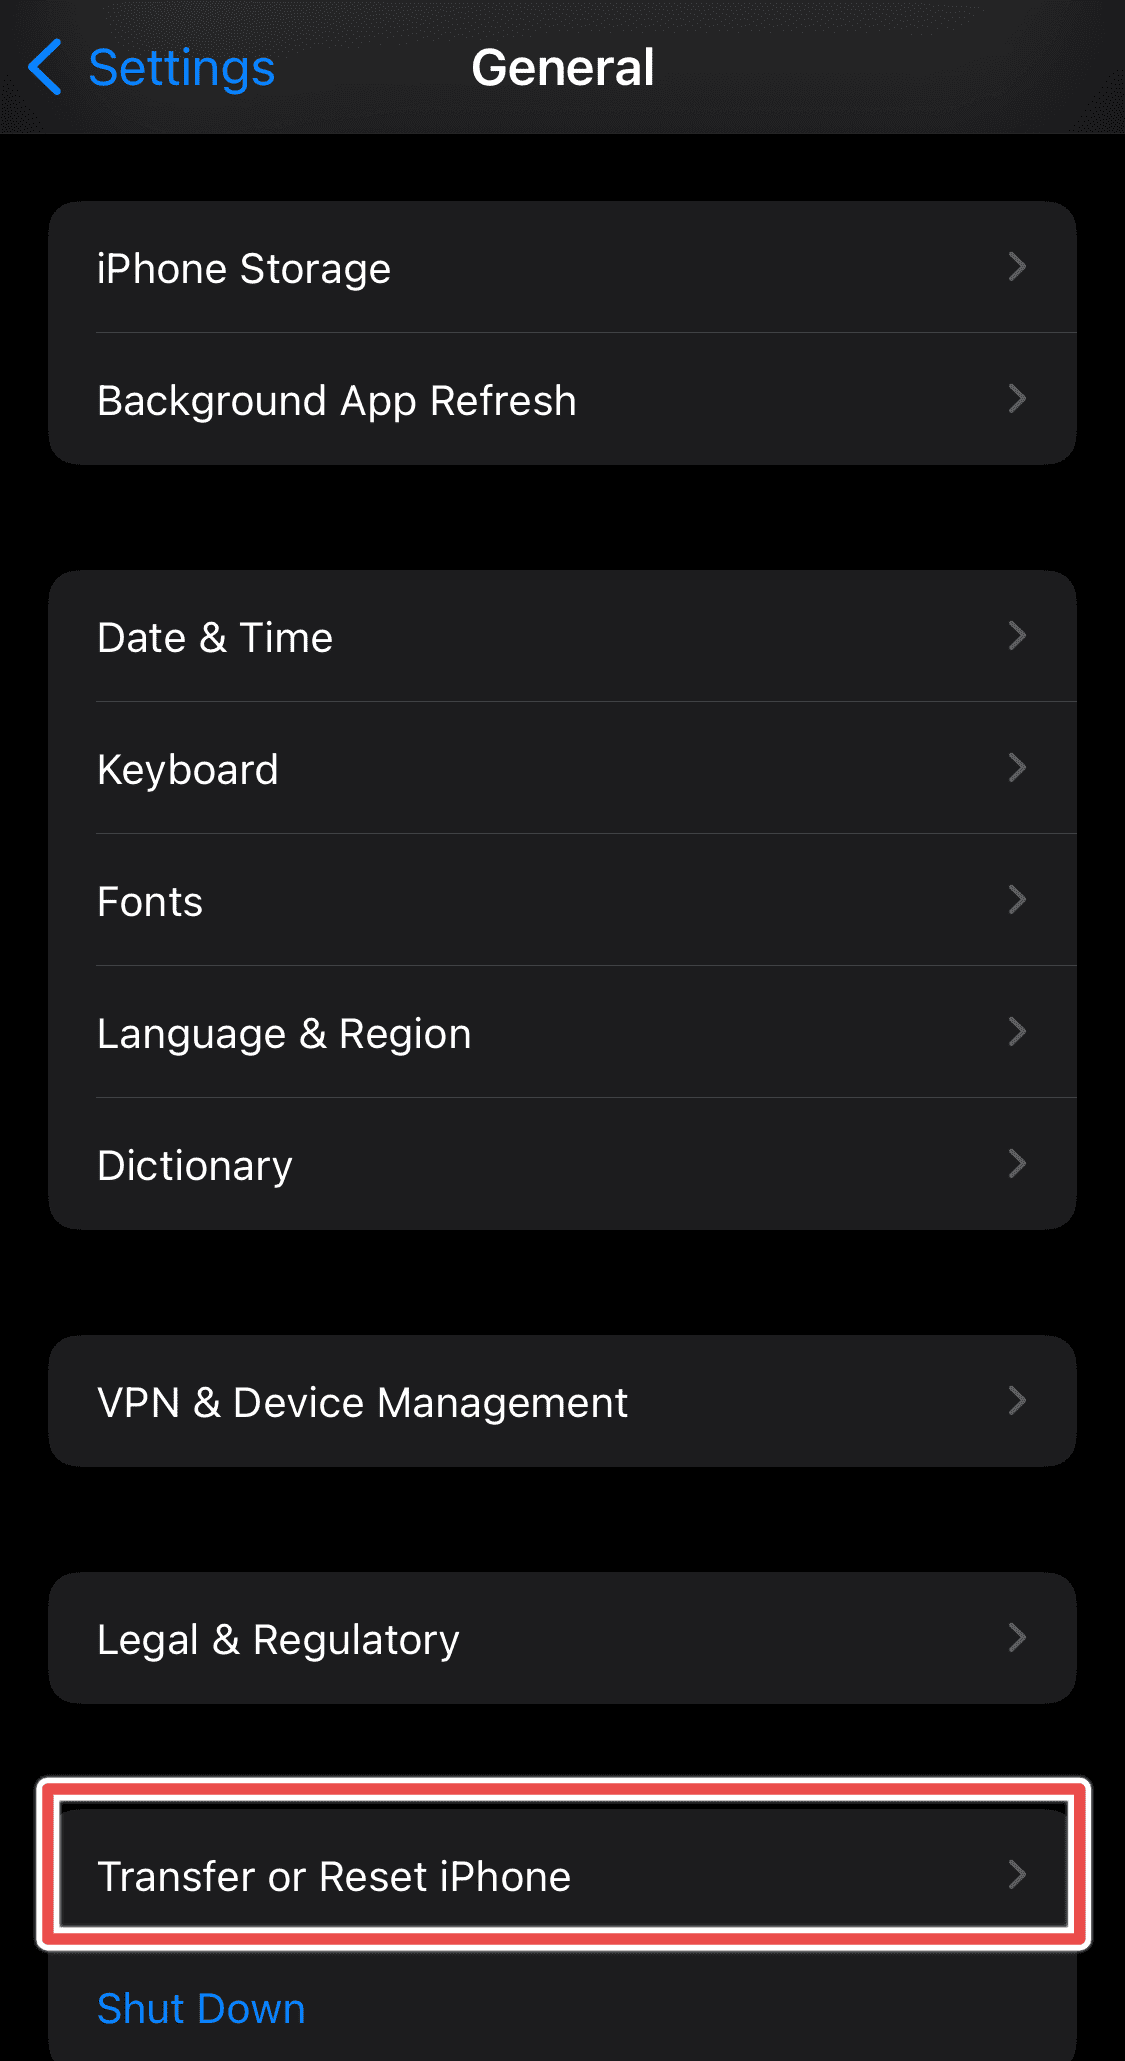
- Open Settings > General.
- Tap Transfer or Reset iPhone.
- Next, tap Reset. Before choosing this option, backup the device to avoid losing any data.


3. Create a New App Password for Exchange Mail
A new App password can solve this error for Exchange accounts that use an Authenticator app or Two-Factor Authentication to encrypt emails. Think of an app password as a long string of random characters you use instead of a password.
Follow these steps to set one up:
- Visit the Microsoft security basics web page to sign into your Microsoft account.
- Select More security options.
- Go to App Passwords > Create a new password.
- Enter the newly generated password to access your Exchange account.
- On your iPhone device, go to Settings > Mail.
- Add your Exchange account and use the new password to sign in.
Additional Steps To Try
If all these don’t work, here’s some additional troubleshooting you can follow.
4. Restart Device
Many times, I’ve had to rely on the good old “device restart” to solve this issue. Hold down the Power Button and Volume Down button simultaneously until a red slide shows on the screen.
Slide to the right to turn off the device. Next, long-press the home button until the Apple logo appears.
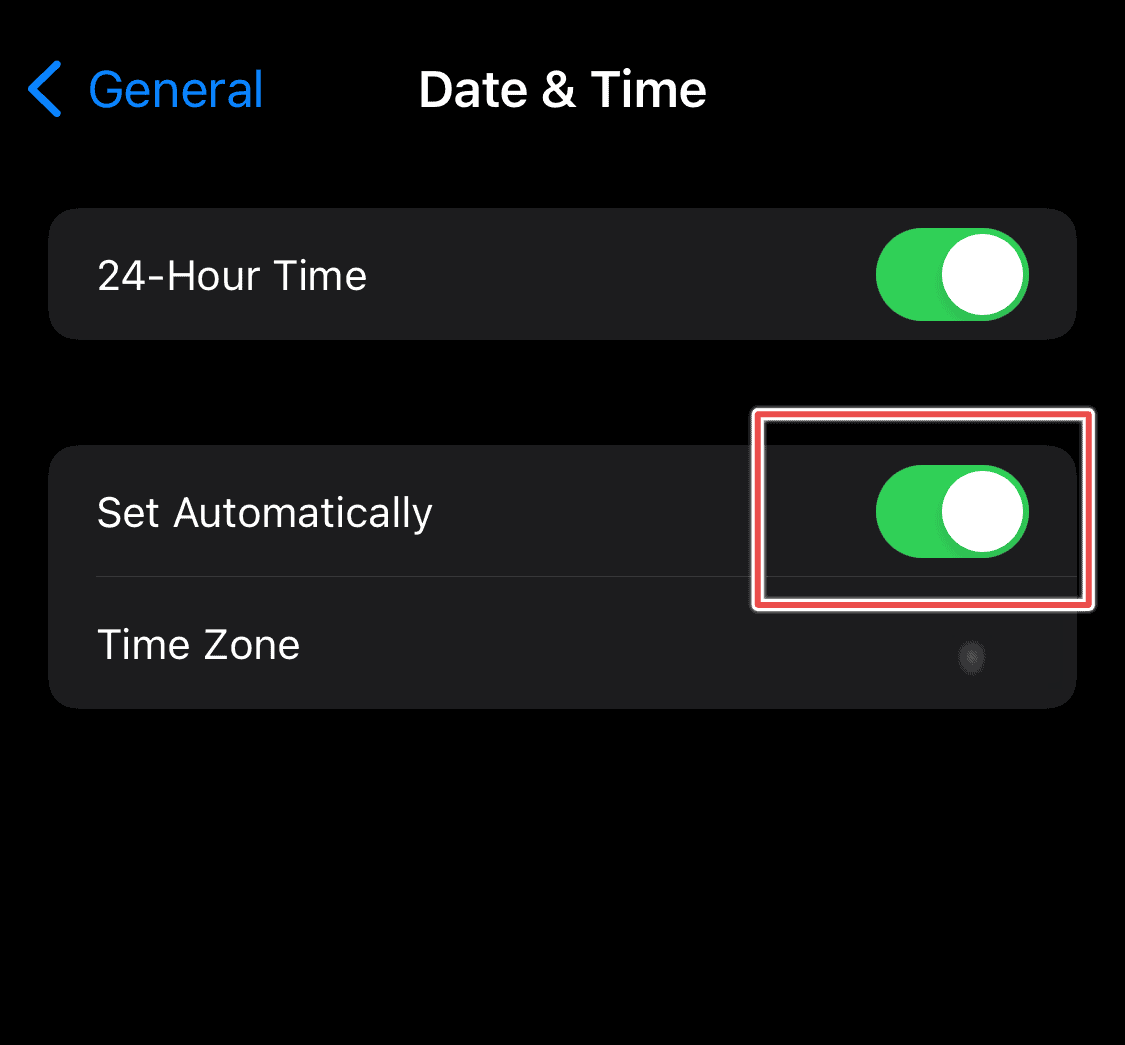
5. Make Changes to Time Settings
Microsoft’s Exchange account is sensitive to timezone settings. Here’s how I navigate this:
- On Mac, go to Calendar > turn on Time Zone support.
- On iPhone, open Settings > General.
- Next, tap Date & Time.
- Turn on the Set Automatically toggle button.

6. Use Outlook for iOS
Microsoft recommends using Outlook for iOS when connecting to an Exchange account. You can access the Outlook account via the web app or download the mobile App from the App Store and log in.
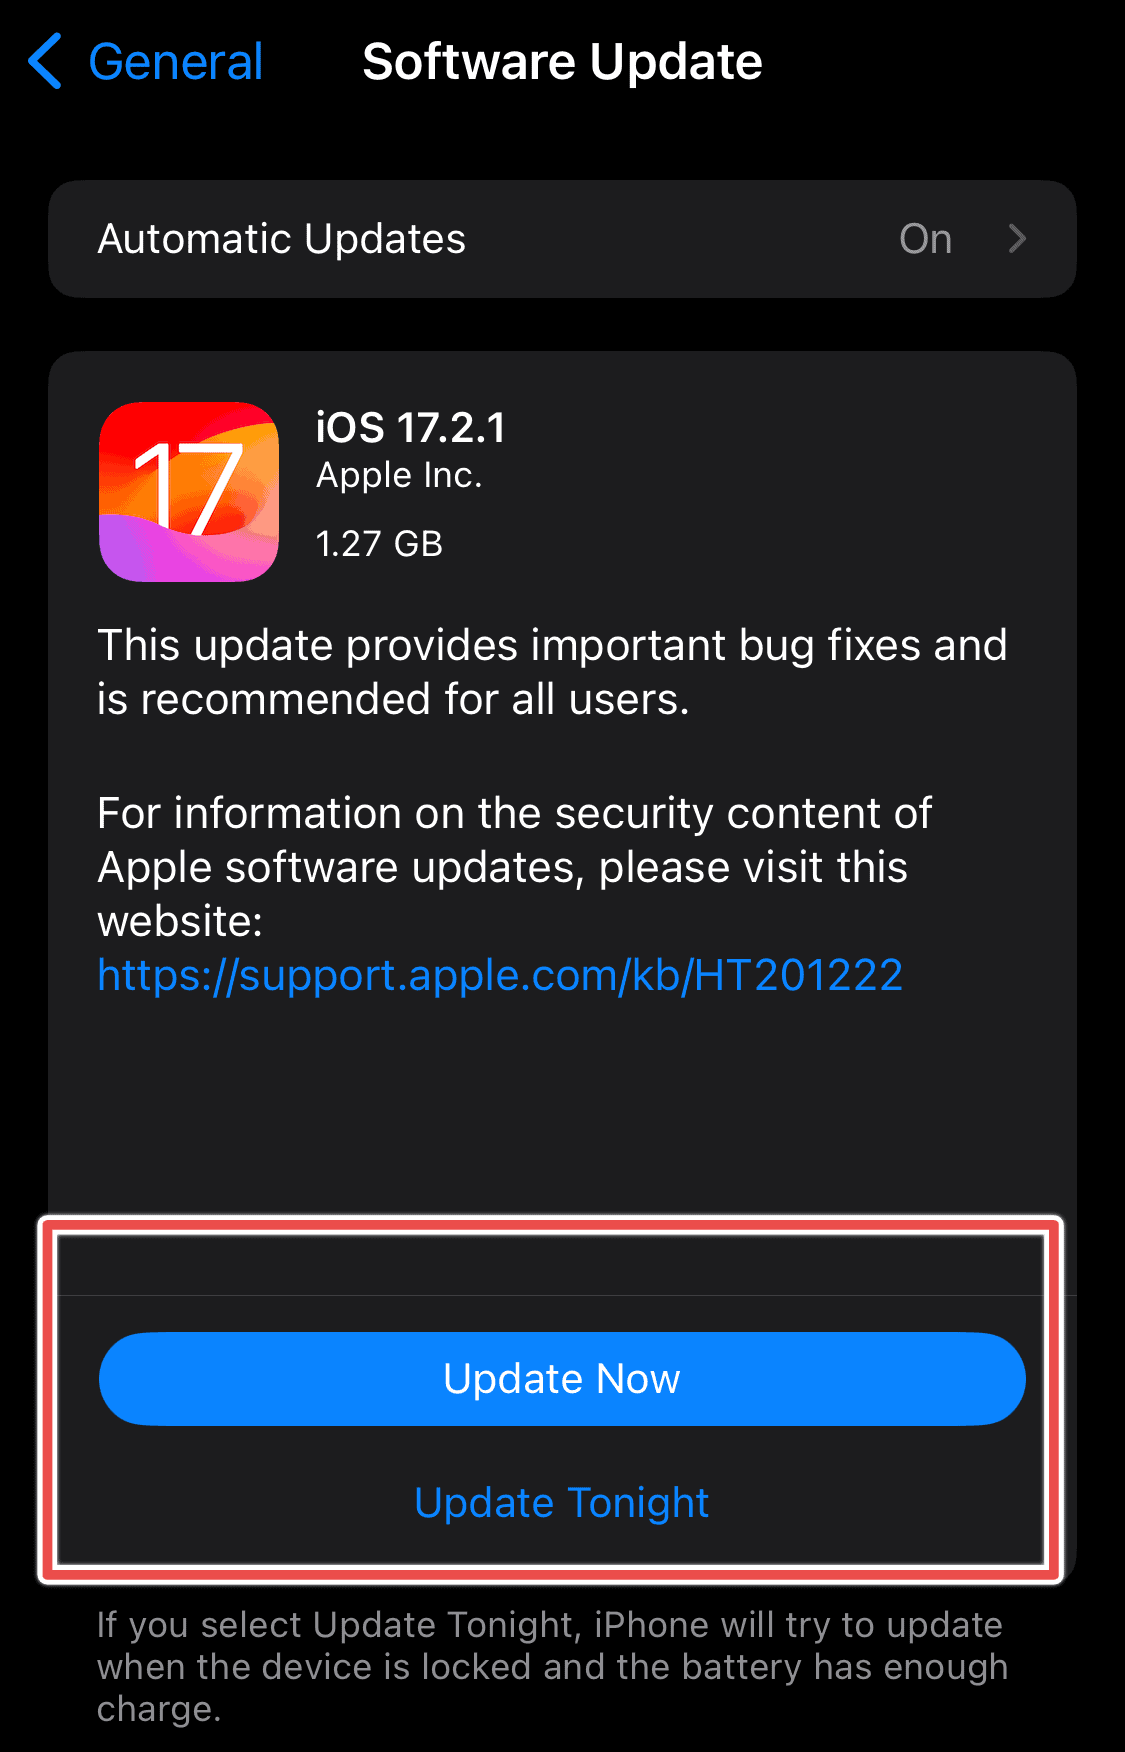
7. Upgrade iPhone/iPad/Mac OS
You may encounter this issue if you use an older version of iOS (Below iOS 17). Older Mail versions may still run Basic Authentication which Microsoft no longer supports. To update your iPhone, follow these steps.
- Open Settings > General.
- Tap Software Update and download the latest update.

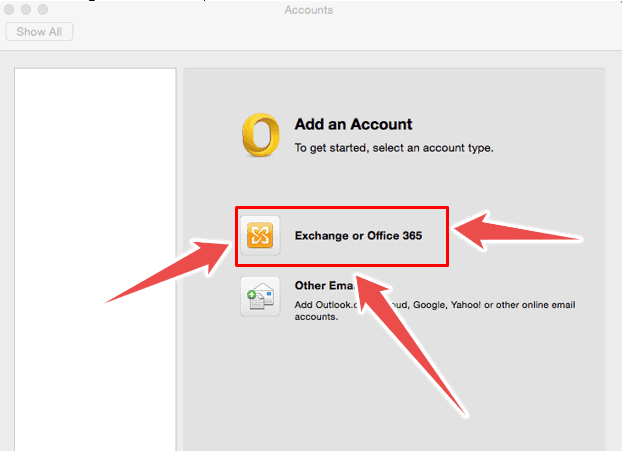
8. Register Exchange Account on Outlook
If you’re using your Exchange account for the first time, register it on Outlook Web.
- Open Outlook and click Tools > Accounts.
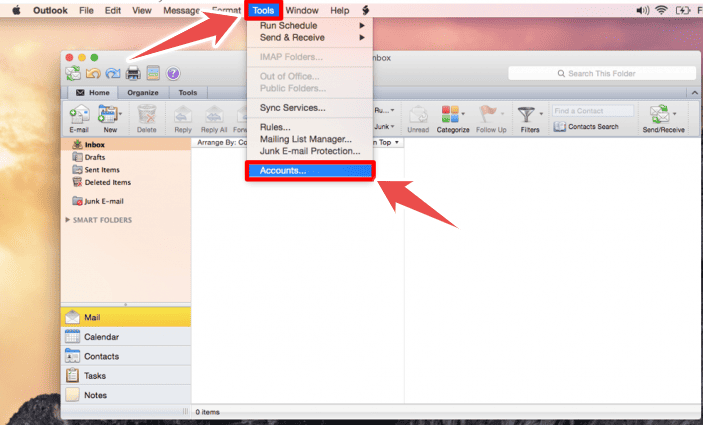
- Choose Exchange or Office 365.
- Input Exchange email details and click Add Account.
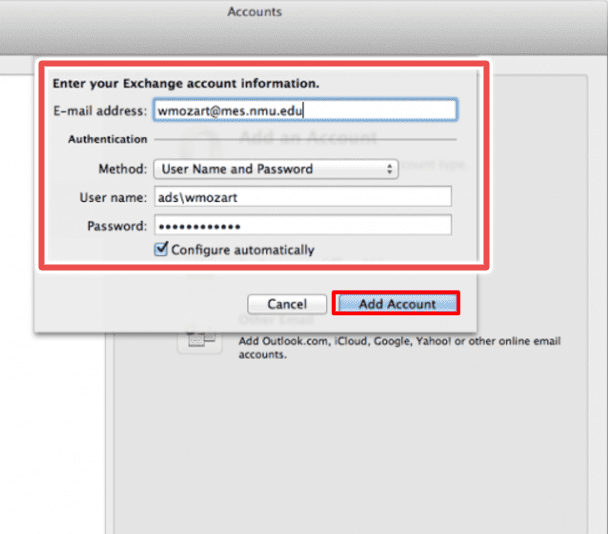
- Put your email and password on the next screen to set up NMU. When filling in the username, be sure to type in “ads\” before the NMU User ID.


When I can’t access my work emails, I try a combination of these steps to get Mail up and running. I hope these help you too.


