
Nothing will make your heart drop faster than a mid-OS update crash. While it’s easy to blame faulty hardware, and that’s not entirely off the table, a kernel panic during macOS Sequoia installation is almost always triggered by software conflicts. You can try booting into Safe Mode, running First Aid, disconnecting external hardware, or removing third-party extensions. At worst, you may need to wait for a patch.
Here’s a closer look at what you can do.
1. Boot Into Safe Mode
Time needed: 10 minutes
Safe Mode prevents non-essential system extensions and third-party software from loading during startup. That makes it one of the best ways to isolate software issues triggering crashes during installation. It also runs a built-in disk check to detect directory errors. If the freeze stops in Safe Mode, it’s likely a rogue extension or background task causing the crash.
- Shut down your Mac completely.
- Press and hold the Power button until Loading Startup Options appears.
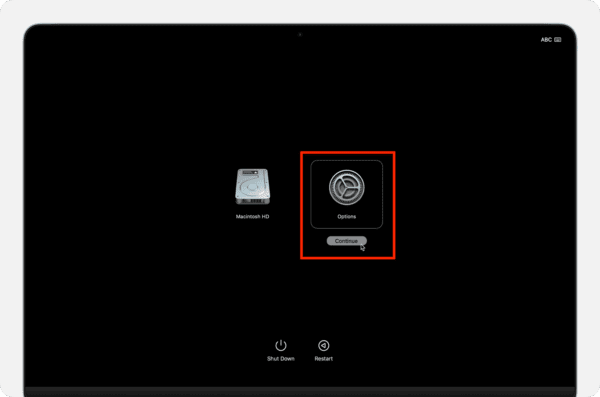
- Select your boot volume.
- Hold Shift, then click Continue in Safe Mode.

- Log in and wait for the system to stabilize.
- Reattempt the installation if it didn’t auto-resume.


2. Boot Into macOS Recovery and Run First Aid
First Aid in Disk Utility scans and repairs your system volume. If the update triggered file system corruption or improper writes, this tool will catch it. Running it through macOS Recovery gives full access to system-level diagnostics without interference from third-party processes or startup apps.
- Shut down your Mac.
- Hold Power until Loading Startup Options appears.
- Click Options, then Continue to enter Recovery.
- Choose Disk Utility from the list.
- Select Macintosh HD, then click First Aid in the toolbar.
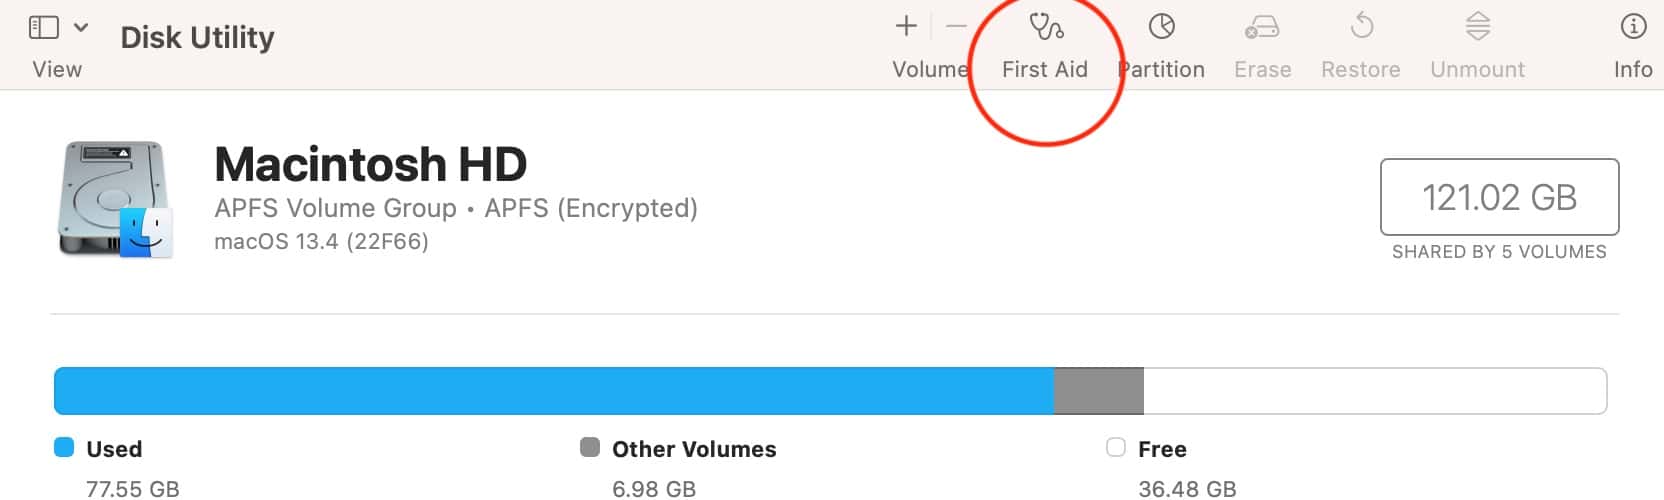
- Let it run fully, then restart your Mac.

3. Disconnect External Devices and Peripherals
Peripheral drivers like docks or displays often load kernel extensions. Outdated or incompatible hardware can cause crashes while you’re rebooting or installing new OS. Try removing all accessories while you’re troubleshooting. Test the system under native conditions without introducing unsupported drivers into the boot chain.
- Power off your Mac.
- Unplug everything except the power adapter.
- Wait 10 seconds, then turn your Mac back on.
- Reconnect devices one at a time after the system stabilizes.
4. Remove or Disable Third-Party Kernel Extensions (kexts)
Kernel extensions (kexts) operate at the lowest level of macOS. Outdated kexts from apps like antivirus tools, virtualization platforms, or file system utilities often break when Apple updates core APIs. If you’ve previously installed any, they could interfere with the installer or post-install boot.
- Boot into macOS Recovery.
- Open Terminal from the Utilities menu.
- Run
kmutil showloadedto list loaded kexts.
- Identify third-party kexts (not from Apple).
- Use
sudo kextunload /path/to/kext.kextto disable them, or remove the file from /Library/Extensions.

5. DFU Firmware Revive
For Apple Silicon Macs, DFU revive restores system firmware without erasing your data. It’s useful when the update process fails at a low level, especially during bridgeOS or T2 chip updates. You’ll need a second Mac and a USB-C cable to use Apple Configurator and bring your bricked Mac back online.
- Connect the malfunctioning Mac to a working Mac via USB-C.
- Install and open Apple Configurator 2 on the working Mac.
- Put the faulty Mac into DFU mode (specific key combo varies by model).

- In Configurator, right-click the device and select Revive.
- Wait for the firmware restore to complete.

6. Factory Reset Mac
If all else fails, a clean erase and reinstall gives you the best shot at restoring functionality. This wipes system-level conflicts and ensures macOS Sequoia installs on a clean volume. You’ll lose your data unless you have a backup, so only do this as a last resort.
- Click the Apple menu icon > System Settings > General.
- Select Transfer or Reset > Erase All Content and Settings.
- Enter your admin profile’s password to continue.
7. Wait for a macOS Update
At this point, your only option is to wait for a macOS update. macOS point releases starting from 15.4 are notorious for errors like kernel panic. I suggest sticking with the current stable version that you’re using right now.
Of course, beta releases are an option, but they might introduce even more bugs. I don’t recommend Public Beta, much less Developer Beta, releases unless you’re interested in beta testing.
You can also contact Apple Support. They’ll walk you through advanced troubleshooting steps specific to your Mac model and configuration. If it turns out to be more than a software issue, they’ll also help determine whether hardware repairs are necessary.


