
If you’re not a fan of iPadOS 26, then you should know that the downgrading process is as easy as connecting your iPad to a computer, putting the iPad in recovery mode, and then restoring it directly from your PC or Mac. While it is possible that you will lose some of the information you saved while running iPadOS 26, know that iCloud is going to have your back for the majority of your files.
There are a lot of reasons you may want to downgrade from iPadOS 26, as it’s currently a developer beta. These betas are typically not ready for everyday use, so experiencing things like battery drain, broken apps or even essential functions missing entirely can be completely normal. Follow along with me as I help you restore your iPad to a stable release.
Don’t miss the best of The Mac Observer
Set us as a preferred source and our Apple reporting ranks higher in your Google Search results and Discover feed — one tap, no account changes.
What To Know About Downgrading
The best way to prevent data loss is to create a backup before installing a developer or public beta. The majority of your vital data should be available in iCloud. That means there are two scenarios: either you made a backup while using iPadOS 18 or you didn’t. If you did, you will have the option to restore to this backup, putting you where you were before updating to the beta.
If you don’t make a backup, you will need to rely on iCloud for the bulk of your data. Before downgrading navigate to Settings > Apple Account [Your Name] > iCloud > See All. See if everything is syncing.
Also, note that this is currently for the developer beta of iPadOS 26. Once the official release hits the public in Fall 2025, downgrading will largely depend on whether or not Apple is signing past releases. Once Apple stops signing a version of iPadOS, you will not be able to downgrade to that version.
How to Downgrade From iPadOS 26 and Restore a Stable Version
Time needed: 30 minutes
To downgrade from iPadOS 26, follow these steps:
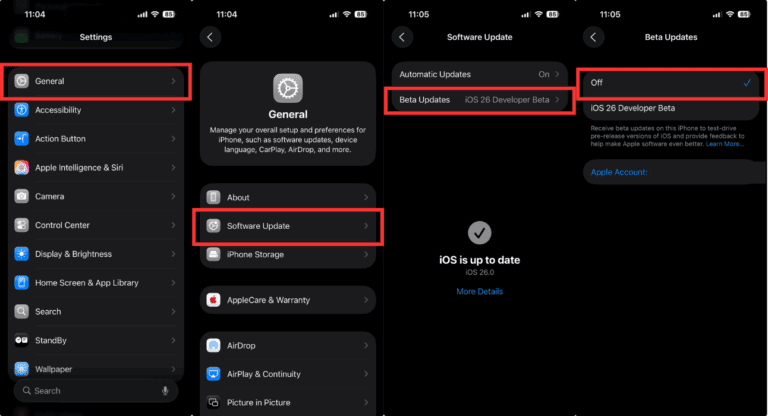
- First, let’s disable beta updates. Navigate to Settings > General > Software Update > Beta Updates and select Off.
- Make sure your computer is running the latest version of macOS or the most current version of the Apple Devices app if using Windows. Check for a software update on Mac via Apple Menu > System Settings > General > Software Update.
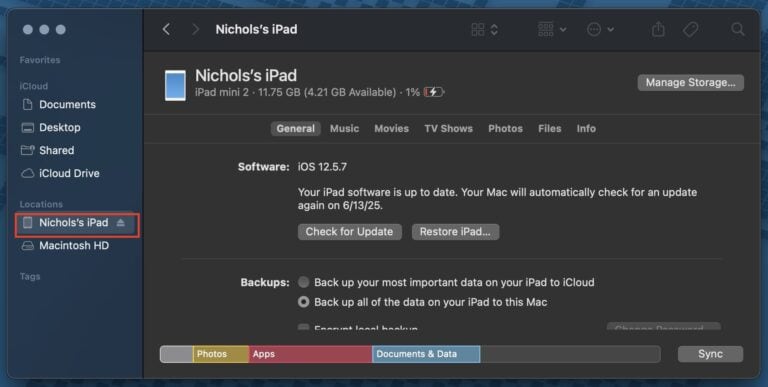
- Connect your iPad to your computer. Should it appear, select your iPad from Finder or Apple Devices from the left-hand column.
- Enter Recovery Mode on your iPad.
- For an iPad without a Home Button, press and quickly release the volume button nearest the top Power button.
- Then, press and quickly release the volume button that is farthest from the top Power button. Finally, press and hold the top button until you enter Recovery Mode.
- Note that this process may take several minutes. Should it take more than 15 minutes and/or your device exits Recovery Mode, go back to the second step.
- At this time, you may get a pop-up on your computer requesting permission to connect to the iPad. Accept this prompt.
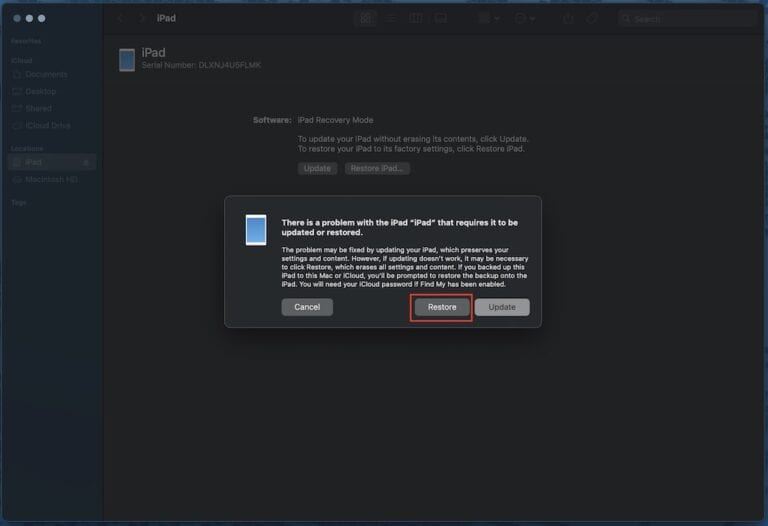
- Once in Recovery Mode, click the Restore option on your computer once it appears. This will erase your iPad and install the current stable version of iPadOS (18.5 at the time of this writing).
- Allow the restore process to finish. You may be asked to sign in to your Apple Account.
- Once the process is complete, you will be able to restore your iPad from an archived backup.


 NOTE
NOTE


Discussion