
The best way to secure all private media, documents, etc., on your iPhone is to put them together and lock the folder. Unfortunately, the Files app on iOS does not come with a native solution to create password-protected folders. But don’t fret, as we’ll help you lock folders on iPhone so that you can store your documents securely.
For those unaware, with iOS 16, the Photos app comes with a Hidden Album where you can store your private images and lock the folder. Moreover, you can even hide the Hidden Album so that it does not appear in the Photos app. Read along to learn how to lock folders on your iPhone.
How to Lock a Folder on iPhone
Since there is no native solution to lock folders on the iPhone, we have to rely on third-party applications. Our choice is the Folder Lock app as it allows you to password-protect your images, documents, contacts, audio recordings, etc. Also, the app is free and you can upgrade to the pro version if you require the extra features.
Time needed: 4 minutes
With that said, here’s how to use the Folder Lock app to lock folders on iPhone.
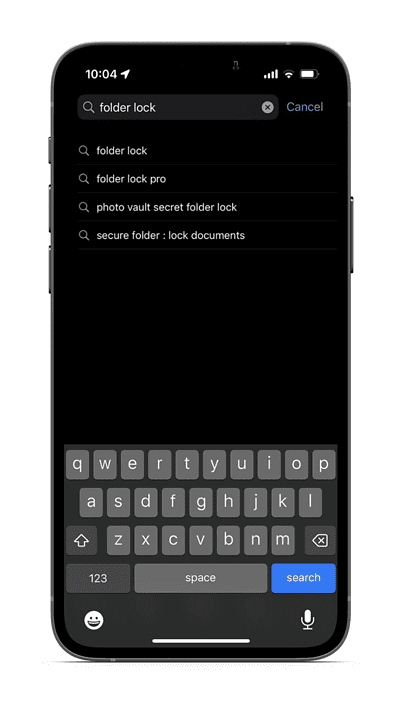
- Open the App Store on your iPhone and search for Folder Lock.
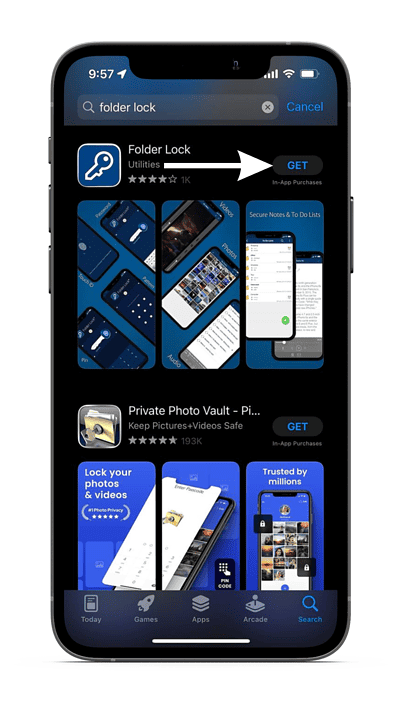
- Navigate to the Folder Lock app and tap Get to install the app on your device.
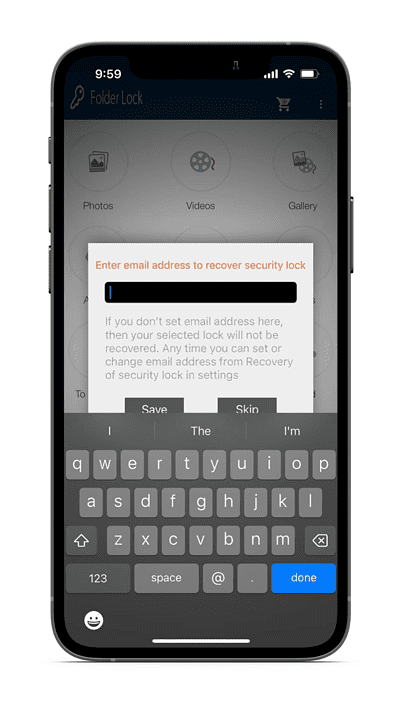
- Open the app once it is installed and Select a Security Lock.

- Also, add a recovery email address which will come in handy in case you forget the password at a later point in time.
- Now, you can select to lock and hide Photos, Videos, Documents, etc. To help you with the steps, we’ll pick Photos as an example.

- Tap the Photos option and select from any of the premade albums. You could also create and add a new album by tapping on the Folder icon at the bottom.
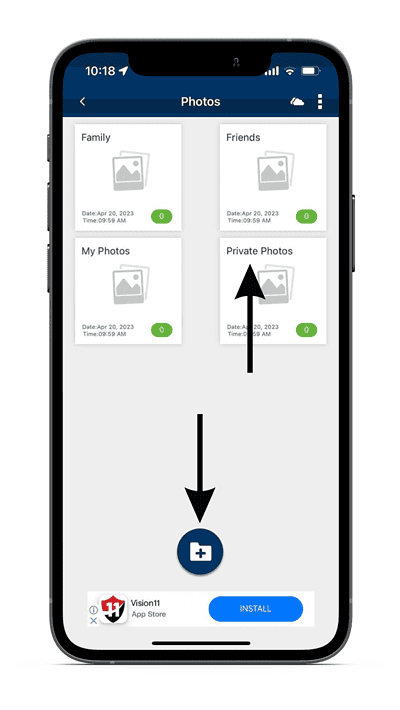
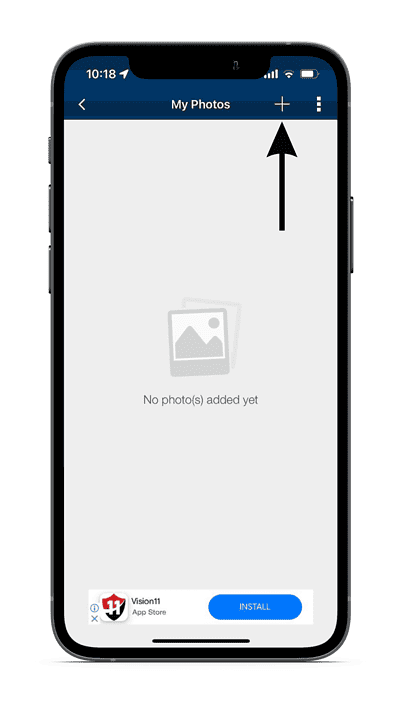
- On the next screen, tap the + icon at the top right corner to add images to the album.
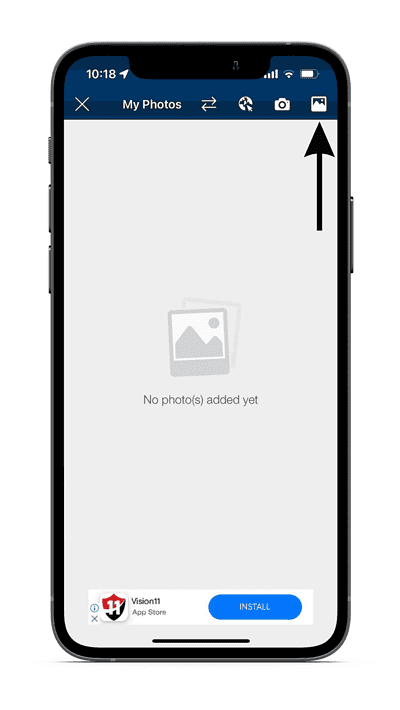
- Now, out of the icons that appear, tap the image icon to the top right if you want to import images from the Photos app. (You also have the choice to import images from your Mac, download and save images from the internet or click images and directly hide them in the Folder Lock app)
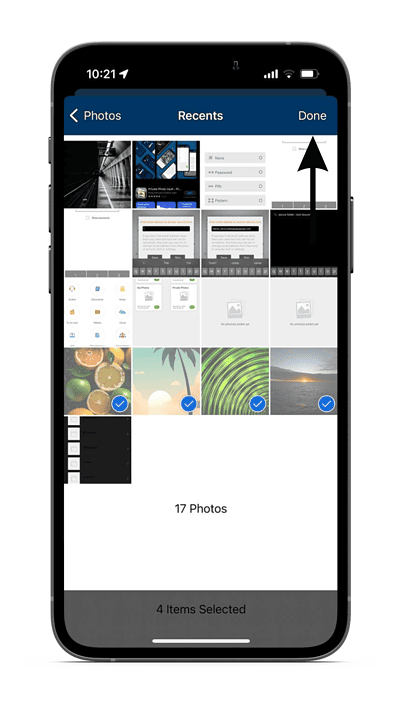
- Grant Folder Lock the access to the Photos app, select the images you want to import, and tap Done at the top right corner.
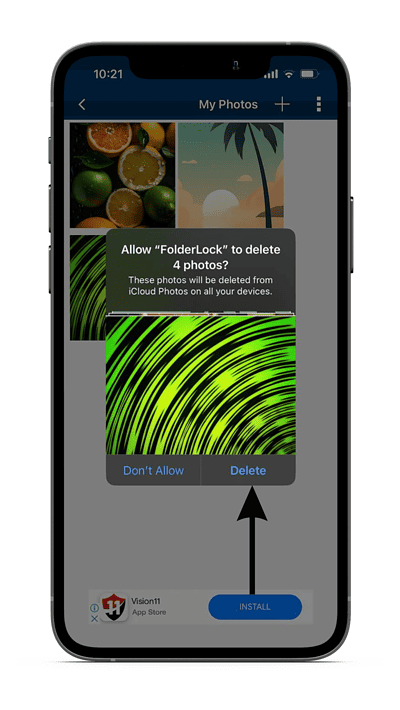
- A message will pop up asking permission to delete these images from iCloud Photos on all your devices, tap Delete and Done.


You’ve successfully transferred images from your iPhone to the Folder Lock app. Anytime you want to access these images, all you have to do is open the app and enter your passcode. The same steps can be repeated for videos, documents, etc.
Add Files to the Notes App and Lock the Notes
The Notes app on iOS allows you to lock notes. If you want to hide and lock plain text, doing it through the Notes app is the best choice. The need to install and sign up for a third-party application is eliminated and you need not pay to lock notes either. However, do note that you can’t lock notes that include videos, audio, tags, PDFs or file attachments. But, you can still scan documents through the Notes app and then lock these notes that have text and images in them.
Moreover, with iOS 16, you get the option to choose between your iPhone passcode or create a new passcode for the Notes app. Going with the latter choice allows you to have a separate passcode for locked notes which even people who know your iPhone passcode wouldn’t be able to access.
If this sounds interesting to you, here’s how to add text or images to Notes and lock them.
1. Copy the text or image from the source.
2. Open the Notes app on your iPhone.
3. Tap on the New icon (pencil and paper) at the bottom right corner.
4. Tap and hold on to the screen and select Paste.
5. Once the image or text is pasted to the note, tap Done.

6. Now, tap the More icon (circle with three dots) at the top right corner.
7. Select the Lock option and the note will be locked immediately.

You can repeat the same steps and create and lock multiple notes. If only Apple allowed us to Lock notes with PDF and other file formats, the need for third-party applications would no longer exist. Hopefully, Apple adds this feature with iOS 17.
Lock Images in the Photos App
If you want to hide images and videos on your iPhone, there is a native solution to do so. There are no major benefits of opting for a third-party application. Especially, when you can save all these images on your iPhone in blink of an eye. Read along to learn how to add images to the Hidden Album. Also, there’s a clever trick that will help you hide the Hidden Album from the Photos app.
1. Open the Photos app on your iPhone.
2. Tap Select and select the images or videos you want to hide.
3. Once you’ve selected the files, tap the More icon (circle with three dots) at the bottom left corner.
4. Tap the Hide option from the list and confirm your selection by selecting “Hide X Photos.”

5. These images will be moved to the Hidden album.
6. To access the Hidden album, head to Albums and scroll down to Utilities. You will find the Hidden album among the rest at the bottom. Tap on the Hidden option and enter your Passcode/Face ID to access the images and videos.
7. Now, if you do not want anyone coming across this Hidden album, open Settings on your iPhone and navigate to Photos.
8. Here, disable the Show Hidden Album toggle. You will no longer find the Hidden album in the Photos app under Utilities.

The next time you want to view these hidden images and videos enable the Show Hidden Album toggle in the Photos app settings and it will appear in the Photos app under Utilities.
Safeguard Your Files and Folder From Prying Eyes
Saving your private files, images, etc., that contain sensitive data in hidden and locked folders is always a good choice. You never know who has bad intentions and if such people come across private files, you’re going to end up in trouble. It’s better to be safe than sorry.
We hope this article helps you lock folders on your iPhone. If you have any doubts, do let us know in the comments below.


